

Register a client in the Zoho API Console
The client is the Zoho app StackOne uses to ask each Bigin user for access.
1
Start a new client
Sign in to the Zoho API Console with your Zoho account.
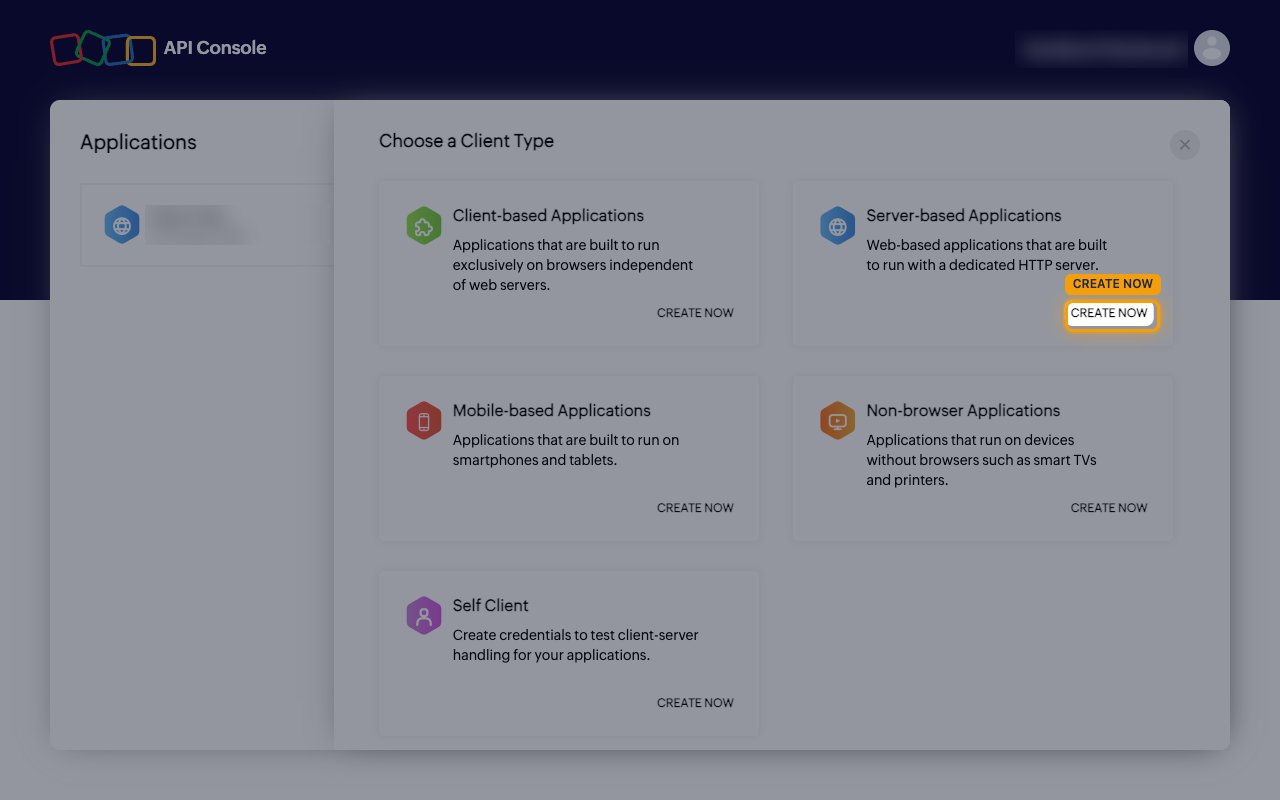
- Click ADD CLIENT.
- In Choose a Client Type, click CREATE NOW on the Server-based Applications card.
2
Enter the client details
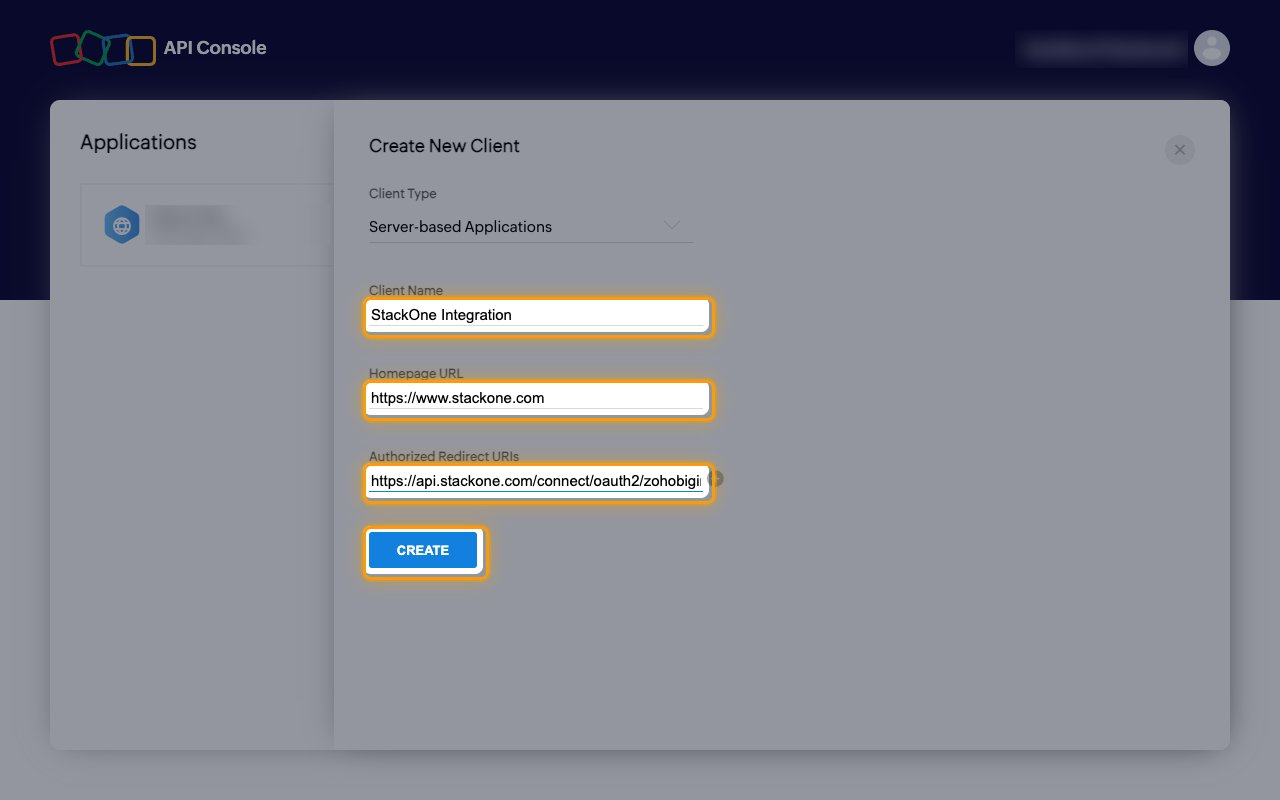
Fill in the Create New Client form.
- Client Name:
StackOne Integration - Homepage URL: Your company website
- Authorized Redirect URIs: the Callback URL from your Connector Profile
- Click CREATE.
3
Copy the Client ID and Client Secret
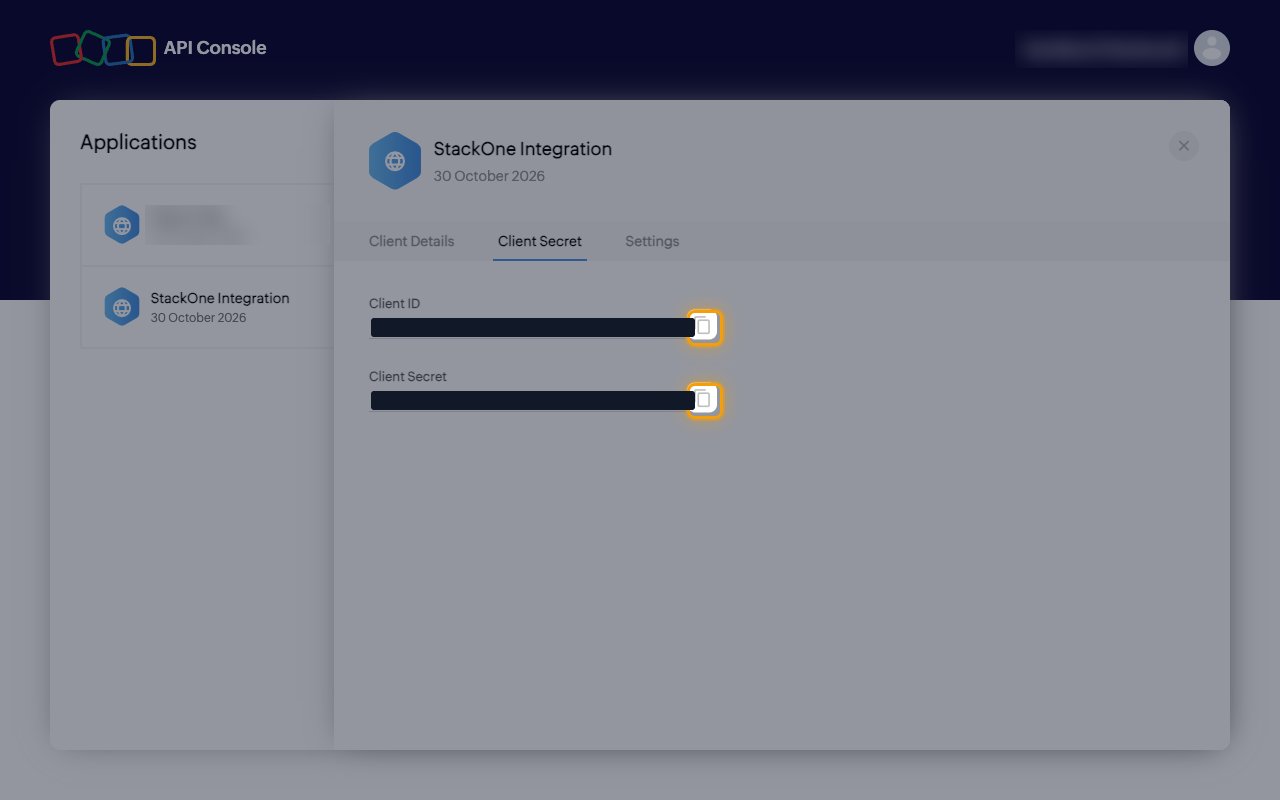
Zoho opens the Client Secret tab of the new client.
- Copy the Client ID into your Connector Profile.
- Copy the Client Secret into your Connector Profile.
- To see them again later, select the client under Applications and open the Client Secret tab.
4
Turn on other data centers
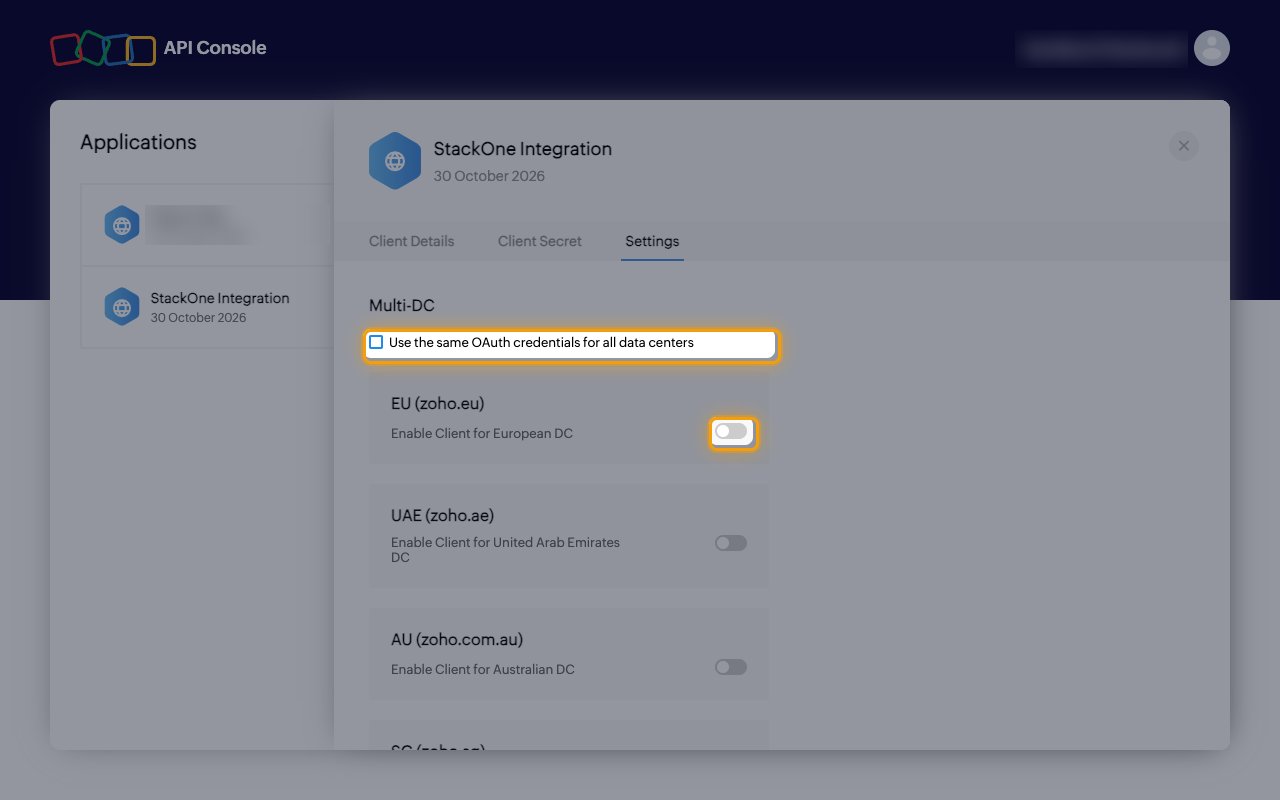
If any customer uses Bigin in a data center other than the one your client is registered in, open the client’s Settings tab.
- Under Multi-DC, select Use the same OAuth credentials for all data centers.
- Turn on the toggle for each data center your customers use, such as EU (zoho.eu).
- The Settings tab has no China data center. A customer on China (CN) needs a client registered in the Zoho API Console for China.
5
Review the scopes
Enables actions: Add Notes, Add Records, Add Tags, Add Tags To Records, Add User, Change Record Owner, Check User Access, Create Bulk Read Job, Create Bulk Write Job, Delete Attachment, Delete Notes, Delete Profile Photo, Delete Records, Delete Tags, Delete User, Delink Related Records, Disable Notifications, Download Attachment, Download Bulk Read Result, Download Bulk Write Result, Download Profile Photo, Enable Notifications, Get Attachments, Get Bulk Read Job Details, Get Bulk Write Job Details, Get Current User, Get Custom View, Get Custom Views, Get Deleted Records, Get Fields, Get Files, Get From Addresses, Get Layouts, Get Module, Get Modules, Get Notes, Get Notification Details, Get Organization, Get Profiles, Get Record, Get Record Count For Tag, Get Record Notes, Get Records, Get Records (COQL), Get Records Count, Get Related Lists, Get Related Records, Get Roles, Get Tag List, Get Team Pipeline Records, Get Team Pipeline Records Related To Contact, Get Unified Credentials, Get Unified Role, Get Unified User, Get User, Get Users, List Unified Roles, List Unified Users, Remove Tags From Records, Search Records, Send Mail, Update Notes, Update Notification Details, Update Notification Info, Update Records, Update Related Records, Update Specific User, Update Tags, Update Users, Upload Attachment, Upload Bulk Write File, Upload Files, Upload Organization Image, Upload Profile Photo, Upsert Records
The client has no scope settings. Each Bigin user approves these scopes when they connect an account.
Create the StackOne Connector Profile
1
Create a Connector Profile
Enable the connector and create a Connector Profile in your project. See Setup Connector Profile.
2
Link an Account
Once the Connector Profile is created, continue to link an account.