You need a Monday.com account that can build apps in the Developer Center. The new OAuth flow is set per app version, so turn it on for each version you connect with.

Create an OAuth app in the Developer Center

Build an app in the Monday.com Developer Center to get the Client ID and Client Secret, turn on the new OAuth flow, and grant the integration the permissions it needs.

1

Create the app

Sign in to your Monday.com account, then open the Developer Center.

  • Click your profile picture in the top right corner.
  • Select Developers.
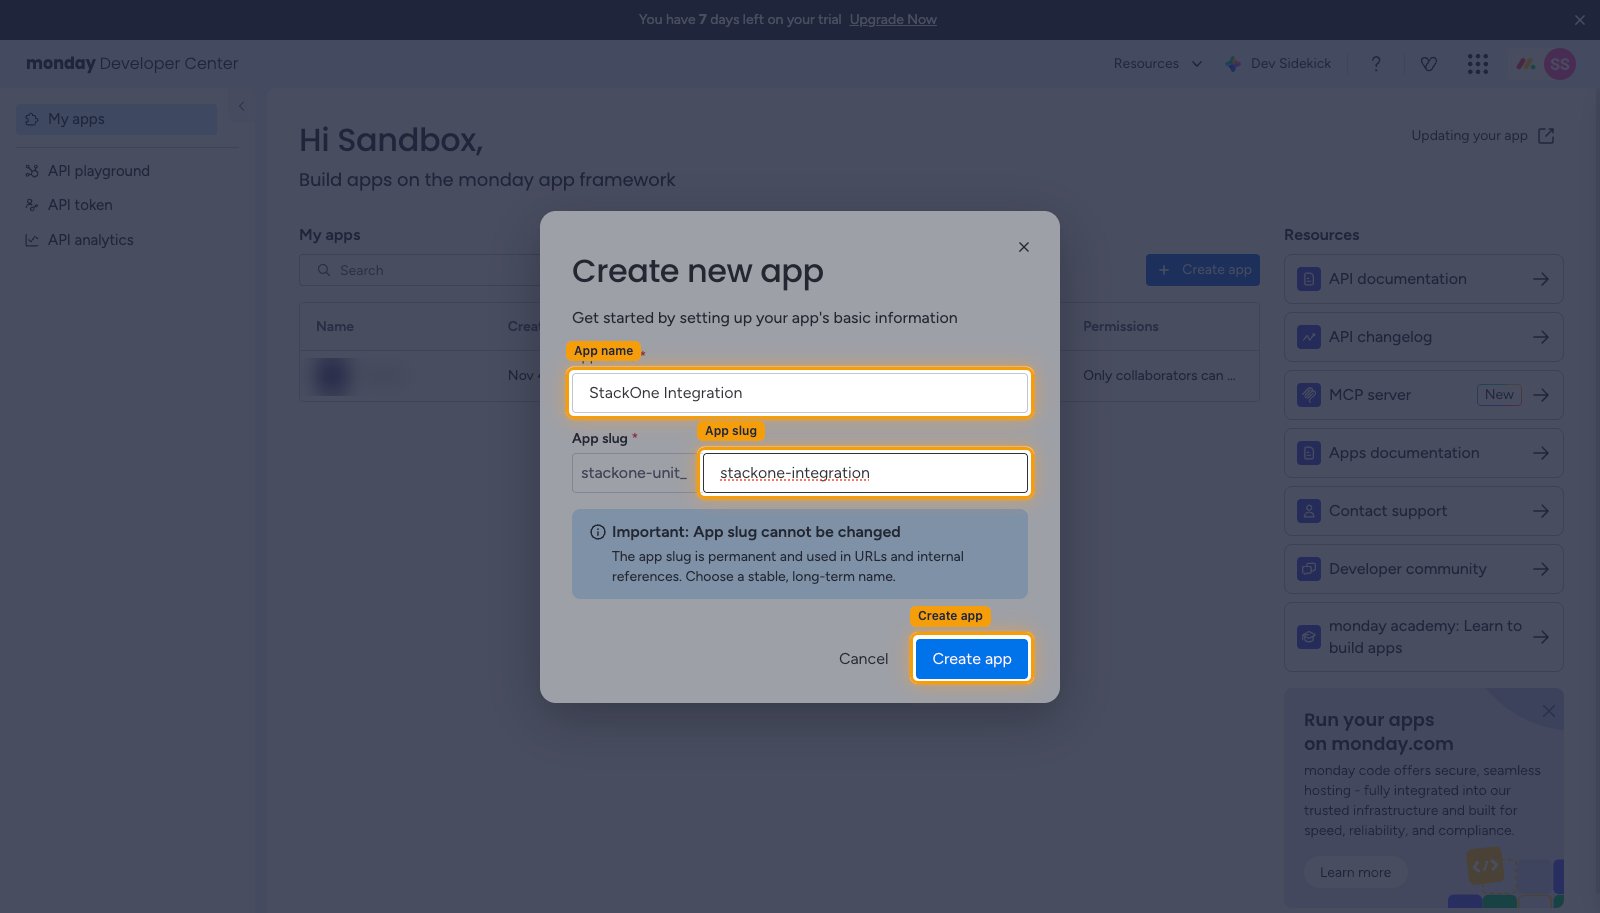
  • Click Create app.
  • App name: StackOne Integration
  • App slug: stackone-integration
  • Click Create app.
The Create new app dialog with the App name and App slug filled in and the Create app button highlighted
2

Turn on the new OAuth flow

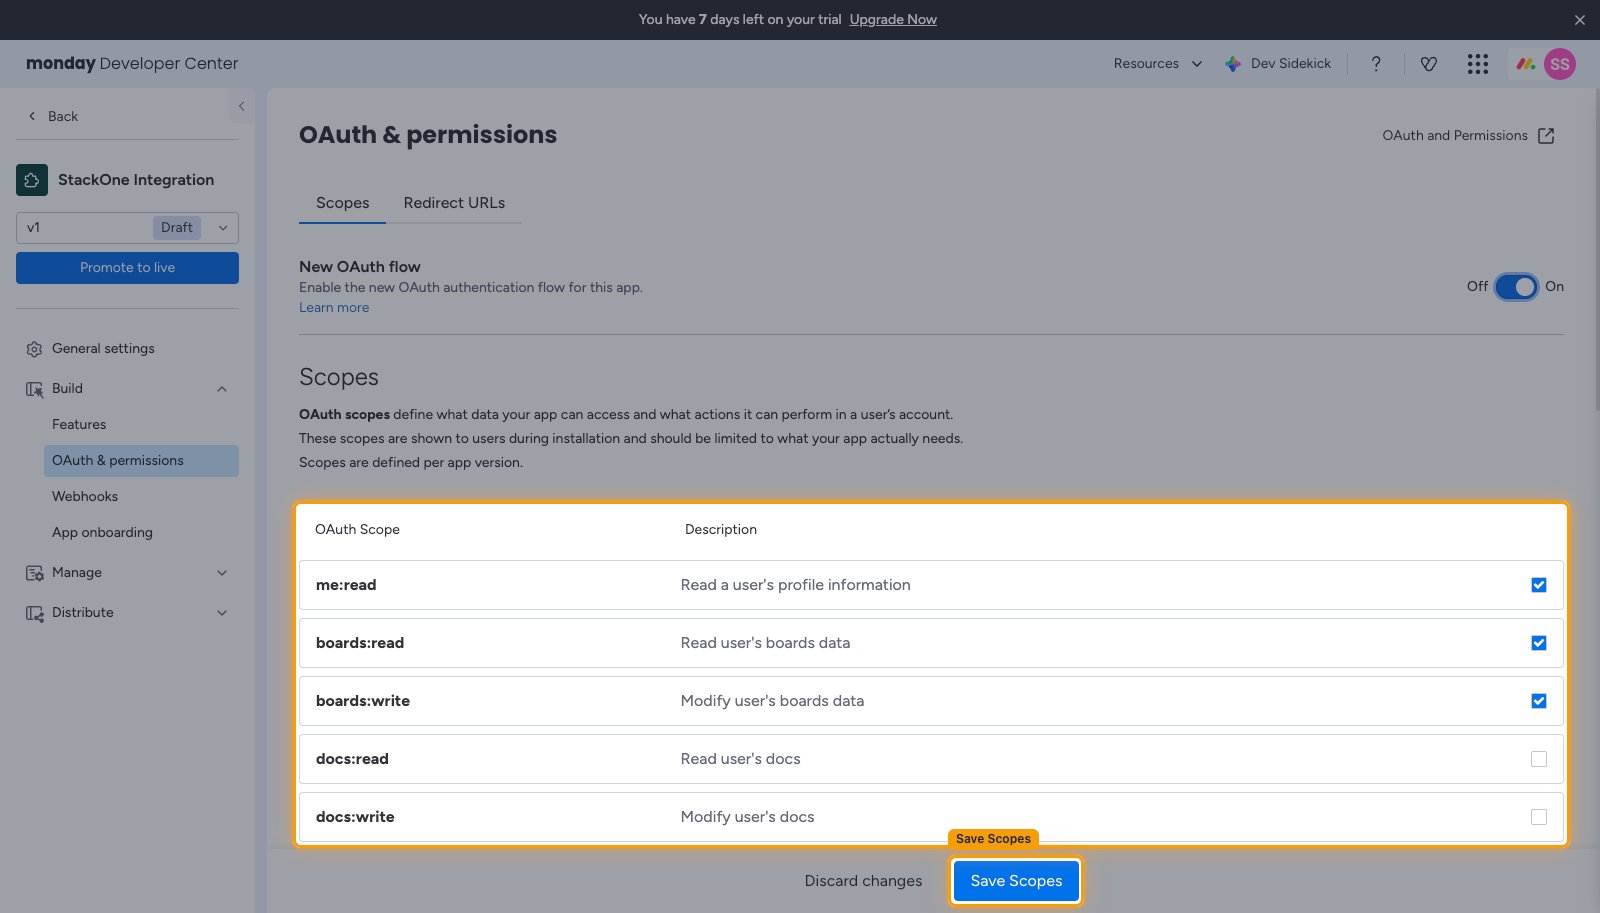
In the left sidebar, open Build > OAuth & permissions, then open the Scopes tab.

  • Set New OAuth flow to On.
  • The new OAuth flow is set per app version, so turn it on again on any later version before you connect with it.
  • Click Promote to live once you have finished configuring the app.
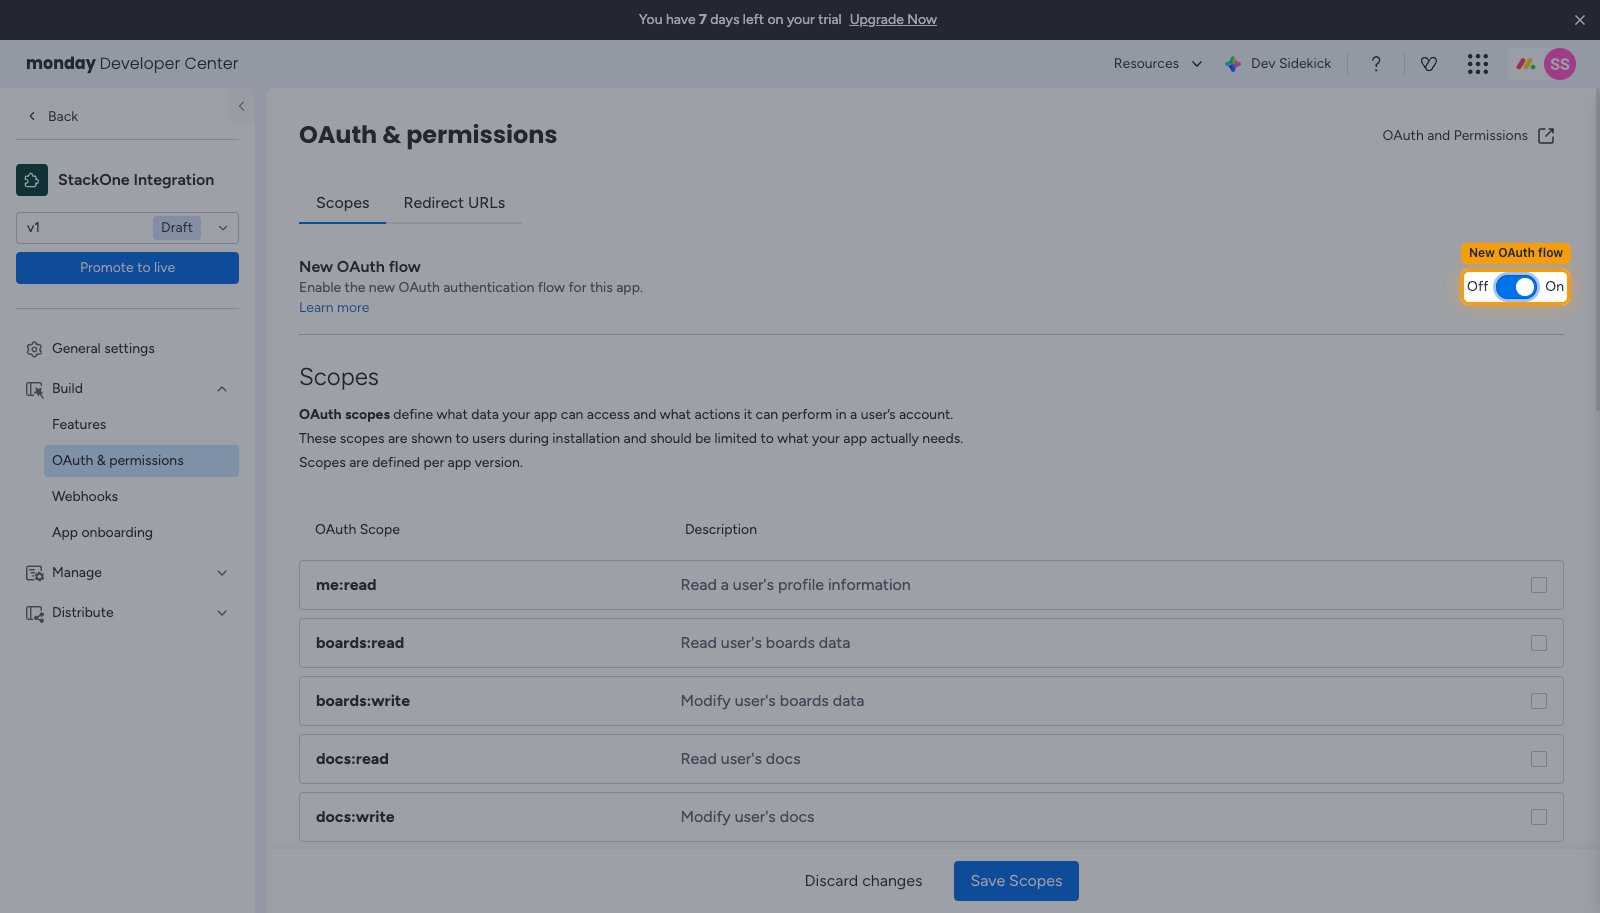
The OAuth and permissions page with the New OAuth flow toggle switched On
3

Add the scopes

Enables actions: Activate Users, Add Subscribers To Object, Add Teams To Board, Add Teams To Workspace, Add Users To Board, Add Users To Team, Add Users To Workspace, Archive Board, Archive Group, Archive Item, Archive Object, Assign Team Owners, Change Column Metadata, Change Column Title, Change Column Value, Change Item Position, Change Multiple Column Values, Change Simple Column Value, Clear Item Updates, Create Board, Create Column, Create Folder, Create Group, Create Item, Create Notification, Create Or Get Tag, Create Subitem, Create Team, Create Update, Create Workspace, Deactivate Users, Delete Board, Delete Column, Delete Favorite, Delete Folder, Delete Group, Delete Item, Delete Object, Delete Subscribers From Board, Delete Team, Delete Teams From Board, Delete Teams From Workspace, Delete Update, Delete Users From Workspace, Delete Workspace, Duplicate Board, Duplicate Group, Duplicate Item, Edit Update, Get API Complexity, Get API Version, Get Account, Get Activity Logs, Get Column Type Schema, Get Form, Get Me, Get Mute Board Settings, Get Plan, Get Unified Credentials, Get Unified Group, Get Unified Organization, Get Unified Role, Get Unified User, Invite Users, Like Update, List API Versions, List Account Roles, List Assets, List Boards, List Columns, List Departments, List Favorites, List Folders, List Groups, List Items, List Items Page, List Notifications, List Objects, List Replies, List Subitems, List Tags, List Teams, List Unified Groups, List Unified Organizations, List Unified Resource Types, List Unified Resource Users, List Unified Roles, List Unified Users, List Updates, List Users, List Workspaces, Move Item To Board, Move Item To Group, Pin Update To Top, Remove Team Owners, Remove Users From Team, Set Board Permission, Set Item Description Content, Unlike Update, Unpin Update From Top, Update Assets On Item, Update Board, Update Board Hierarchy, Update Email Domain, Update Folder, Update Group, Update Multiple Users, Update Mute Board Settings, Update Users Role, Update Workspace

On the Scopes tab, select each scope this integration needs. Monday.com write scopes do not grant read access, so select both the read and the write scope for any resource you need to both read and modify.

  • Click Save Scopes.
The Scopes tab with OAuth scopes selected and the Save Scopes button highlighted
4

Set the redirect URL

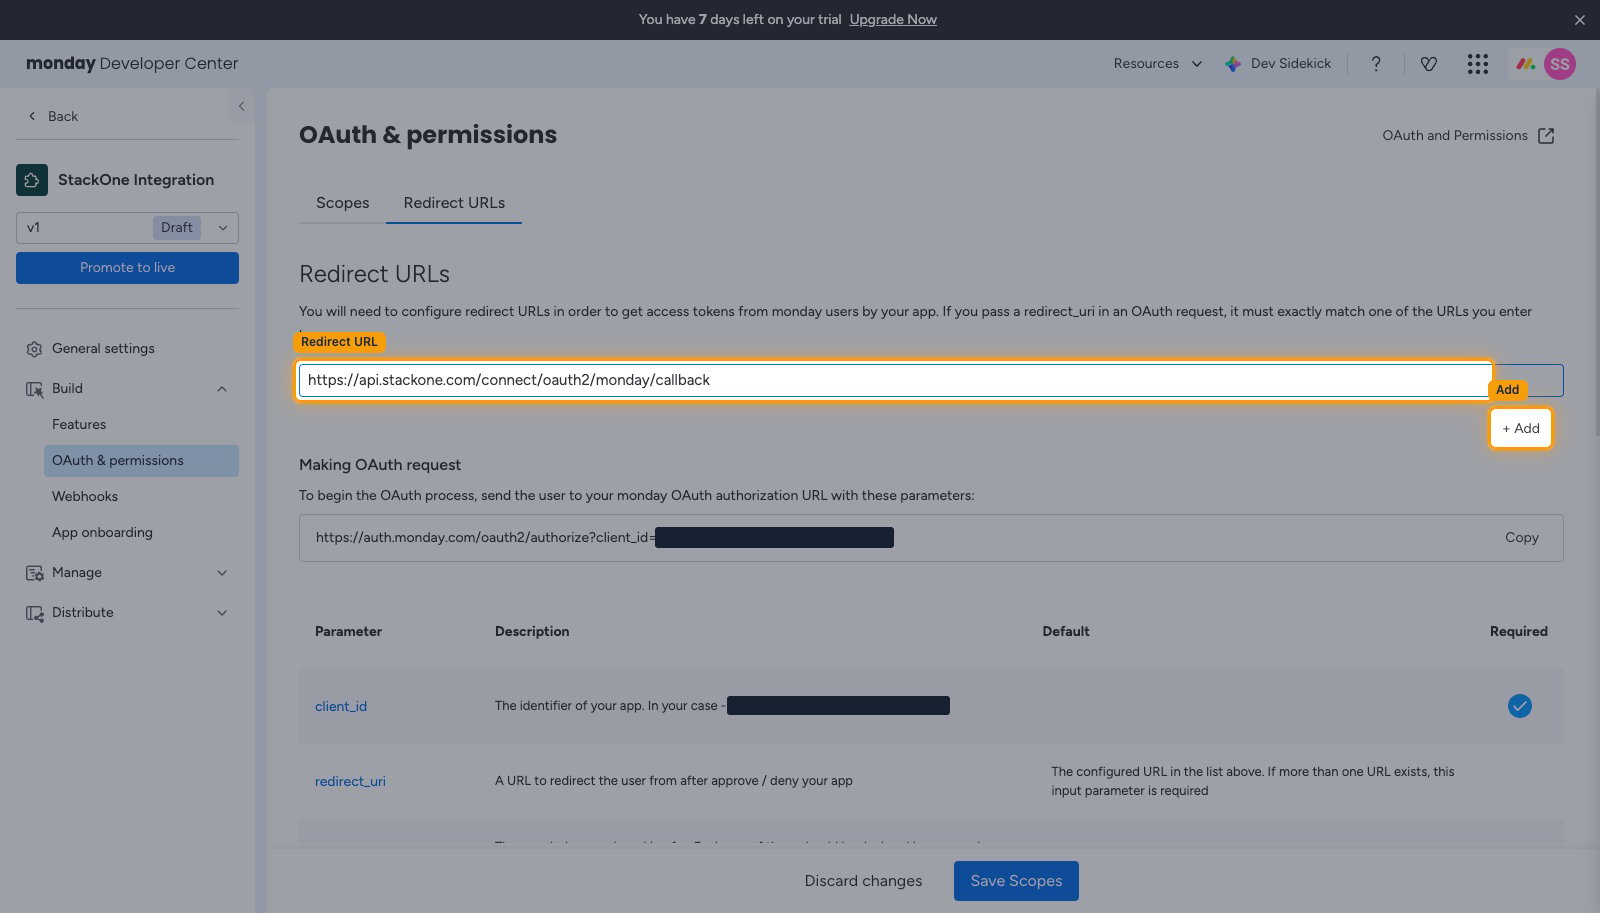
Open the Redirect URLs tab. The redirect URL must match the one sent in the OAuth request exactly.

  • Enter the Callback URL from your Connector Profile.
  • Click + Add.
The Redirect URLs tab with the callback URL entered and the Add button highlighted
5

Copy the app credentials

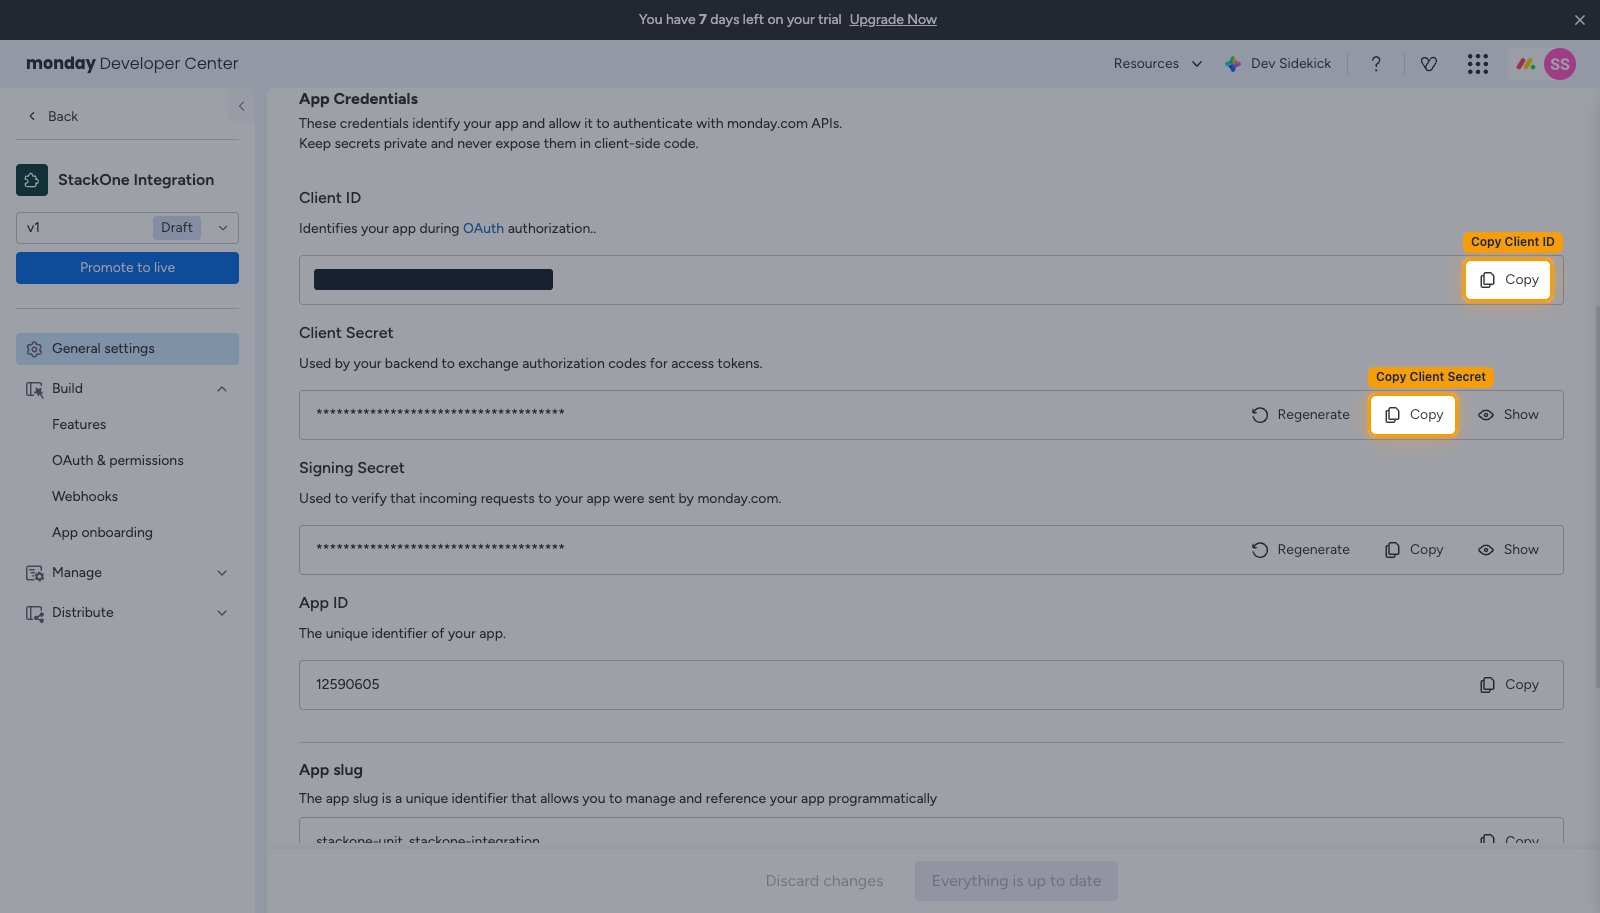
Copy the Client ID and Client Secret into your Connector Profile.

  • In the left sidebar, open General settings.
  • Under App Credentials, click Copy next to Client ID.
  • Click Copy next to Client Secret.
The App Credentials section of General settings showing the Client ID and Client Secret with their Copy buttons highlighted

Create the StackOne Connector Profile

1

Create a Connector Profile

Enable the connector and create a Connector Profile in your project. See Setup Connector Profile.
2

Link an Account

Once the Connector Profile is created, continue to link an account.