

Register a SMART app
These steps use the OAuth 2.0 server built into IRIS. On an external authorization server, create a confidential client with the same redirect URL, grant type, authentication type and scopes.
Check the authorization server
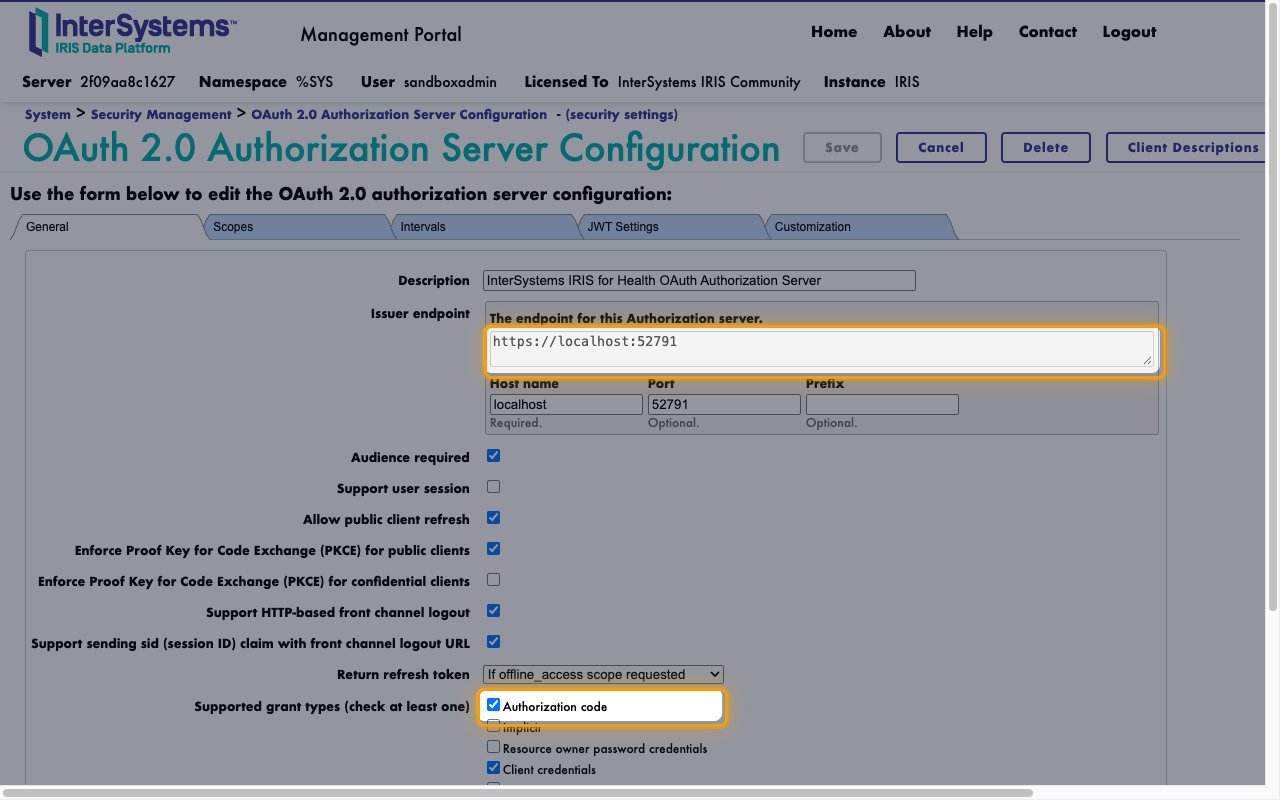
Sign in to your IRIS Management Portal and open System Administration > Security > OAuth 2.0 > Server.
- Supported grant types (check at least one): Authorization code selected
- Return refresh token: If offline_access scope requested
- Click Save.
- The Authorization URL and Token URL stay empty when the Issuer endpoint has the same host as your FHIR server. Otherwise, add
/oauth2/authorizeand/oauth2/tokento the Issuer endpoint, or use the endpoints of your external authorization server, and copy them into your Connector Profile. - Format:
{Issuer endpoint}/oauth2/authorizeand{Issuer endpoint}/oauth2/token - Example: if the Issuer endpoint is
https://auth.example.org, your Authorization URL ishttps://auth.example.org/oauth2/authorizeand your Token URL ishttps://auth.example.org/oauth2/token
Add the scopes
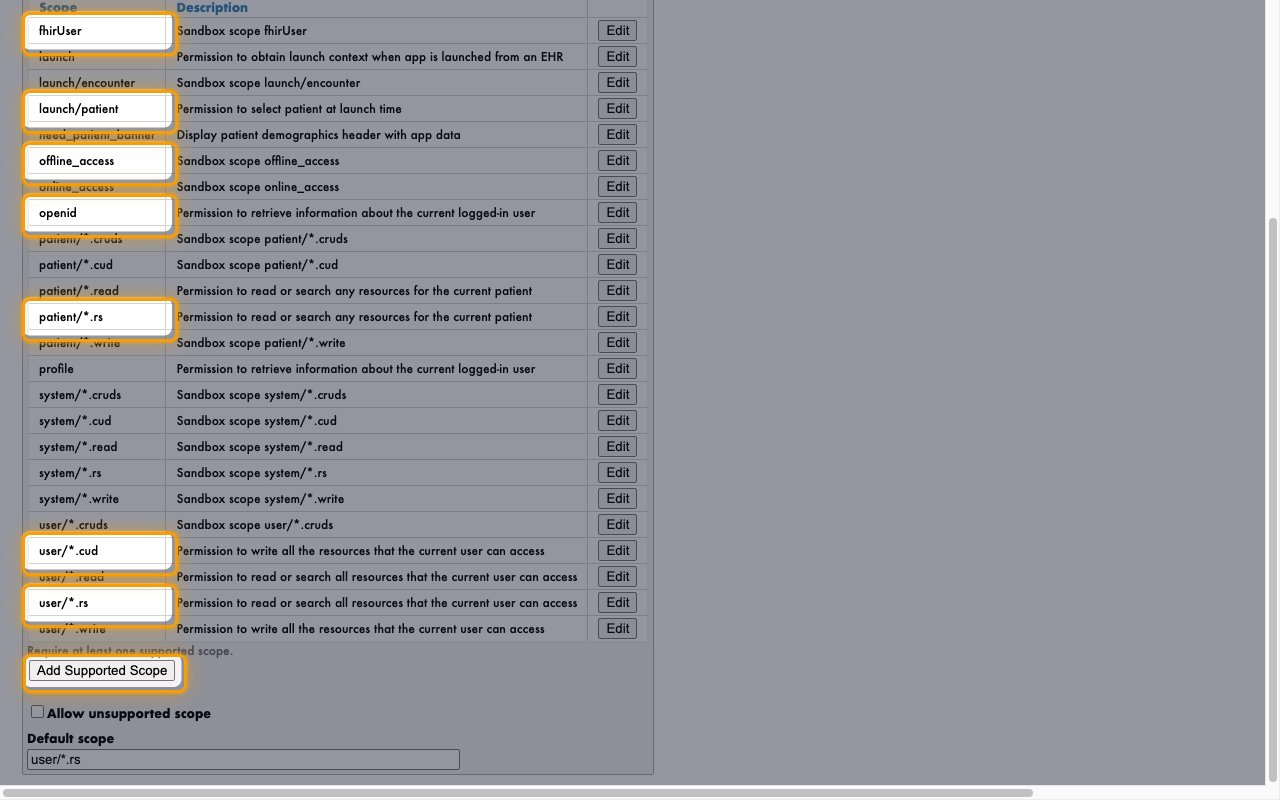
On the Scopes tab, check that openid, fhirUser, offline_access, user/*.rs and user/*.cud are listed. Patient sign-in also uses launch/patient and patient/*.rs. Add the ones the list is missing.
- Click Add Supported Scope.
- Enter supported scope: the scope, such as
offline_access - Click OK.
- Click Save.
Create the client
On the server configuration page, open Client Descriptions.
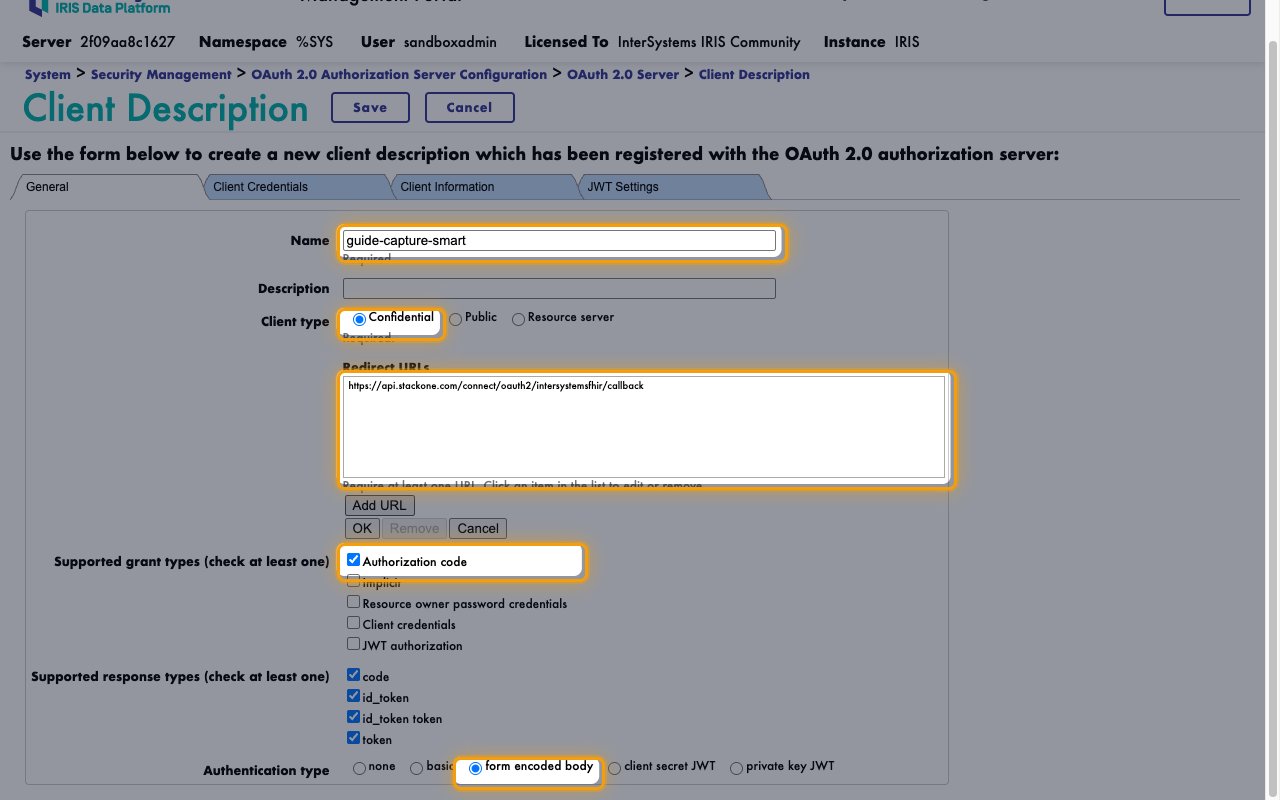
- Click Create Client Description.
- Name:
StackOne - Client type: Confidential
- Click Add URL.
- Enter URL: the Callback URL from your Connector Profile
- Click OK.
Set the grant and authentication types
These settings on the same form decide how the client gets its tokens.
- Supported grant types (check at least one): Authorization code
- Authentication type: form encoded body
- Click Save.
Copy the client credentials
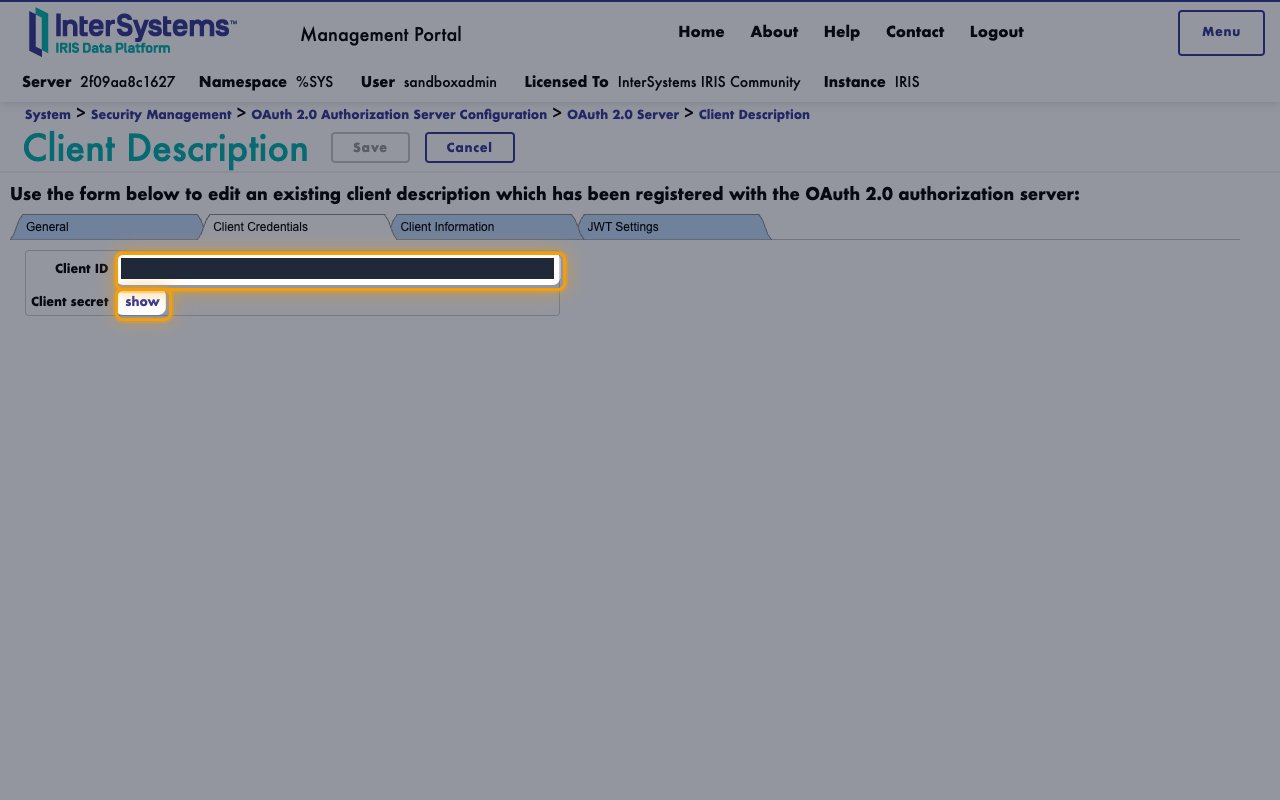
In the OAuth 2.0 Server list, click the new client’s name.
- Open the Client Credentials tab.
- Copy the Client ID into your Connector Profile.
- Click show next to Client secret.
- Copy the Client secret into your Connector Profile.
Create the StackOne Connector Profile
Create a Connector Profile
Link an Account