

Select a Google Cloud project
StackOne connects to the Cloud Text-to-Speech API through an OAuth client that lives in a Google Cloud project.
Sign in to Google Cloud
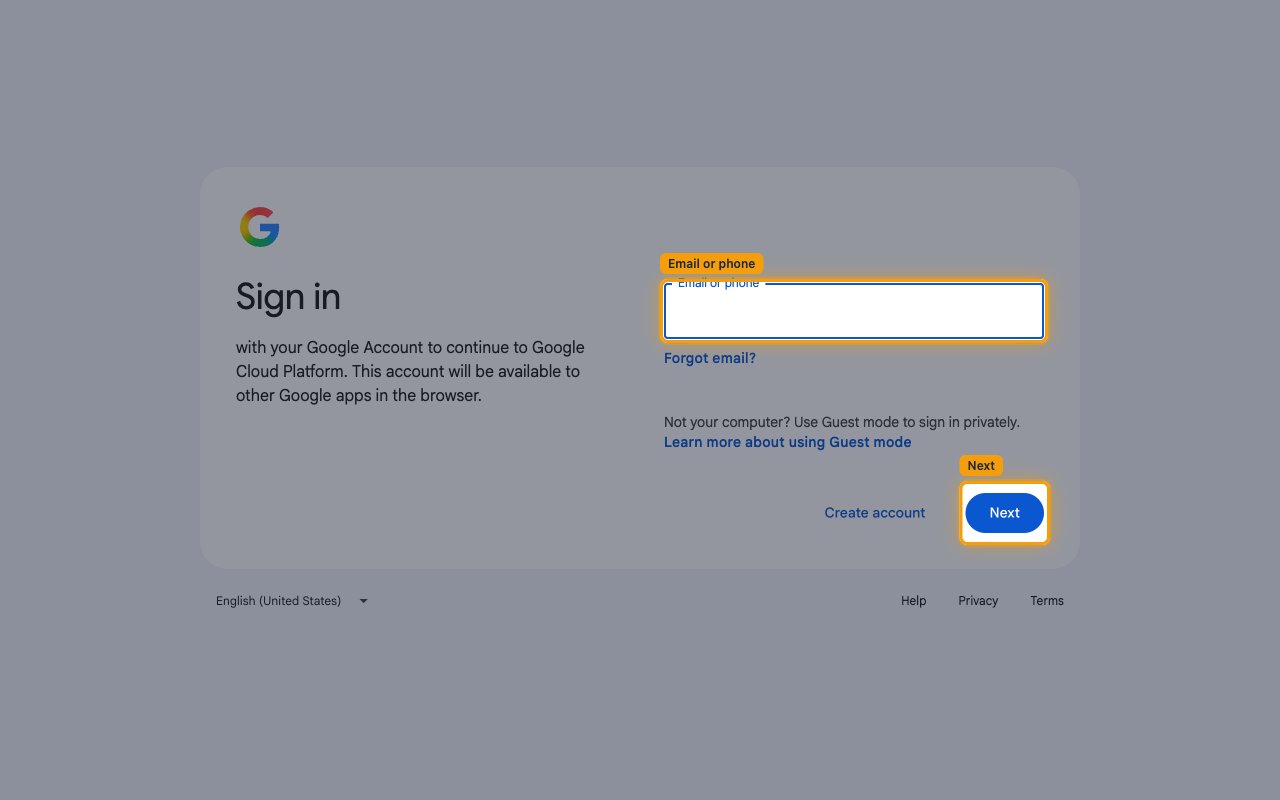
Sign in to your Google Cloud account.
- Enter your Email or phone, click Next and complete the sign-in.
Select or create a project
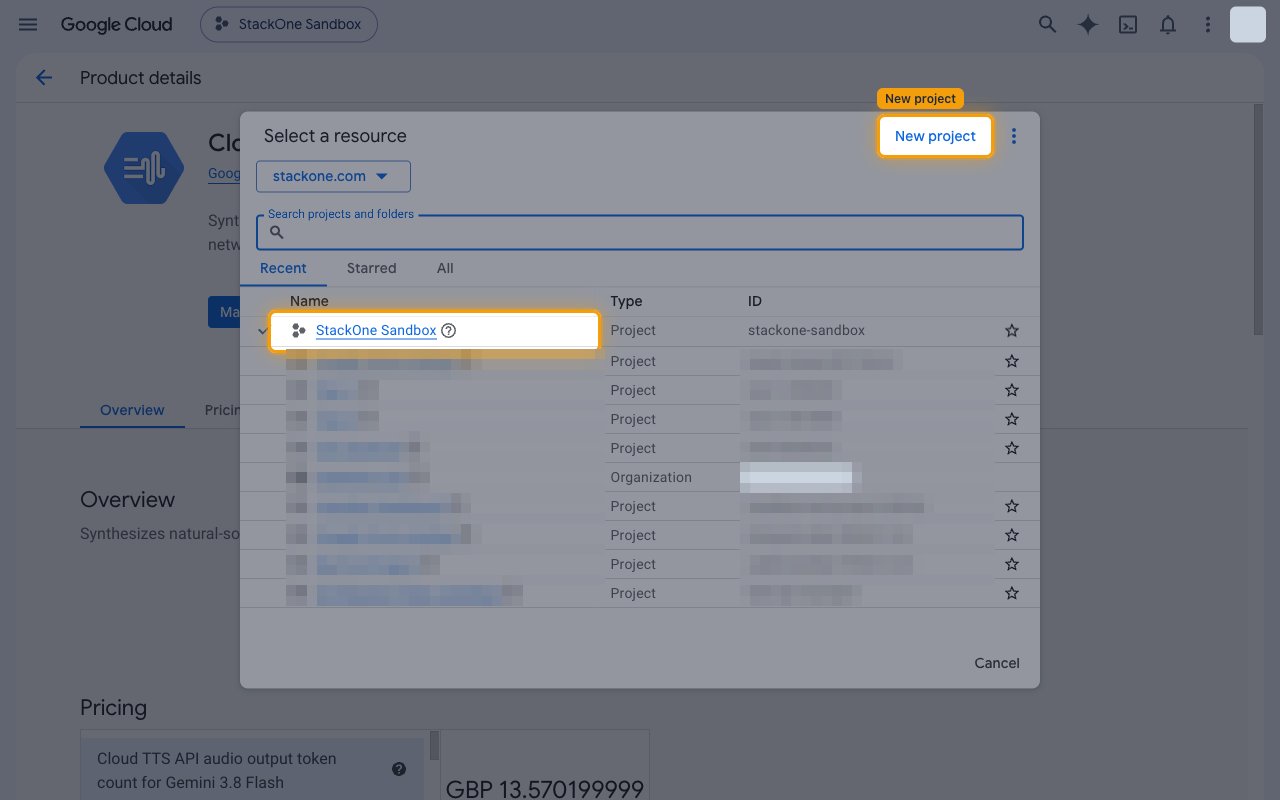
Click the project picker in the top bar to open Select a resource.
- Select the project you want to connect from the list.
- To use a new project, click New project and create it.
Enable the Cloud Text-to-Speech API
The Cloud Text-to-Speech API must be enabled in the project, and the project must have billing enabled.
Enable the API
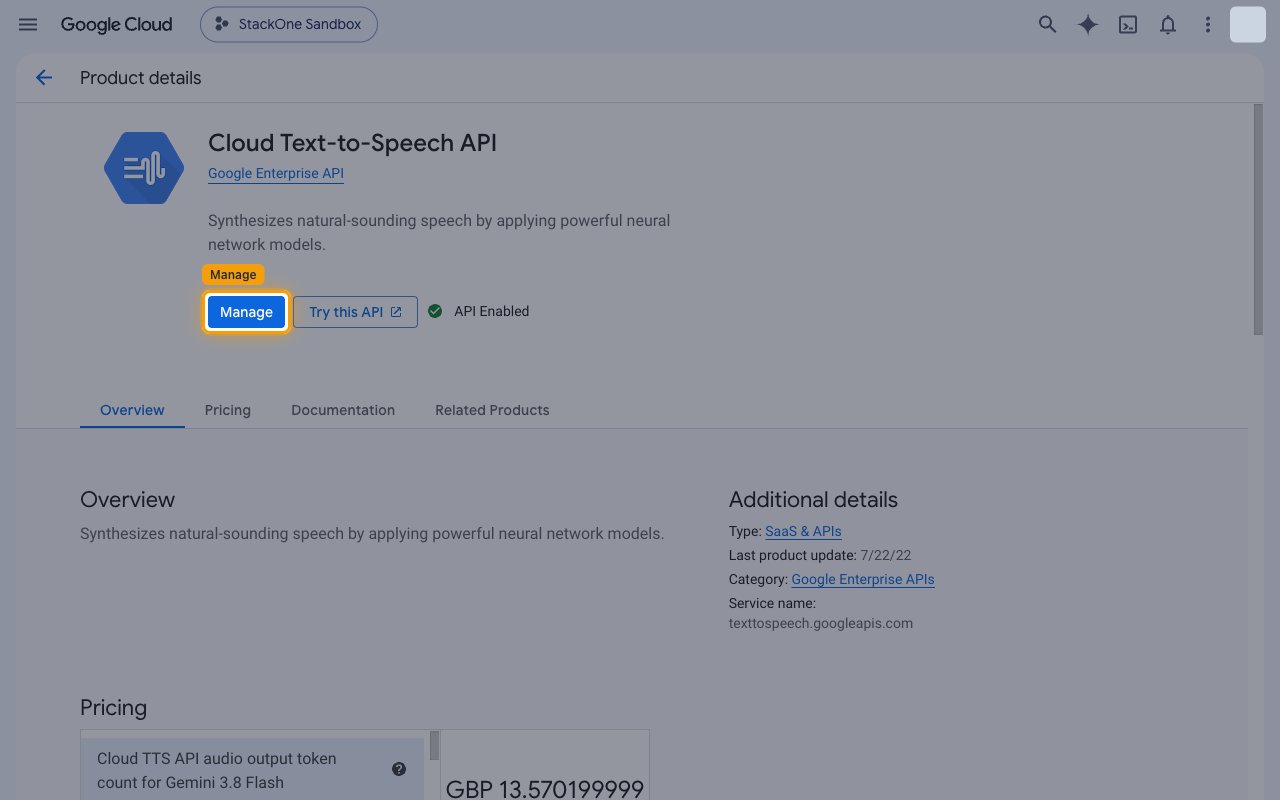
With your project selected, open the Cloud Text-to-Speech API page and click Enable.
- If the API is already enabled, the page shows API Enabled and a Manage button instead, and no action is needed.
Configure the Google Auth Platform
Open Google Auth Platform for your project. These pages control the consent screen users see when they connect.
Review the branding
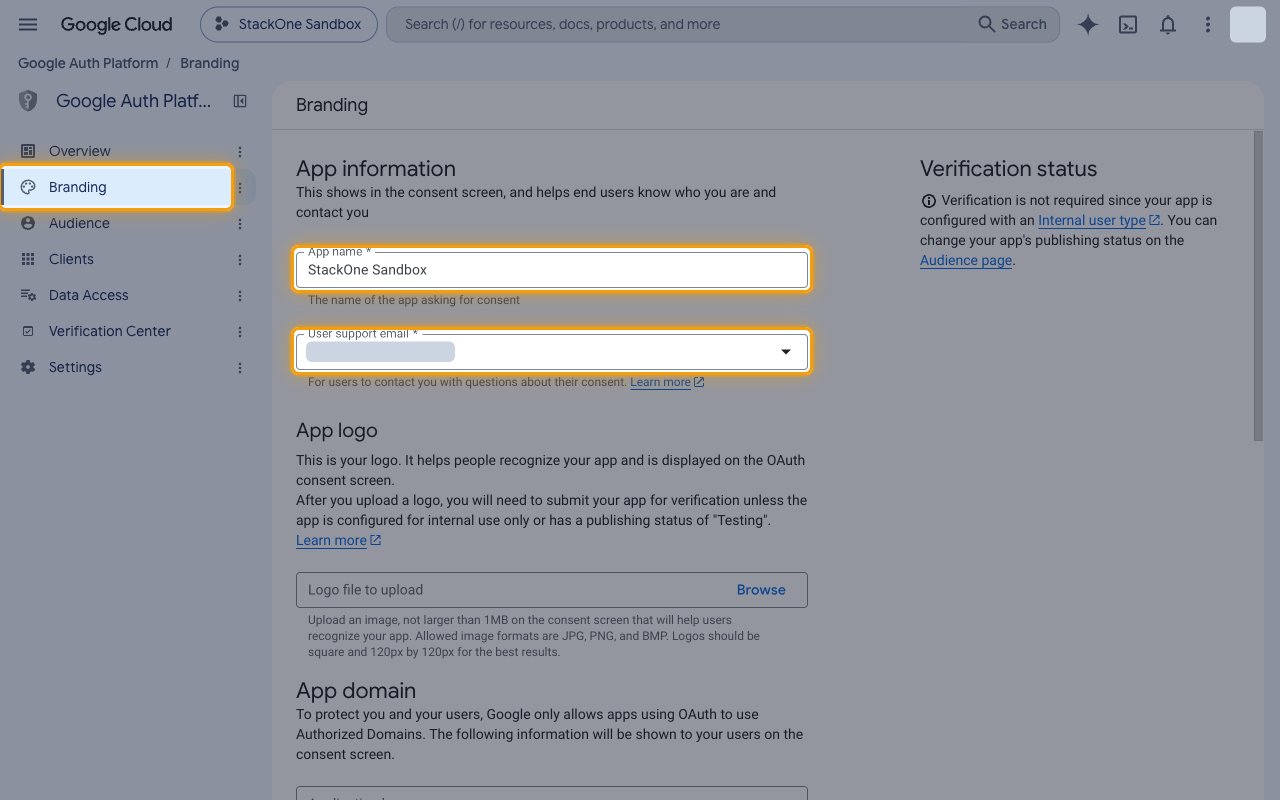
In the sidebar, click Branding and fill in the App information section.
- App name — the name users see on the Google consent screen (for example,
StackOne Integration). - User support email — the address users can contact with questions about their consent.
- Under Developer contact information, enter at least one address in Email addresses.
- Click Save if you changed anything.
Choose the audience
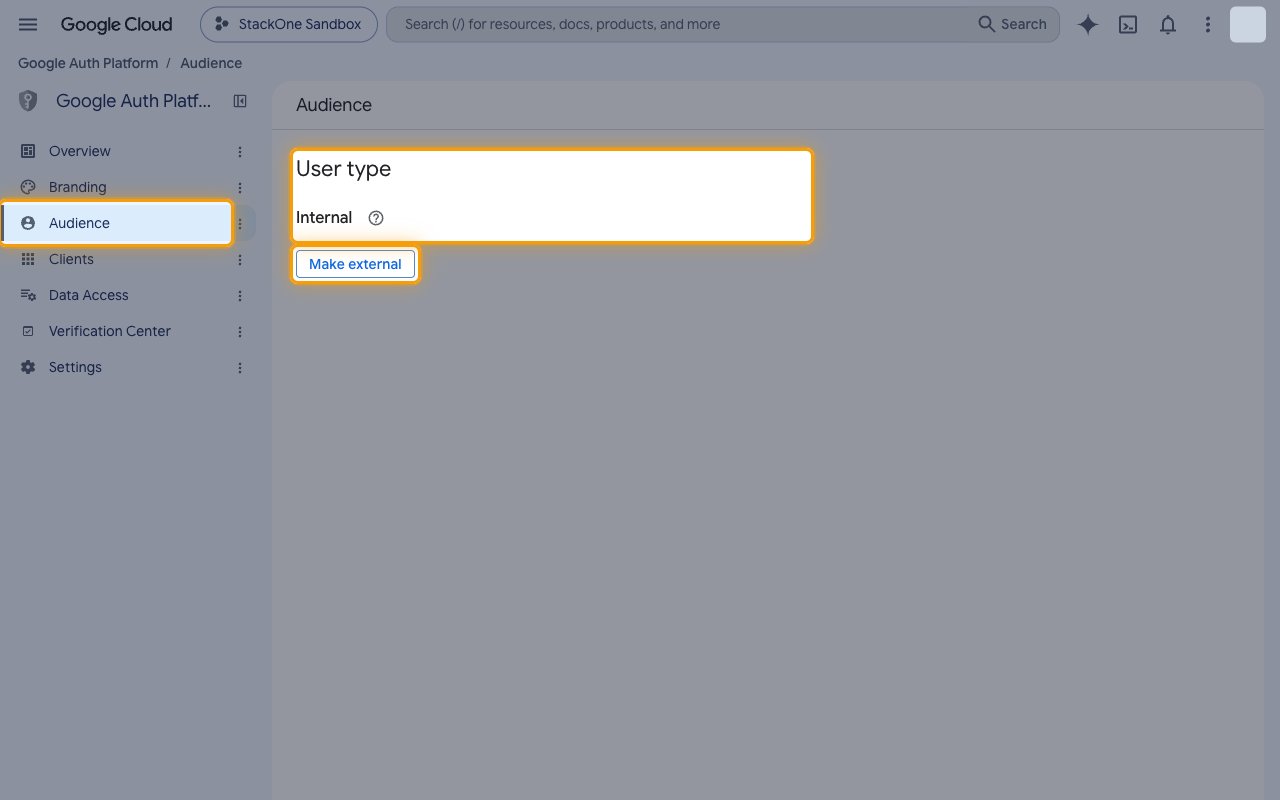
In the sidebar, click Audience and check the User type.
- Internal — only users in your Google Workspace organization can authorize the app.
- External (switch with Make external) — any Google account can authorize the app. While an external app’s publishing status is Testing, refresh tokens expire after 7 days and the connection must be re-authorized, so publish the app to production for long-lived access.
Open Data Access
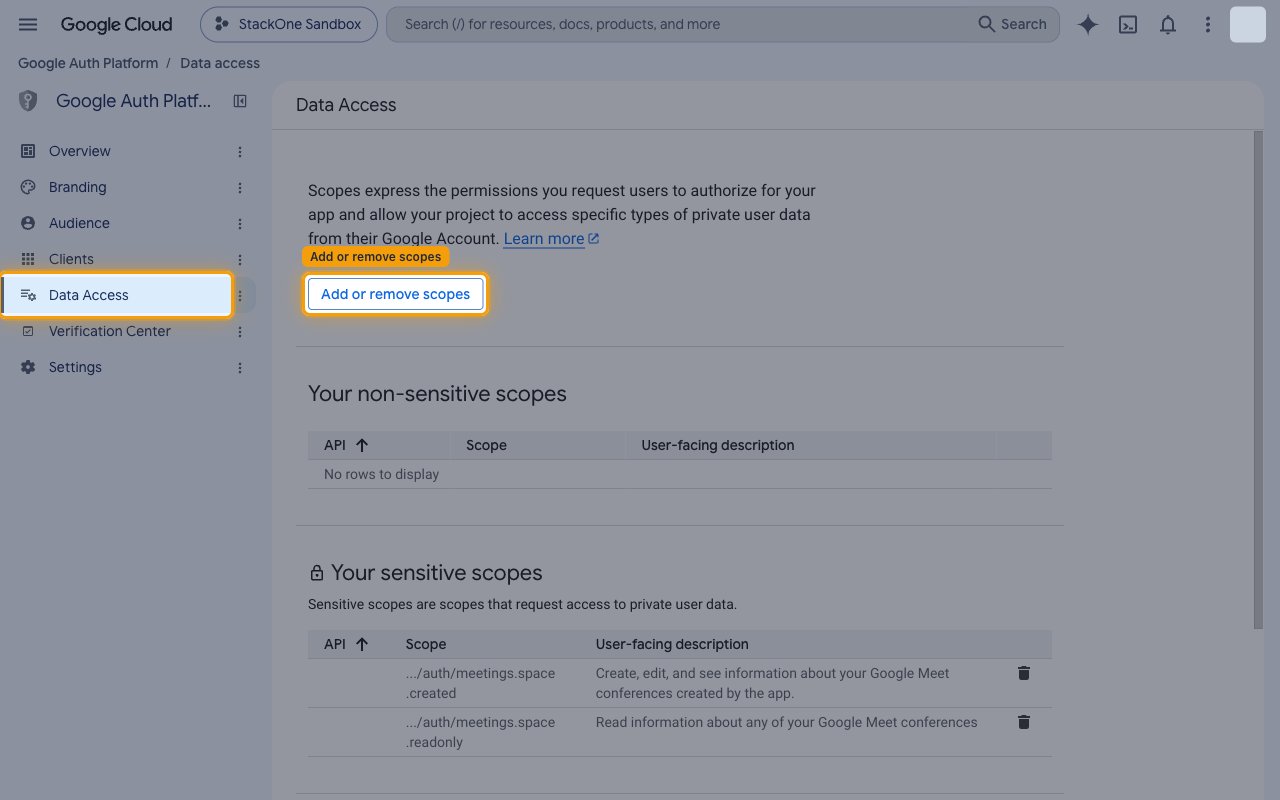
In the sidebar, click Data Access, then click Add or remove scopes.
Add the Cloud Platform scope
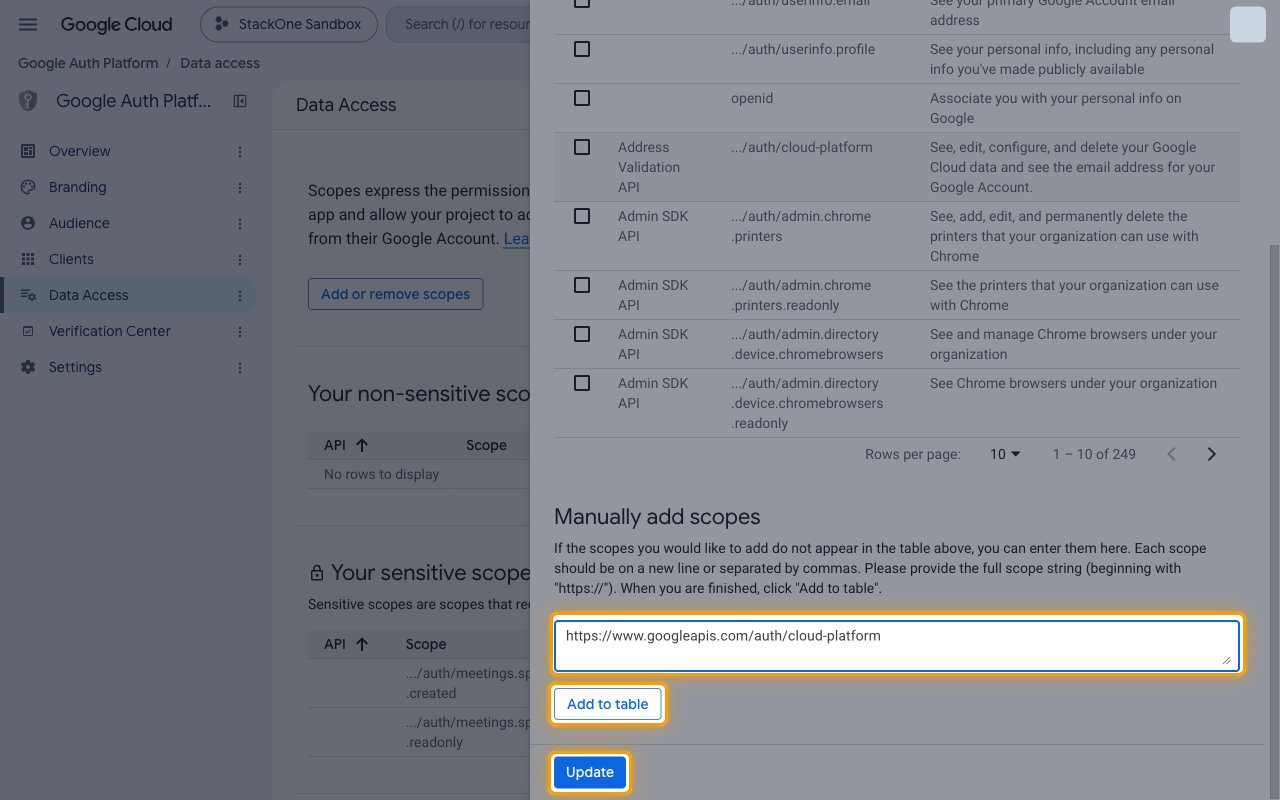
In the Update selected scopes panel, paste the scope below into the Manually add scopes box, click Add to table, then click Update. Back on Data Access, click Save. The Cloud Text-to-Speech API accepts only this scope, so leave the Scopes field in the StackOne Connector profile empty to request it by default.
Create OAuth 2.0 client credentials
Create a web application OAuth client. StackOne uses its Client ID and Client Secret to request access on behalf of each connected account.
Open Clients
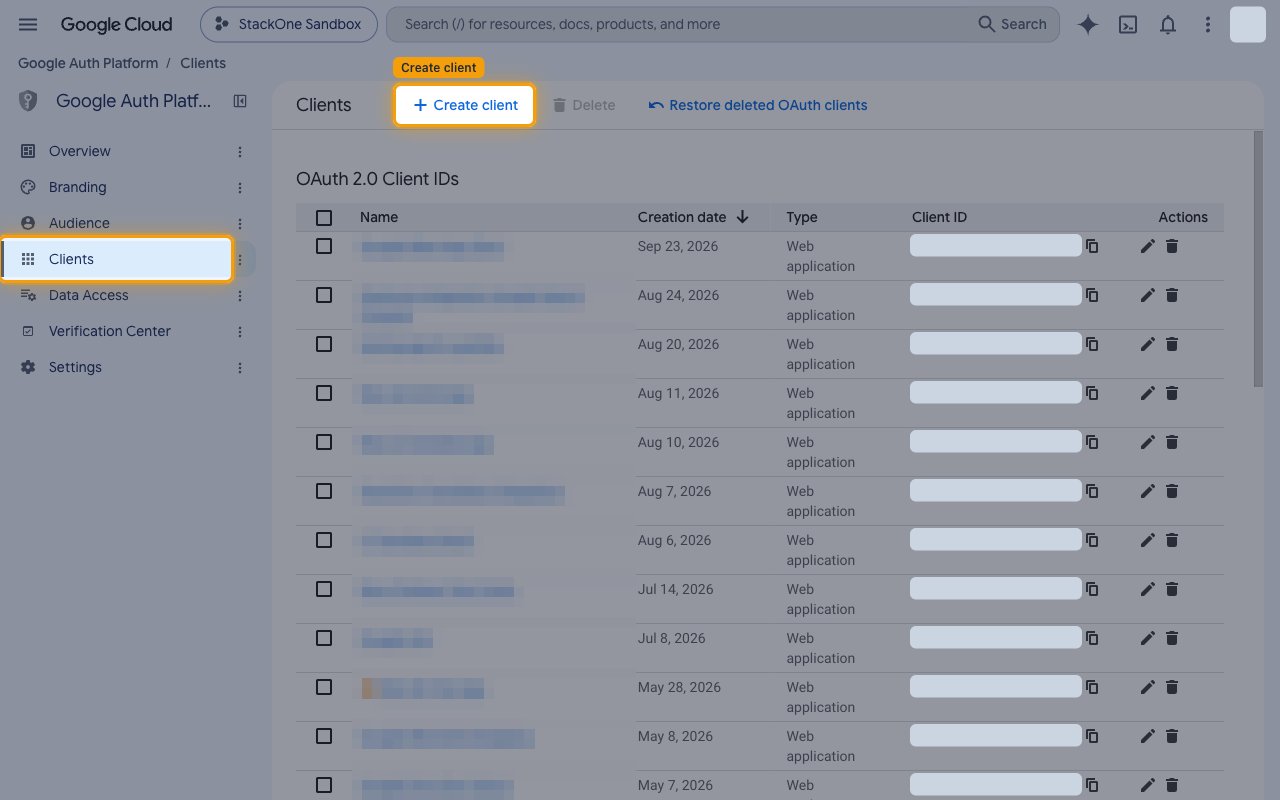
In the Google Auth Platform sidebar, click Clients, then click Create client.
Choose the application type
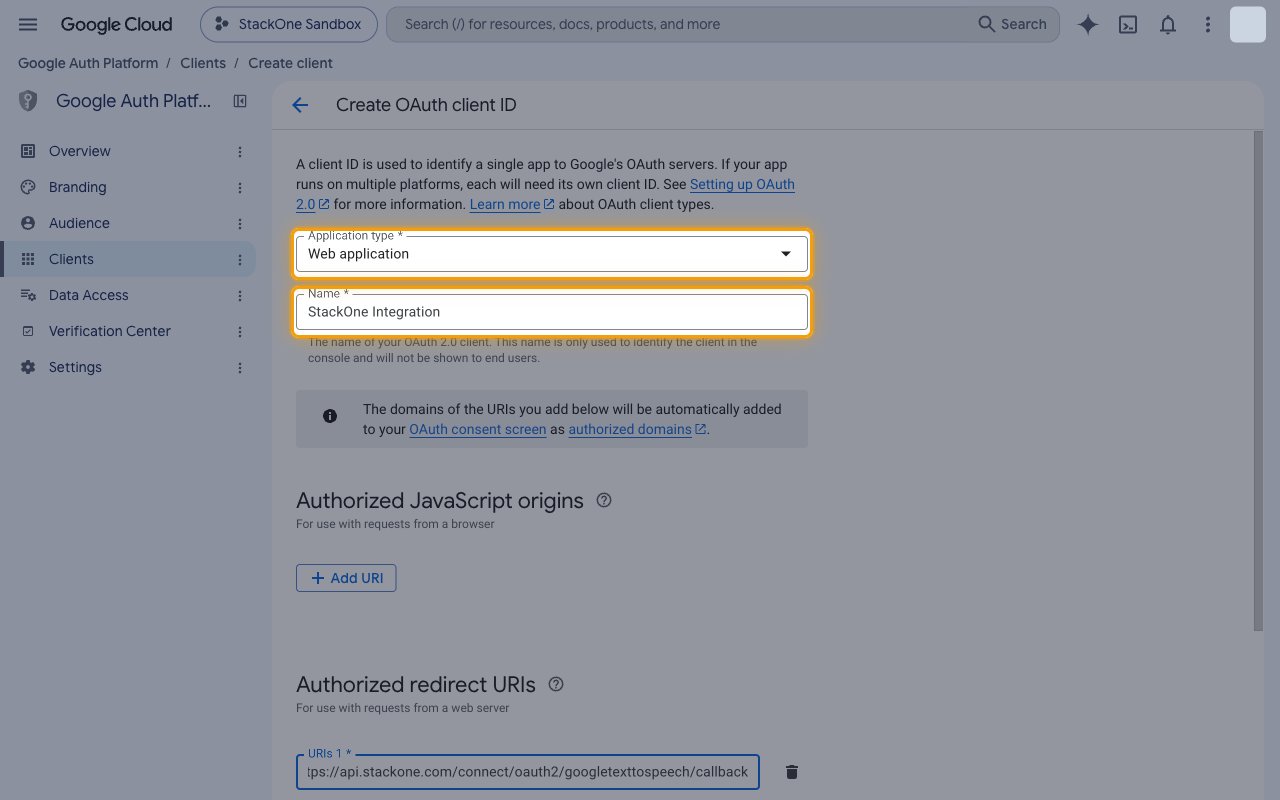
On Create OAuth client ID, set Application type to Web application.
- In Name, enter
StackOne Integration. The name only identifies the client in the console.
Add the redirect URI
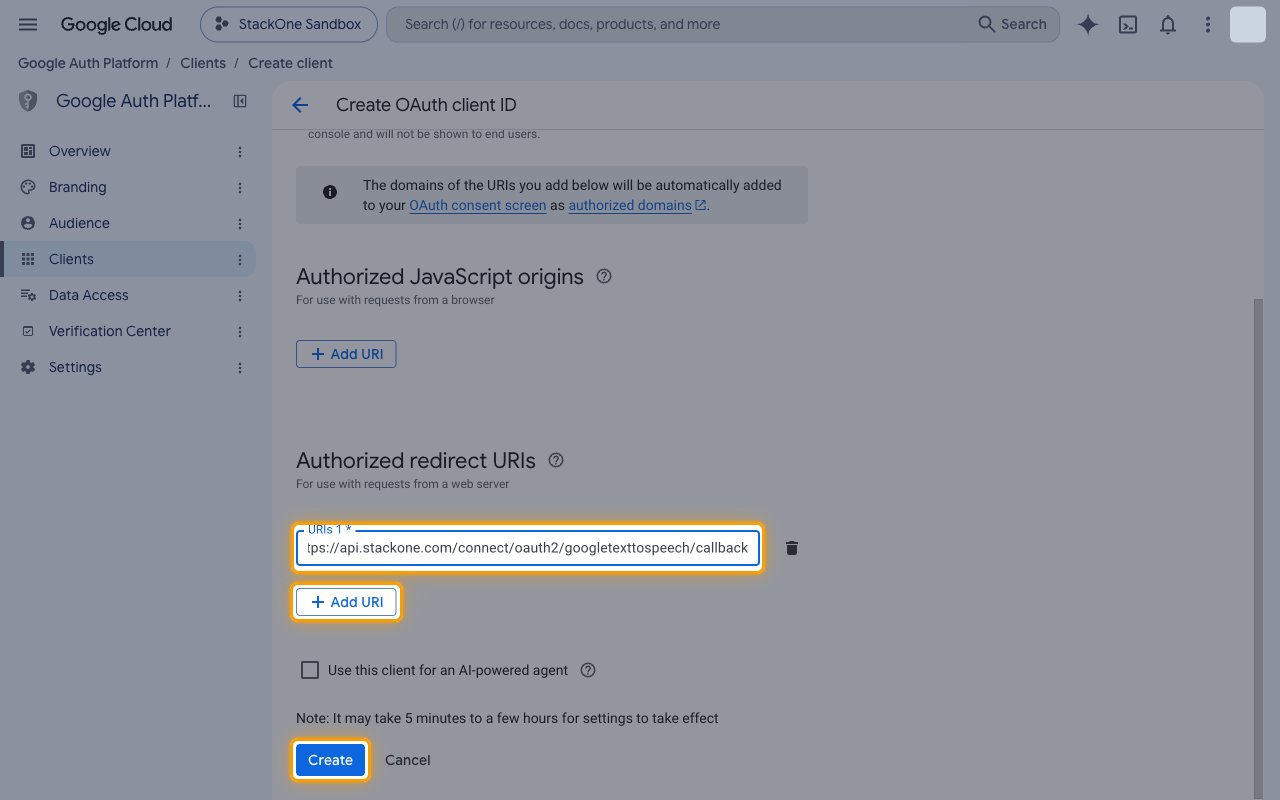
Under Authorized redirect URIs, click Add URI and enter https://api.stackone.com/connect/oauth2/googletexttospeech/callback.
- Click Create.
- Google notes that it may take 5 minutes to a few hours for new settings to take effect.
Copy the client credentials
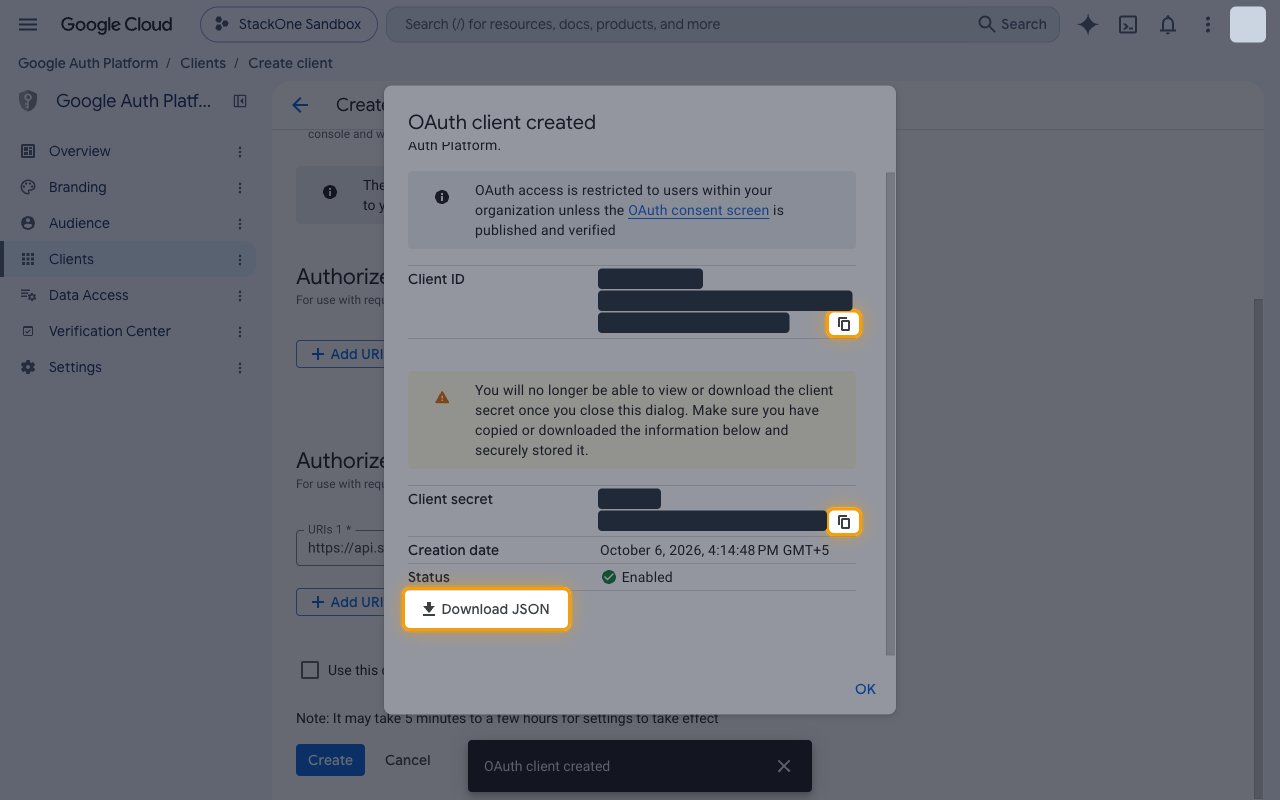
The OAuth client created dialog shows the new credentials. Copy both values now and store them securely for use later.
- Client ID — the public identifier of the OAuth client. Click the copy icon next to it and paste the value into the Client ID field in the StackOne Connector profile.
- Client secret — the private key StackOne uses to exchange and refresh tokens. Click the copy icon next to it and paste the value into the Client Secret field in the StackOne Connector profile.
- The Client Secret is only displayed once. You will no longer be able to view or download the client secret once you close this dialog, so click Download JSON to keep a copy.
- Click OK to close the dialog.
Creating the StackOne Connector Profile
To create the Connector Profile in StackOne for Google Text-to-Speech:Navigate to Connector Profiles
Create New Connector Profile
- Click + Connector Profile
- Search for and select Google Text-to-Speech
- Select Type as OAuth 2.0
- Fill out the fields using details retrieved from your provider:
- Client ID
- Client Secret
- Scopes (Optional)
- (Optional) Select Actions to be enabled for this Connector Profile
- Click Create profile