

Register OAuth application
Create an OAuth application in the Autodesk Platform Services portal to obtain a Client ID and Client Secret.
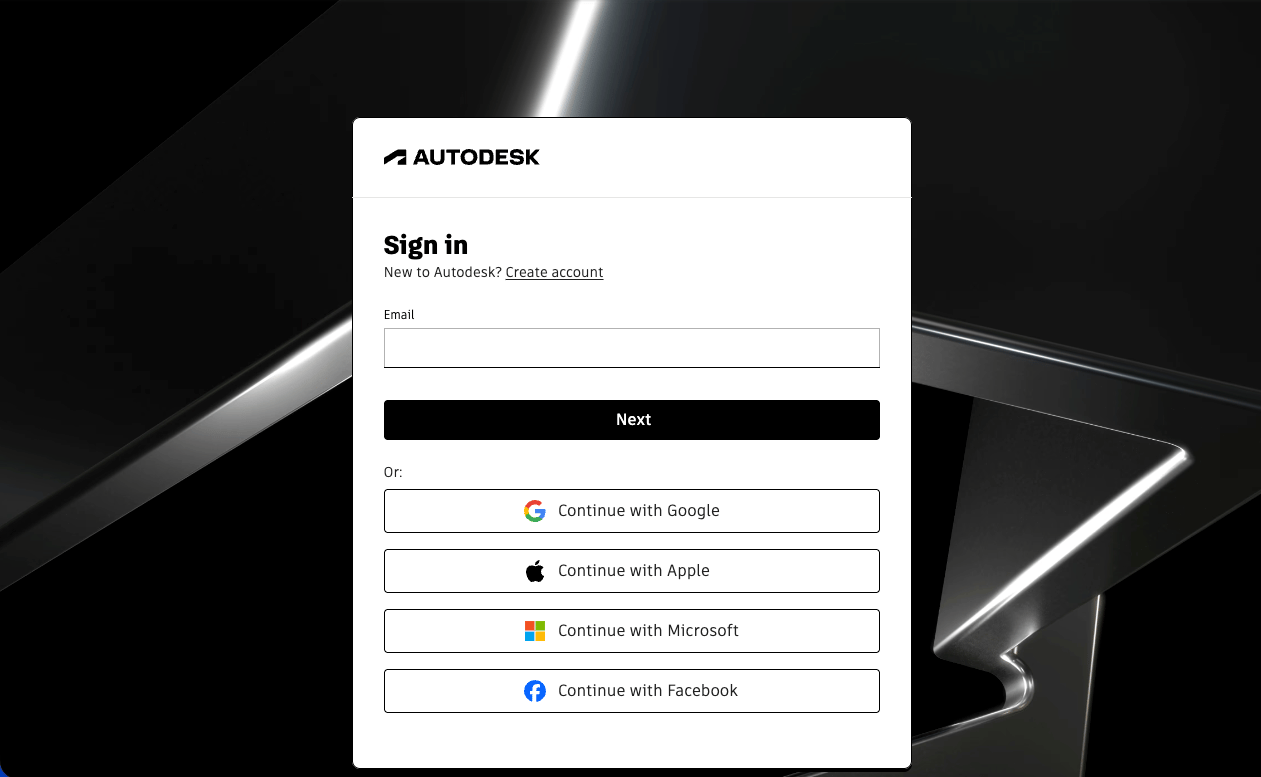
Sign in to Autodesk Platform Services
Sign in to the APS developer portal hub.
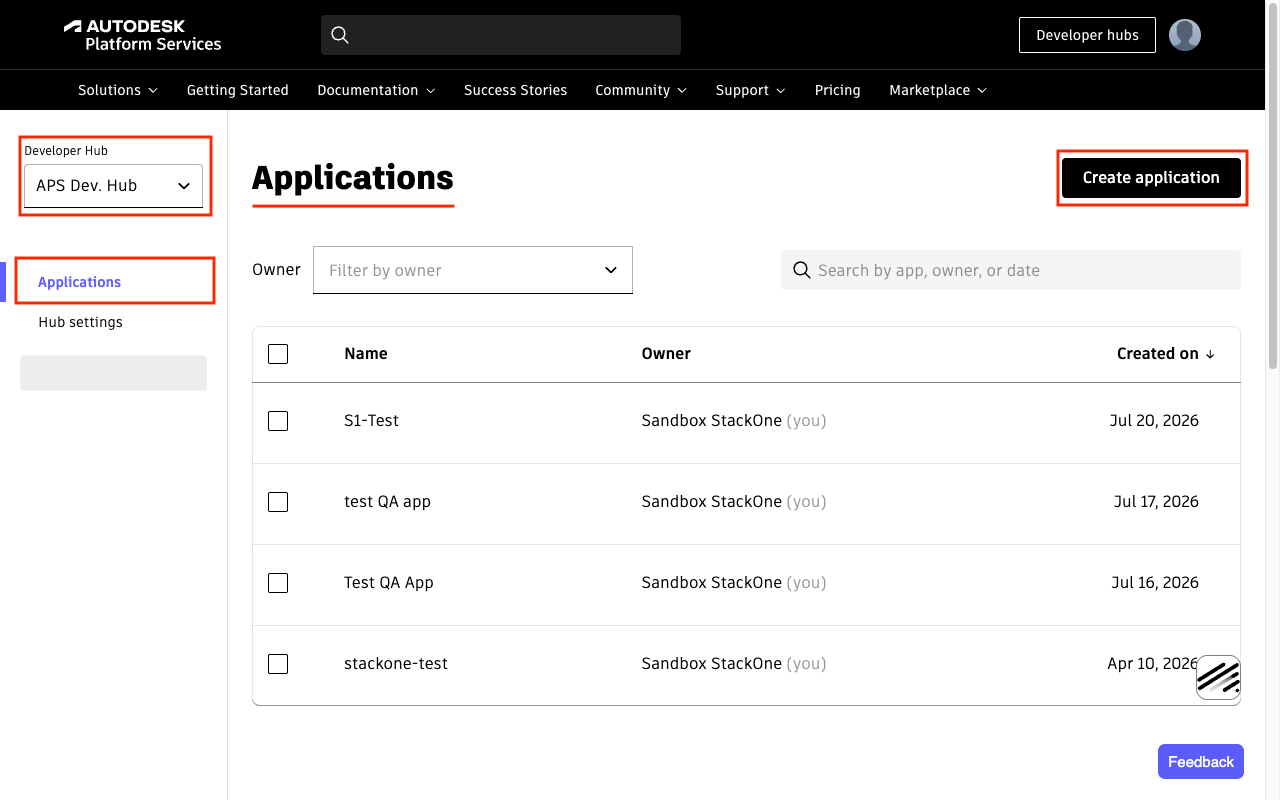
Open Applications page
After signing in, you will be directed to the Applications page.
- Click the Create application button in the top right.
Create application
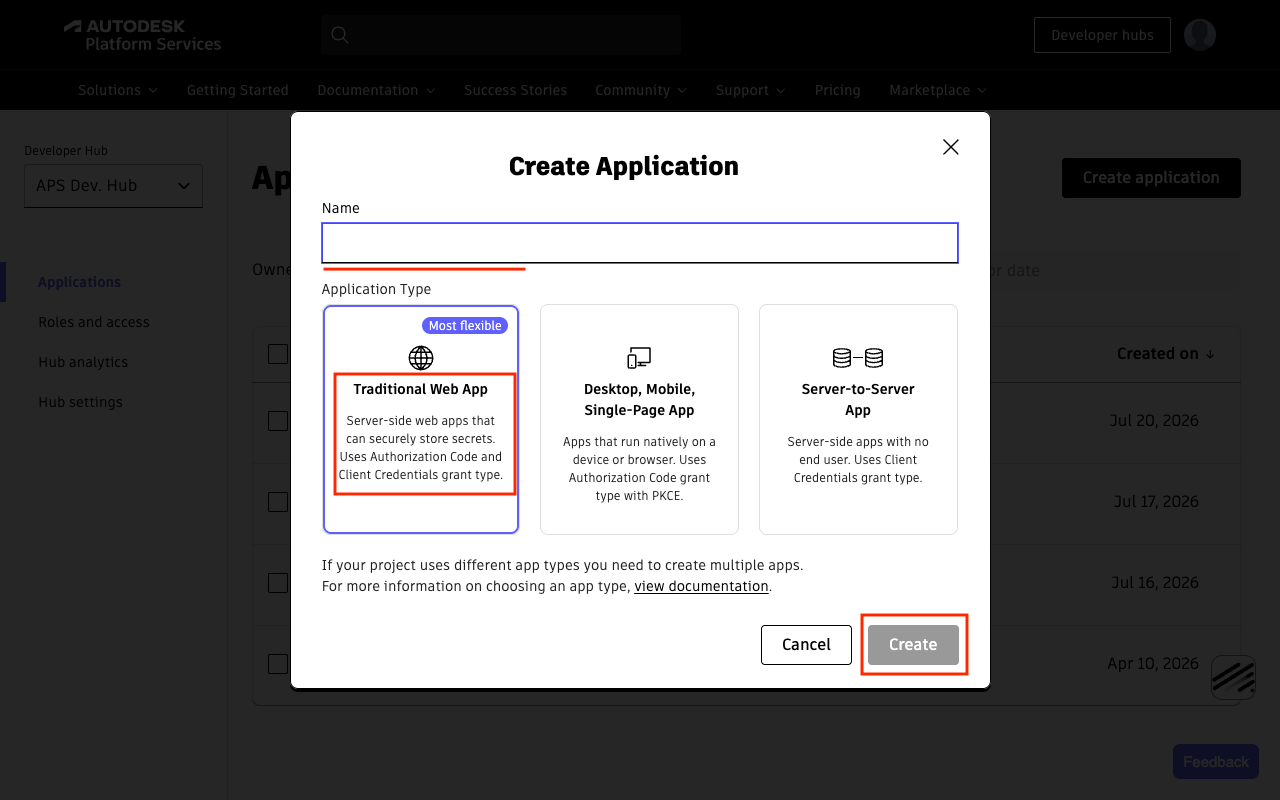
Fill in the details in the dialog.
- App Name: e.g.
StackOne Integrations - Application Type: select Traditional Web App
- Click Create.
Configure Callback URL
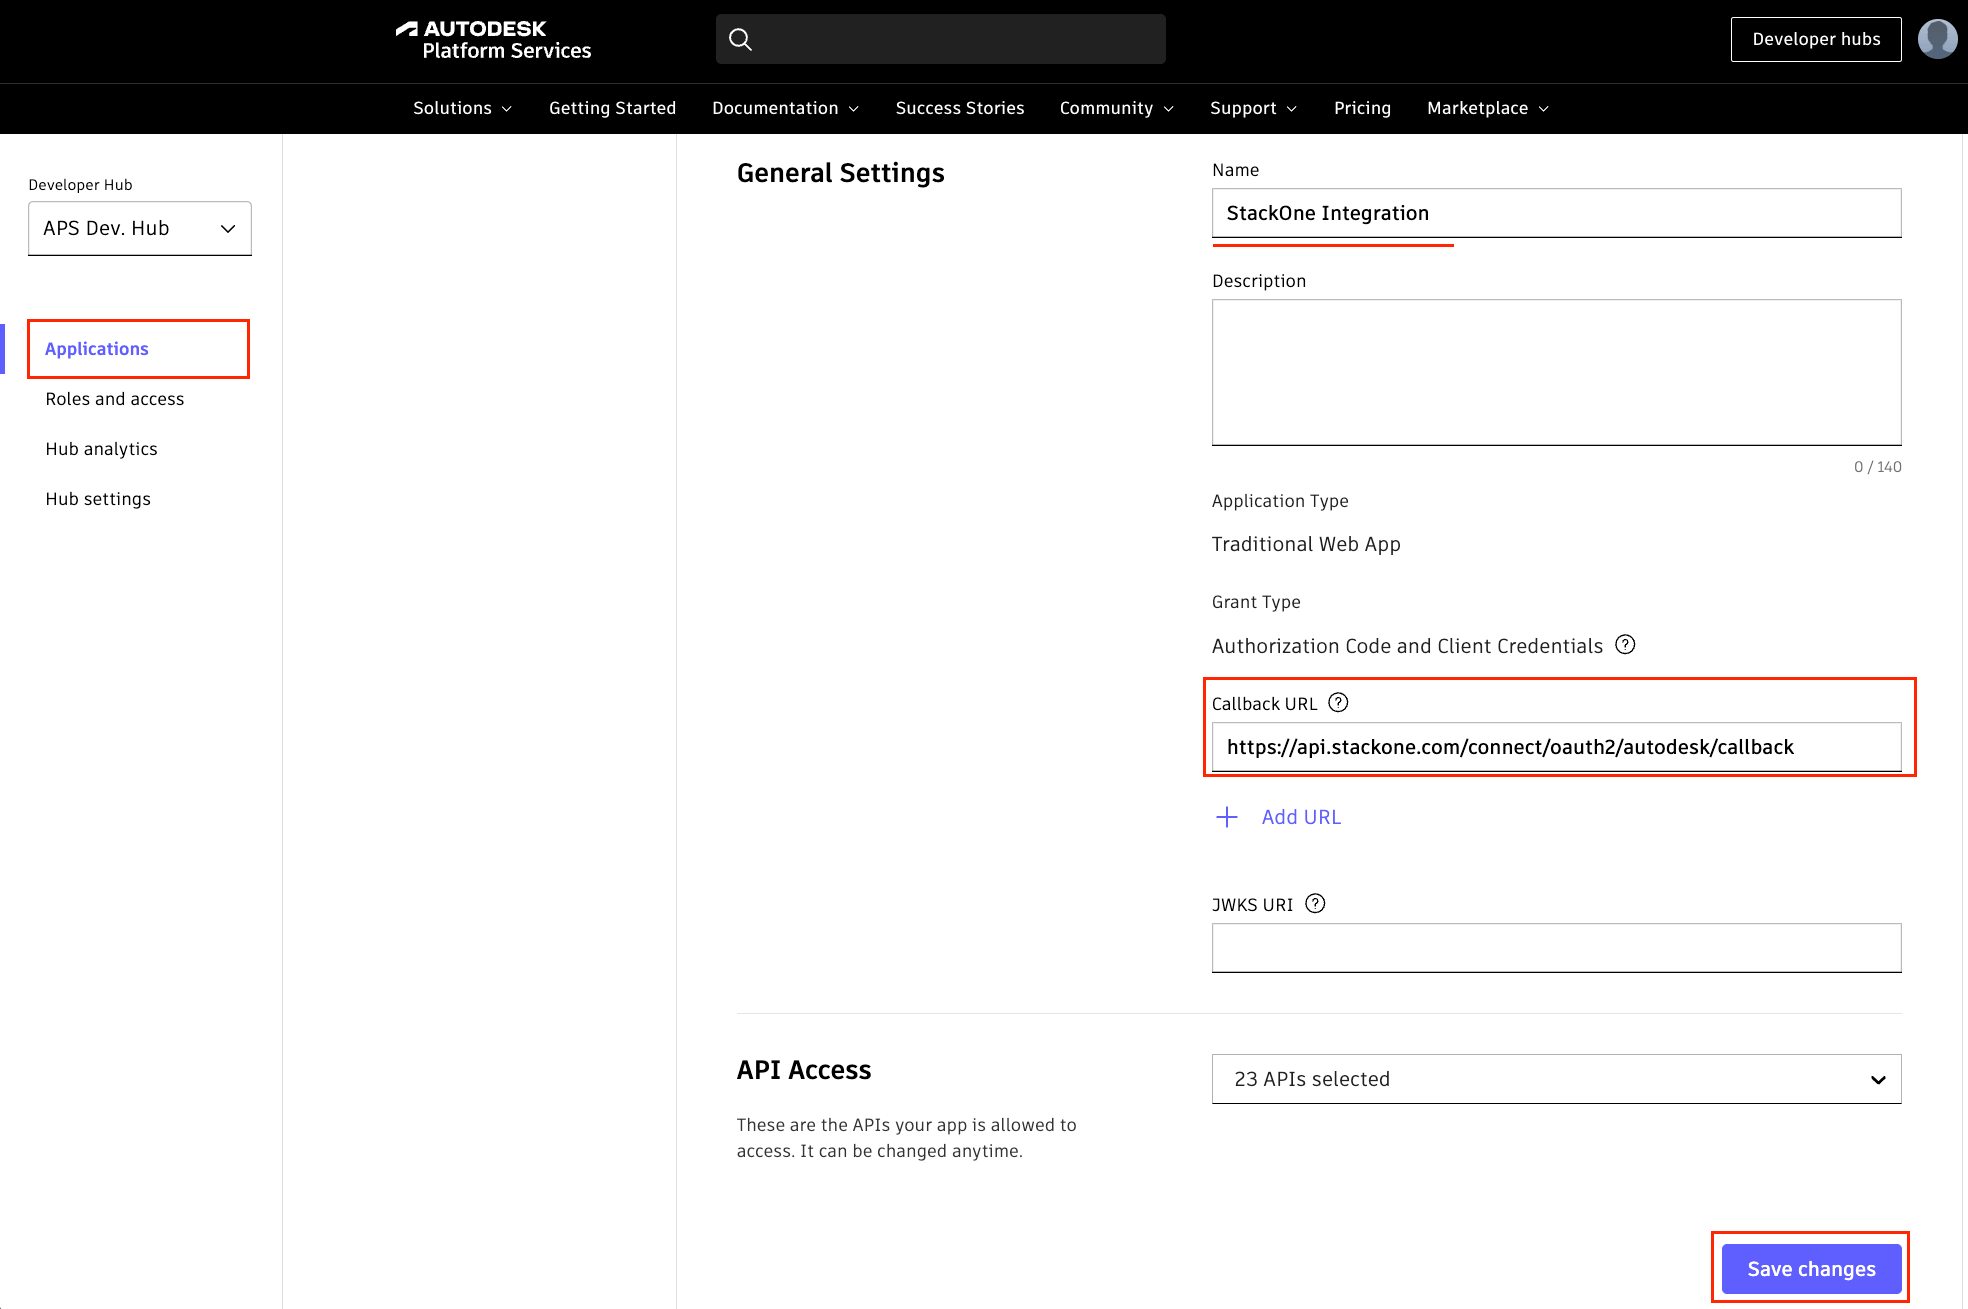
After the app is created, configure the Callback URL in the app settings page.
- Callback URL:
https://api.stackone.com/connect/oauth2/autodesk/callback - Click Save changes.
Select APIs
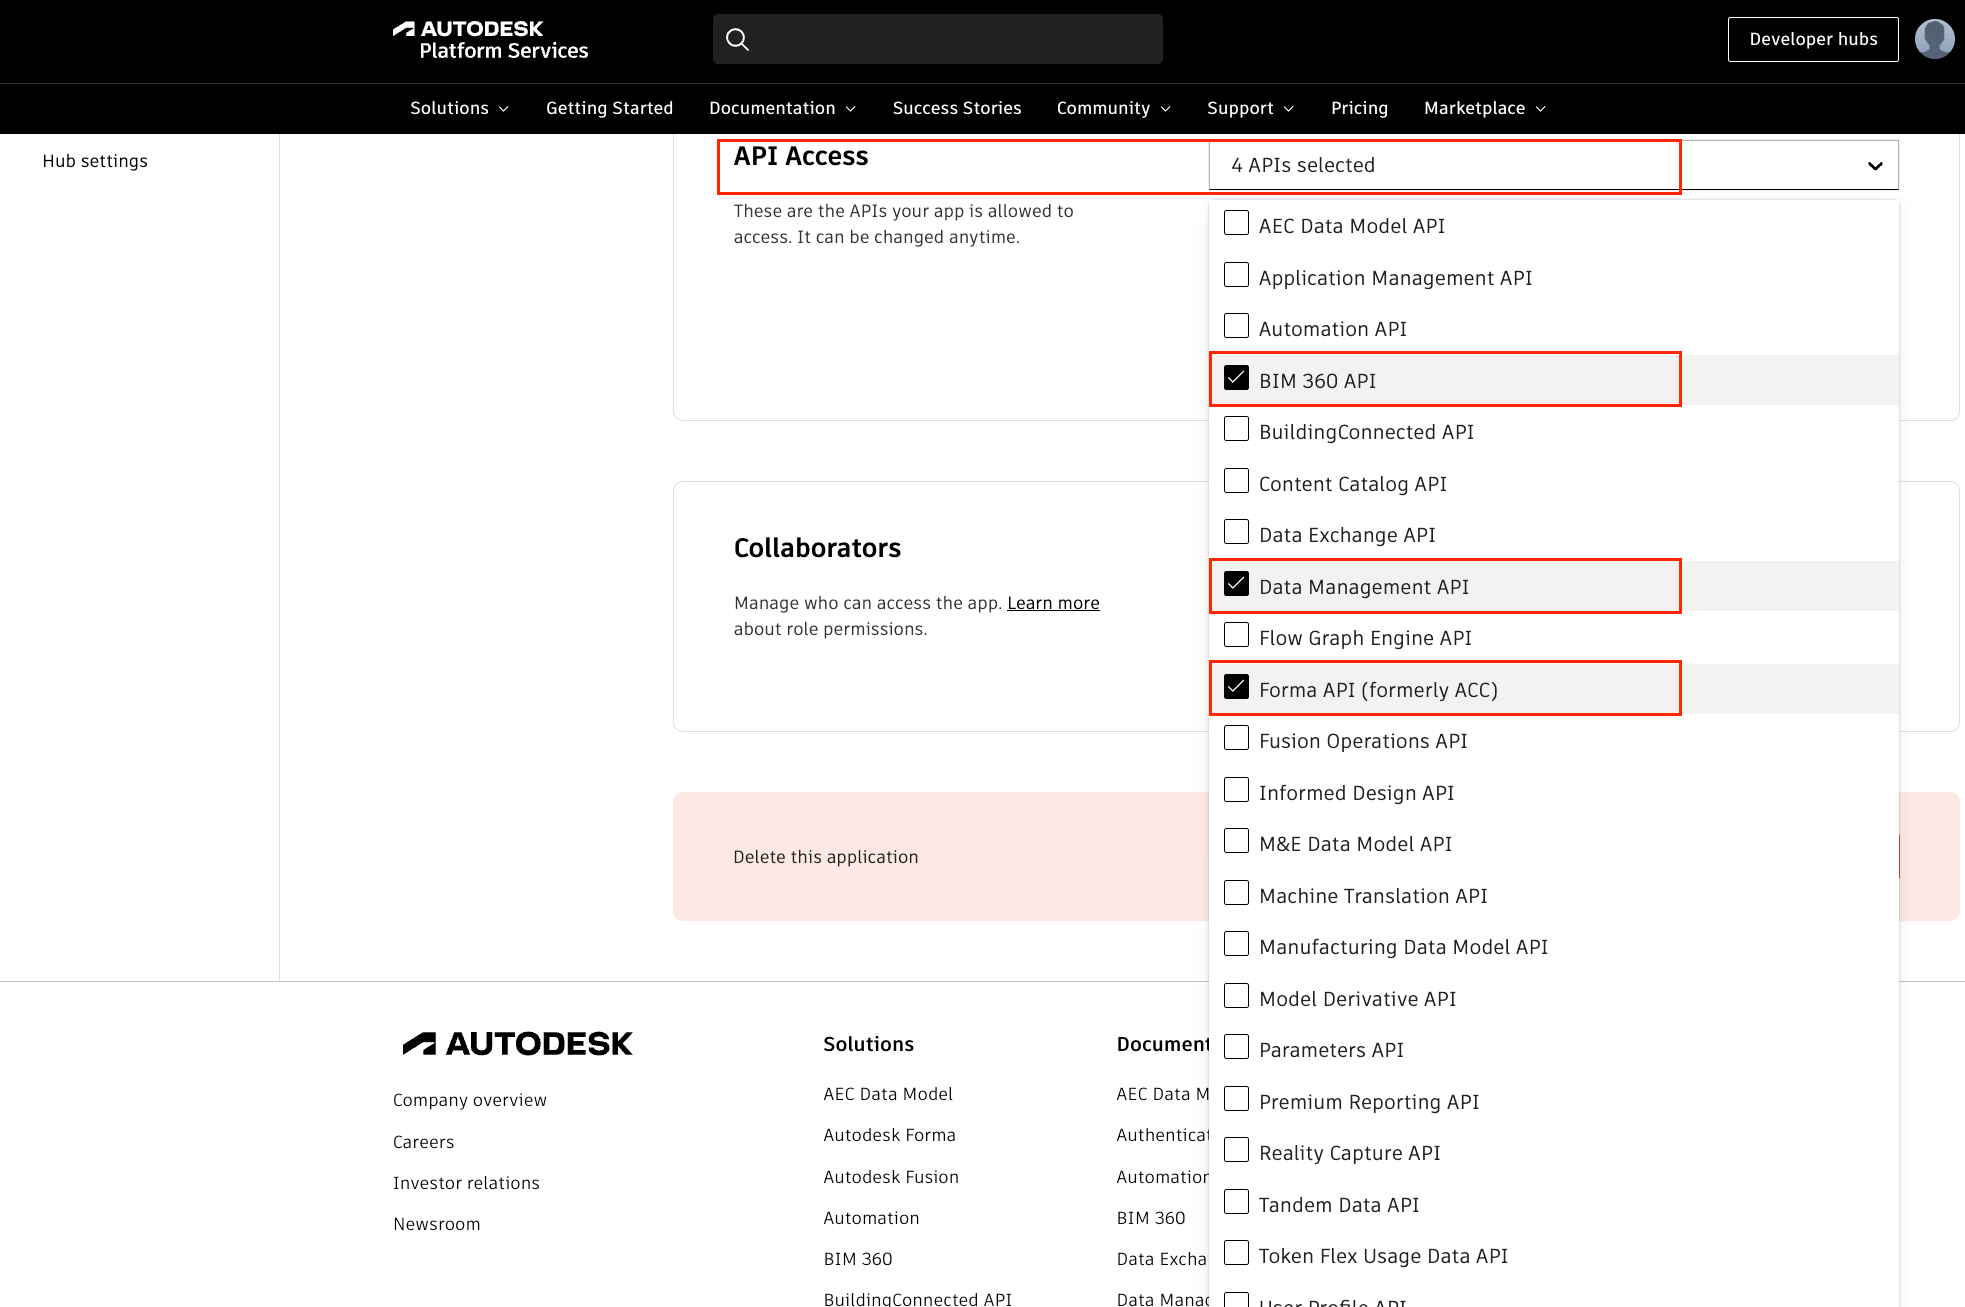
Navigate to the API Access section in the app settings page. All APIs are enabled by default. The StackOne integration uses the following APIs.
- Data Management API — required for
data:*andbucket:*scopes (files, folders, hubs, projects, storage). - Forma API (formerly ACC) — required for
account:*scopes (account admin, projects, companies, users). - BIM 360 API — required for BIM 360 account administration endpoints (
/hq/v1/accounts/...). - Webhooks API — required if using webhook actions.
- You may deselect any other APIs you do not need.
Configure scopes
The following scopes are configured in StackOne’s connector setup, not in the APS portal. Select the scopes required for your integration.
Copy credentials
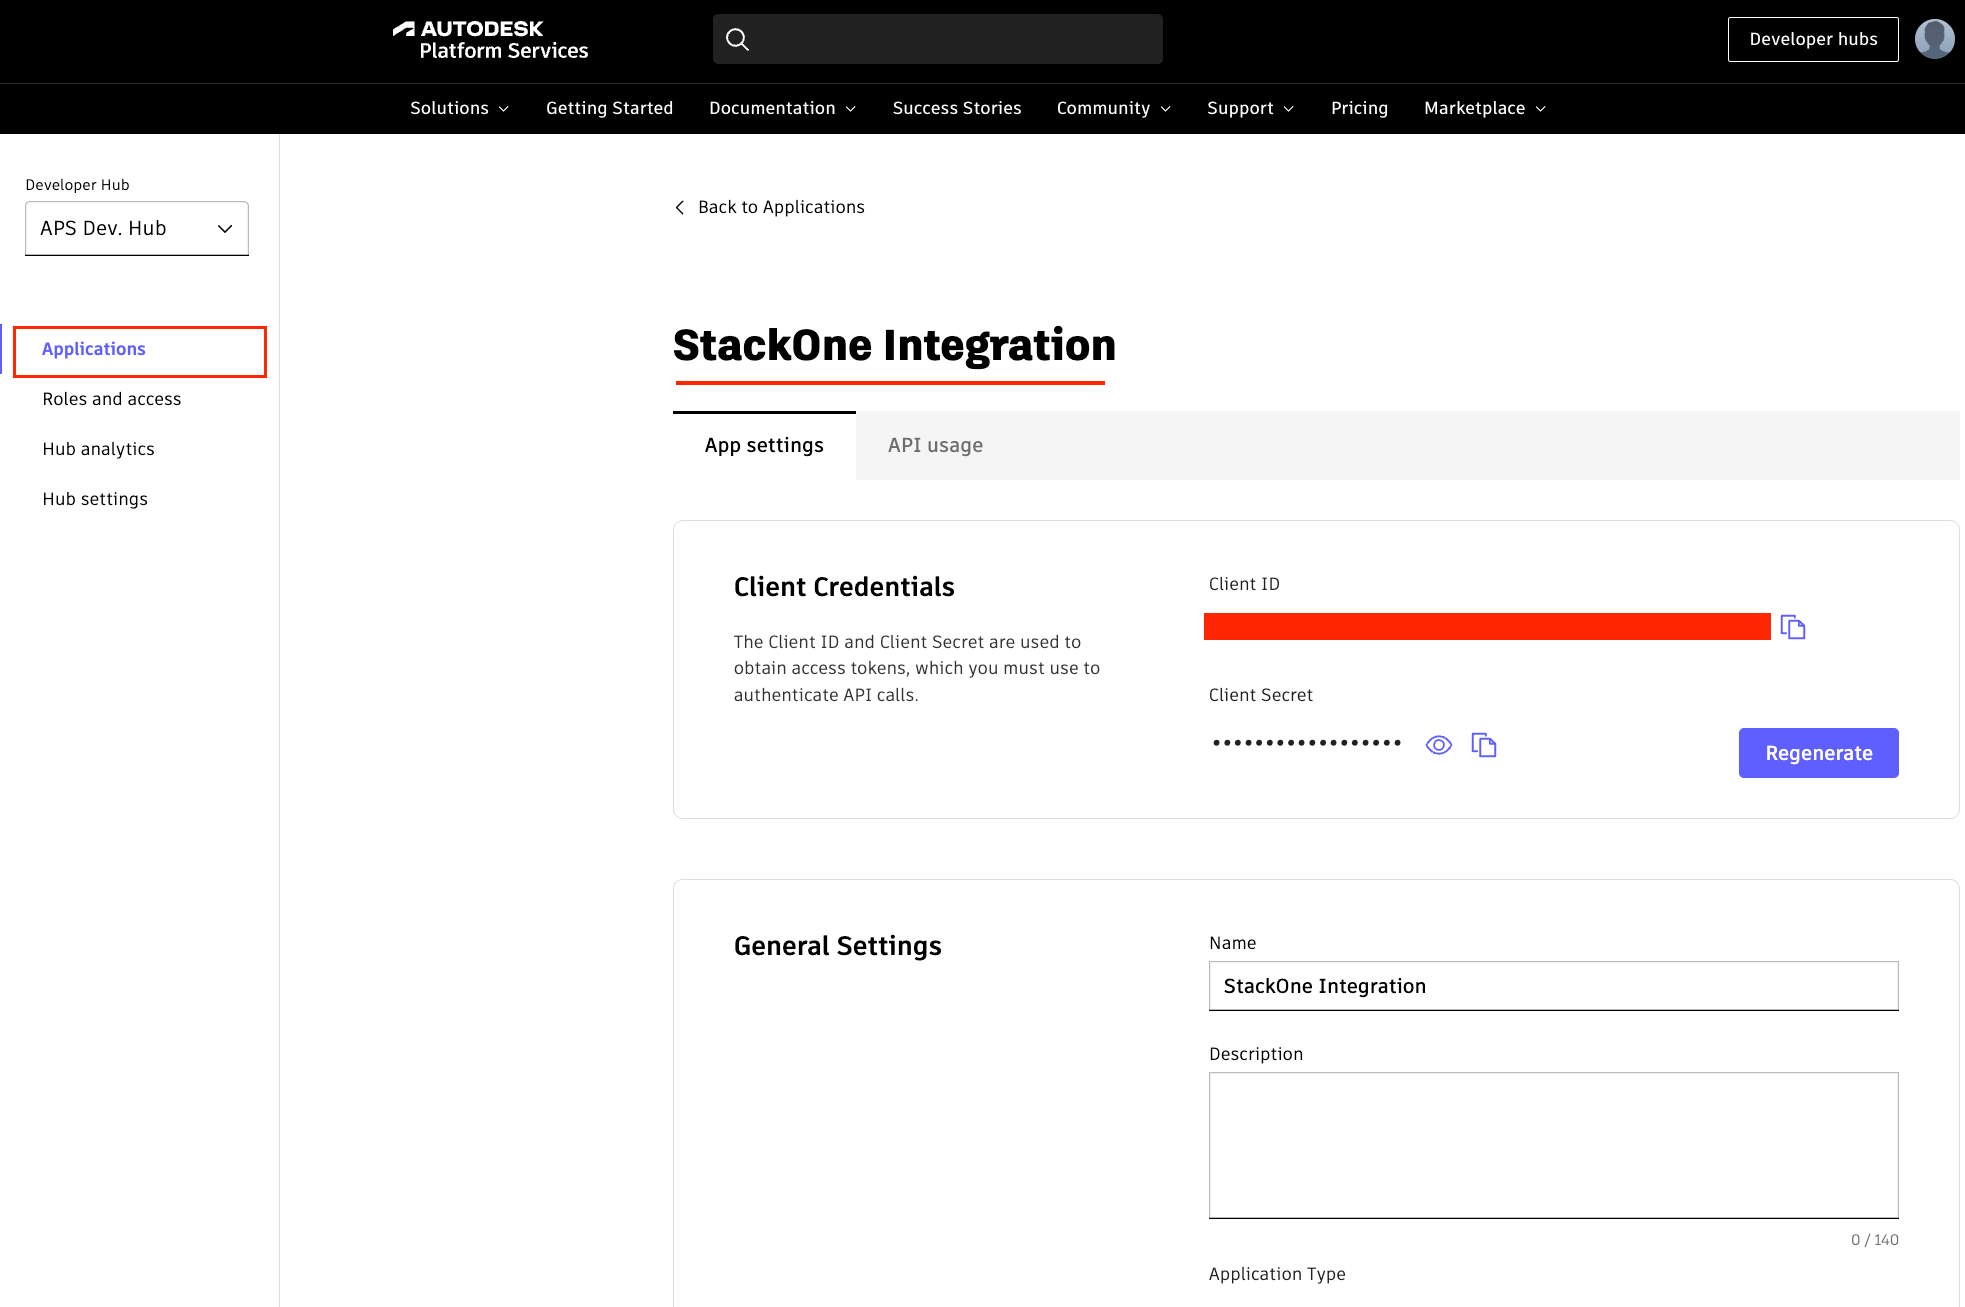
Open the application details page and copy the credentials.
- Copy the Client ID.
- Copy the Client Secret and store it securely for use later.
- The Client Secret is shown in full only once — regenerate it from the app details if lost.
Creating the StackOne Connector Profile
To create the Connector Profile in StackOne for Autodesk:Open the connector
Choose actions and events
- Click Add Profile.
- If the connector offers more than one authentication method, set the Auth Method filter to OAuth 2.0 (Three-Legged).
- Select the actions, and any events, to enable for this Connector Profile.
- Click Continue.
Set up authentication
- Select Authentication Type as OAuth 2.0 (Three-Legged).
- Fill out the fields using details retrieved from your provider:
- Client ID
- Client Secret
- Scopes (Optional)
- Click Create Profile.