

Find your subdomain
Your subdomain is the unique identifier in your Zendesk URL.
- Check your browser address bar when signed in to Zendesk.
- Format:
https://{subdomain}.zendesk.com - Example: if your URL is
https://acme.zendesk.com/agent/home, your subdomain isacme - Enter it in the Subdomain field in StackOne Hub.
Registering an OAuth client
An OAuth client registered in your own Zendesk account lets StackOne request access on your behalf.
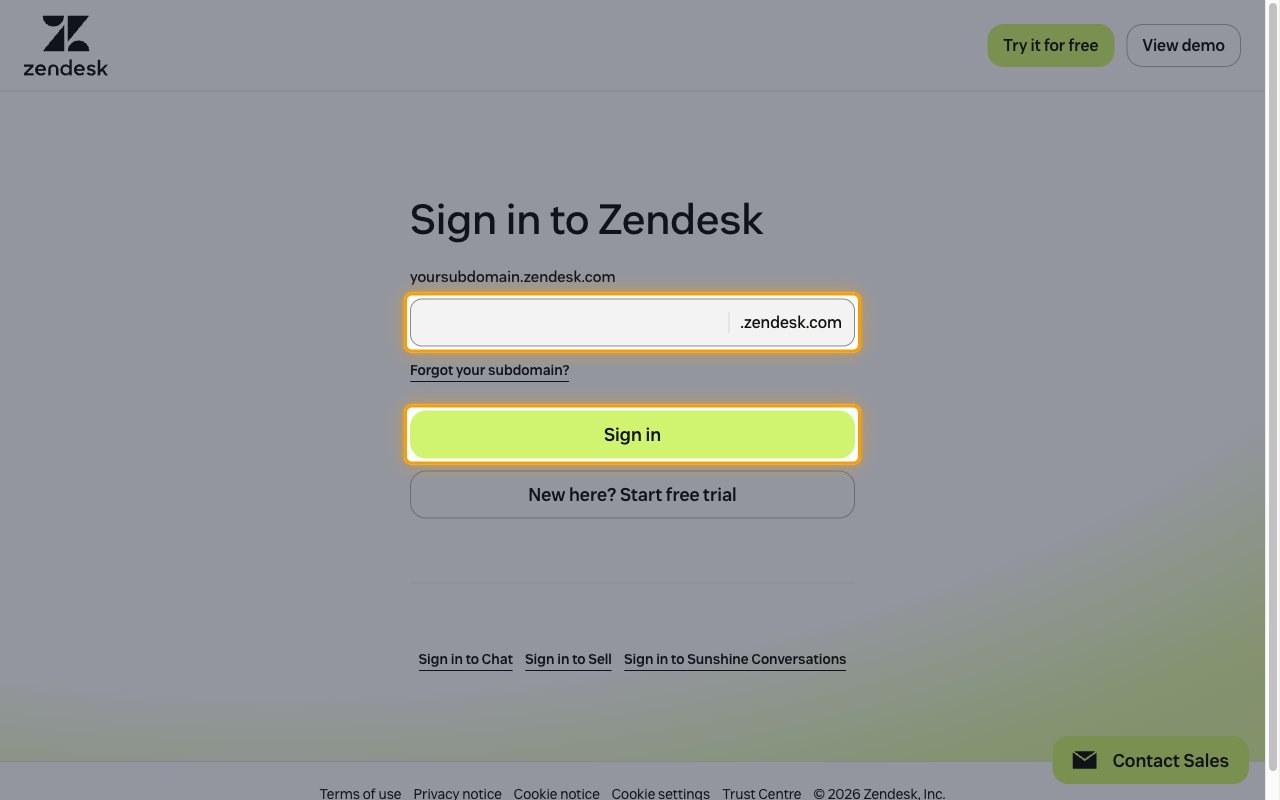
Sign in to Zendesk
Sign in to your Zendesk account.
- Enter your subdomain in the yoursubdomain.zendesk.com field and click Sign in.
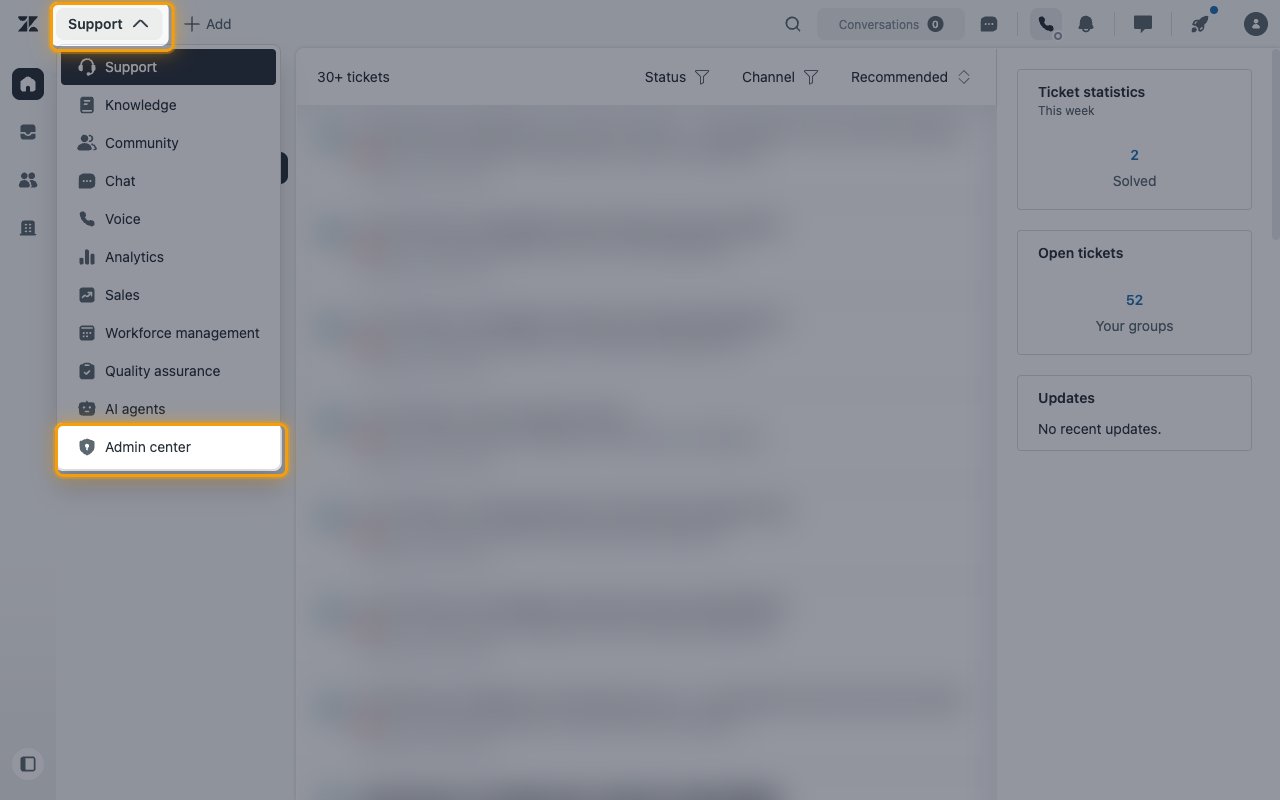
Open Admin center
In the top bar, click the product switcher labeled Support, then select Admin center.
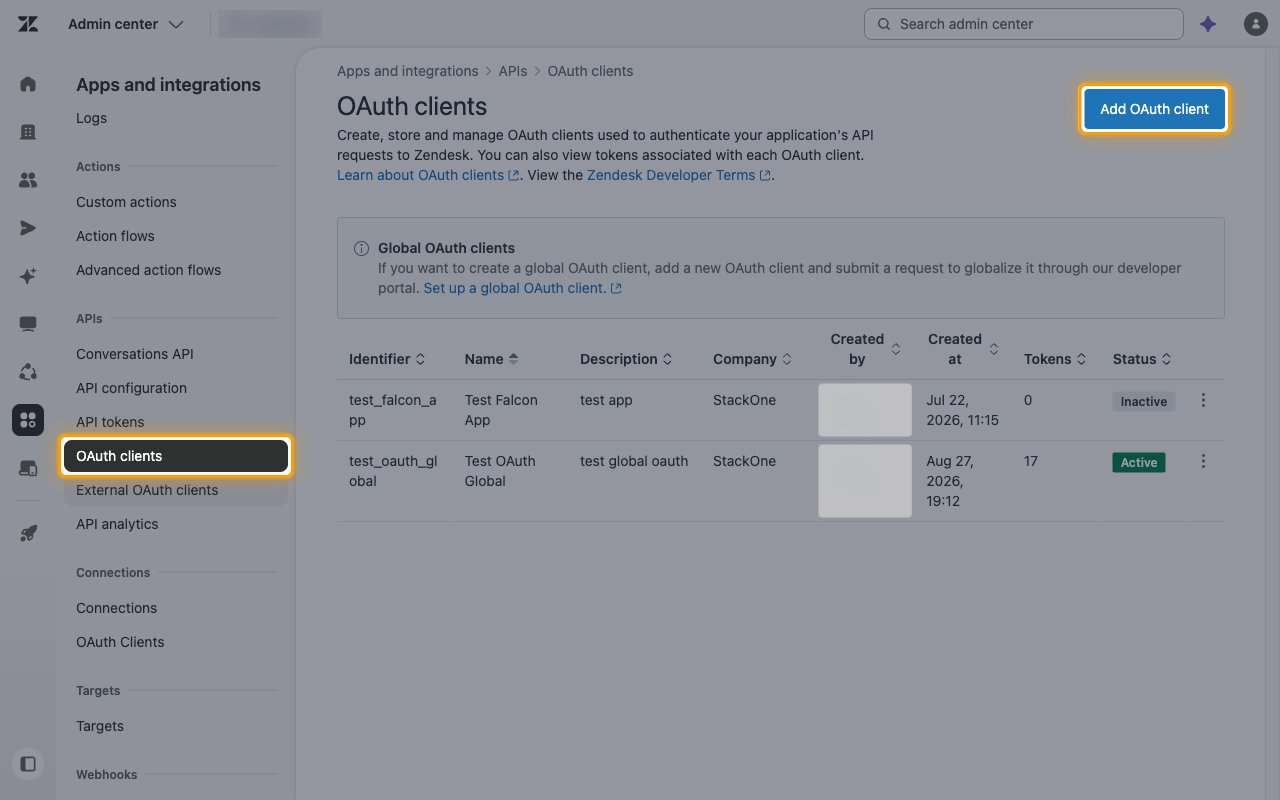
Open OAuth clients
In Admin center, click Apps and integrations in the sidebar, then select APIs > OAuth clients and click Add OAuth client.
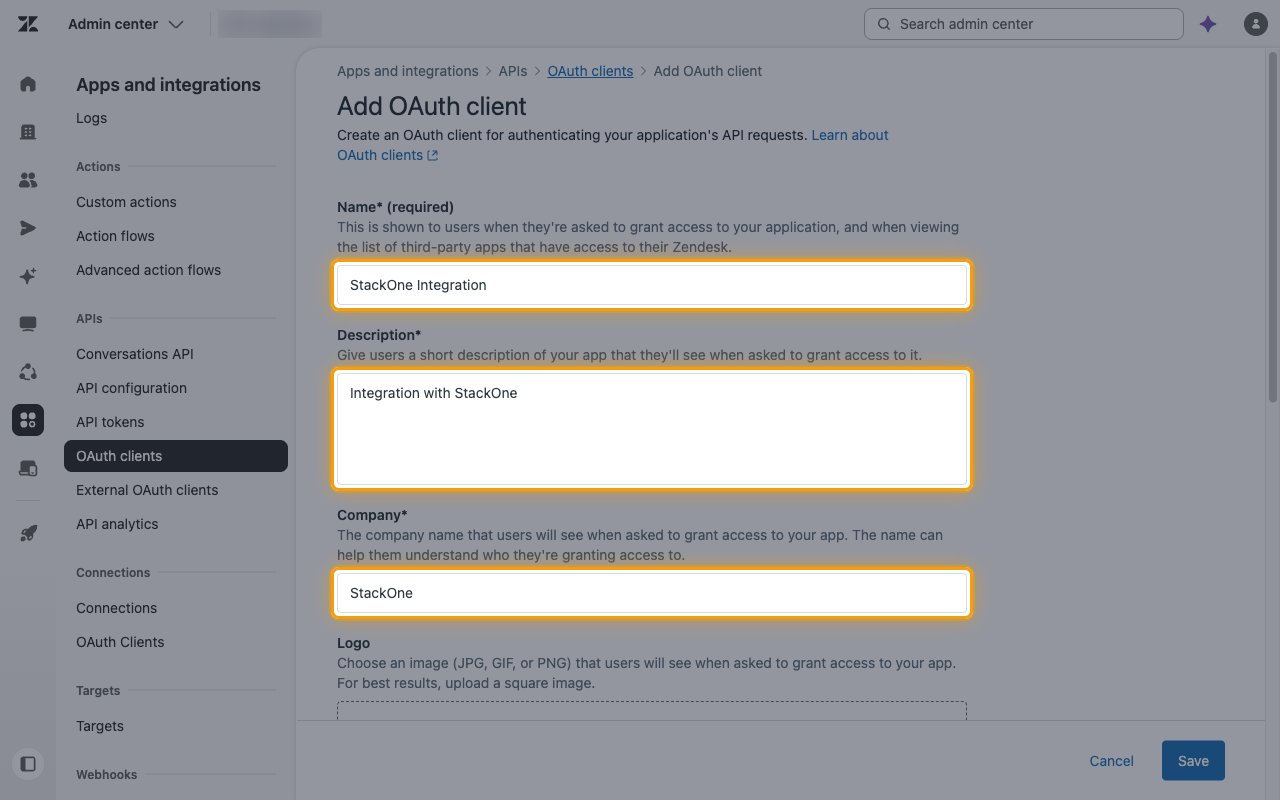
Enter the client details
Fill in the details that users see when they are asked to grant access to your application.
- Name: the name users see when asked to grant access, for example
StackOne Integration. - Description: a short description of the app, for example
Integration with StackOne. - Company: your company name.
- Logo: optional. Upload a square JPG, GIF, or PNG.
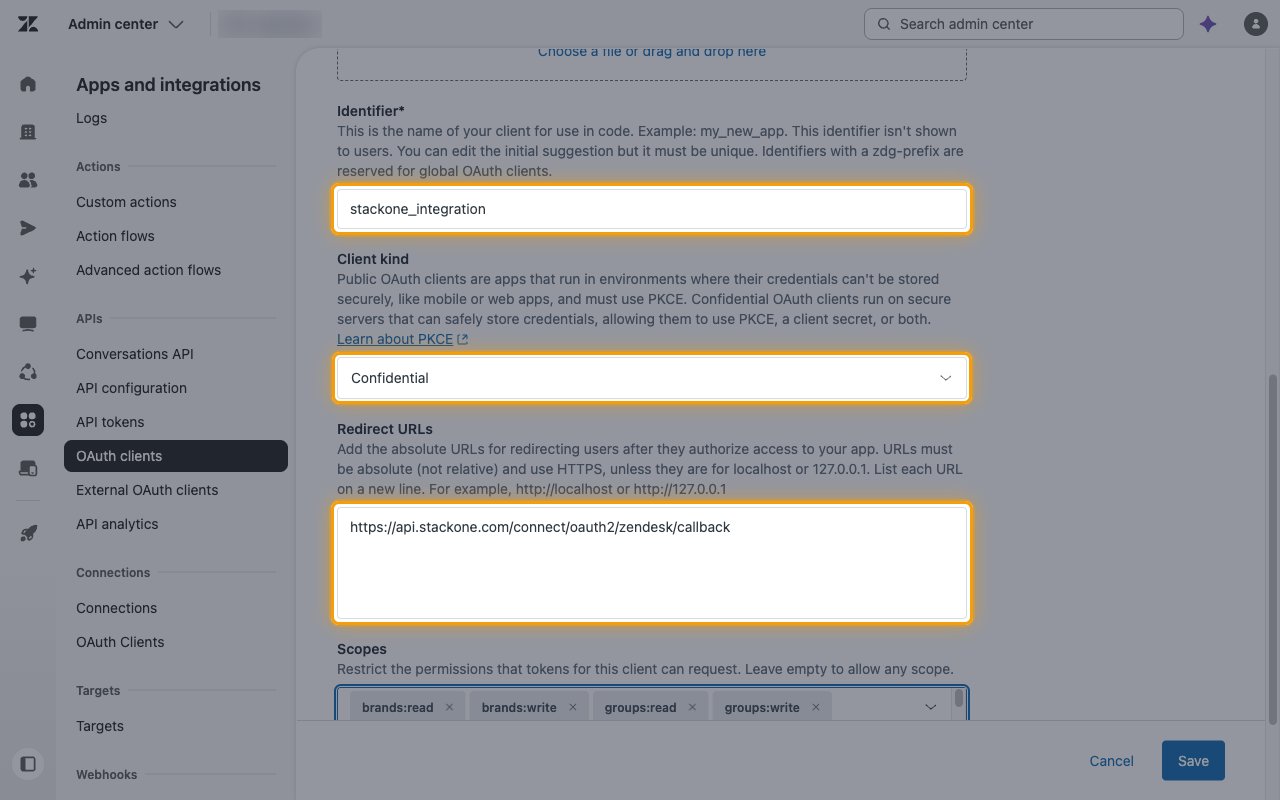
Set the identifier, client kind, and redirect URL
The Identifier is auto-populated from the name. You can edit it, but it must be unique. Copy it, it is your Client ID.
- Client kind: select Confidential.
- Redirect URLs:
https://api.stackone.com/connect/oauth2/zendesk/callback
Select scopes
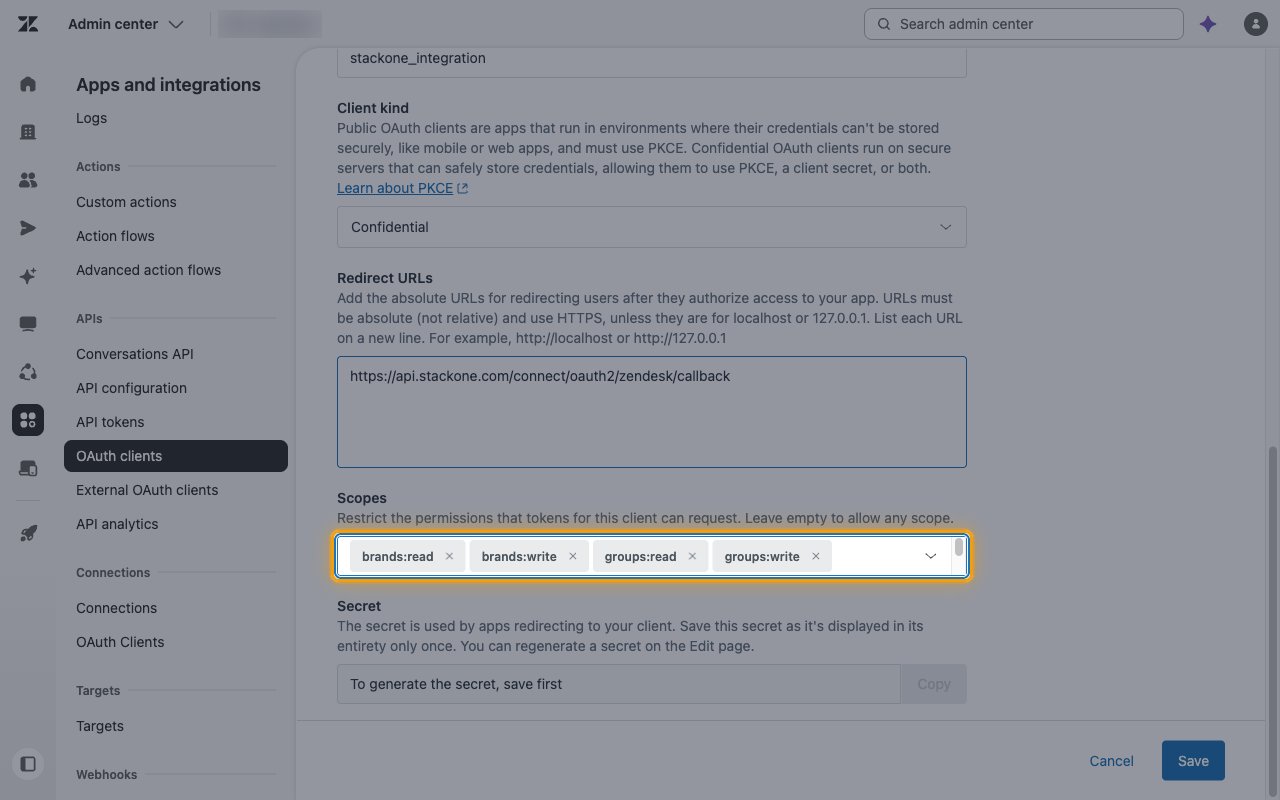
In Scopes, click Select scopes and select the scopes listed below. Leave the field empty to allow any scope, or select only the scopes StackOne needs for the actions you use.
Save and copy the secret
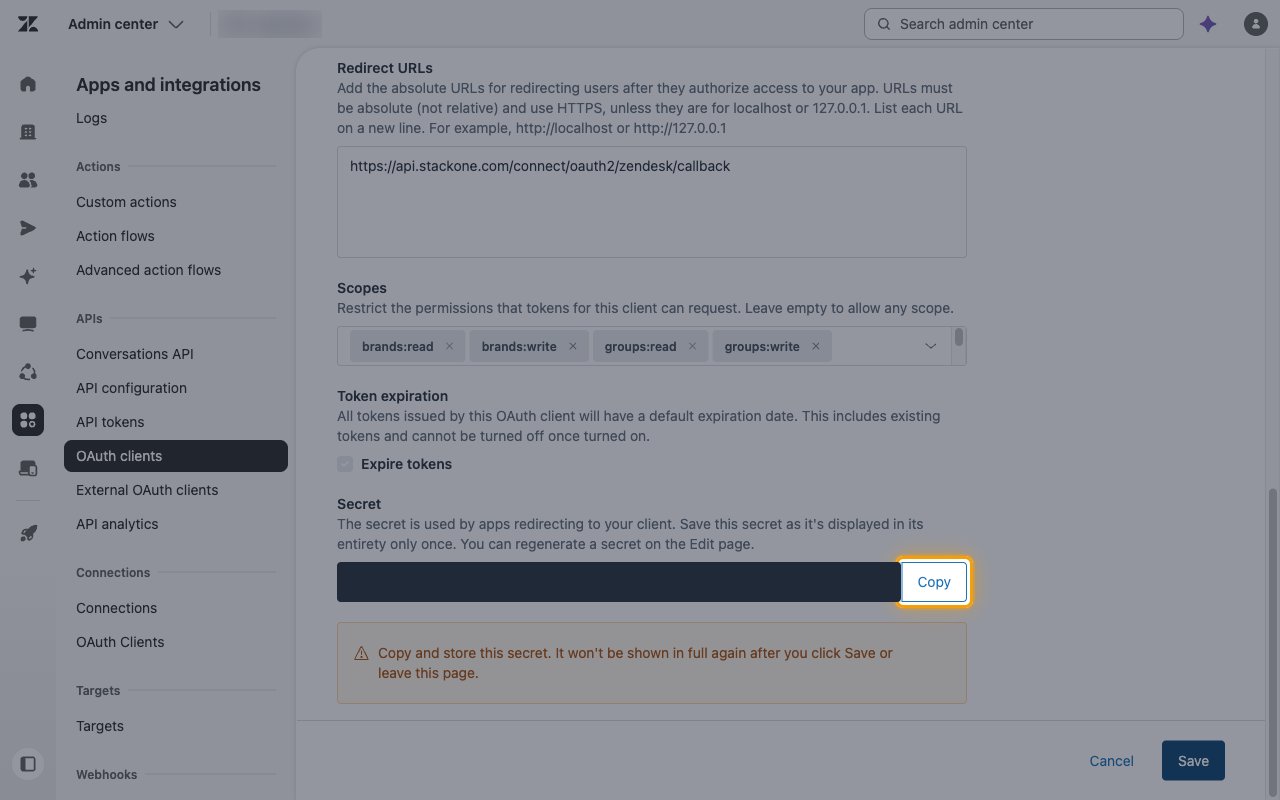
Click Save. The Secret field now shows the generated secret. Click Copy and store it securely for use later.
- The secret is shown in its entirety only once and cannot be retrieved later. It won’t be shown in full again after you click Save or leave this page. You can regenerate a secret on the Edit page.
- Click Save again to finish creating the client.
Entering the credentials in StackOne
The Identifier and Secret from the OAuth client are the credentials StackOne uses to request access on your behalf.
- Enter the Identifier in the Client ID field in StackOne Hub.
- Enter the Secret in the Client Secret field in StackOne Hub.
- Scopes is optional. Leave it empty to request the full set the connector needs, or enter a space-separated subset. Every scope you enter must be included in the client’s Scopes, otherwise authorization fails.
Linking the Account from the Hub
Navigate to the Hub
Fill out the fields
- Subdomain
- Client ID
- Client Secret
- Scopes (Optional)
Connect
- Click Connect
- If applicable, the provider will redirect you to a sign-in or authorization page. Complete the provider’s authorization flow.
- Once authorization is successful, you will see a confirmation popup
If the account linking is successful, you will see the newly linked account in your Accounts page.
Next Steps
Webhooks setup
Configure receiving Events for Zendesk into StackOne.