

Create an X developer app
Register an app in the X Developer Console to get OAuth 2.0 credentials.
Sign in to the X Developer Console
Sign in to your X Developer Console account with your X account.
- In the left sidebar, under Access, click Apps.
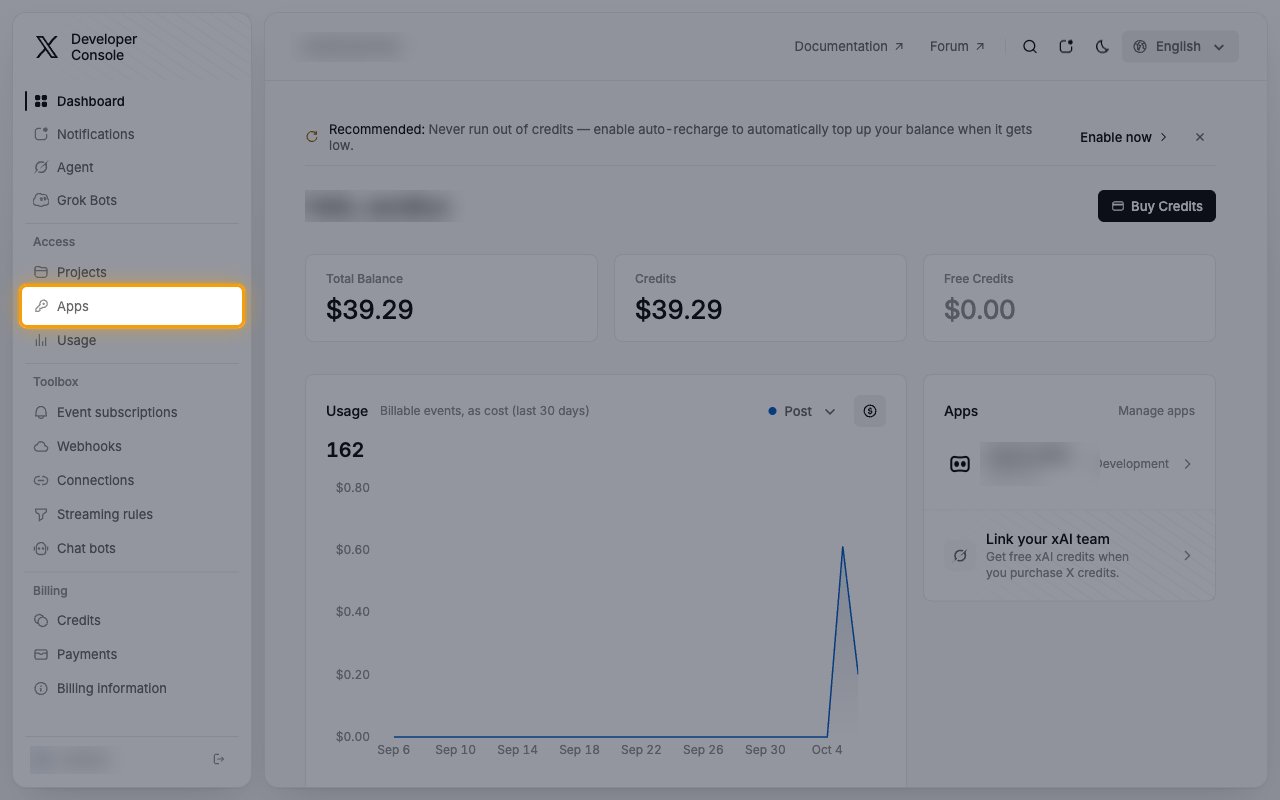
Start a new app
On the Apps page, click Create App.
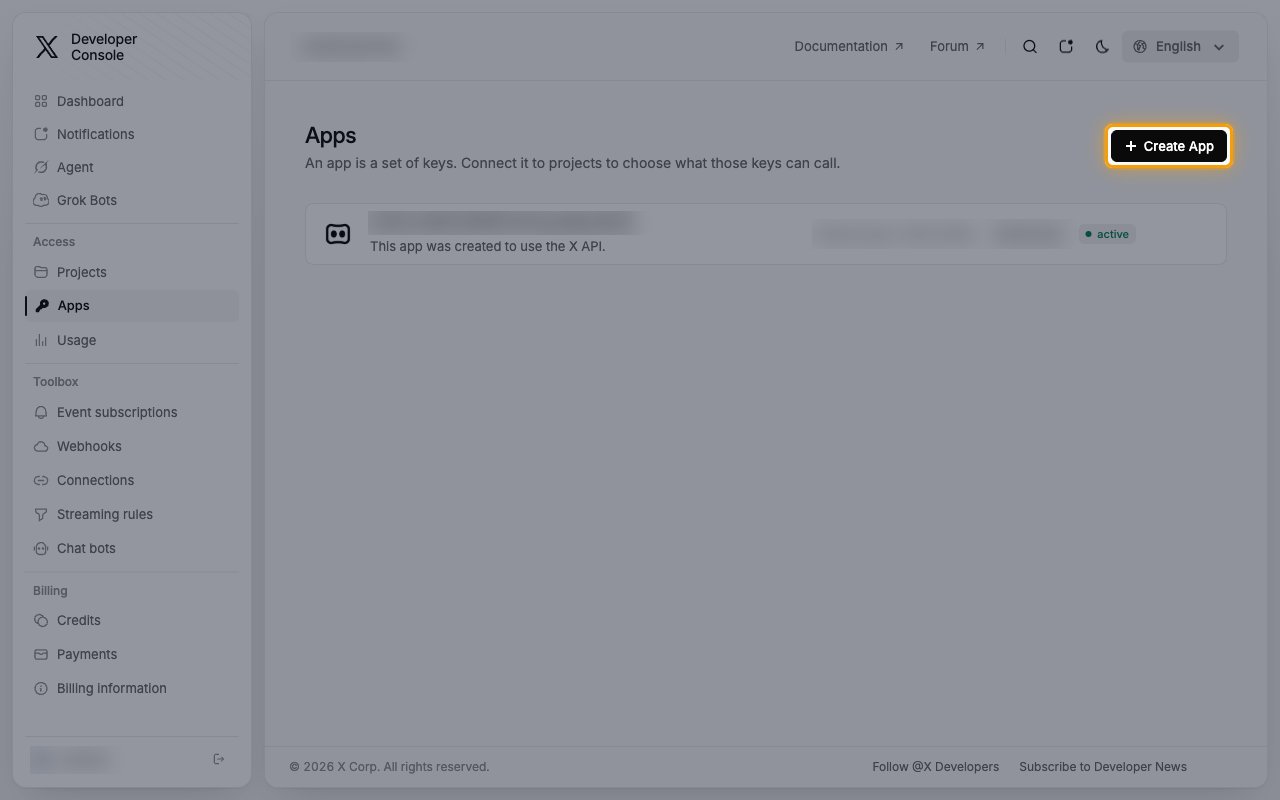
Name the app and create it
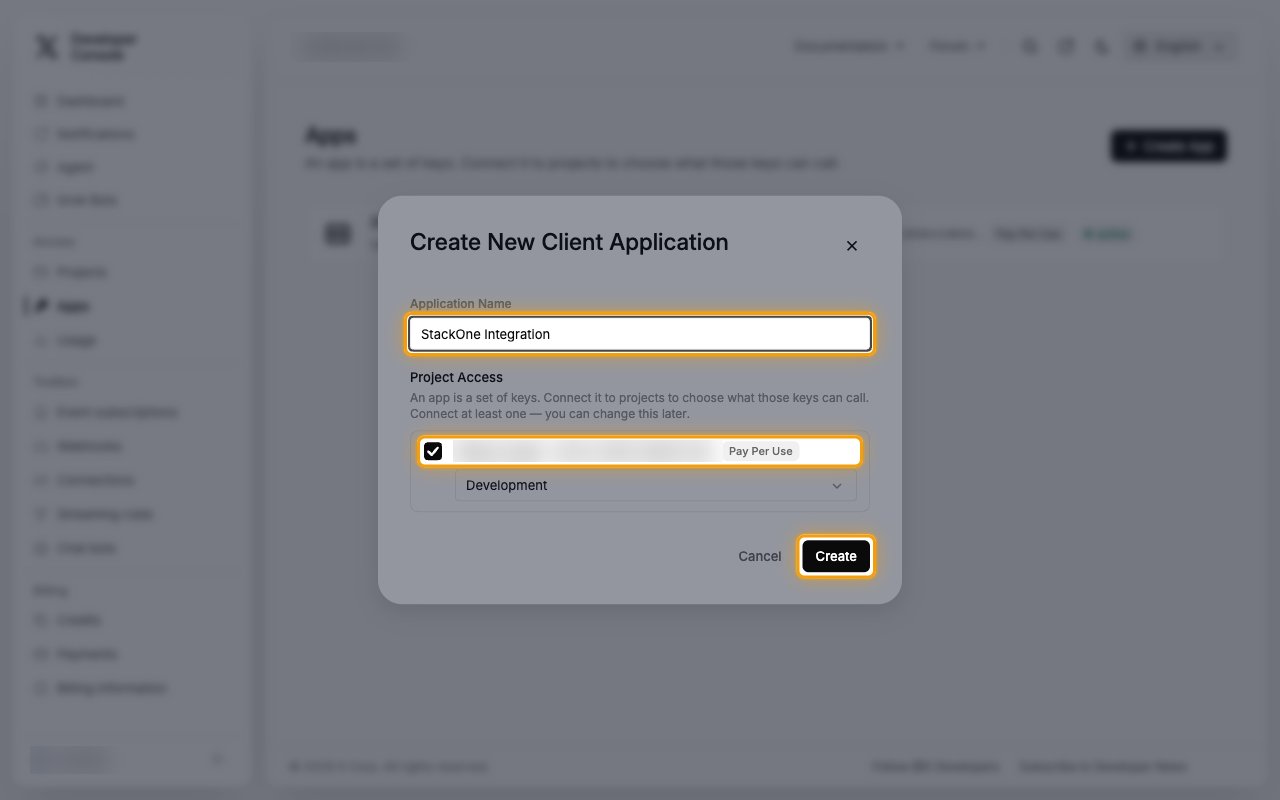
In the Create New Client Application dialog, enter the app details.
- Application Name:
StackOne Integration - Under Project Access, keep your project selected so the app’s keys can call the X API.
- Click Create.
- The Application Created Successfully dialog shows OAuth 1.0 keys and a Bearer Token, which this connection does not use. Click Close.
Configure user authentication
Enable OAuth 2.0 on the app and register StackOne’s redirect URL.
Open the user authentication settings
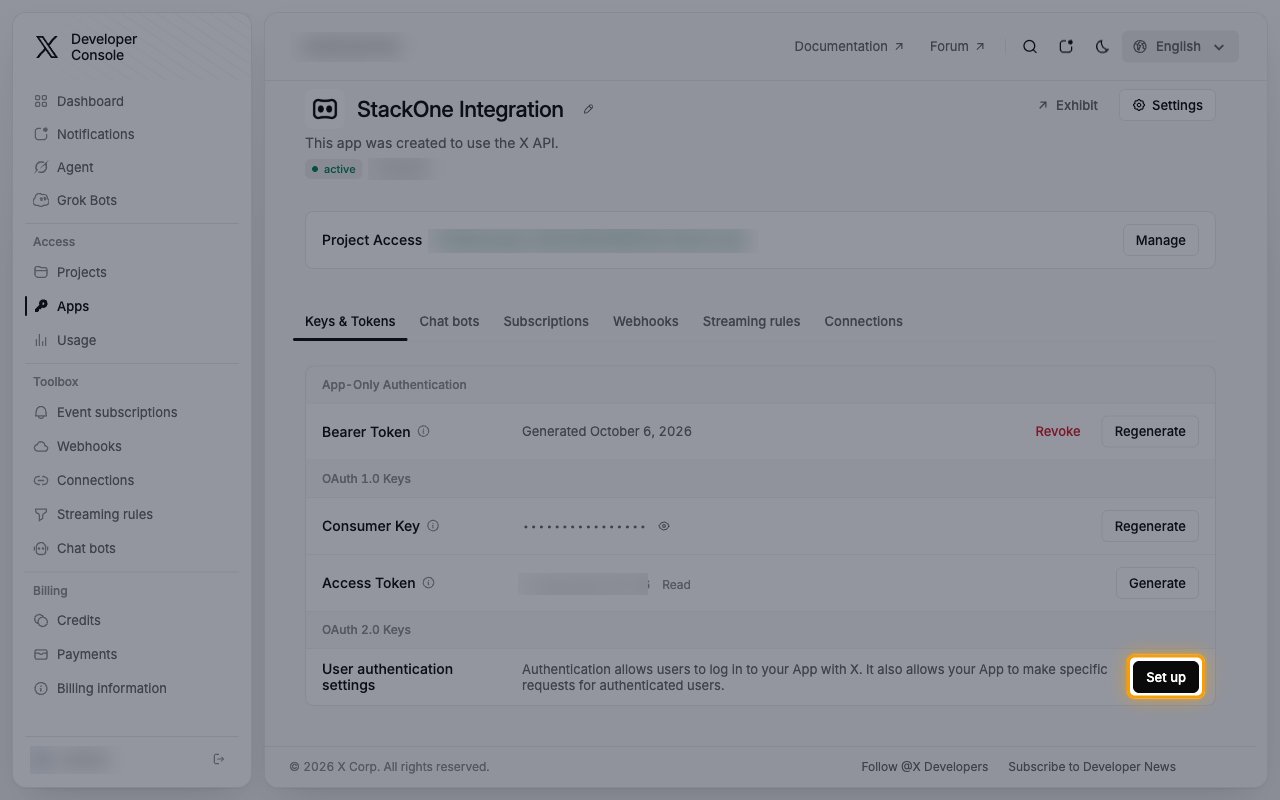
On the Apps page, open StackOne Integration.
- On the Keys & Tokens tab, under OAuth 2.0 Keys, find User authentication settings and click Set up.
Choose the app permissions and type
On the Authentication settings page, set how the app accesses X.
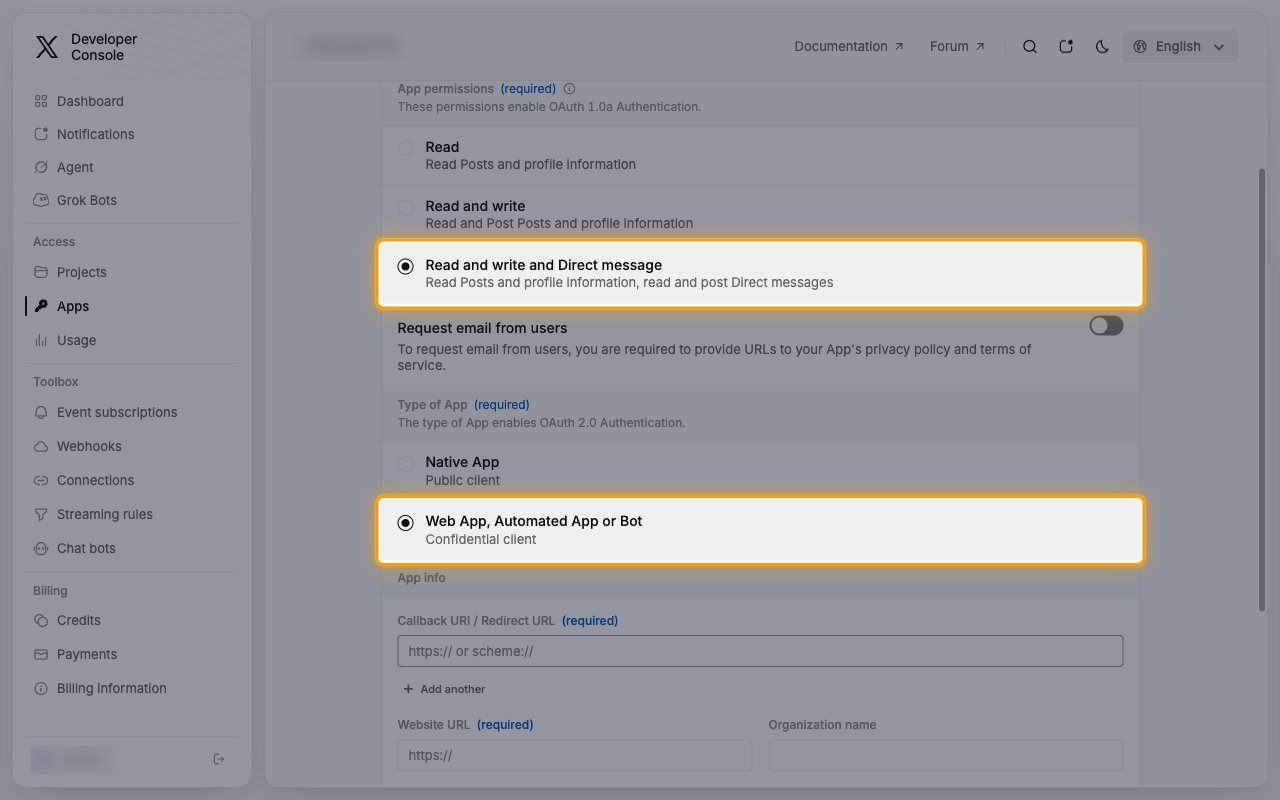
- Under App permissions, select Read and write and Direct message.
- Under Type of App, select Web App, Automated App or Bot (Confidential client). This type issues a Client Secret.
- If you choose Native App (Public client) instead, X issues no Client Secret and you leave Client Secret blank in StackOne.
Add the redirect URL and save
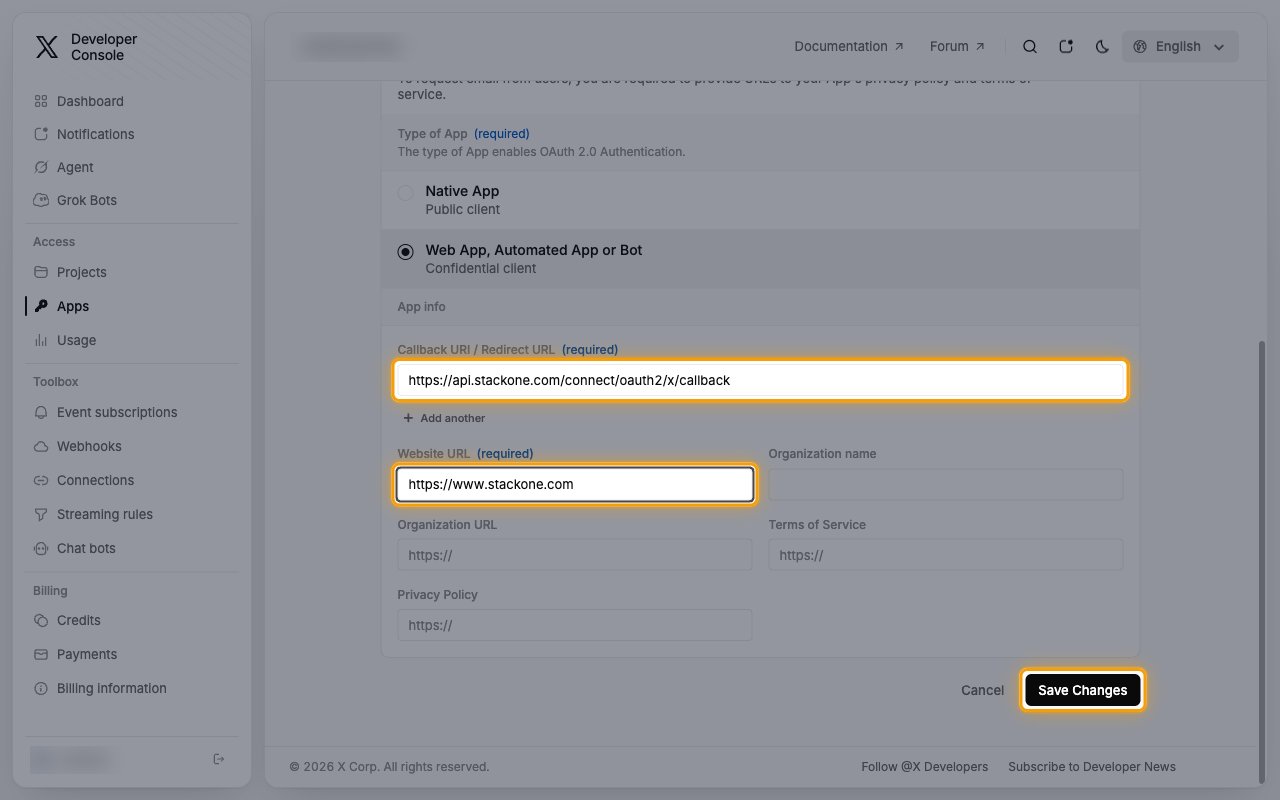
Under App info, fill in the required fields.
- Callback URI / Redirect URL:
https://api.stackone.com/connect/oauth2/x/callback - Website URL: your company website, for example
https://www.example.com - Click Save Changes.
Copy the OAuth 2.0 credentials
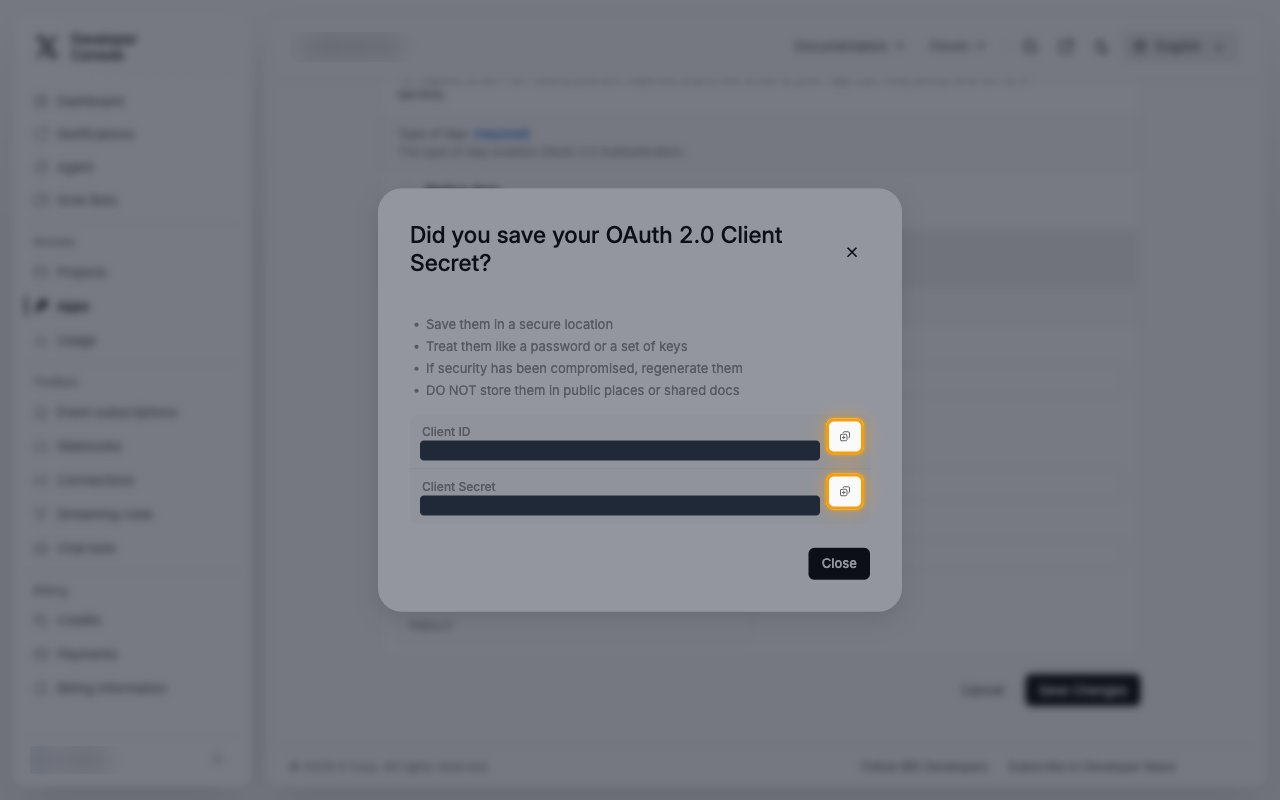
After you save, X displays the app’s OAuth 2.0 Client ID and Client Secret.
Copy the Client ID and Client Secret
In the Did you save your OAuth 2.0 Client Secret? dialog, click the copy button next to each value.
- Client ID — the public identifier of your app. Paste it into the Client ID field in the StackOne Connector profile.
- Client Secret — the app’s confidential key. Paste it into the Client Secret field in the StackOne Connector profile.
- The Client Secret is only displayed once and cannot be retrieved later. If you lose it, open the app’s Keys & Tokens tab and click Regenerate next to Client Secret.
- Store both values securely for use later, then click Close.
Choose OAuth 2.0 scopes
X grants OAuth 2.0 scopes when the user authorizes your app, based on the scopes StackOne requests. Choose them in the StackOne Connector profile.
Enter the scopes
In the StackOne Connector profile, enter the scopes your integration needs in Scopes as a space-separated list. Include offline.access so the connection can refresh its access token after it expires (access tokens are valid for two hours). If you leave Scopes blank, StackOne requests every scope listed here.
Creating the StackOne Connector Profile
To create the Connector Profile in StackOne for X (Twitter):Open the connector
Choose actions and events
- Click Add Profile.
- If the connector offers more than one authentication method, set the Auth Method filter to OAuth 2.0.
- Select the actions, and any events, to enable for this Connector Profile.
- Click Continue.
Set up authentication
- Select Authentication Type as OAuth 2.0.
- Fill out the fields using details retrieved from your provider:
- Client ID
- Client Secret (Optional)
- Scopes (Optional)
- Click Create Profile.