

Create an External Client App
The client credentials flow signs in as a Salesforce user you choose, without a browser sign-in. It needs its own External Client App with that flow turned on.
Start the app
Sign in to your Salesforce org, then click the gear icon and select Setup.
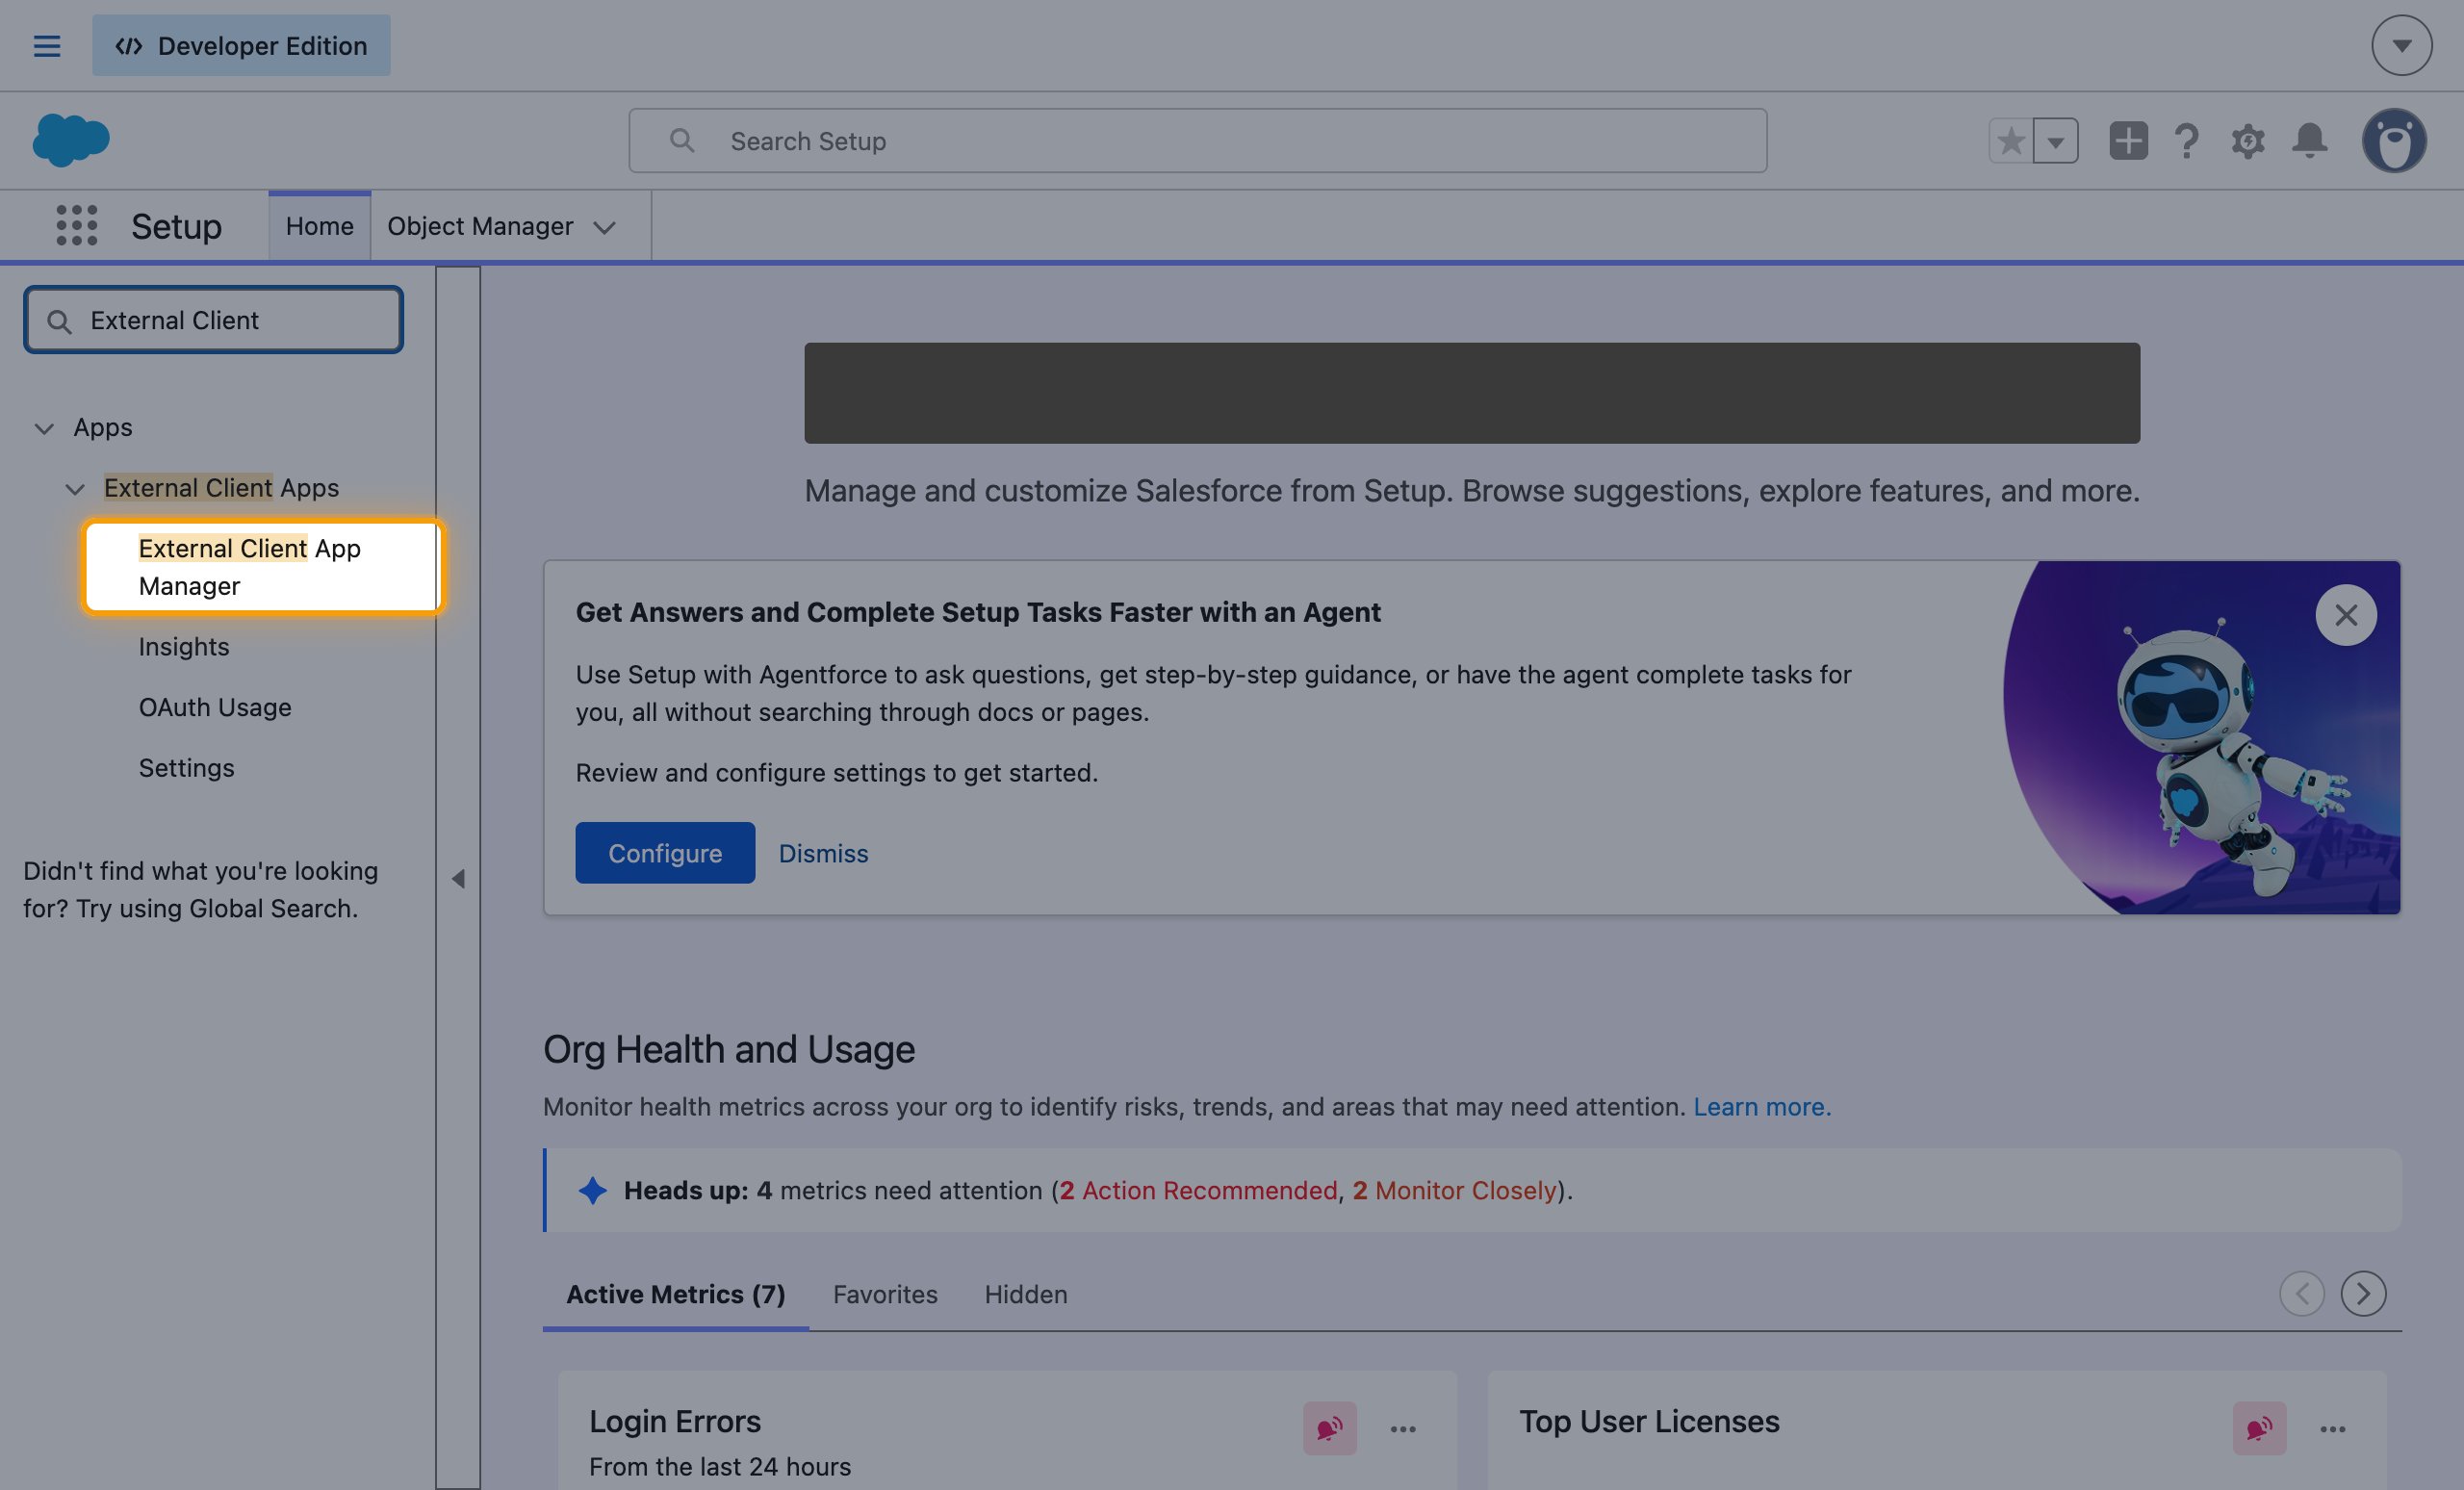
- In the Quick Find box, enter
External Clientand select External Client App Manager. - Click New External Client App.
Fill in the basic information
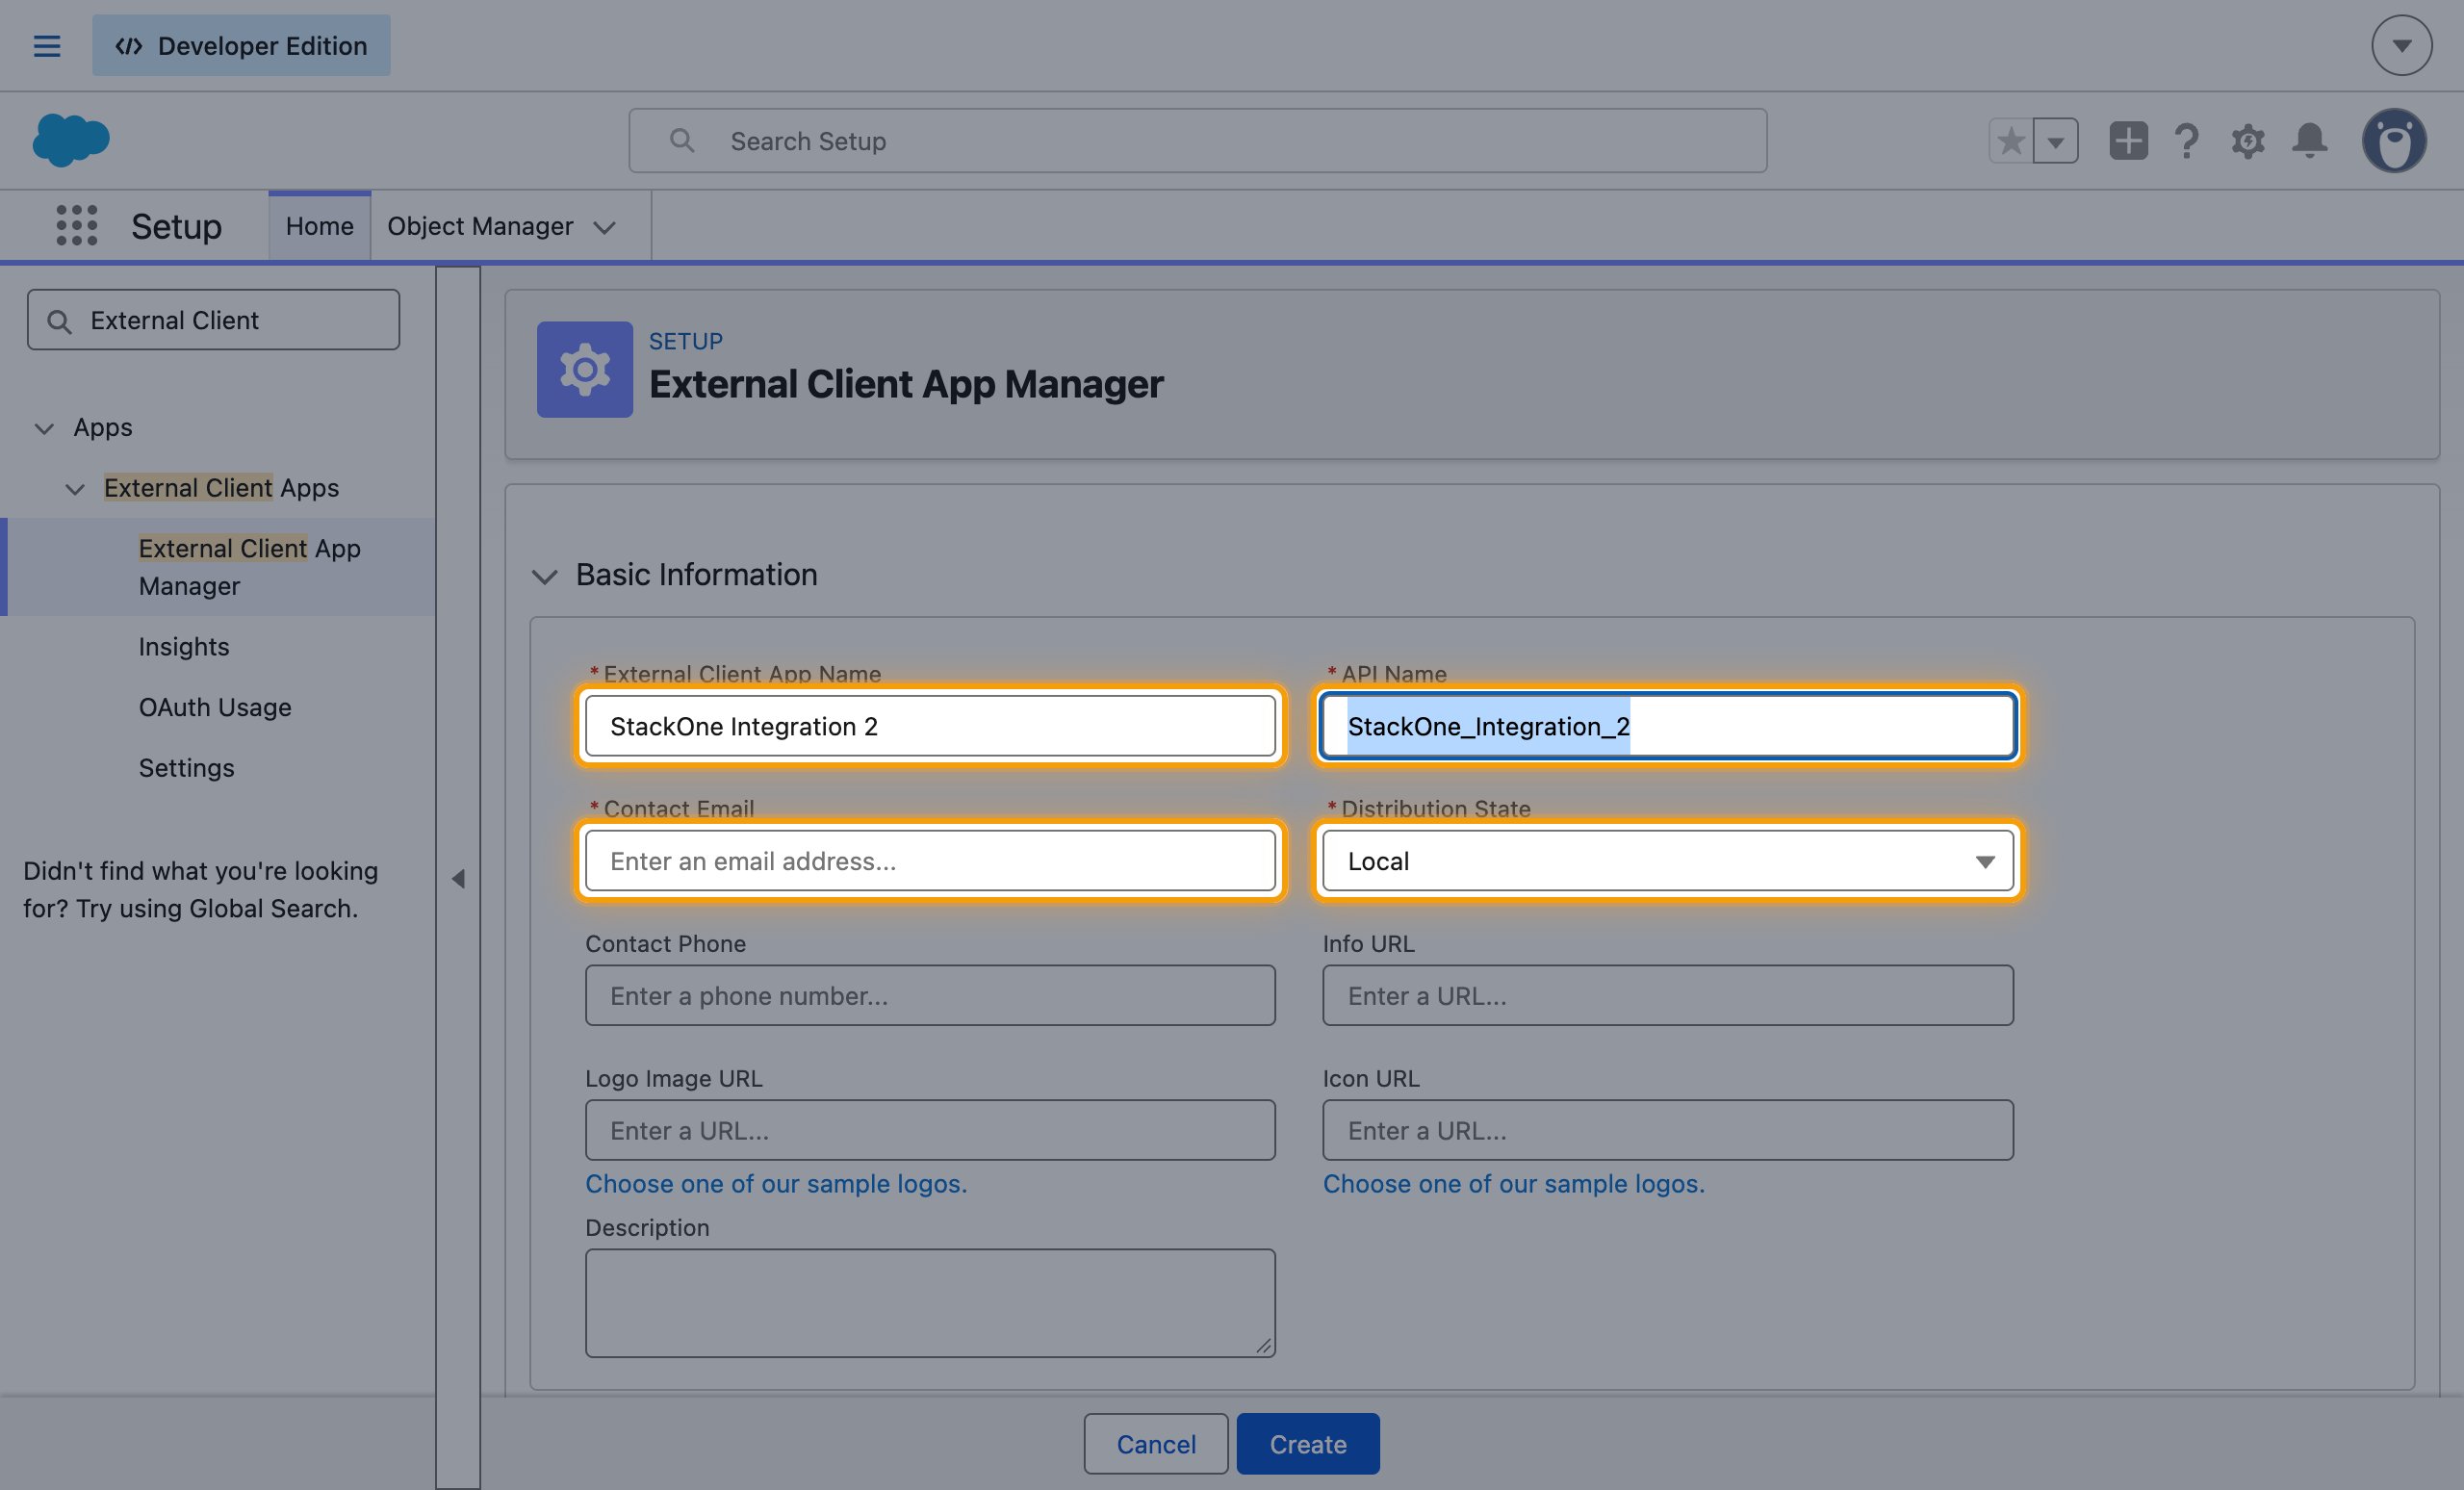
Complete the Basic Information section.
- External Client App Name:
StackOne Integration - API Name: filled in from the app name
- Contact Email: Your email address
- Distribution State: Local
Add the API scope
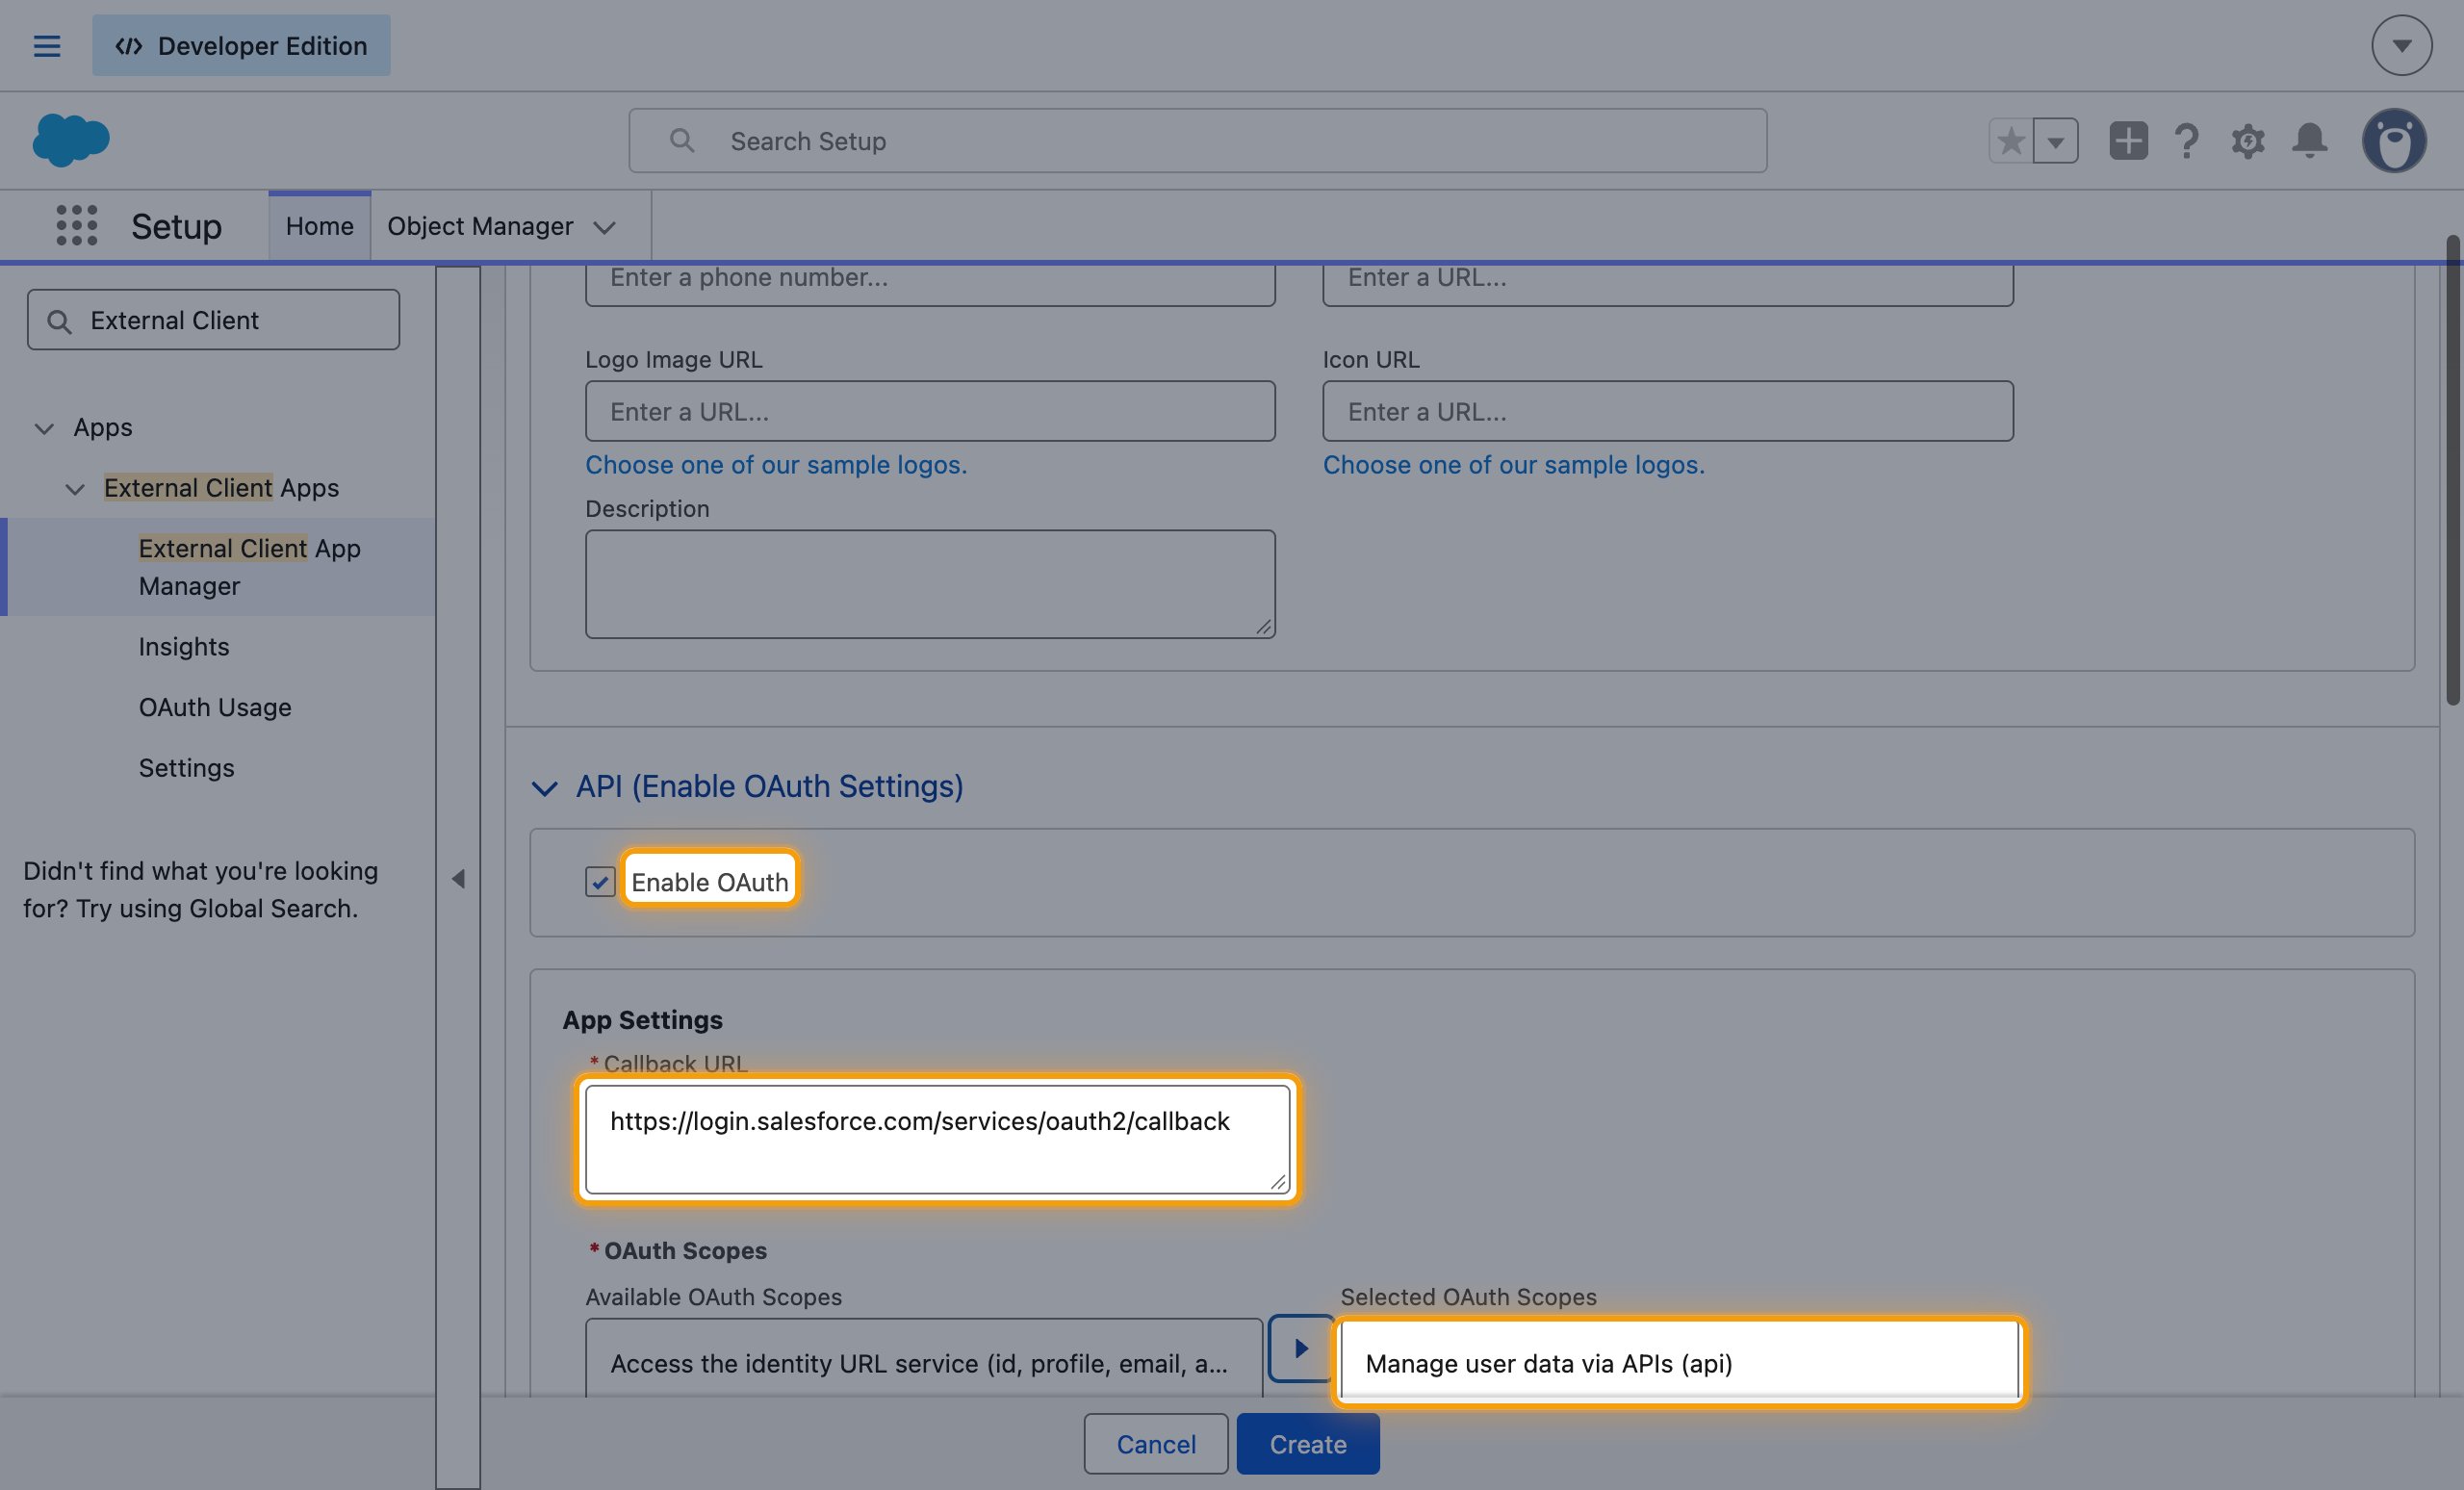
Expand API (Enable OAuth Settings) and select Enable OAuth.
- Callback URL:
https://login.salesforce.com/services/oauth2/callback. The form requires a value, but the client credentials flow never redirects to it. - Under Available OAuth Scopes, select each scope listed and click the arrow to move it to Selected OAuth Scopes.
Enable the client credentials flow
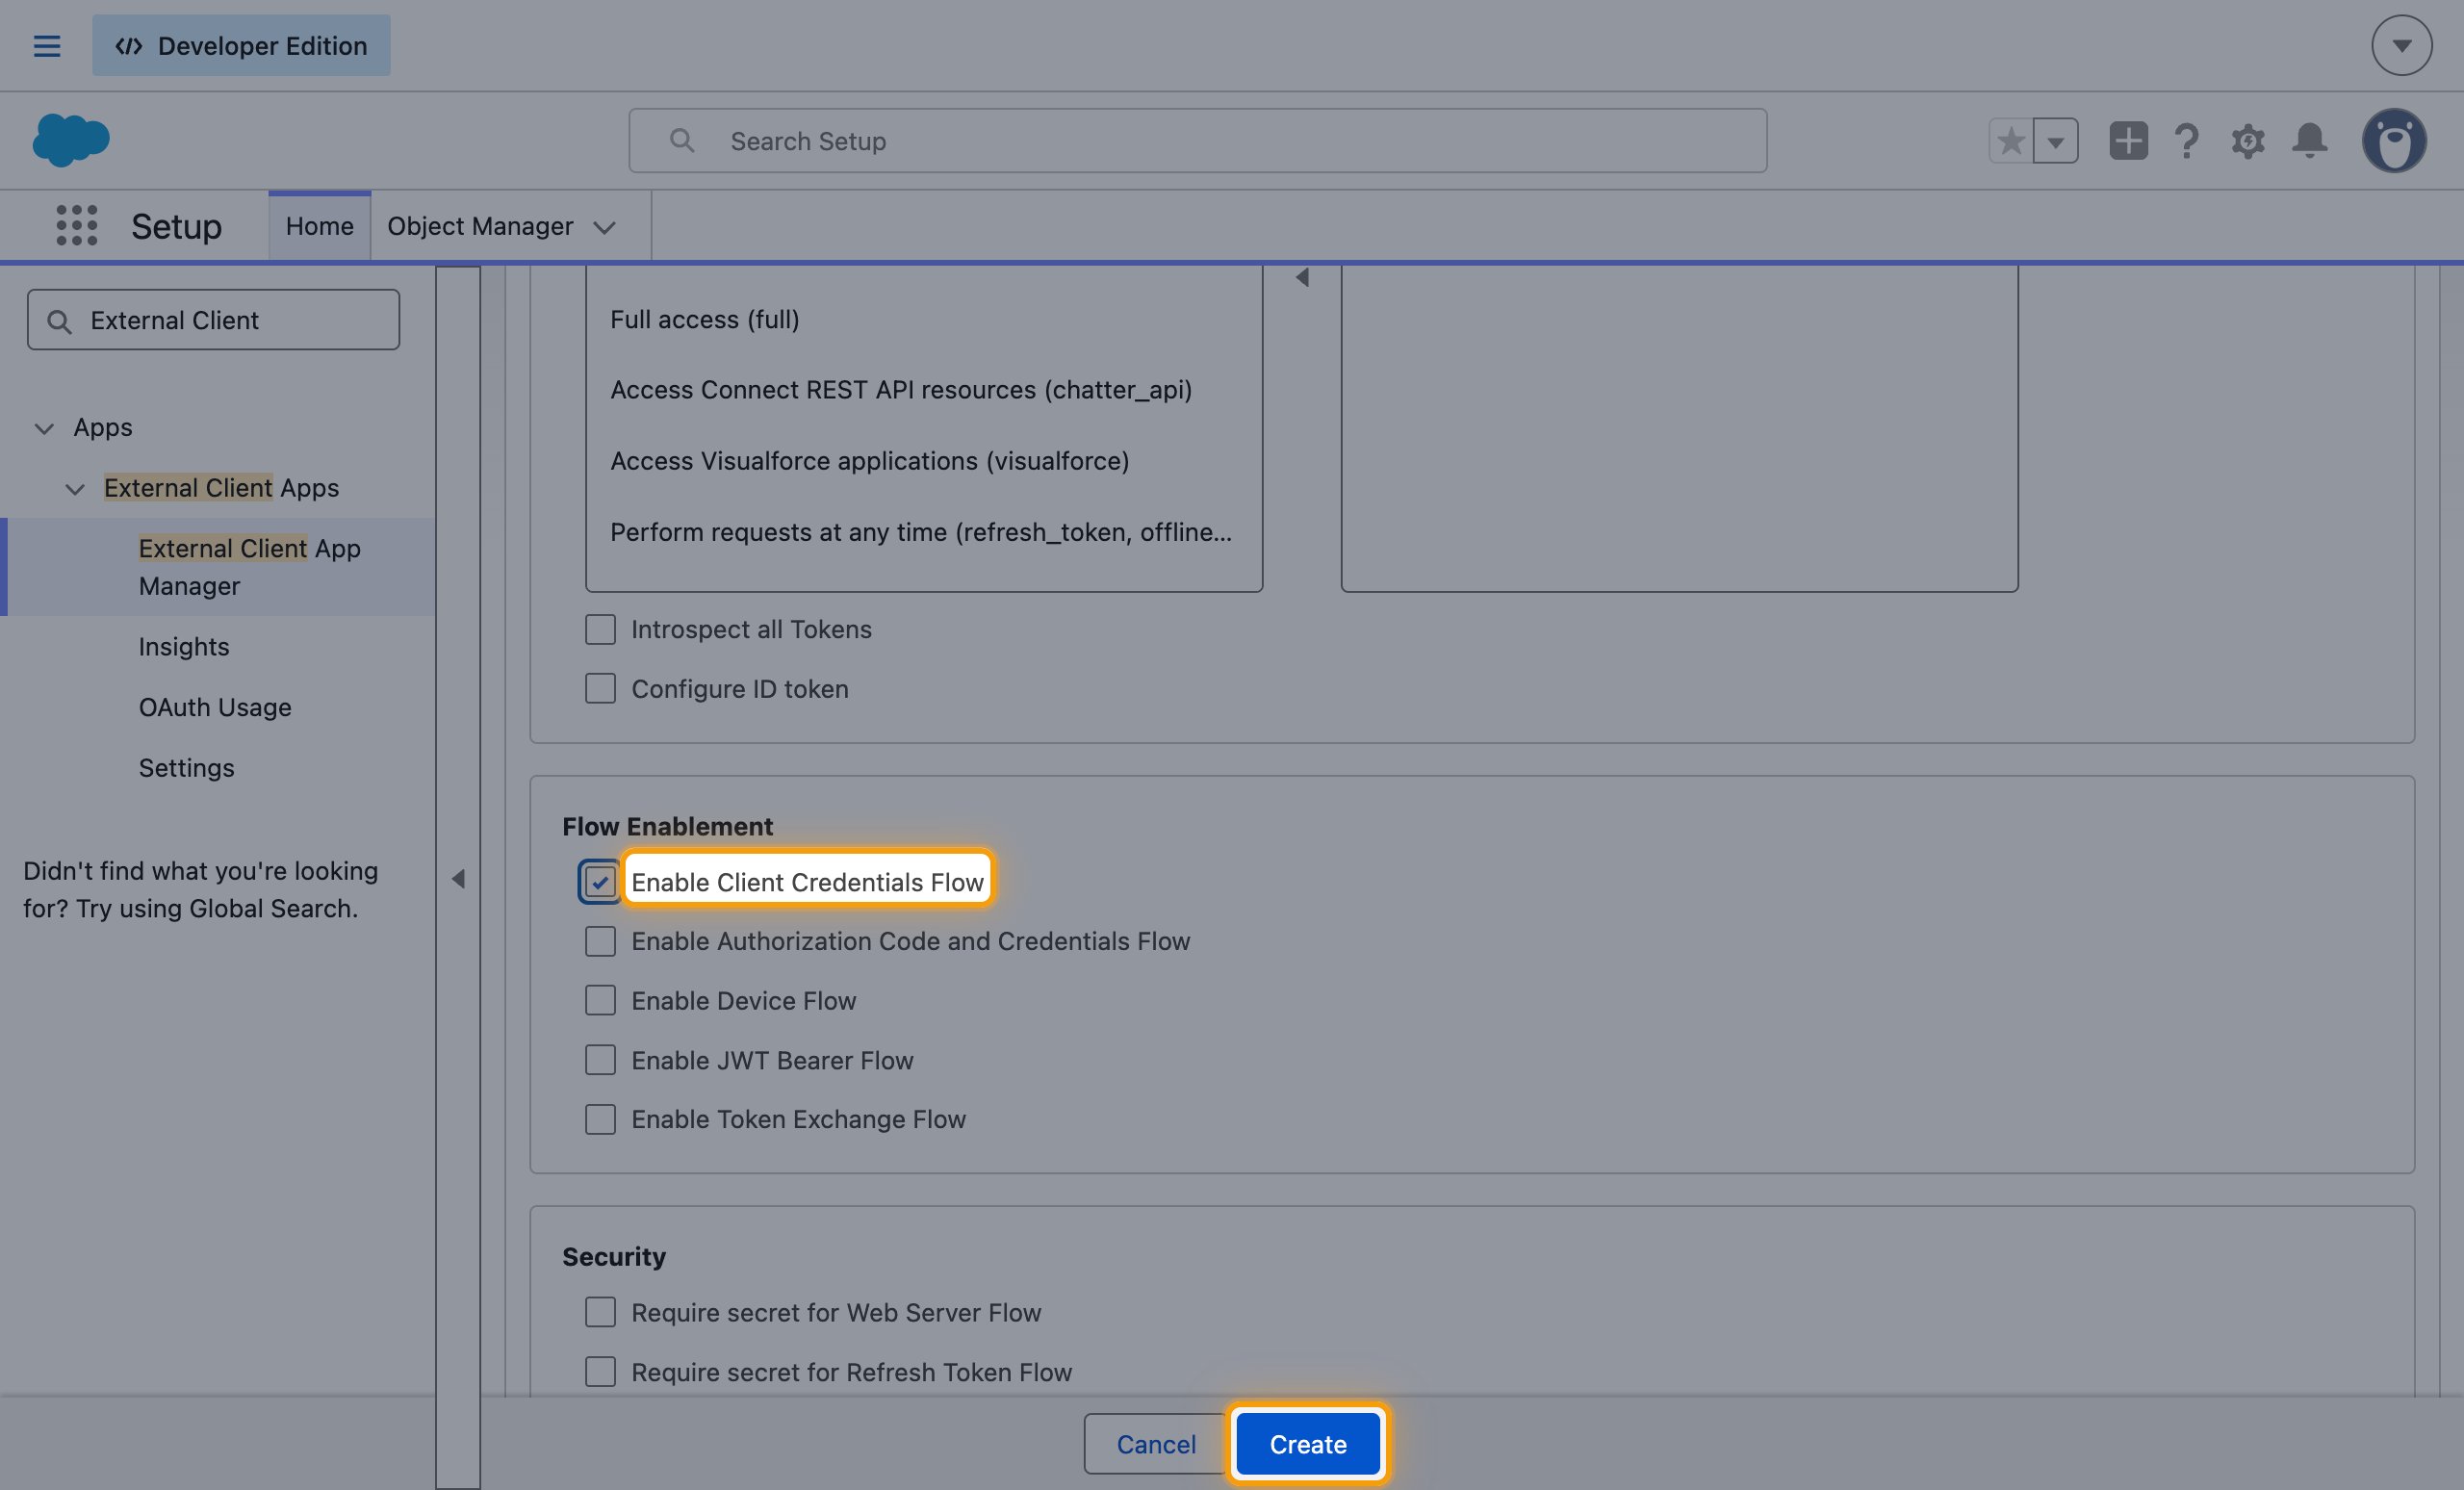
Under Flow Enablement, select Enable Client Credentials Flow.
- Click OK to confirm.
- Click Create.
Set the Run As user
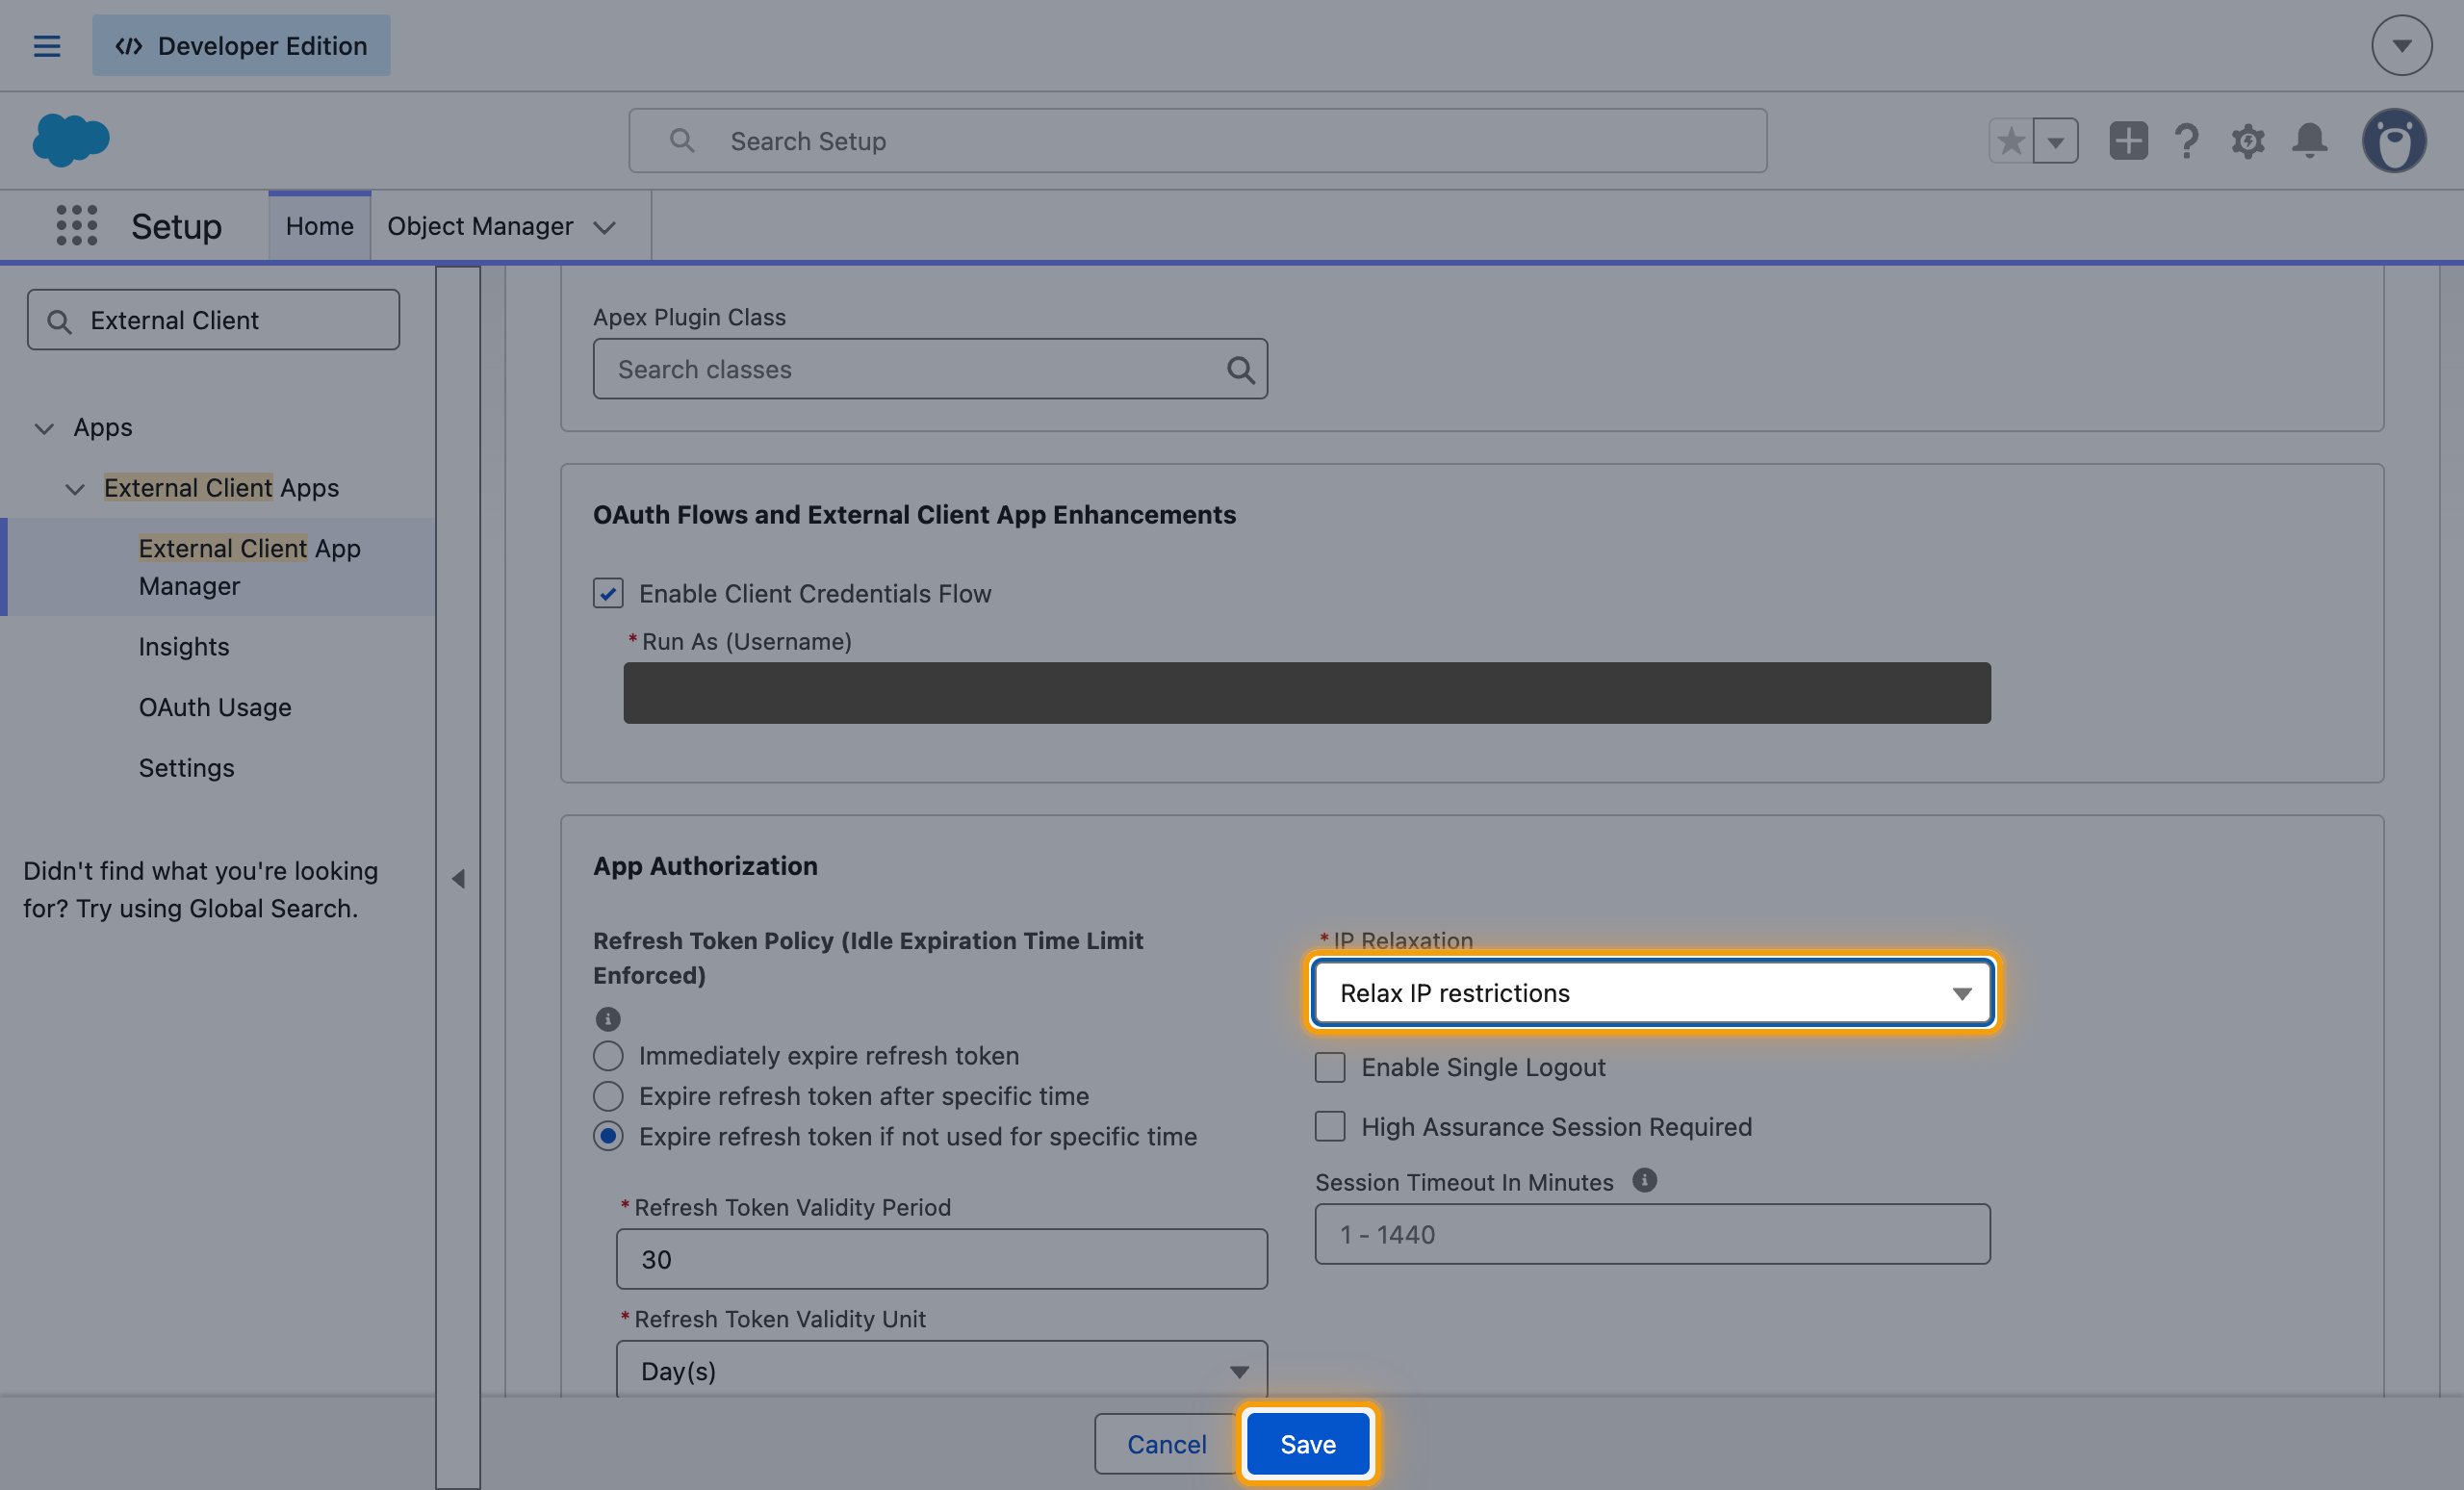
On the new app, open the Policies tab, click Edit, and expand OAuth Policies.
- Under OAuth Flows and External Client App Enhancements, select Enable Client Credentials Flow.
- Run As (Username): the username of the Salesforce user the connection acts as. Every action runs with this user’s permissions.
- IP Relaxation: Relax IP restrictions
- Click Save.
Copy the consumer key and secret
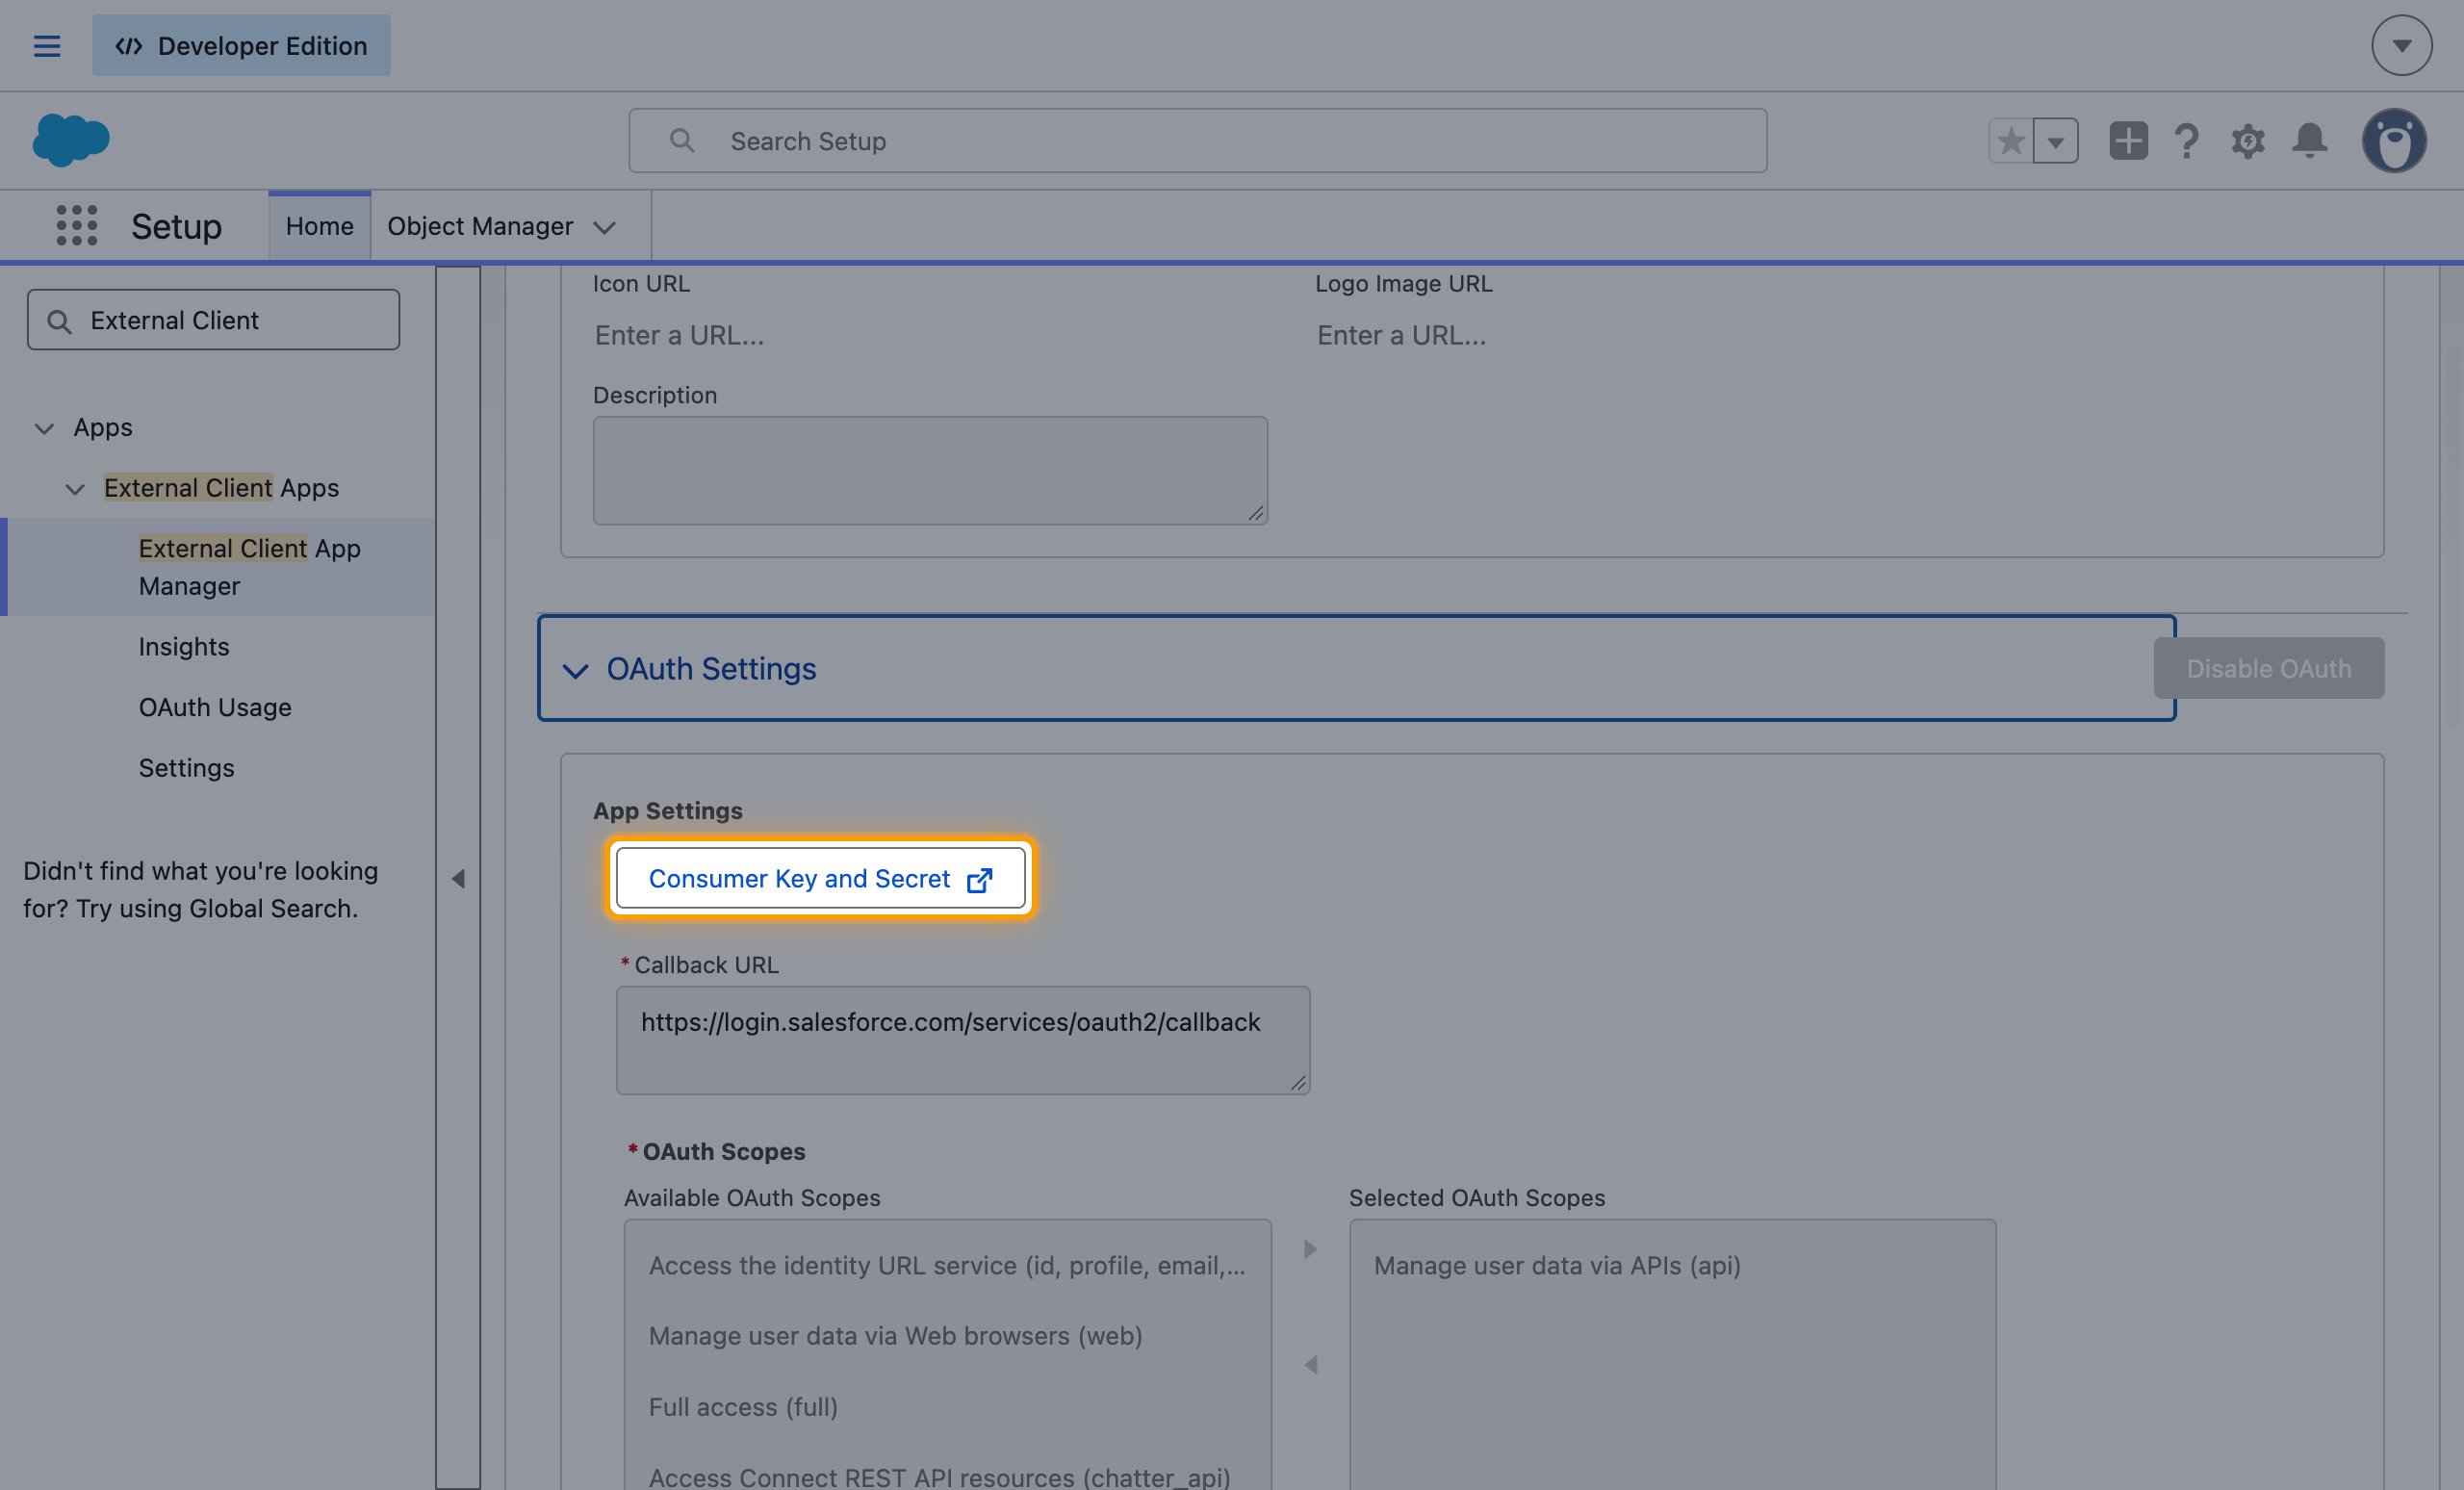
Open the Settings tab, expand OAuth Settings, and click Consumer Key and Secret.
- Enter the verification code Salesforce emails you.
- Copy the Consumer Key across.
- Copy the Consumer Secret across.
Find your My Domain
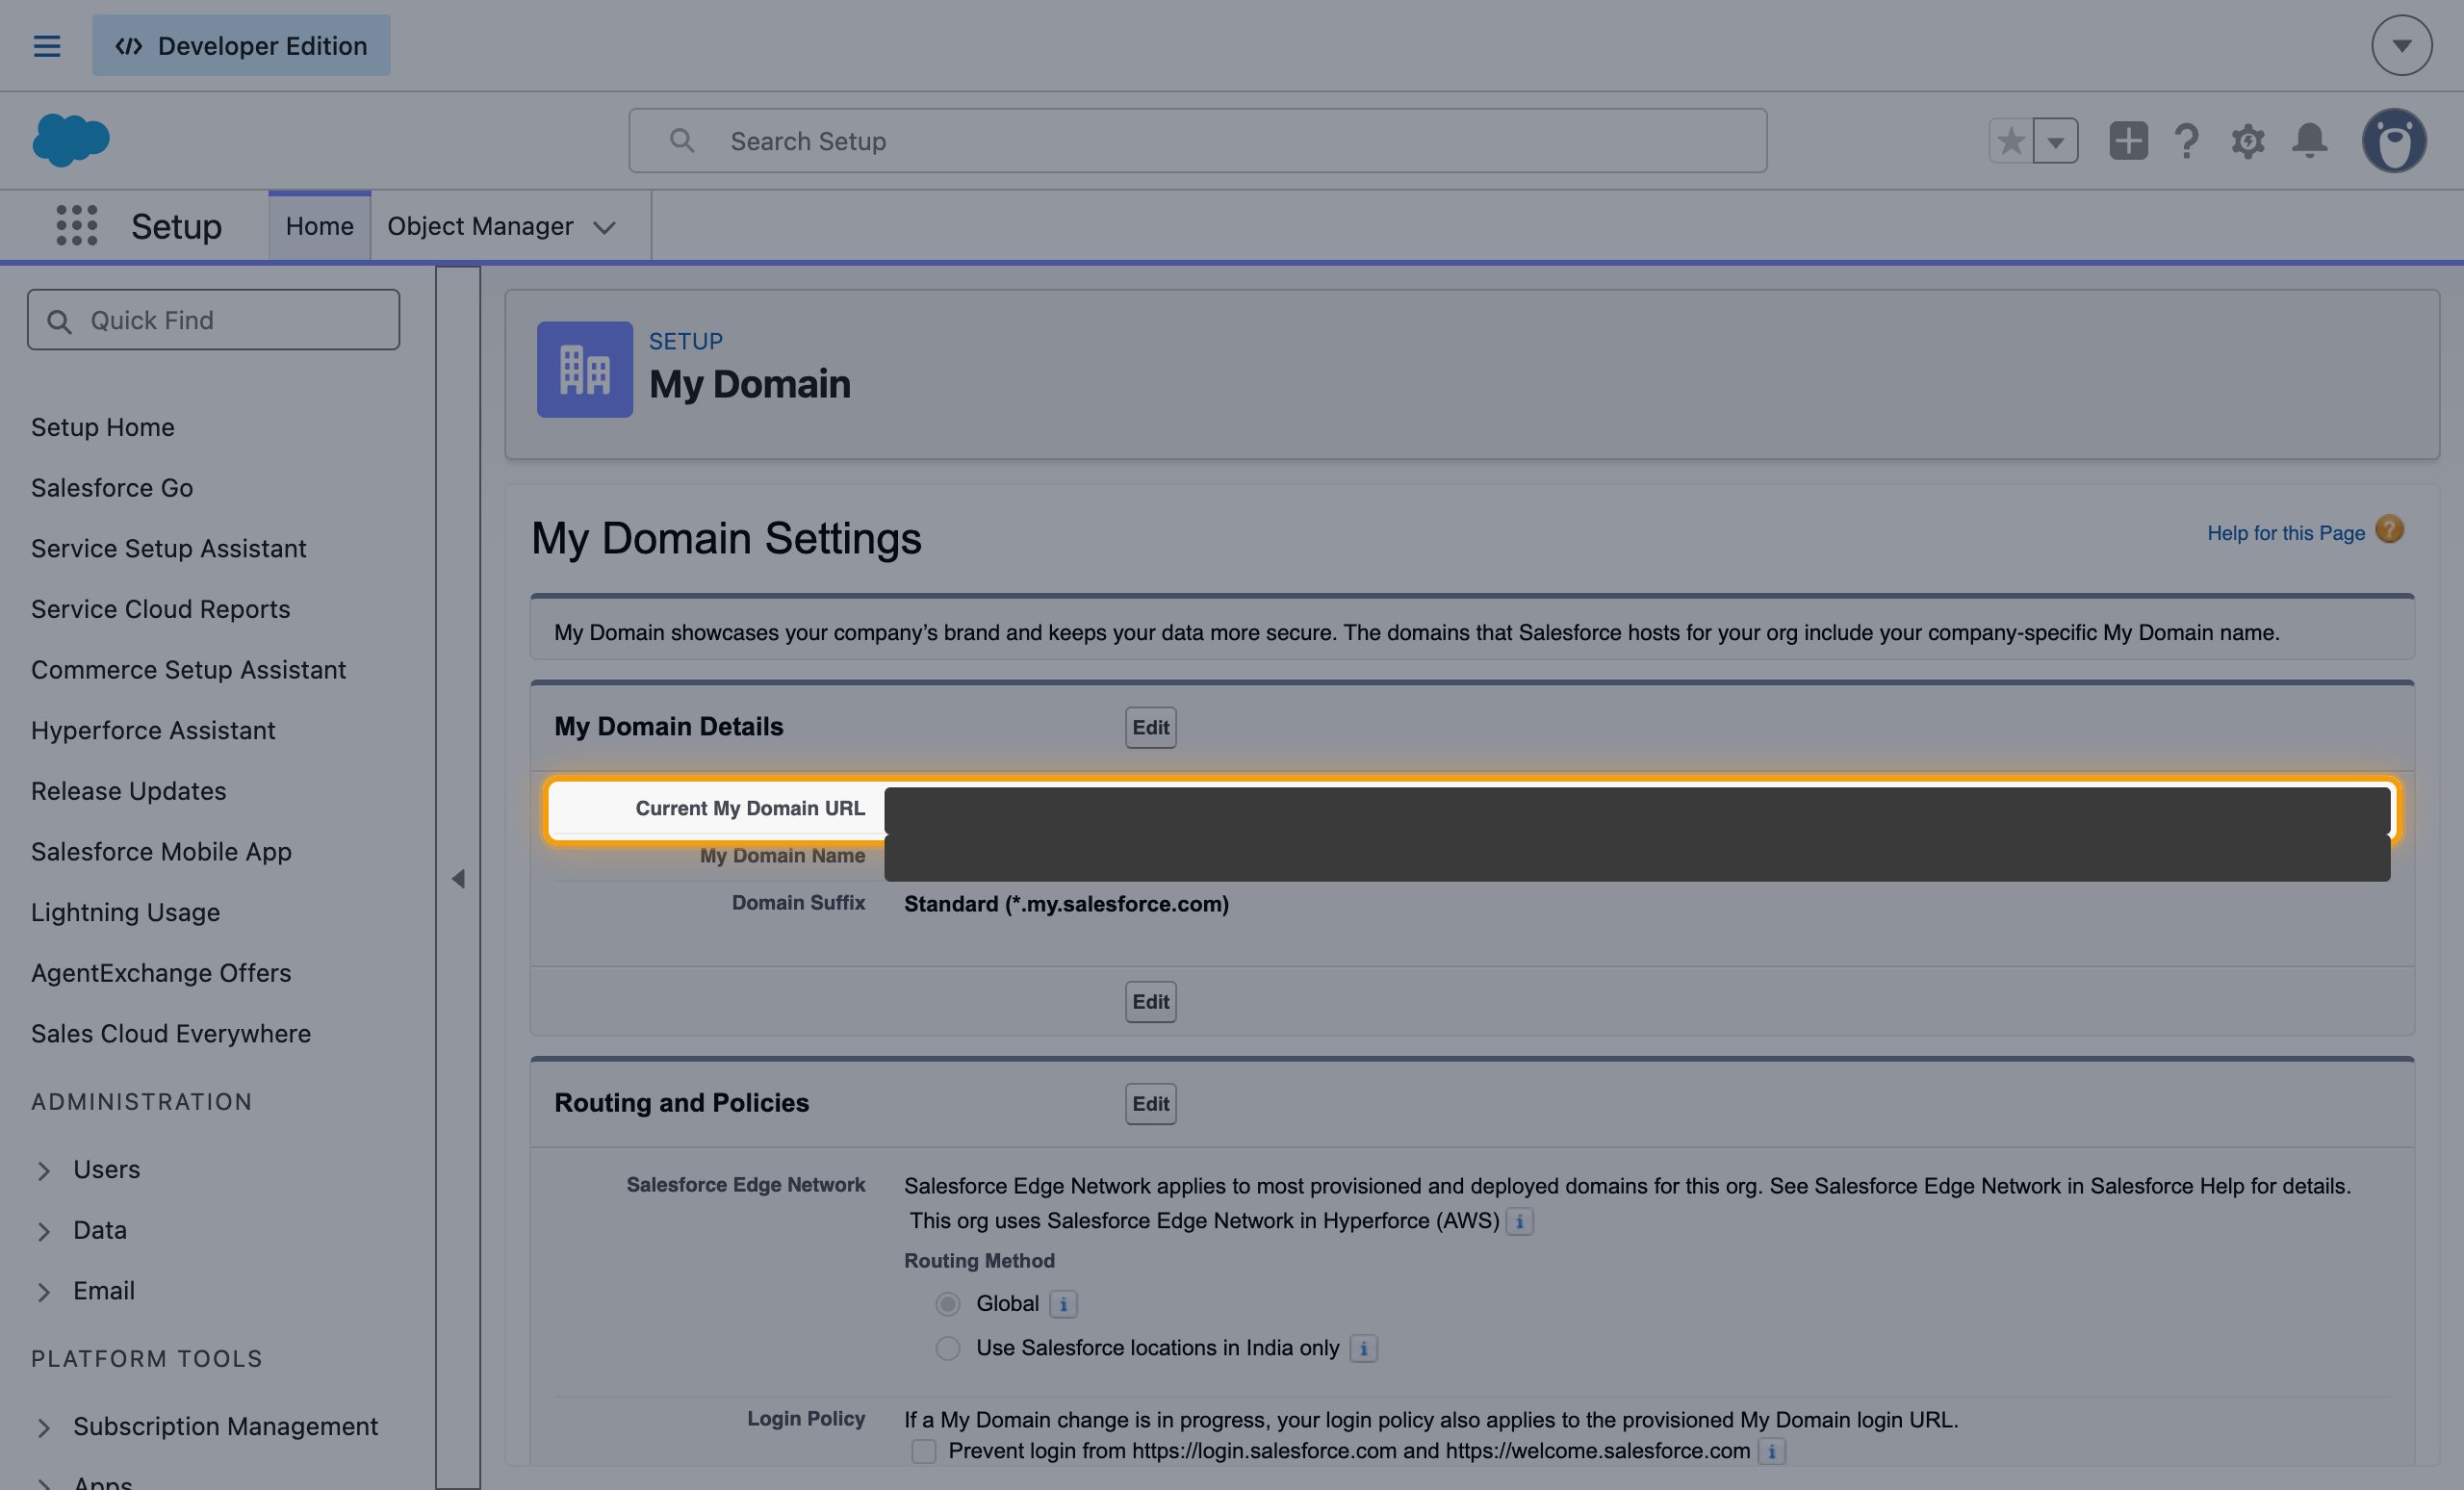
Your My Domain is your org’s own Salesforce host. The client credentials flow only accepts a token request sent to it.
- In Setup, enter
My Domainin the Quick Find box and select My Domain. - Copy the Current My Domain URL across, leaving out the protocol.
- Format:
{name}.my.salesforce.com, or{name}--{sandbox}.sandbox.my.salesforce.comfor a sandbox - Example:
acme.my.salesforce.com
Link the Account
Connect
- Click Connect.
- If applicable, the provider will redirect you to a sign-in or authorization page. Complete the provider’s authorization flow.
- Once authorization is successful, you will see a confirmation popup.
Use Actions