

Registering a PagerDuty app with Scoped OAuth
Register an app on your PagerDuty account and give it Scoped OAuth functionality to obtain the Client ID and Client Secret.
1
Create the app
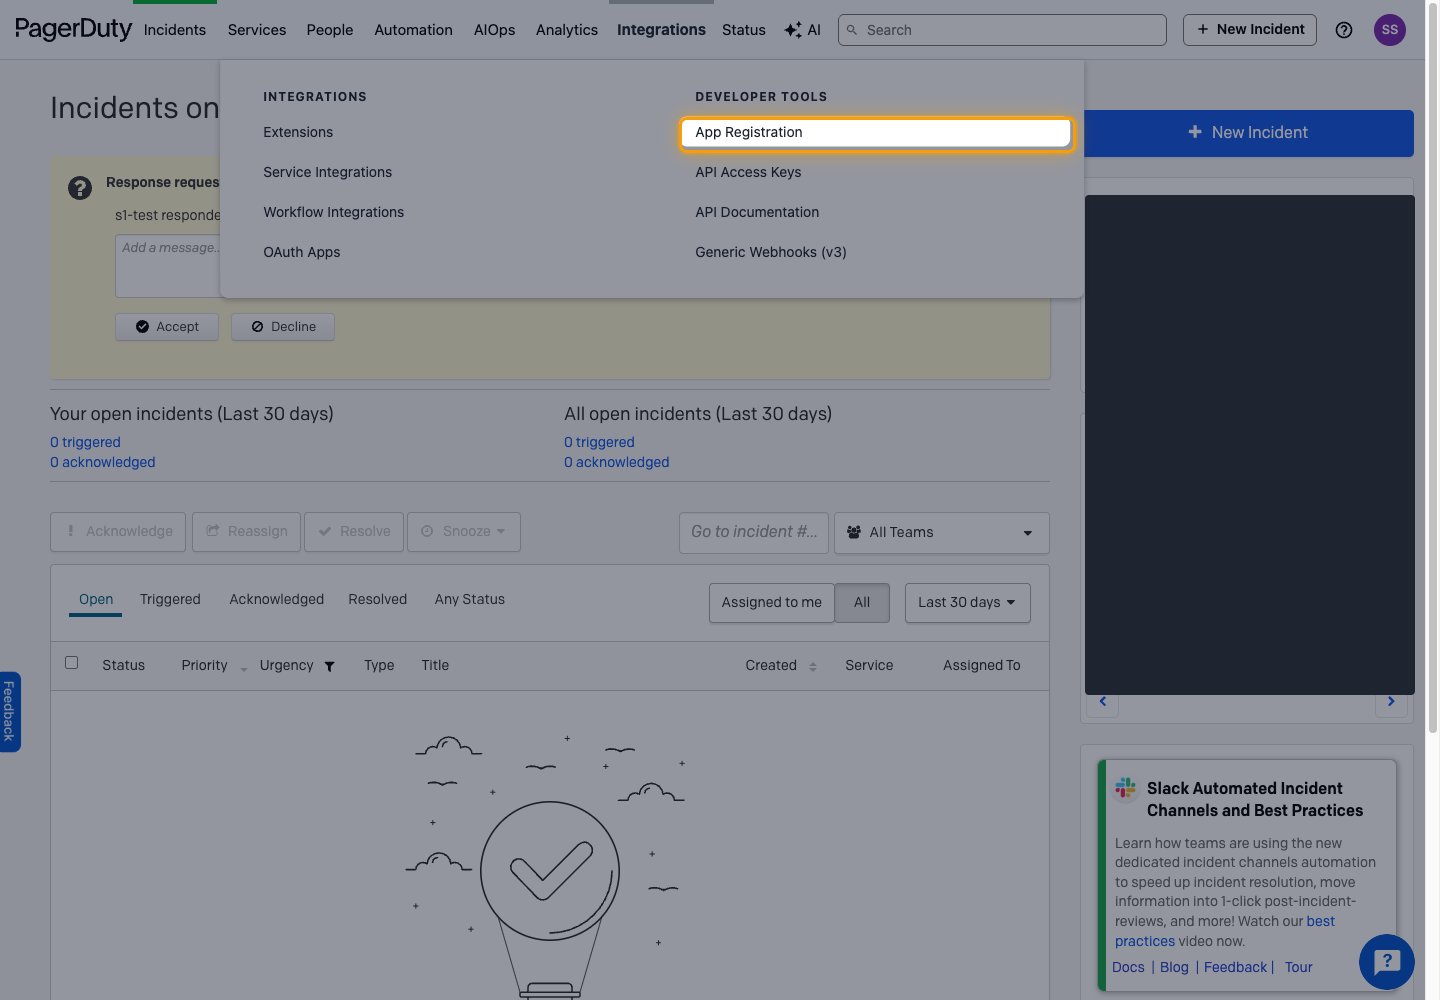
2
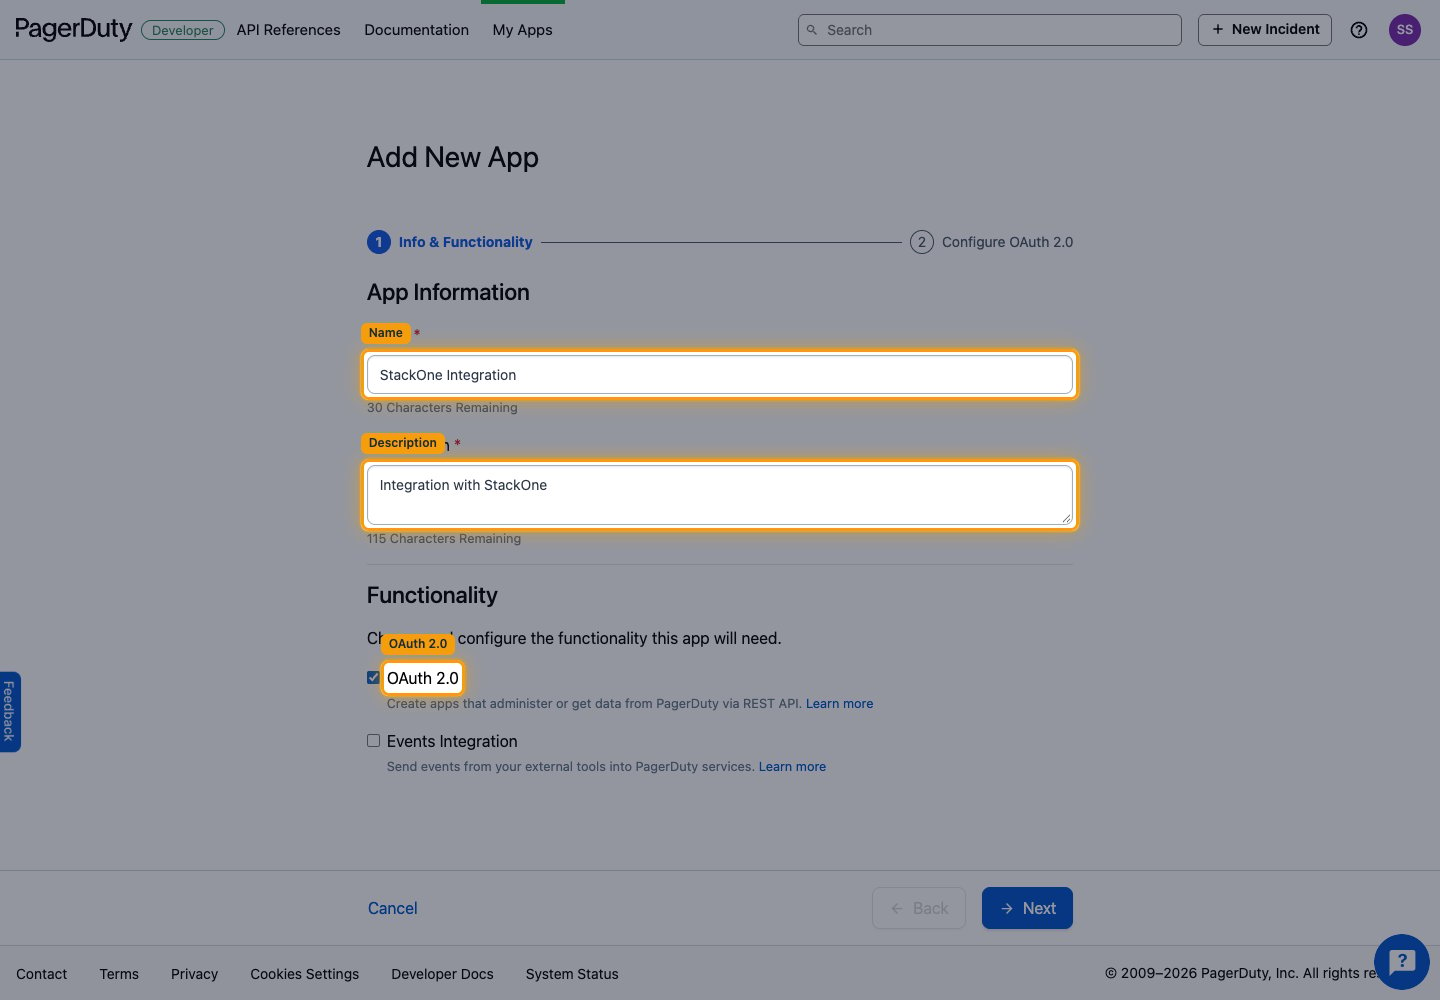
Name the app and turn on OAuth 2.0
The Add New App form opens on Info & Functionality.
- Name:
StackOne Integration - Description:
Integration with StackOne - Under Functionality, select OAuth 2.0.
- Click Next.
3
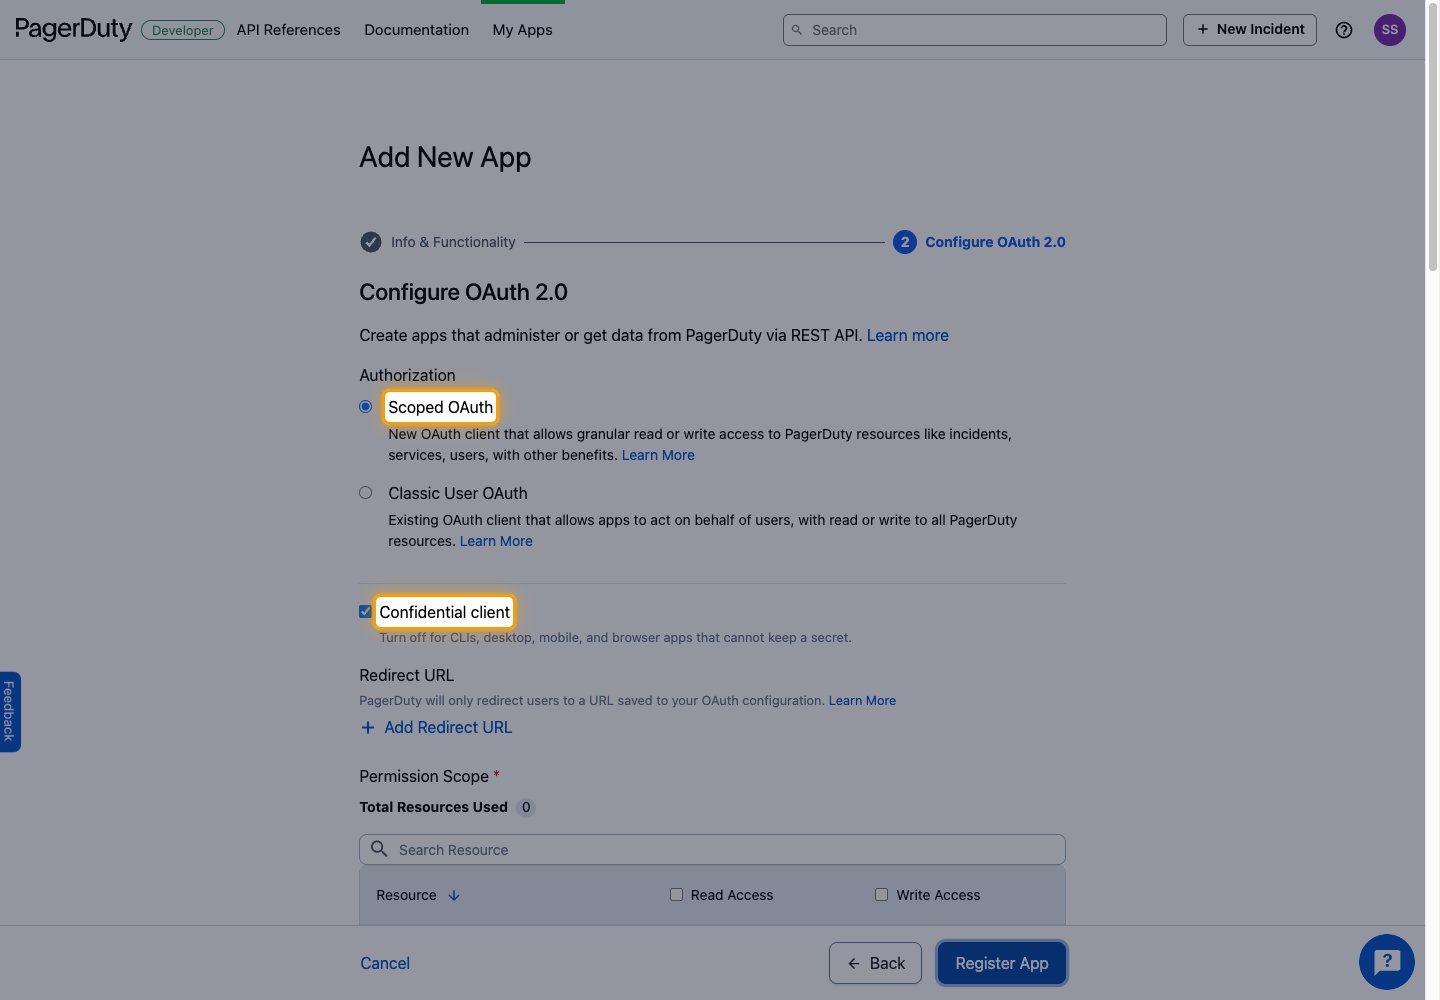
Choose Scoped OAuth
On Configure OAuth 2.0, pick the OAuth type under Authorization.
- Select Scoped OAuth. It grants access per resource type, rather than everything the authorizing user can reach.
- Leave Confidential client selected. StackOne keeps the Client Secret on its own servers and sends it on the token request.
4
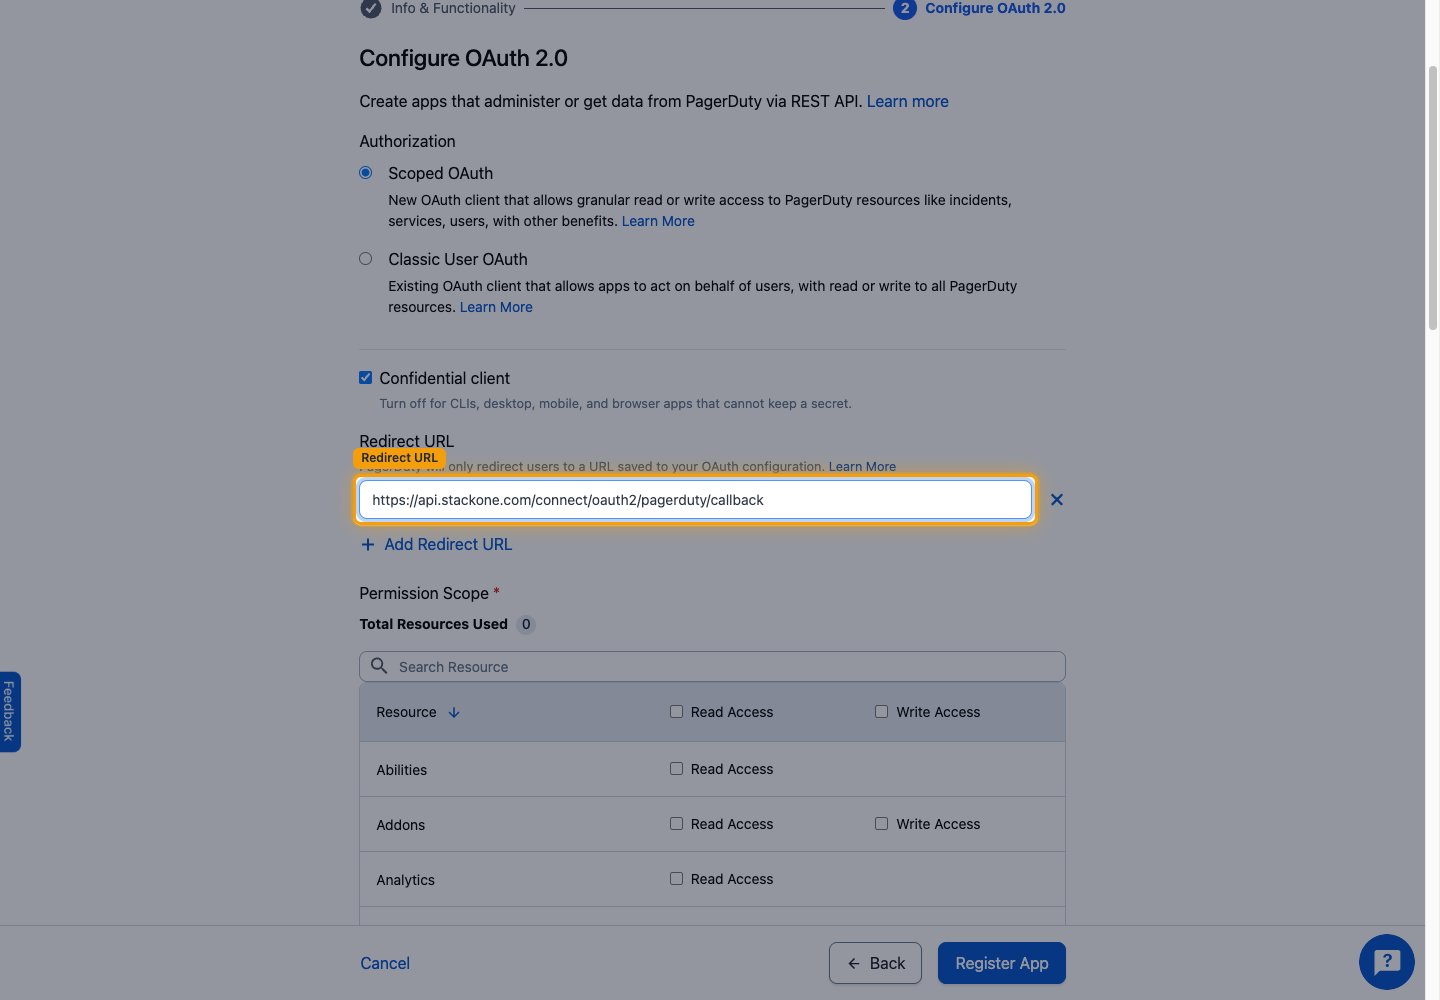
Set the redirect URL
Under Redirect URL, click + Add Redirect URL.
- Redirect URL: the Callback URL from your Connector Profile
- PagerDuty compares the redirect URL with its saved value exactly, so copy it without changes.
5
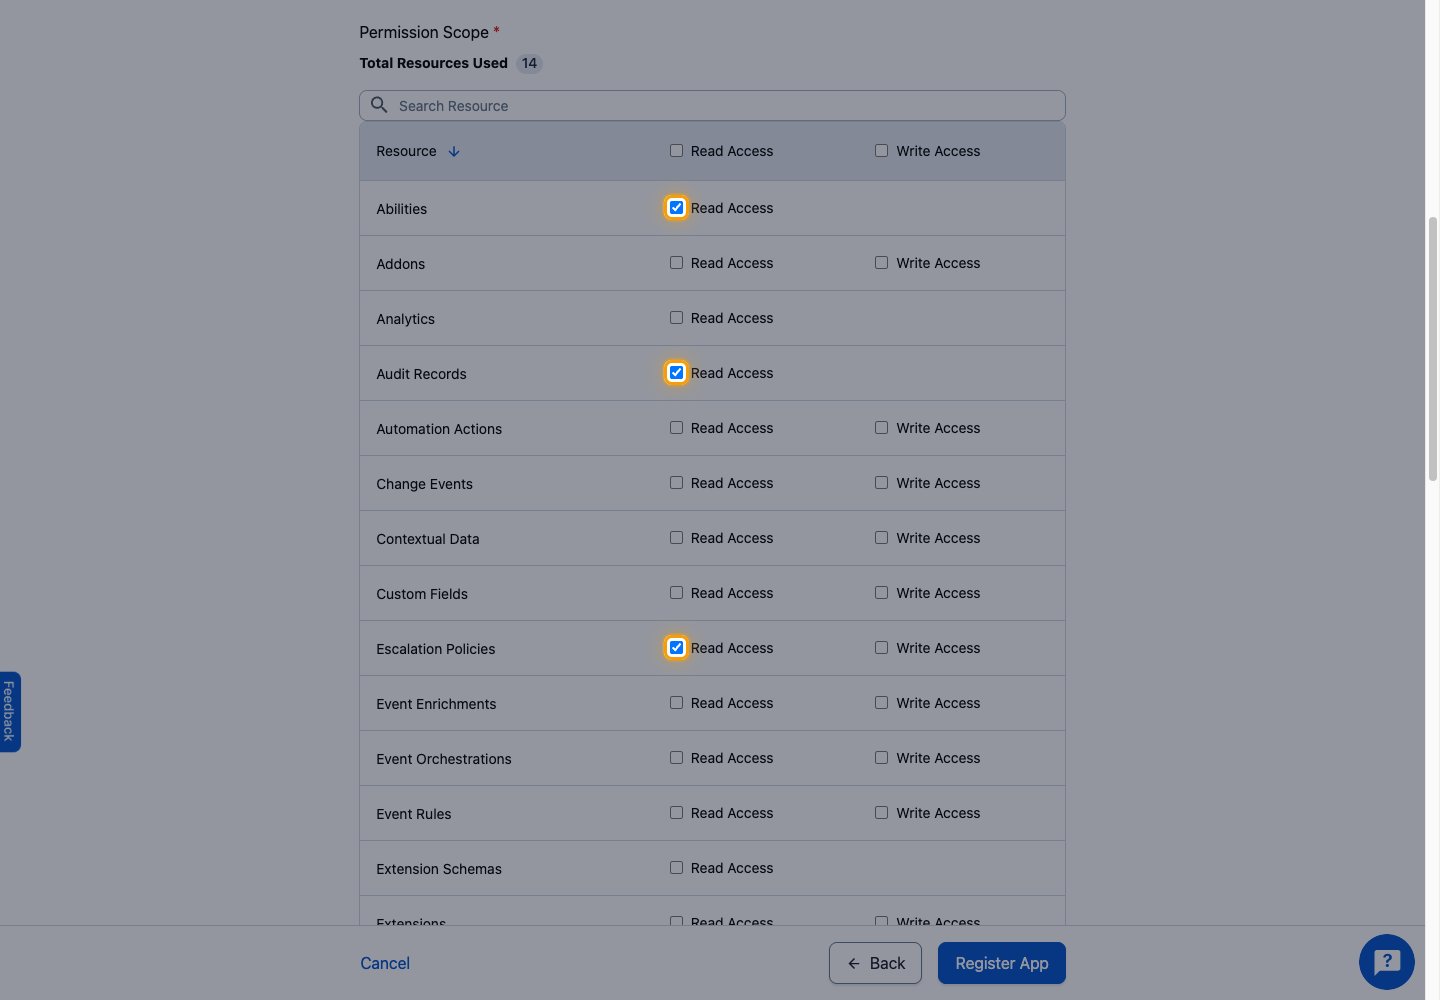
Add the permission scopes
Enables actions: Add Note To Incident, Create Incident, Create Schedule, Create Service, Create Team, Create User, Delete Schedule, Delete Service, Delete Team, Delete User, Get Escalation Policy, Get Incident, Get Incident Type, Get Schedule, Get Service, Get Team, Get Unified Group, Get Unified Role, Get Unified User, Get User, Get User License, Get Vendor, List Audit Records, List Escalation Policies, List Incident Log Entries, List Incident Notes, List Incident Types, List Incidents, List License Allocations, List Licenses, List On-Calls, List Priorities, List Schedules, List Services, List Teams, List Unified Groups, List Unified Resource Types, List Unified Resource Users, List Unified Roles, List Unified Users, List Users, List Vendors, Update Incident, Update Service, Update Team, Update User
Under Permission Scope, find each resource in the table and select its Read Access or Write Access checkbox. Search Resource filters the table, and Total Resources Used counts the resources selected so far.
- Select every scope the connector requests. When an app requests a scope it does not hold, PagerDuty issues a token carrying only the
openidscope, and every API call then fails.
6
Copy the credentials
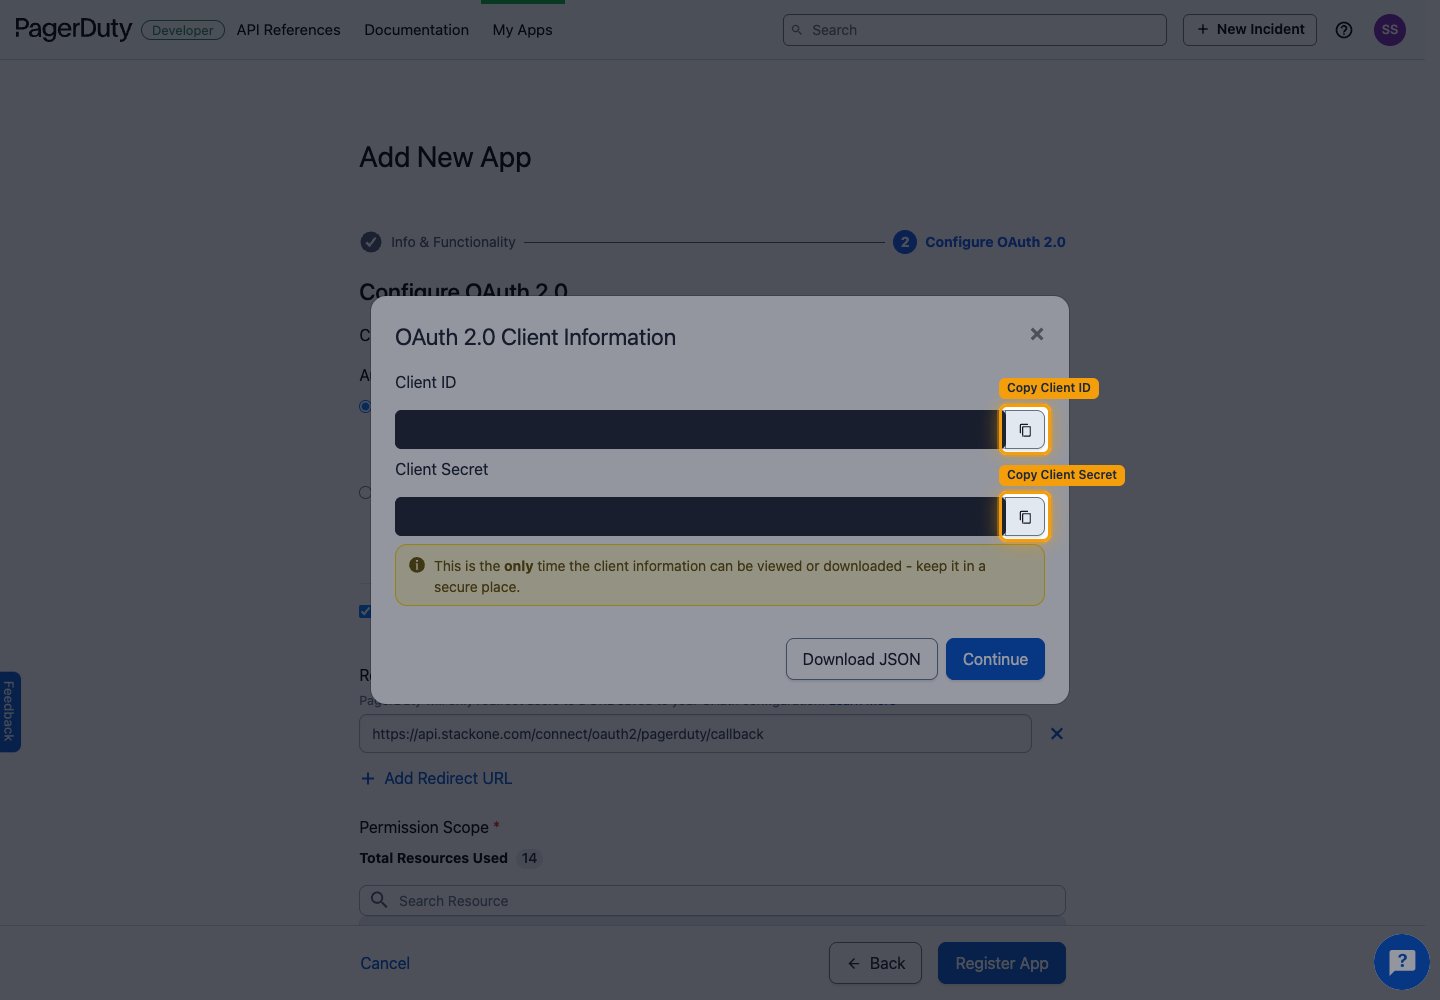
Click Register App. The OAuth 2.0 Client Information dialog opens with the credentials.
- Copy the Client ID into your Connector Profile.
- Copy the Client Secret into your Connector Profile.
- This is the only time the client information can be viewed or downloaded. The Client Secret cannot be retrieved later, so store it securely before closing the dialog.
- Click Continue.
Create the StackOne Connector Profile
1
Create a Connector Profile
Enable the connector and create a Connector Profile in your project. See Setup Connector Profile.
2
Link an Account
Once the Connector Profile is created, continue to link an account.