

Create or select a Google Cloud project
To connect Google Meet with OAuth 2.0, you first need a Google Cloud project. You can reuse an existing project or create a new one.
Sign in to Google Cloud
Open the Google Cloud Console and sign in with an account that has Owner or Editor access to the project you want to use.
Select or create a project
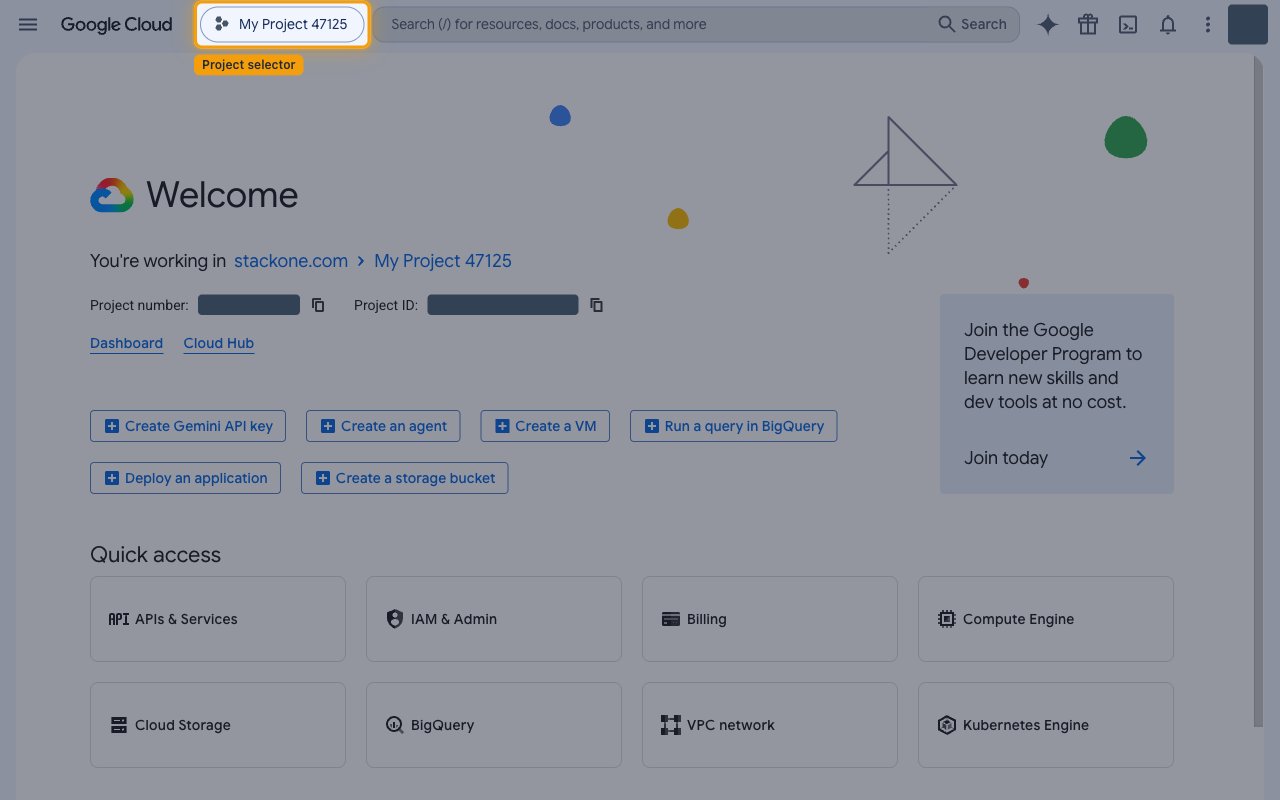
Use the project selector at the top of the page to choose the project you want to use, or open the selector and create a new project if you don’t have one yet.
Enable the Google Meet REST API
The Google Meet REST API must be enabled on your project before you can authenticate against it.
Open the API Library
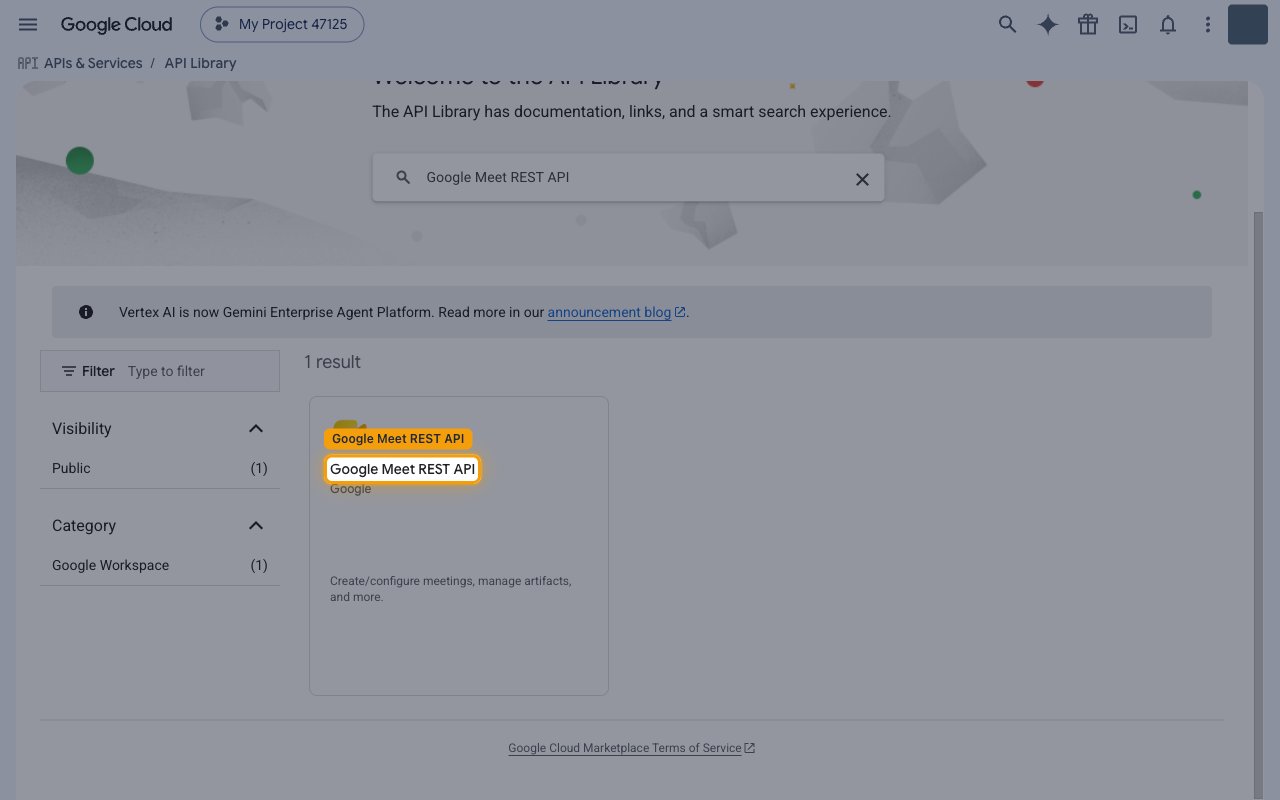
In the Google Cloud Console, go to APIs & Services > Library and search for Google Meet REST API, then click the result.
Enable the API
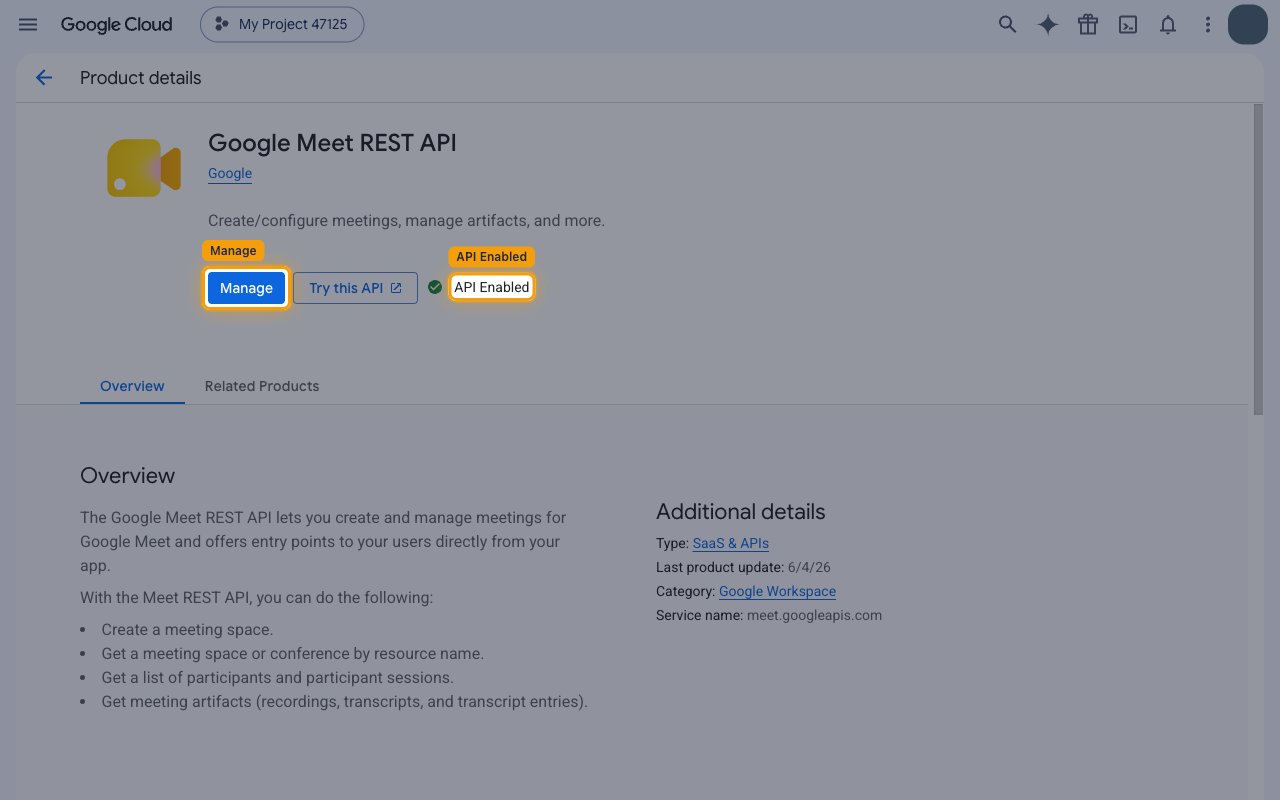
On the Google Meet REST API product page, enable the API for your project.
- If the API is not yet enabled, click Enable.
- If it is already enabled, the button shows Manage and the status reads API Enabled — no further action is needed.
Open the Google Auth Platform
OAuth credentials are managed from the Google Auth Platform. From here you configure the app’s branding, audience, scopes, and clients.
Navigate to the Google Auth Platform
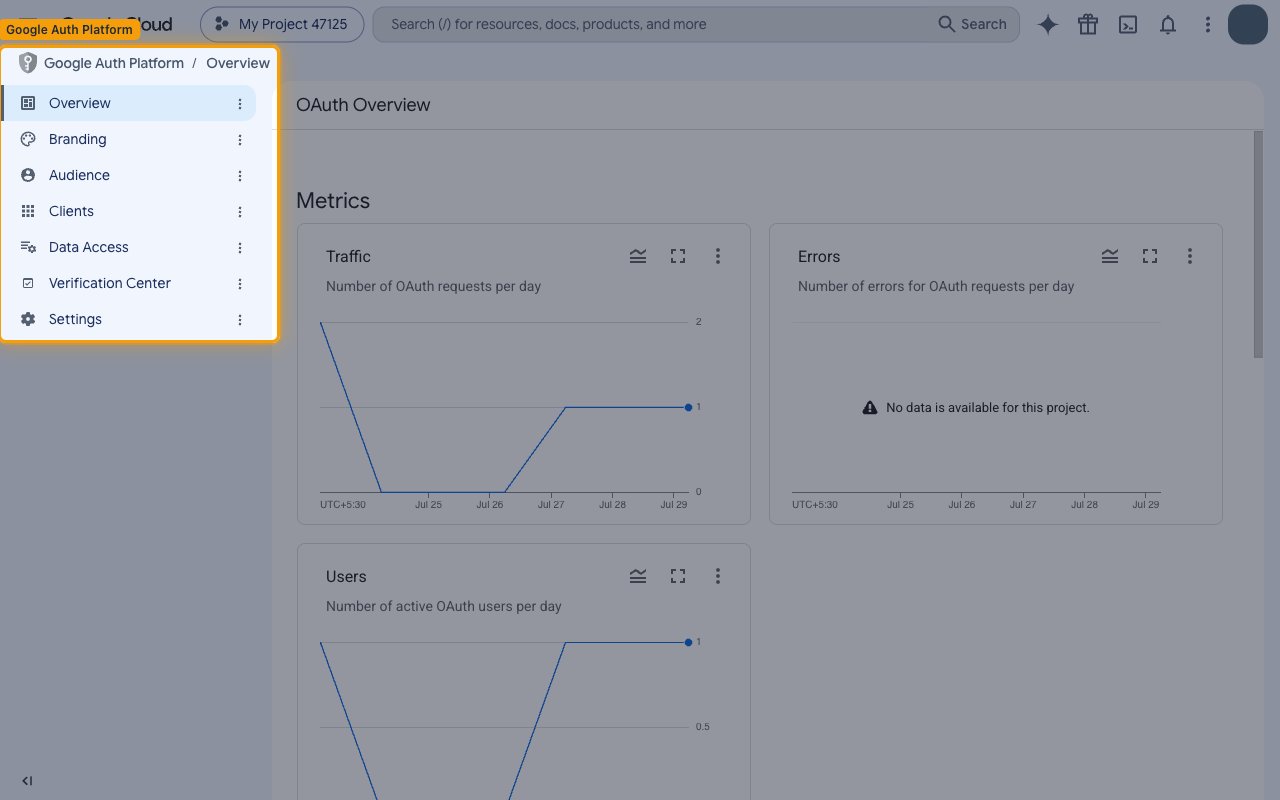
In the Google Cloud Console, go to APIs & Services > OAuth consent screen to open the Google Auth Platform. Its sidebar contains Overview, Branding, Audience, Clients, Data Access, Verification Center, and Settings.
- If this is the first time you open the Google Auth Platform for the project, click Get started and complete the initial app registration before continuing.
Configure scopes
Grant the OAuth scopes that the Google Meet integration needs so that StackOne can read meeting spaces, conference records, and artifacts.
Open Data Access
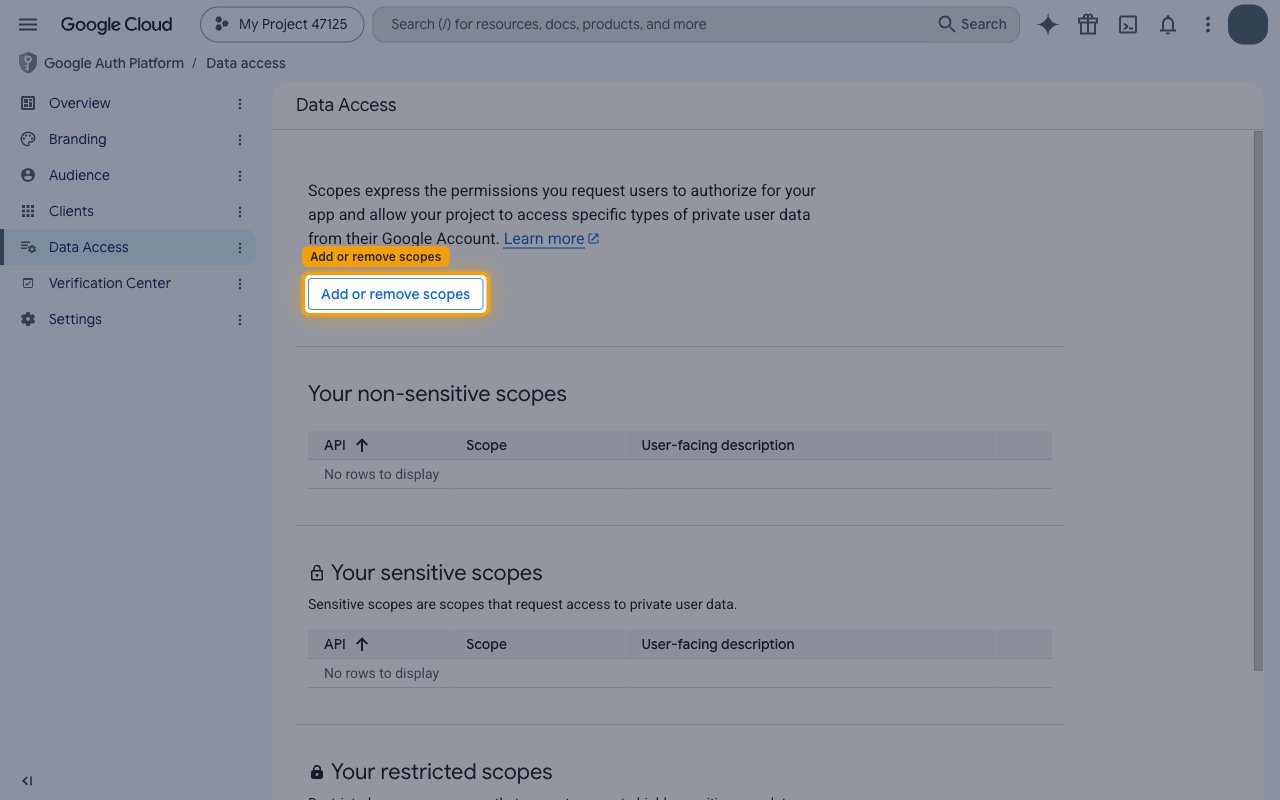
In the Google Auth Platform sidebar, open Data Access and click Add or remove scopes.
Add the required scopes
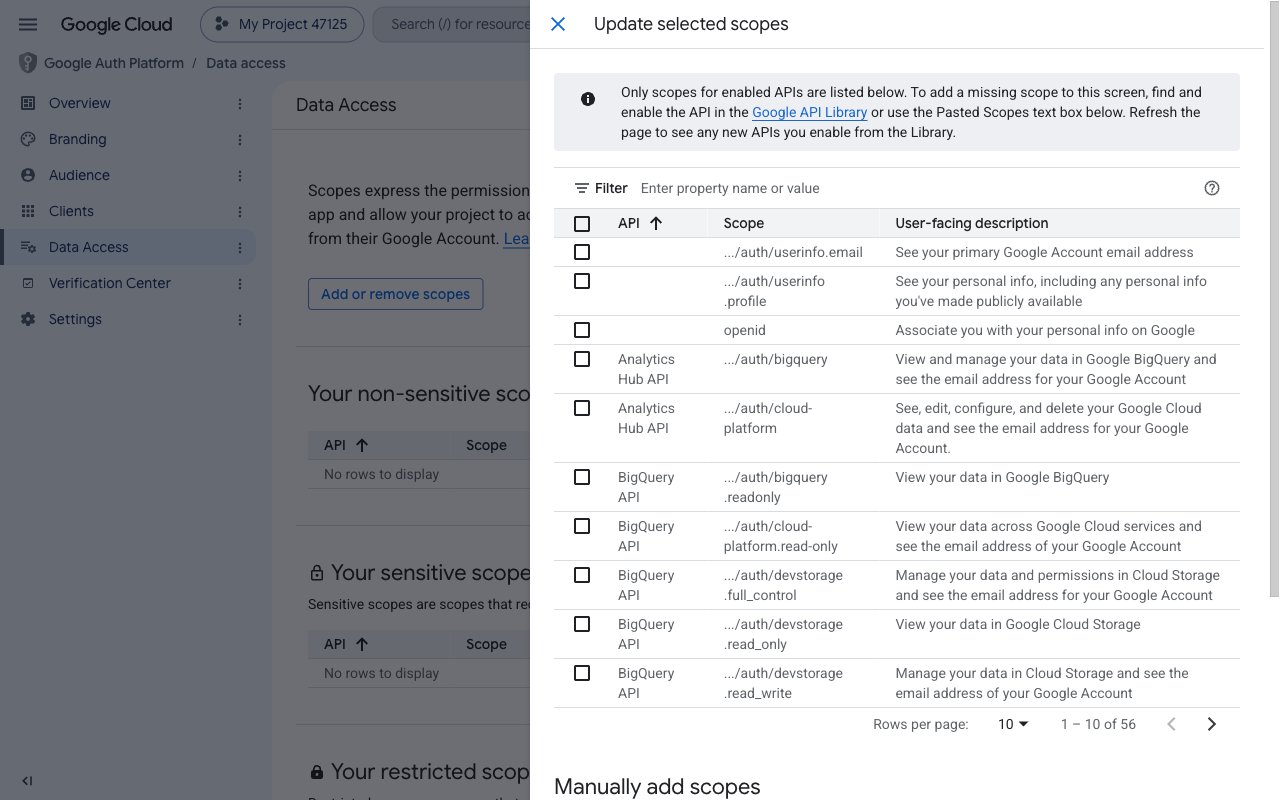
In the Update selected scopes panel, enable the scopes this integration needs. If a scope does not appear in the list, add it in the Manually add scopes box and click Add to table.
Save the scope configuration
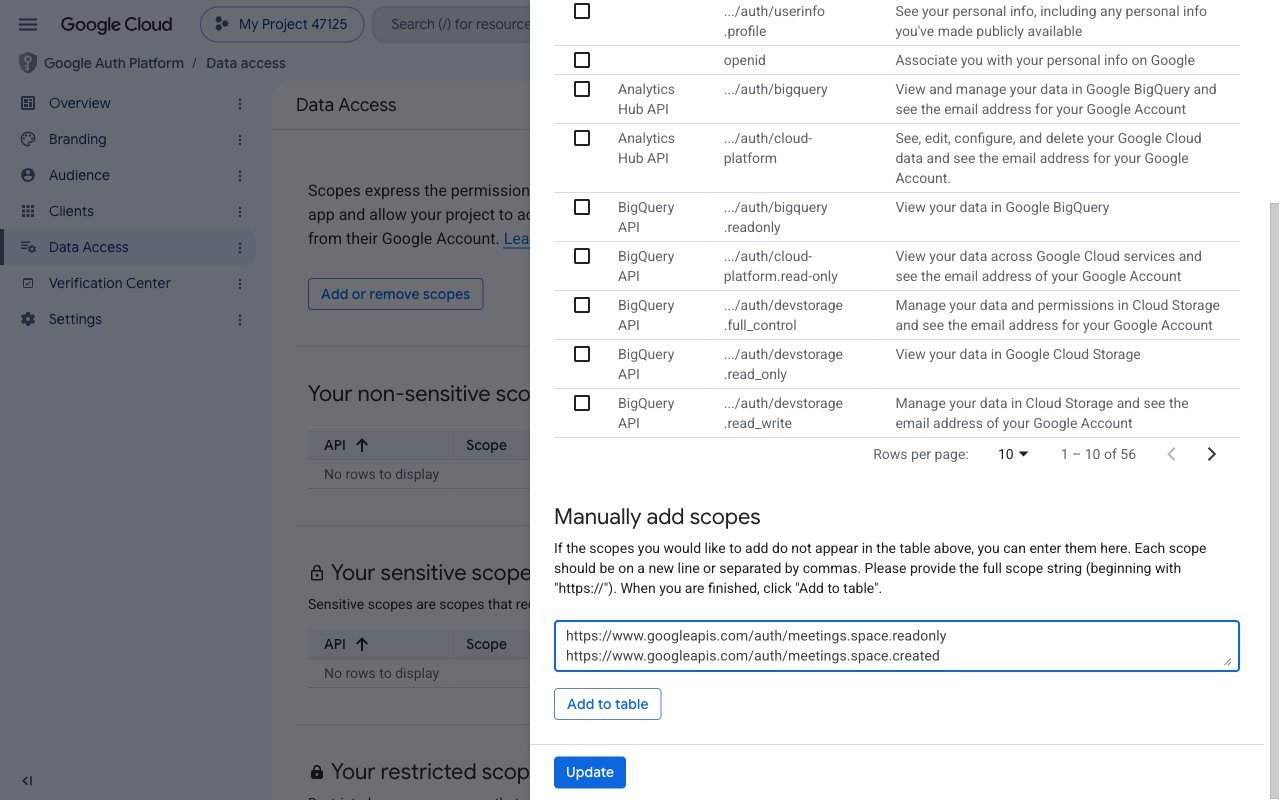
Paste the full scope URLs into the Manually add scopes box (one per line), click Add to table, then click Update to close the panel. Back on the Data Access page, click Save to persist the configuration.
- Format:
https://www.googleapis.com/auth/{scope} - Example:
https://www.googleapis.com/auth/meetings.space.readonly
Create OAuth 2.0 client credentials
Create a Web application OAuth client to obtain the Client ID and Client Secret that StackOne uses to authenticate.
Open Clients and create a new client
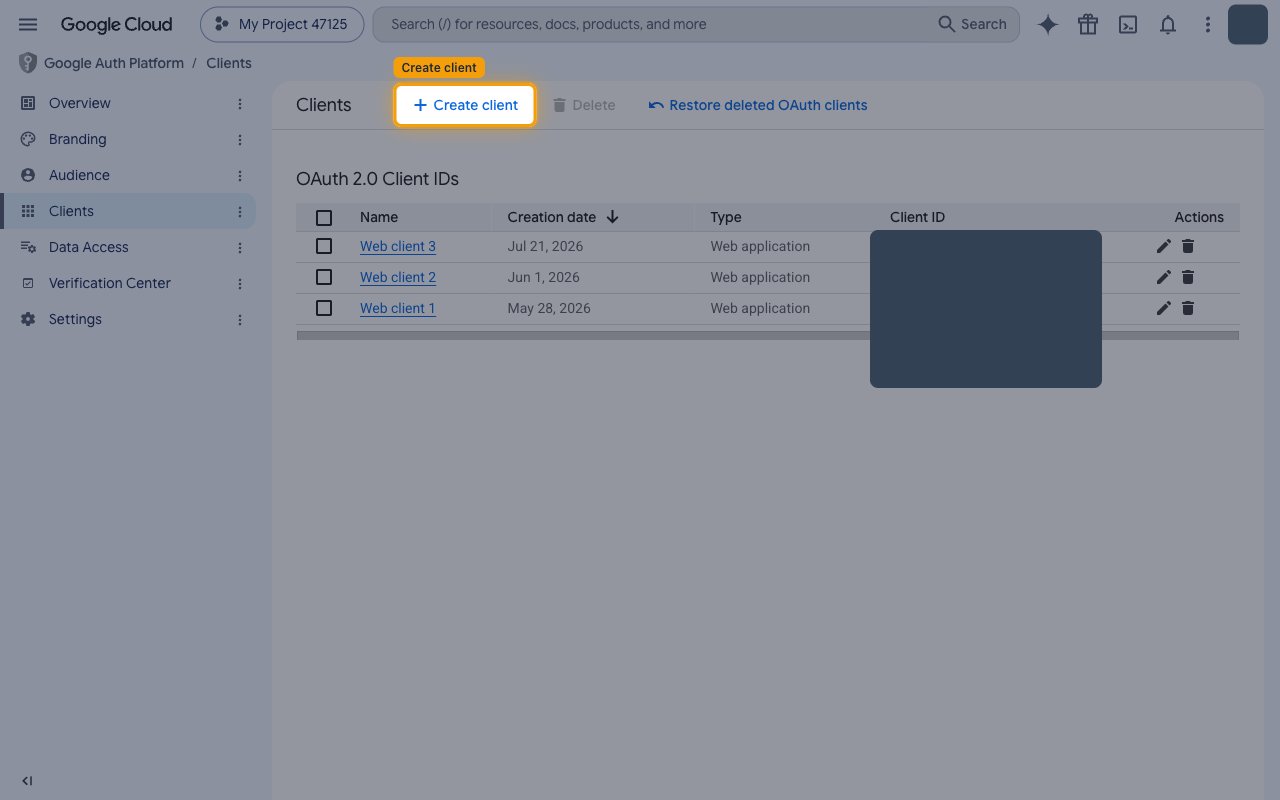
In the Google Auth Platform sidebar, open Clients and click Create client.
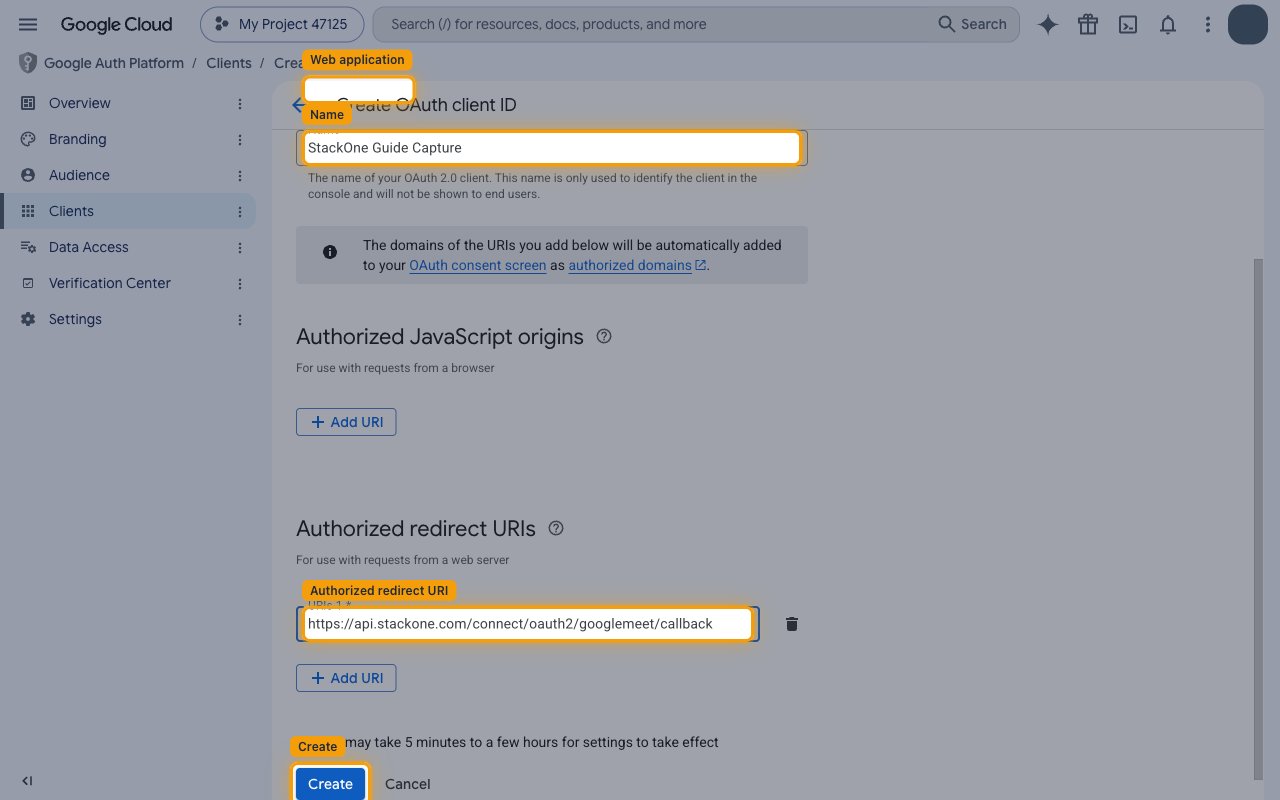
Configure the Web application client
Fill in the client details and register StackOne’s redirect URI.
- Set Application type to Web application.
- Enter a Name for the client (for example, StackOne Google Meet).
- Under Authorized redirect URIs, click Add URI and enter StackOne’s callback URL:
https://api.stackone.com/connect/oauth2/googlemeet/callback - Click Create.
Copy the Client ID and Client Secret
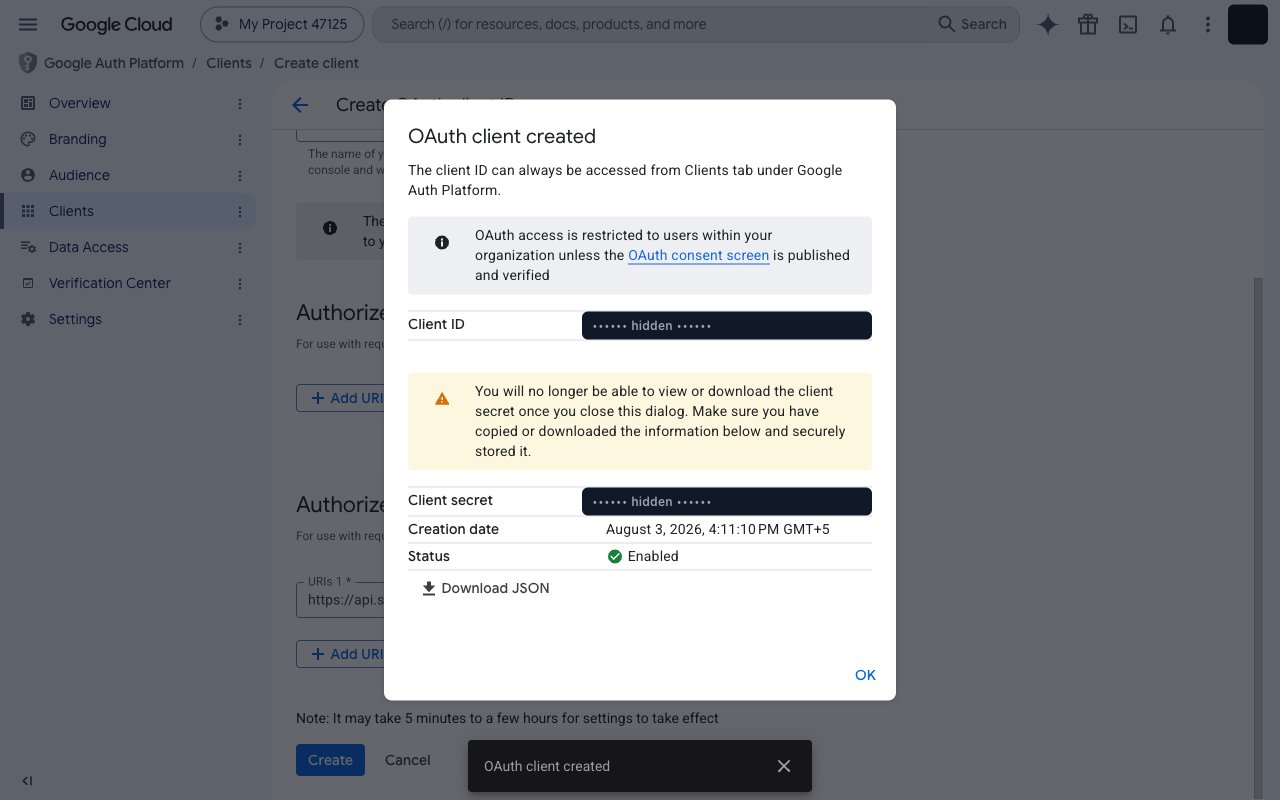
The OAuth client created dialog shows your Client ID and Client secret. Copy both and store them securely.
- The Client secret is only displayed once and cannot be retrieved later — you will no longer be able to view or download it after you close this dialog, so copy it first.
Enter your credentials in StackOne
Enter the values from your OAuth client into the StackOne Connector profile.
- Client ID — the OAuth client’s Client ID; paste it into the Client ID field in the StackOne Connector profile.
- Client Secret — the OAuth client’s Client secret; paste it into the Client Secret field in the StackOne Connector profile.
- Scopes — optional. Leave blank to use the default Google Meet scopes, or enter a space-separated list of scope URLs to override them. Example:
https://www.googleapis.com/auth/meetings.space.readonly https://www.googleapis.com/auth/meetings.space.created
Creating the StackOne Connector Profile
To create the Connector Profile in StackOne for Google Meet:Open the connector
Choose actions and events
- Click Add Profile.
- If the connector offers more than one authentication method, set the Auth Method filter to OAuth 2.0.
- Select the actions, and any events, to enable for this Connector Profile.
- Click Continue.
Set up authentication
- Select Authentication Type as OAuth 2.0.
- Fill out the fields using details retrieved from your provider:
- Client ID
- Client Secret
- Scopes (Optional)
- Click Create Profile.