

Create or select a Google Cloud project
To use the Google People API with OAuth 2.0, you need a Google Cloud project.
Sign in to Google Cloud
Sign in to your Google Cloud Console.
Create or select a project
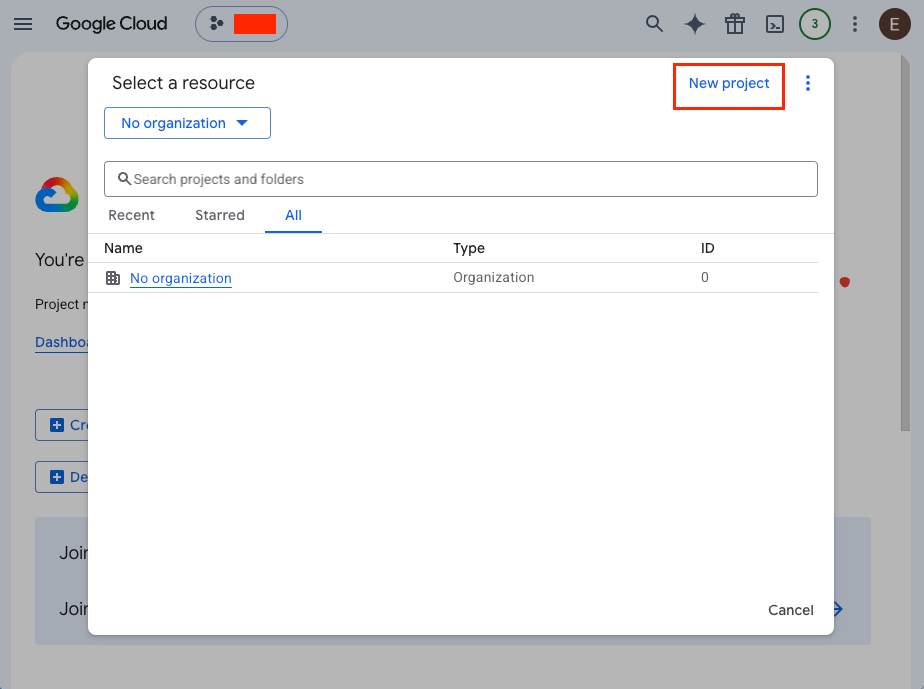
Select an existing project from the dropdown at the top of the page, or create a new one by clicking New Project and filling in the Project name, Organization, and Parent resource fields, then clicking Create.
Enable the Google People API
Enable the Google People API for your project. This step is required whether you created a new project or selected an existing one.
Open the API Library
In the Google Cloud Console, navigate to APIs & Services > Library.
Enable Google People API
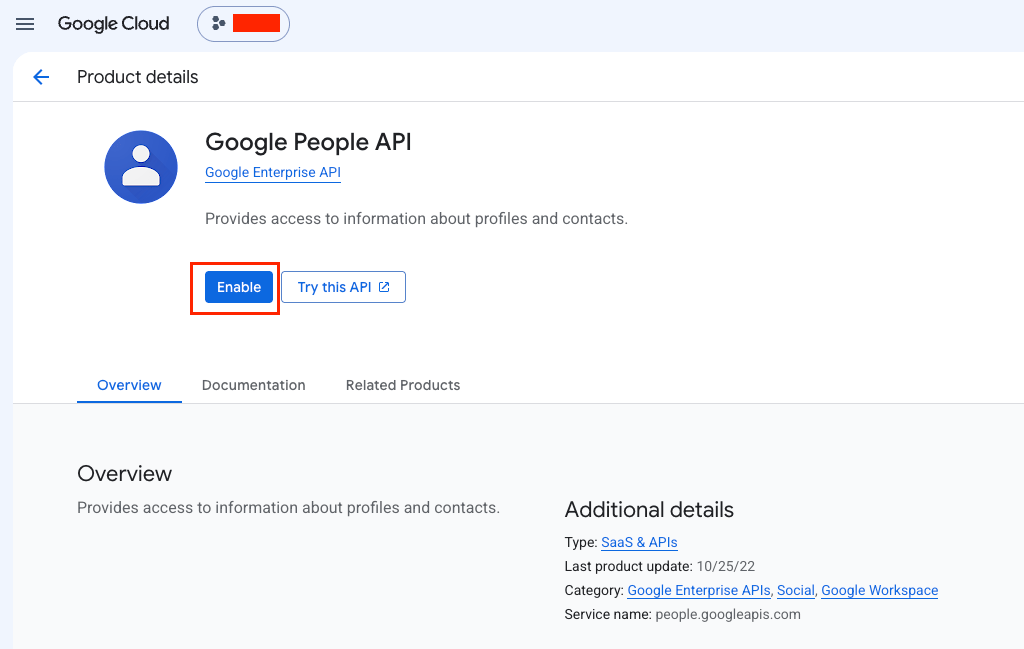
Search for “Google People API” and click on it.
- New project: Click Enable to activate the API.
- Existing project: If the API is already enabled, the button will show Manage. If it shows Enable, click it to enable the API.
Configure Google Auth Platform
Before creating OAuth credentials, ensure the Google Auth Platform is configured.
Navigate to Google Auth Platform
In the Google Cloud Console, go to APIs & Services > OAuth consent screen from the left sidebar. This will open the Google Auth Platform overview page.
Start configuration
If you have already configured the Auth Platform (the OAuth Overview page with usage metrics is shown), skip this step and navigate to the Branding page from the sidebar. Otherwise, you will see a Get started button — click it to begin the configuration process.
Enter app information
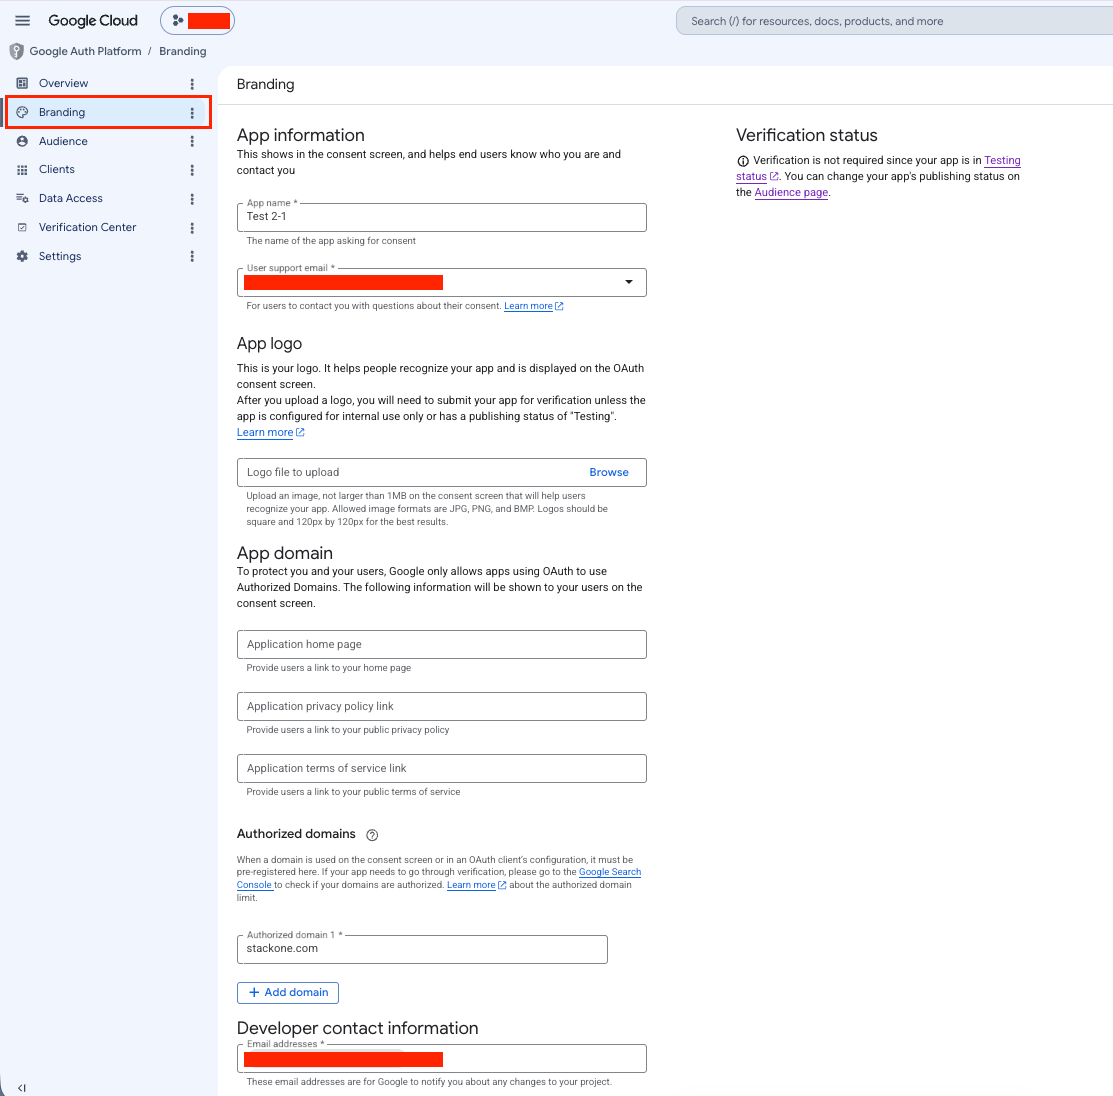
Fill in the required fields.
- App name: Enter a name for your application (e.g., StackOne Integration).
- User support email: Select an email address for user enquiries.
- Click Next to continue.
- Note: If you already have an existing OAuth consent screen configuration, you can edit the details in this and the following steps.
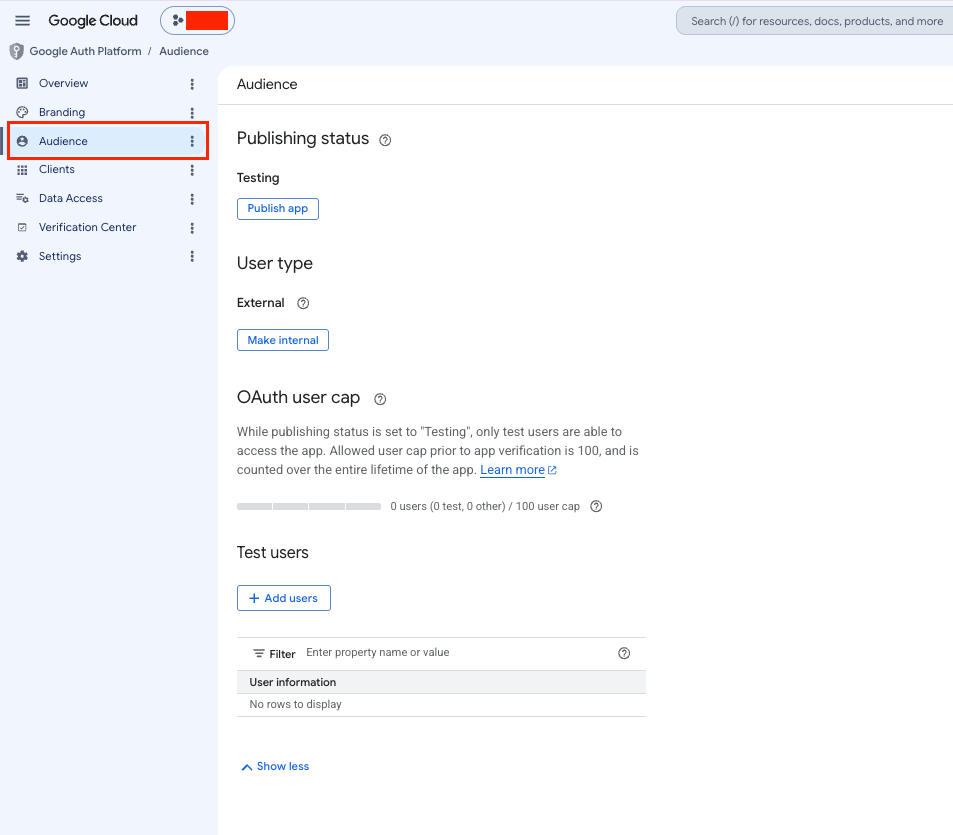
Select audience
Choose the appropriate user type, or go to the Audience page from the left sidebar to select the user type.
- Internal: Only users within your Google Workspace organisation can authorise (no app verification required).
- External: Any Google account can authorise (requires app verification for production use).
Enter contact information
Provide email addresses for Google to notify you about any changes to your project. Click Next to continue.
Finish configuration
Review your settings, agree to the Google API Services User Data Policy, and click Create to complete the setup.
Configure scopes
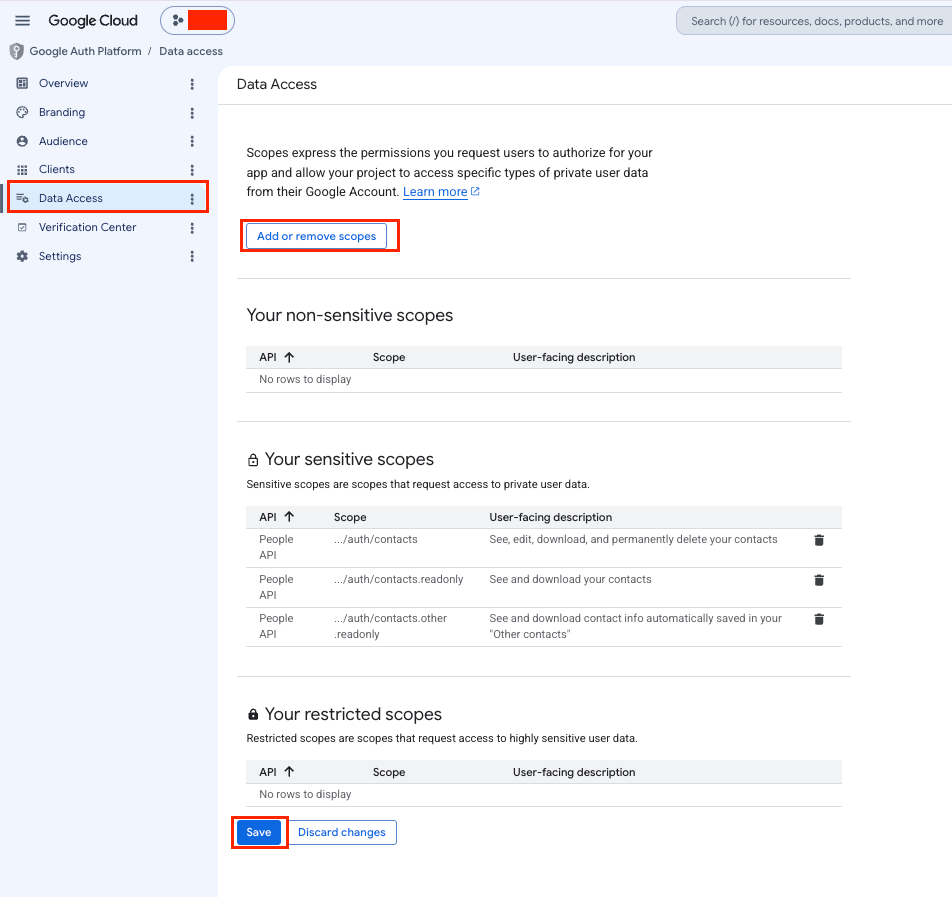
In the Google Auth Platform, go to Data Access and click Add or Remove Scopes to configure the OAuth scopes your application needs.
Add scopes
Add the required Google Contacts scopes for your integration.
Select scopes from the list
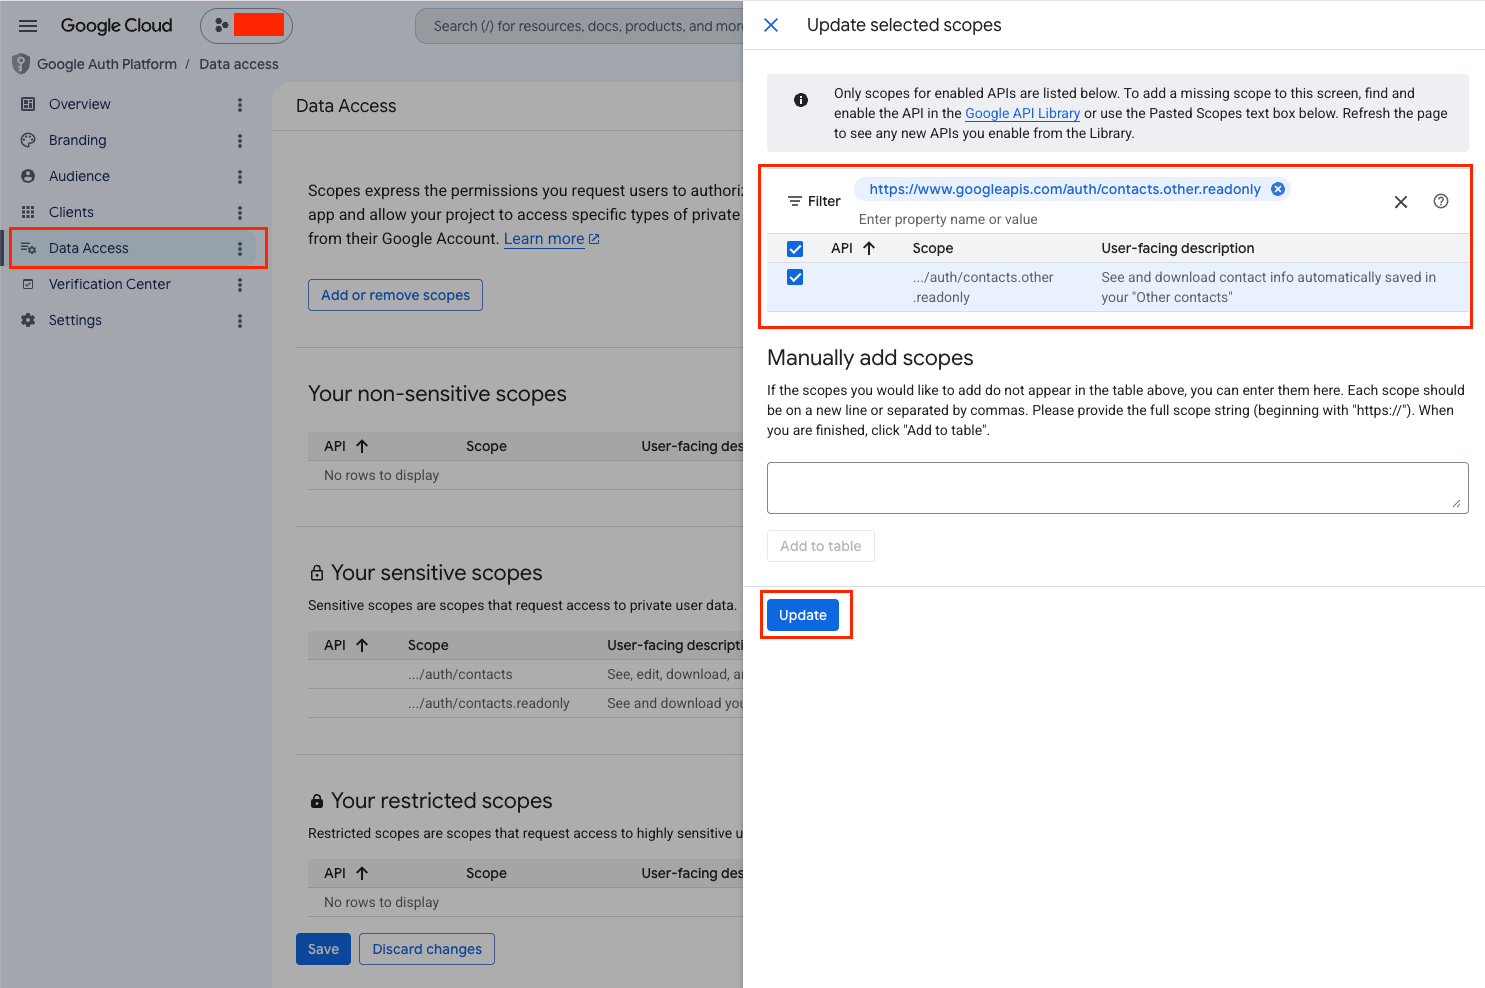
In the Update selected scopes side panel that opens, check the required scopes from the list.
Manually add scopes (if needed)
If a required scope is not shown in the list, use the Manually add scopes section.
- Enter the full scope URL in the input field.
- Click Add to table.
Apply and save
Confirm and save your scope configuration.
- Click Update to apply the selected scopes. The side panel will close.
- On the Data Access page, click Save to persist the scope configuration.
Create OAuth 2.0 client credentials
Set up OAuth client credentials to authenticate with the Google People API. If you already have an existing OAuth 2.0 client, you can reuse it by adding the StackOne redirect URI and generating a new secret.
Navigate to Credentials
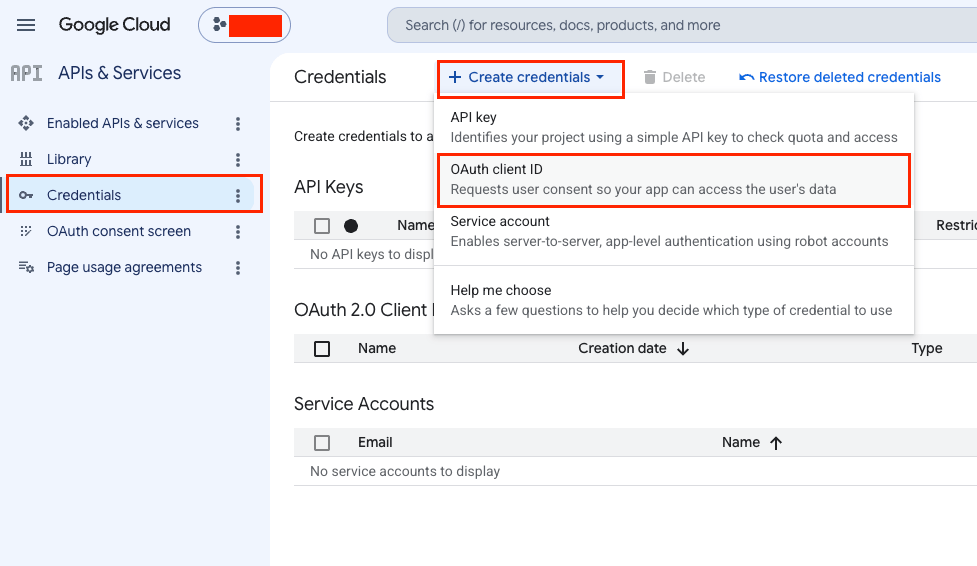
In the Google Cloud Console, go to APIs & Services > Credentials.
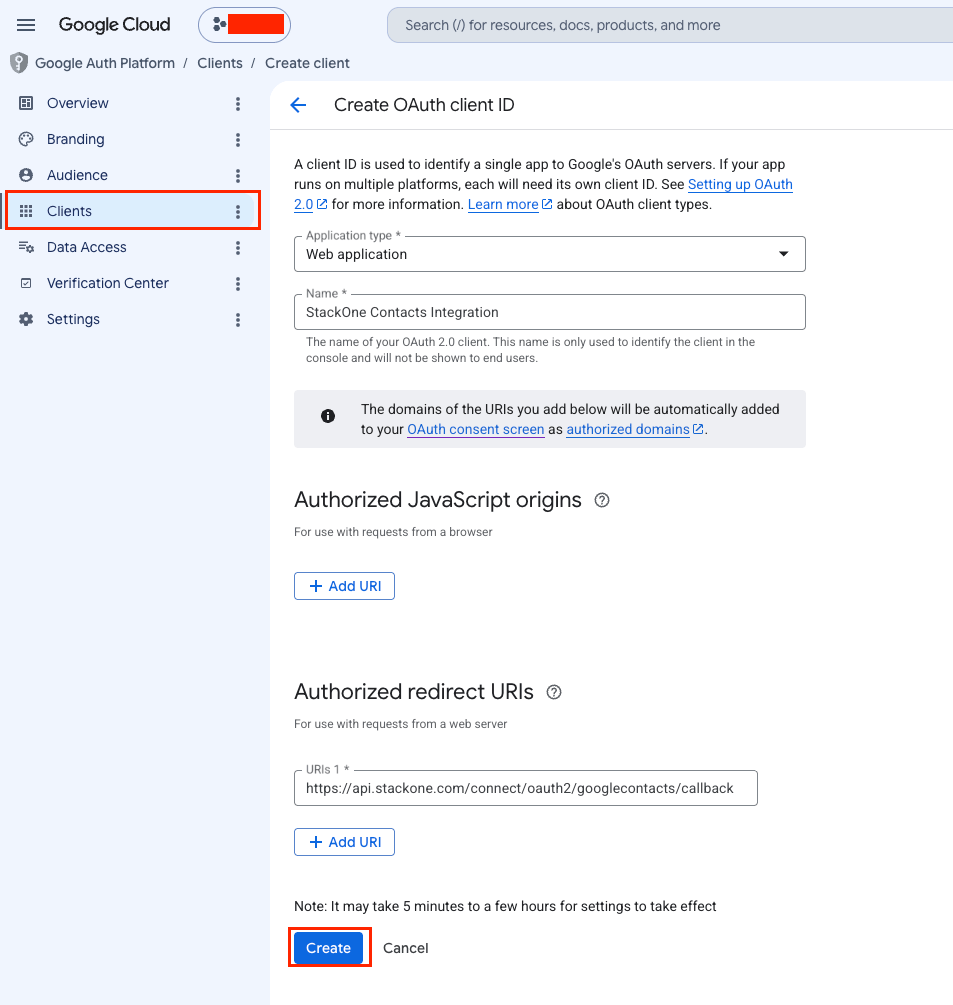
Option A — Create a new OAuth client
Skip this step if you are using an existing client.
- Click + Create Credentials and select OAuth client ID.
- Select Web application as the application type.
- Enter a Name for your OAuth client (e.g., StackOne Contacts Integration).
- Under Authorized redirect URIs, click Add URI and enter
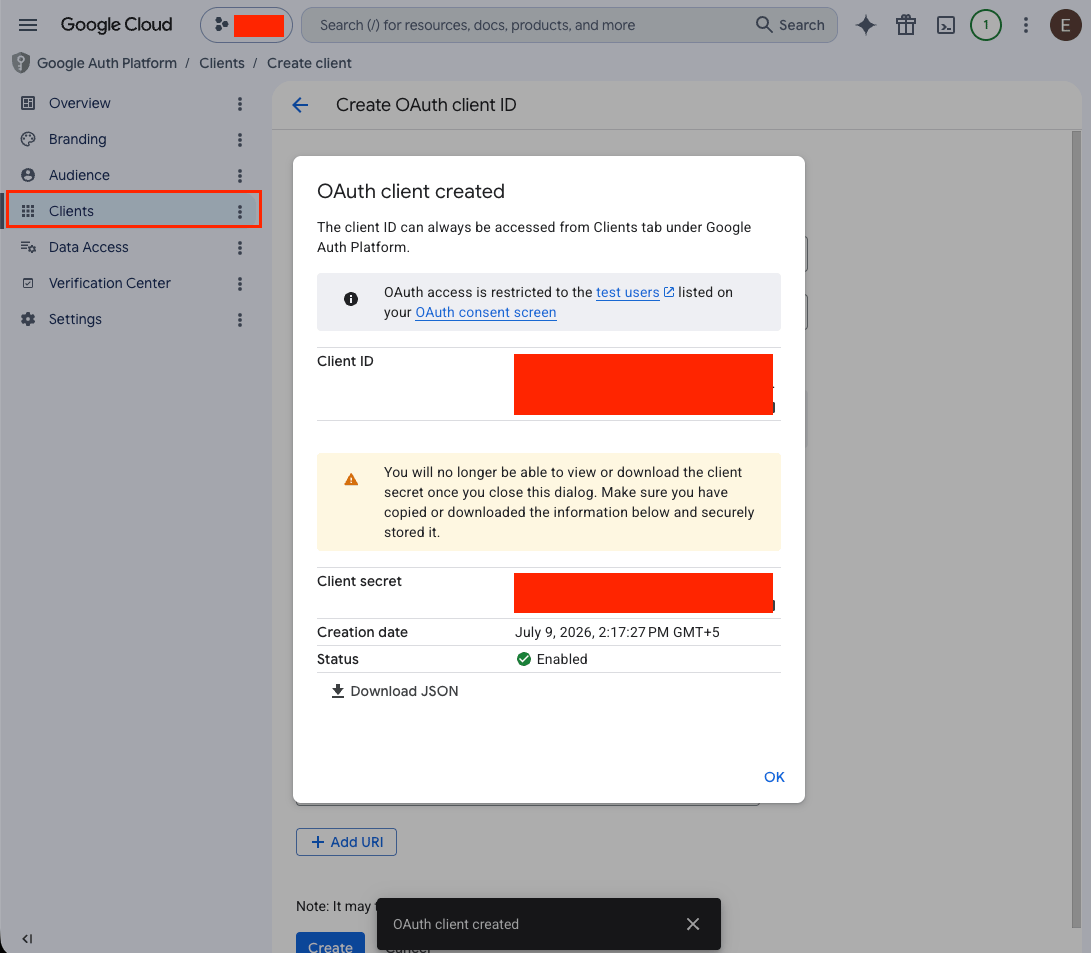
https://api.stackone.com/connect/oauth2/googlecontacts/callback. - Click Create. A dialogue will display your Client ID and Client Secret — copy and store them securely.
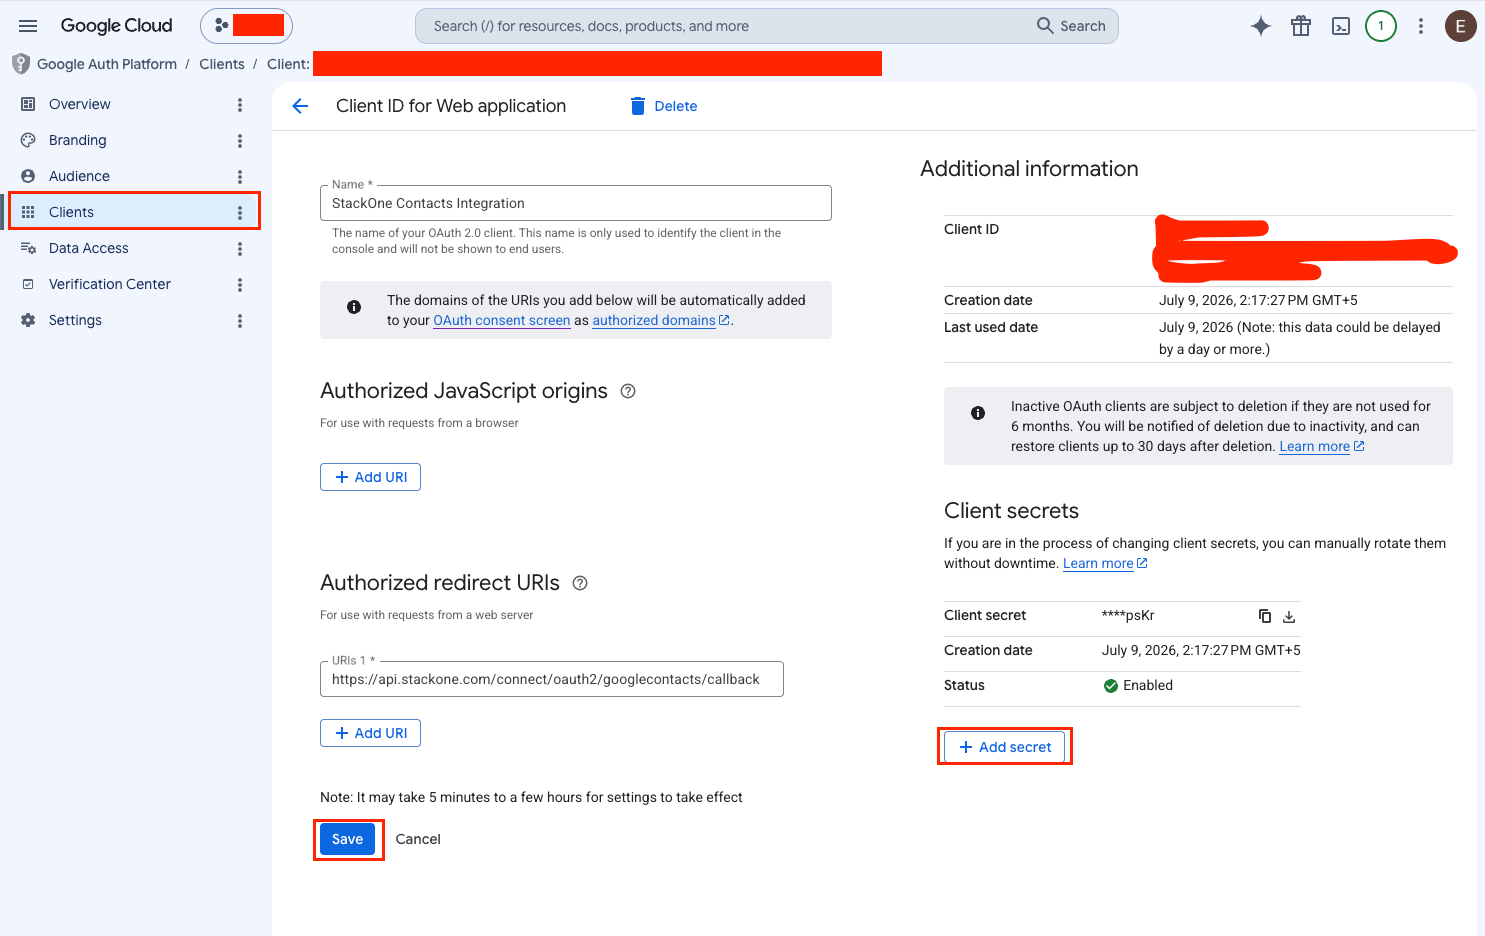
Option B — Use an existing OAuth client
Skip this step if you created a new client above.
- Click on your existing OAuth 2.0 client ID from the list.
- Under Authorized redirect URIs, click Add URI, enter
https://api.stackone.com/connect/oauth2/googlecontacts/callback, and click Save. - Under Client secrets, click + Add secret to generate a new secret. Copy and store it securely — it will not be shown again.
- Your Client ID is shown on the same page under Additional information.
Creating the StackOne Connector Profile
To create the Connector Profile in StackOne for Google Contacts:Open the connector
Choose actions and events
- Click Add Profile.
- If the connector offers more than one authentication method, set the Auth Method filter to OAuth 2.0.
- Select the actions, and any events, to enable for this Connector Profile.
- Click Continue.
Set up authentication
- Select Authentication Type as OAuth 2.0.
- Fill out the fields using details retrieved from your provider:
- Client ID
- Client Secret
- Scopes (Optional)
- Click Create Profile.