

Creating an OAuth client
Cal.com issues a Client ID and Client Secret when you create an OAuth client, and reviews the
client before it can be used.
1
Start a new OAuth client
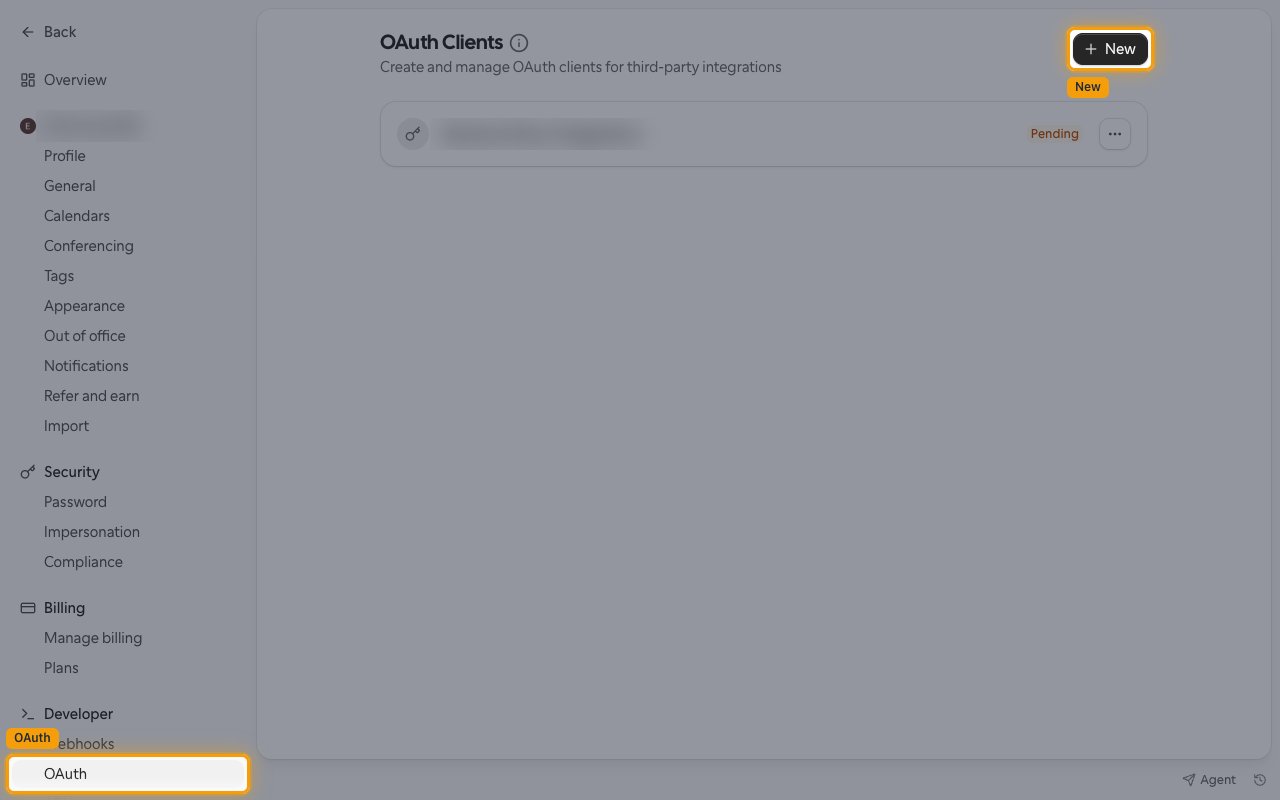
2
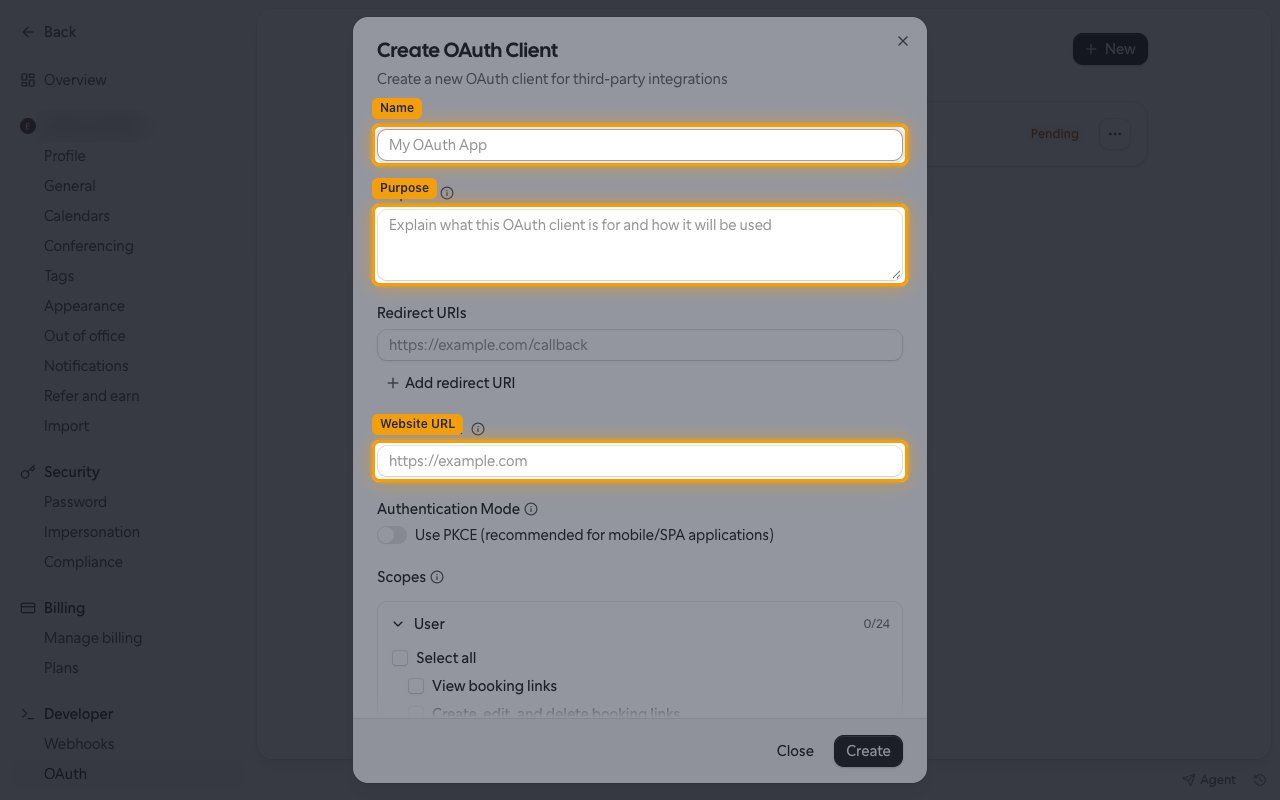
Fill in the client details
Describe the client in the Create OAuth Client dialog.
- Name:
StackOne Integration - Purpose: What this client is for and how it will be used
- Website URL: Your company website
3
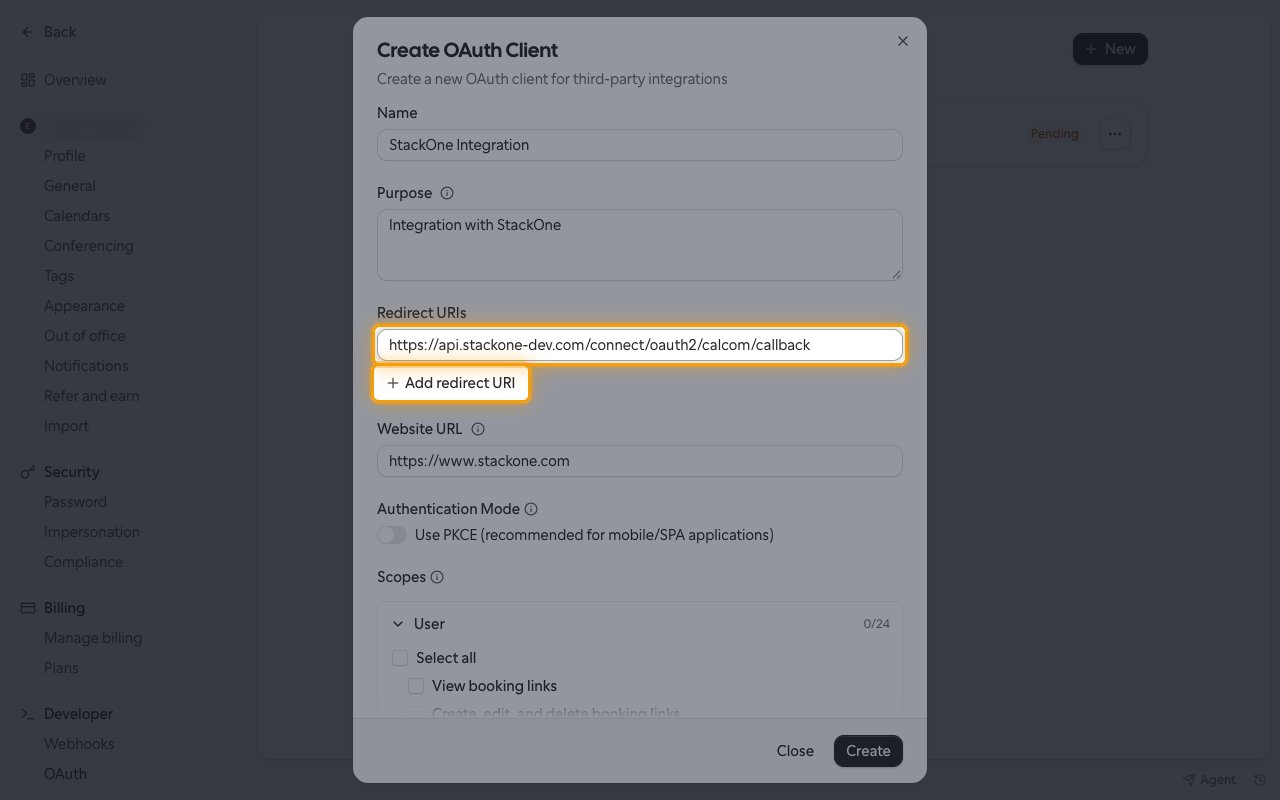
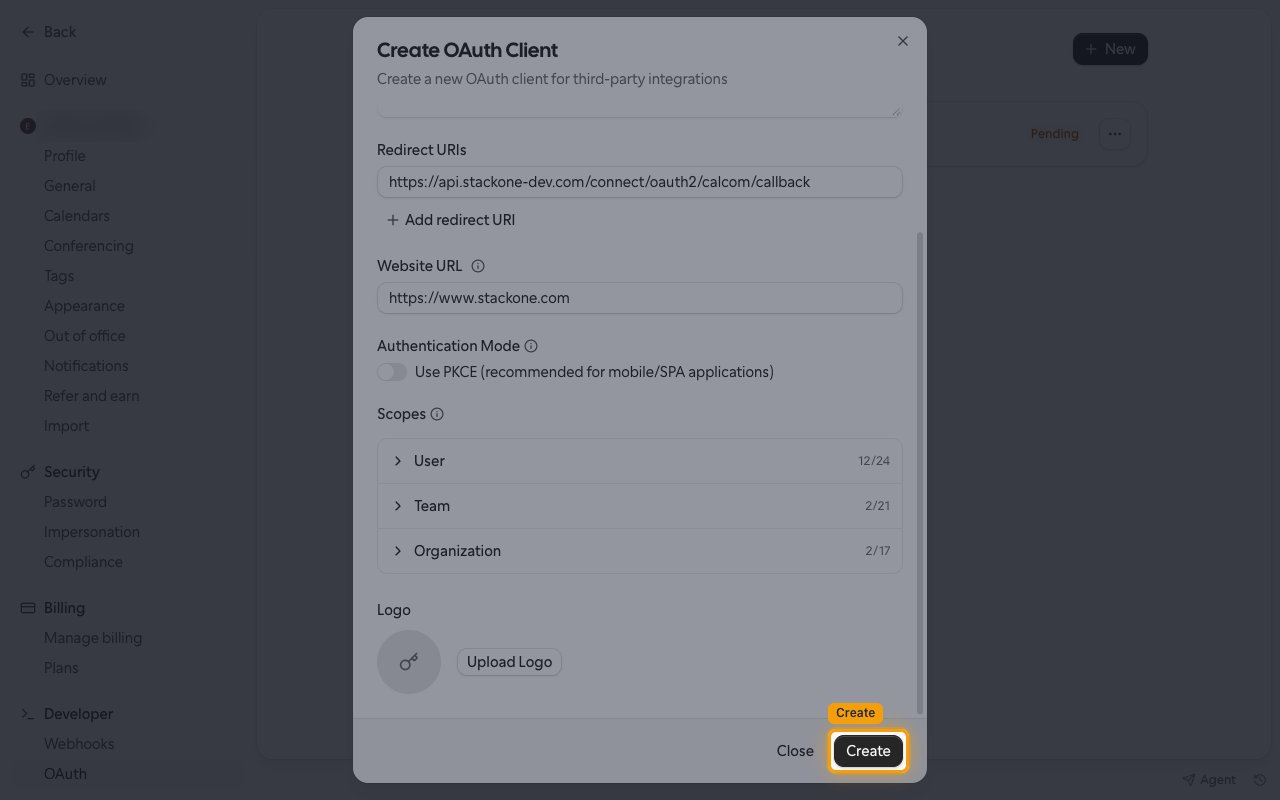
Add the redirect URI
Under Redirect URIs, enter the Callback URL from your Connector Profile.
- Click Add redirect URI to register another one.
- Cal.com matches each redirect URI exactly as registered and rejects wildcards, so register the full URL.
4
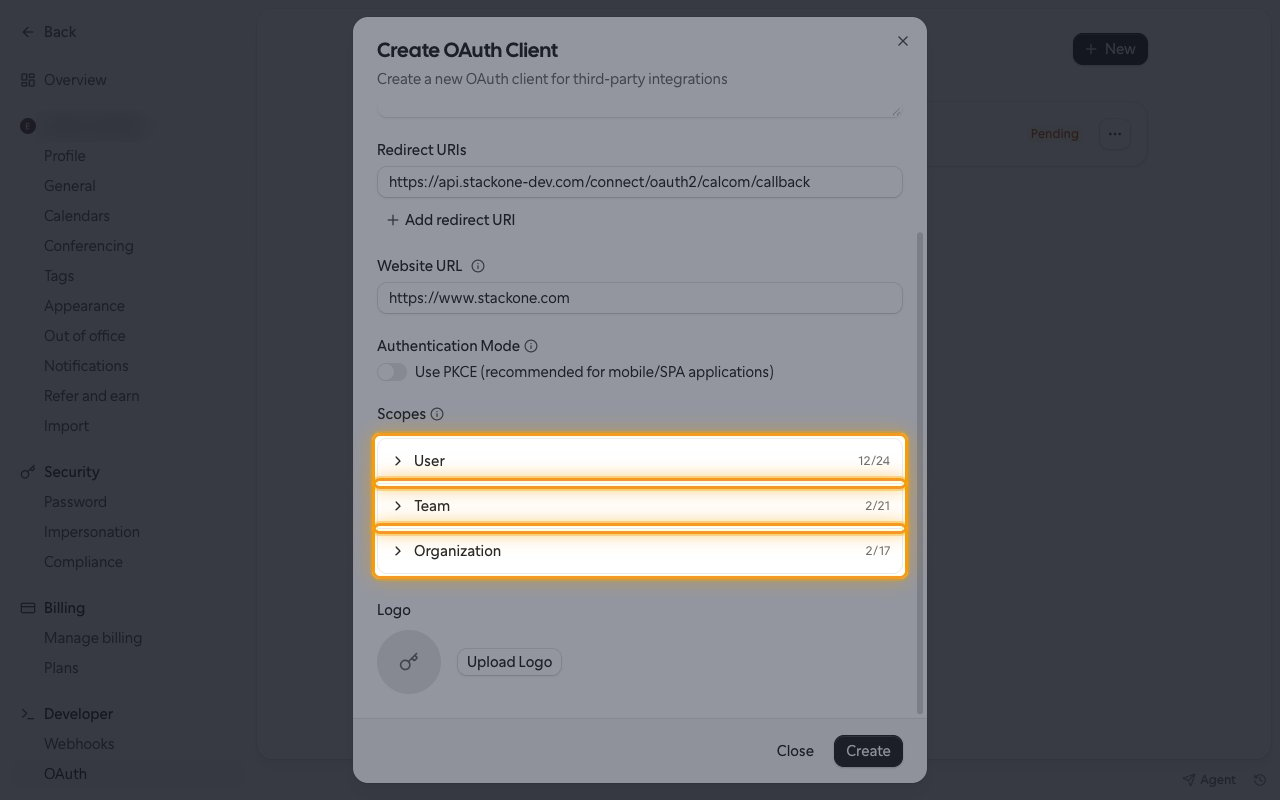
Select the scopes
Enables actions: Add Booking Attendee, Add Booking Guests, Check Calendar Connection, Confirm Booking, Connect Conferencing App, Create Event Type, Create Out Of Office Entry, Create Schedule, Create Webhook, Decline Booking, Delete Event Type, Delete Out Of Office Entry, Delete Schedule, Delete Webhook, Disconnect Calendar, Disconnect Conferencing App, Get Booking Attendee, Get Booking Attendees, Get Calendar OAuth URL, Get Conferencing OAuth URL, Get Current User, Get Default Conferencing App, Get Default Schedule, Get Event Type, Get Schedule, Get Team, Get Unified Credentials, Get Unified Group, Get Unified Organization, Get Unified User, Get Webhook, List Bookings, List Calendars, List Conferencing Apps, List Event Types, List Out Of Office Entries, List Schedules, List Teams, List Unified Groups, List Unified Organizations, List Unified Resource Types, List Unified Resource Users, List Unified Users, List Webhooks, Set Default Conferencing App, Update Current User, Update Event Type, Update Out Of Office Entry, Update Schedule, Update Webhook
Under Scopes, select the permissions this integration needs.
- Expand User, Team and Organization.
- Select each scope listed.
5
Create the client
Click Create.
6
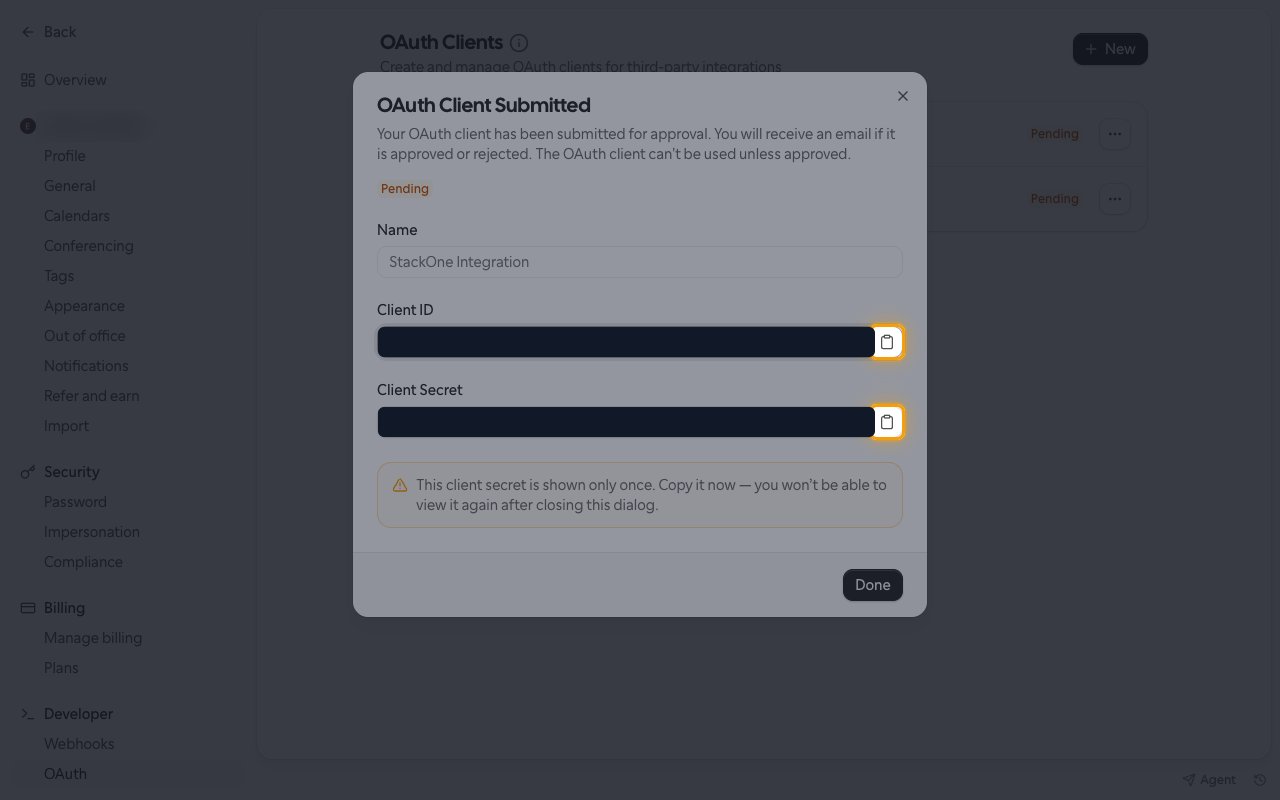
Copy the client credentials
Copy the Client ID and Client Secret into your Connector Profile.
- The Client Secret is shown only once and cannot be viewed again after the dialog closes.
- Click Done.
Create the StackOne Connector Profile
1
Create a Connector Profile
Enable the connector and create a Connector Profile in your project. See Setup Connector Profile.
2
Link an Account
Once the Connector Profile is created, continue to link an account.