

Creating an Attentive app
Create a custom app in Attentive, then enable distribution to generate its OAuth credentials.
1
Create the app
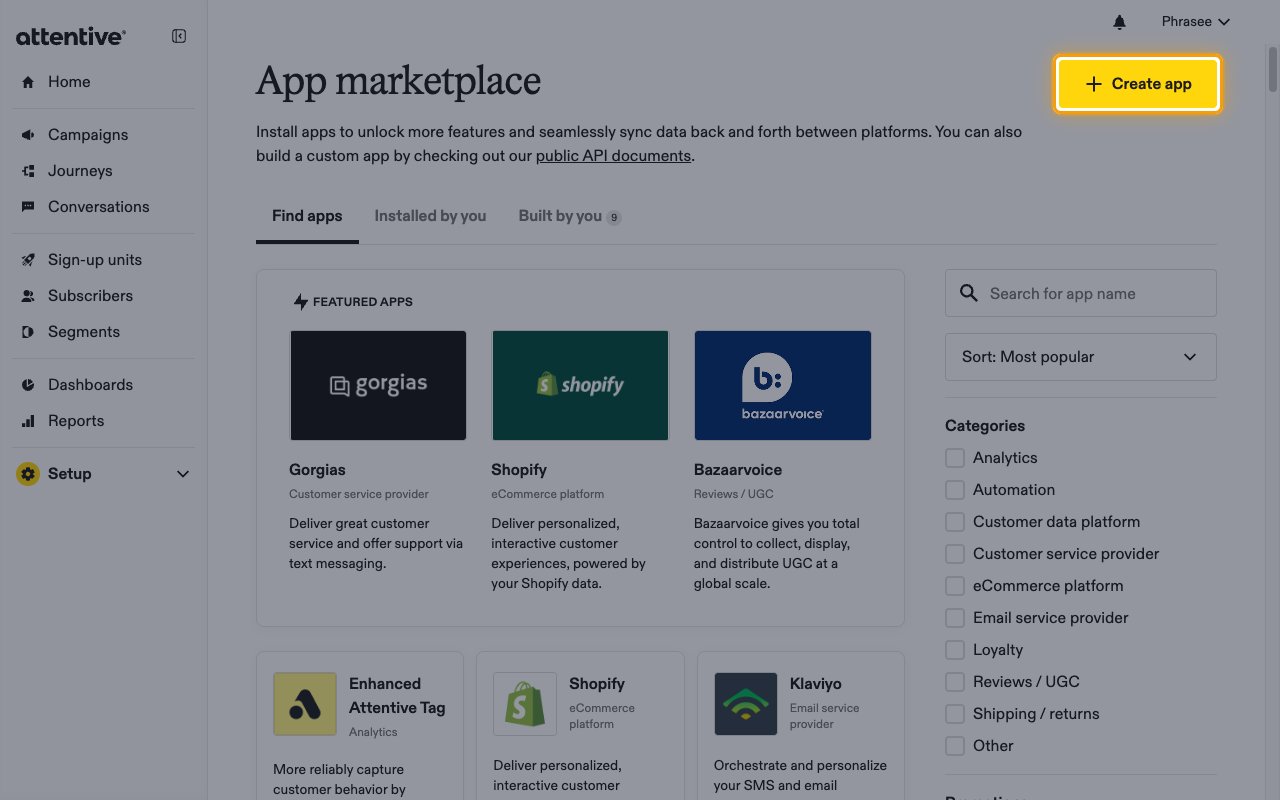
Sign in to your Attentive account, which opens the App marketplace.
- Click Create app.
- App name:
StackOne Integration - Contact email: the email address Attentive should contact about the app
2
Set the permissions
Enables actions: Add A Deletion Request, Add To Cart, Bulk Update User Attributes, Create Or Update User With Attributes, Get A CCPA Delete Request By Id, Get Custom Attributes, Get Subscription, Lookup Product Catalog Ingestion, Product View, Purchase, Send Custom Event, Set Custom Attributes, Subscribe User, Unsubscribe Subscriptions For A User, Upload Product Catalog, View Recent Catalog Uploads
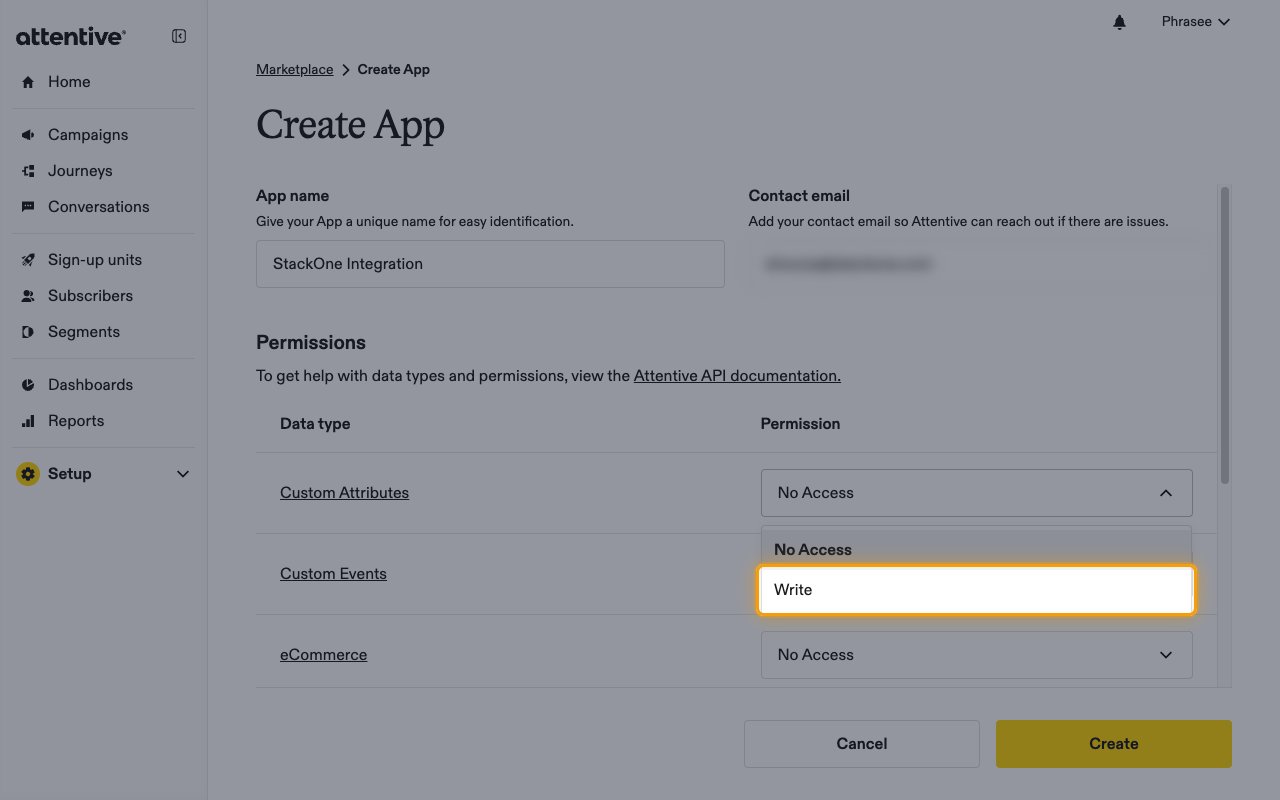
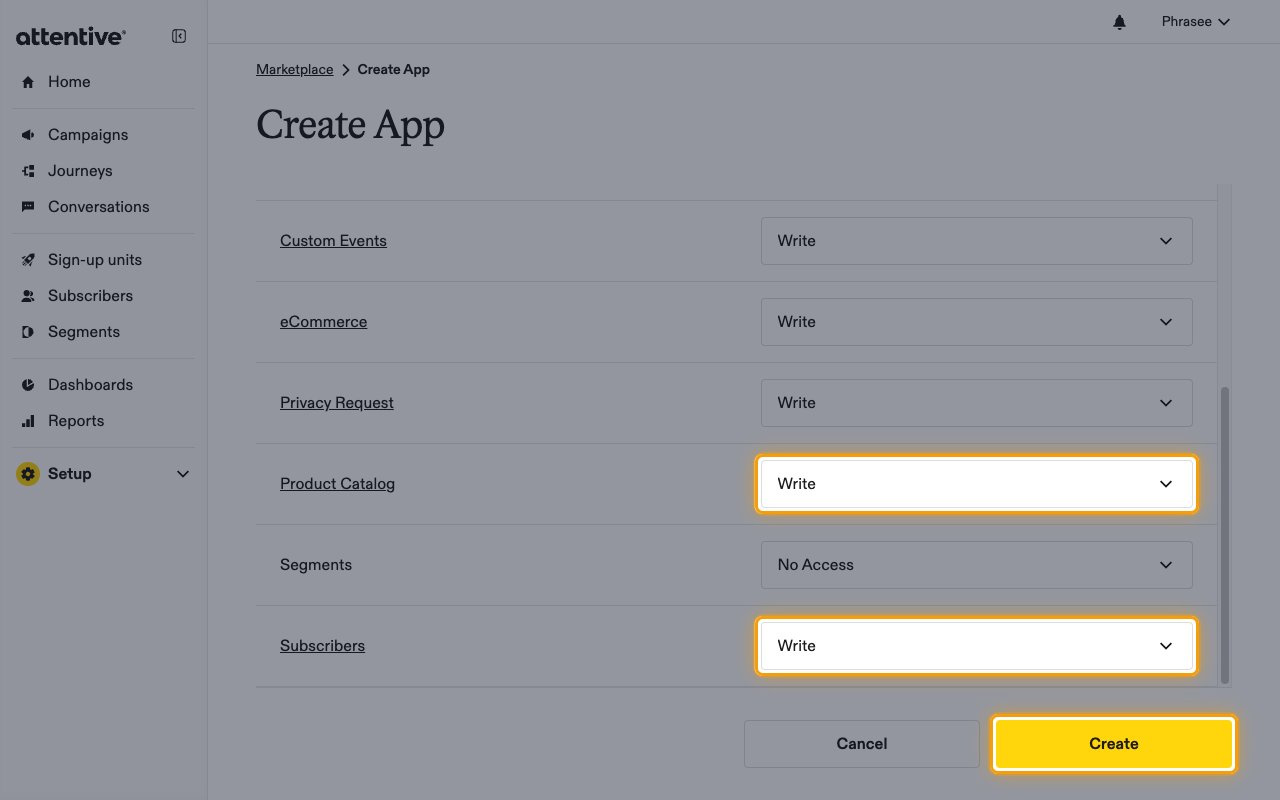
In the Permissions table, open the Permission dropdown for each data type below and select Write.
- Custom Attributes
- Custom Events
- eCommerce
- Privacy Request
- Product Catalog
- Subscribers
3
Save the app
Click Create.
- Close the Copy API key dialog.
4
Add the redirect URL
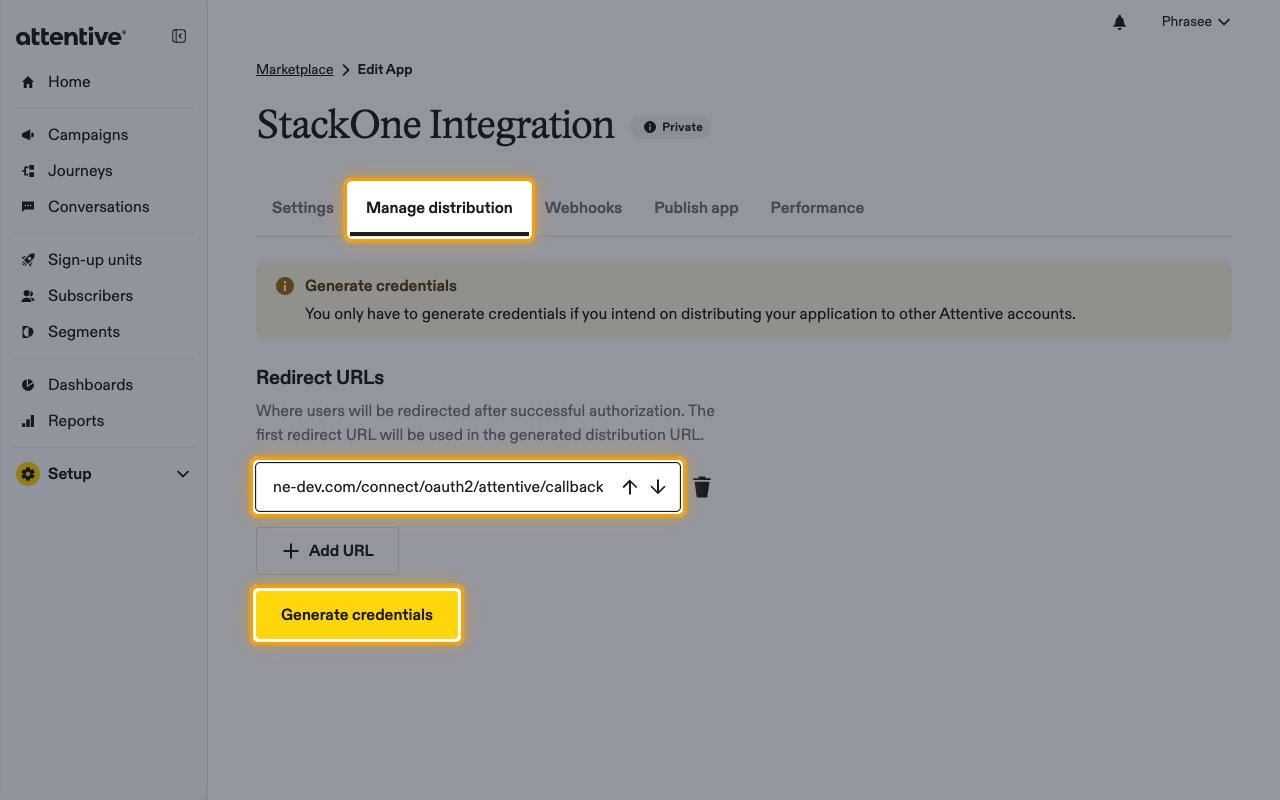
Open the Manage distribution tab of the app.
- In Redirect URLs, enter the Callback URL from your Connector Profile.
- Click Generate credentials.
5
Copy the credentials
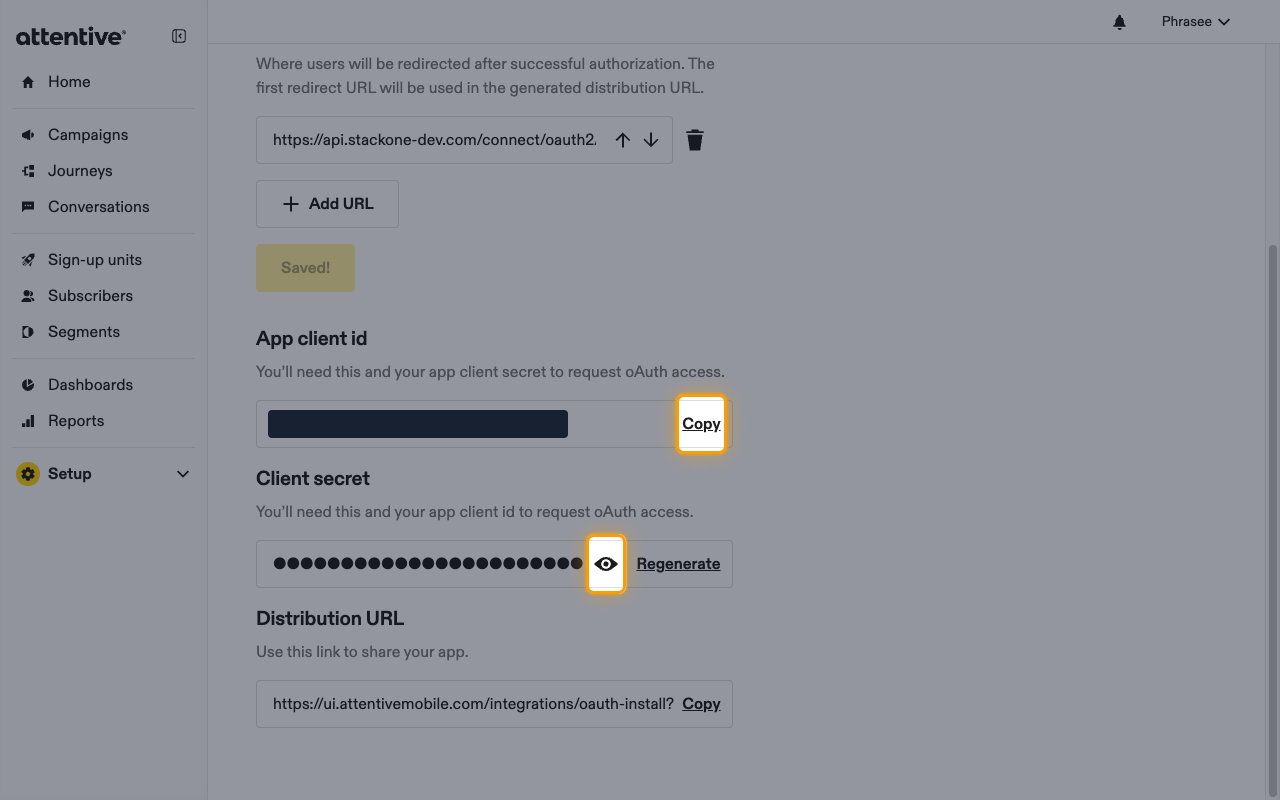
Copy the App client id and Client secret into your Connector Profile.
- Click Copy next to App client id.
- Click the eye icon next to Client secret to show it.
Create the StackOne Connector Profile
1
Create a Connector Profile
Enable the connector and create a Connector Profile in your project. See Setup Connector Profile.
2
Link an Account
Once the Connector Profile is created, continue to link an account.