

Find Your Subdomain
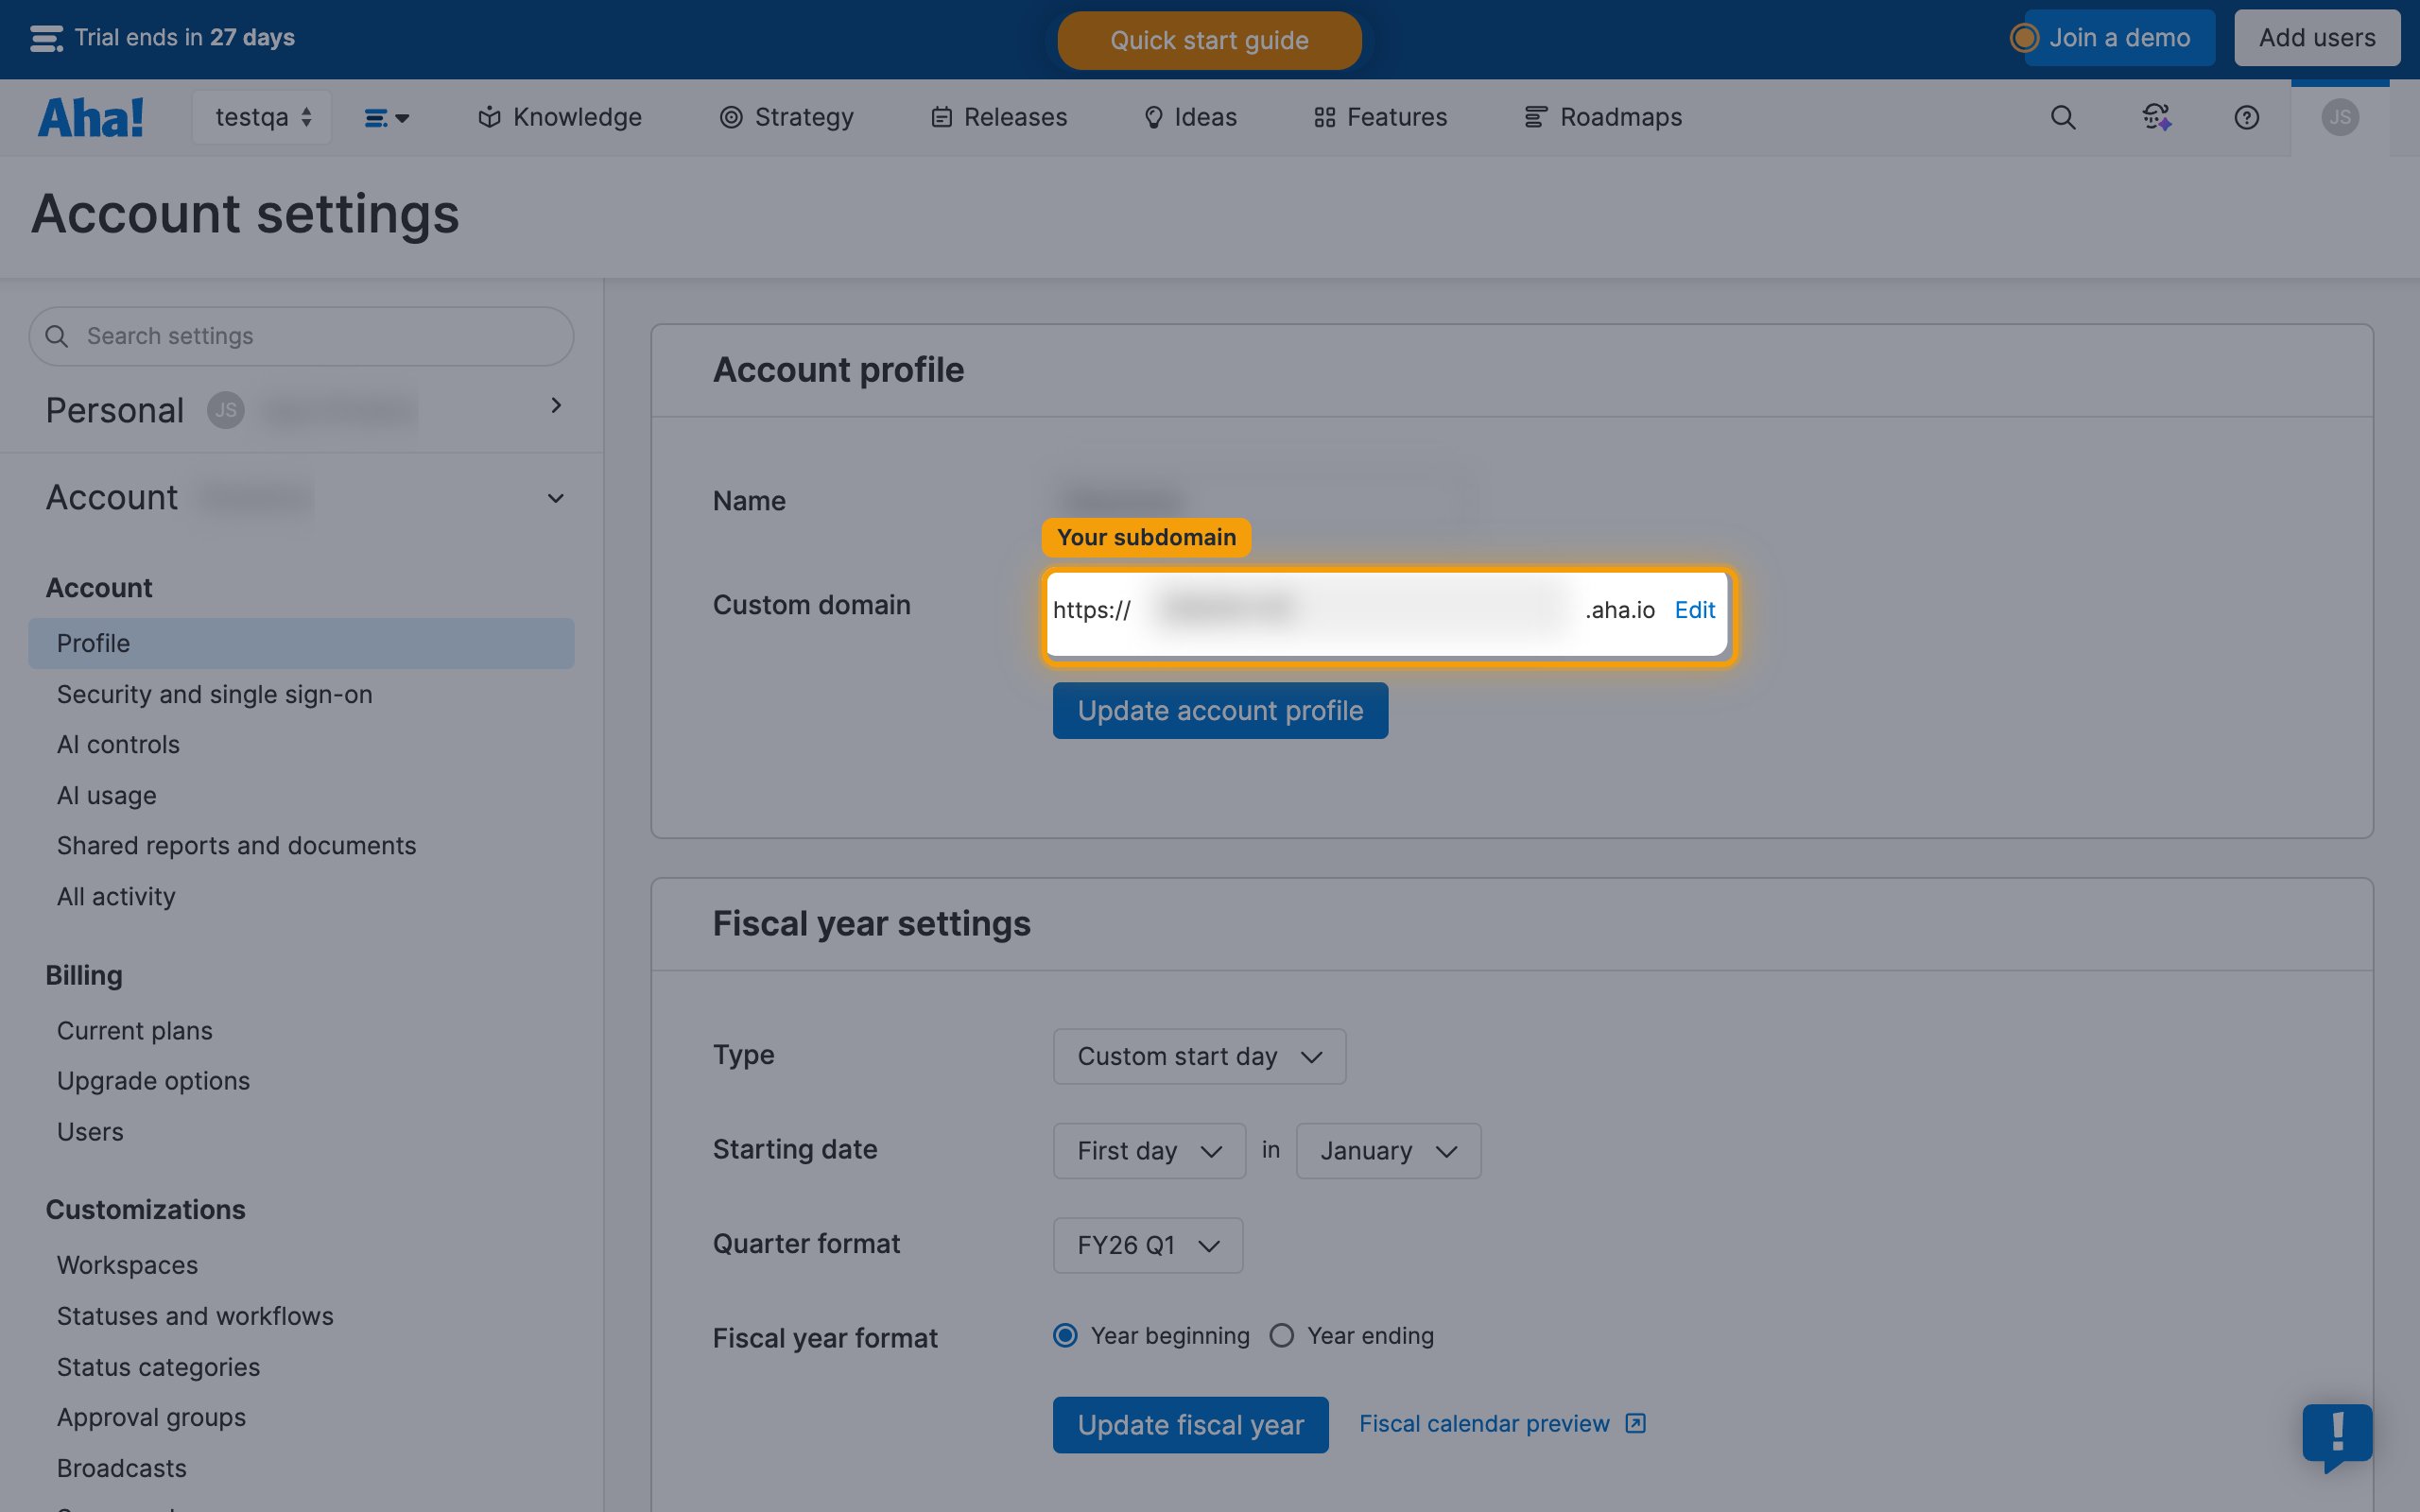
Identify your Aha! subdomain for the connection.
- Your subdomain is the part before
.aha.ioin your Aha! URL. - For example, if your URL is
https://acme.aha.io, your subdomain is acme. - Account administrators can confirm it under Settings > Account > Profile, in the Custom domain field.
Register OAuth 2.0 Application
Create an OAuth 2.0 application in your Aha! account to obtain your Client ID and Client Secret.
Sign in to Aha!
Sign in to your Aha! account. You can also reach it by entering your workspace subdomain followed by .aha.io in your browser — the same value you enter as Aha! Subdomain on the StackOne Hub form.
Open your personal settings
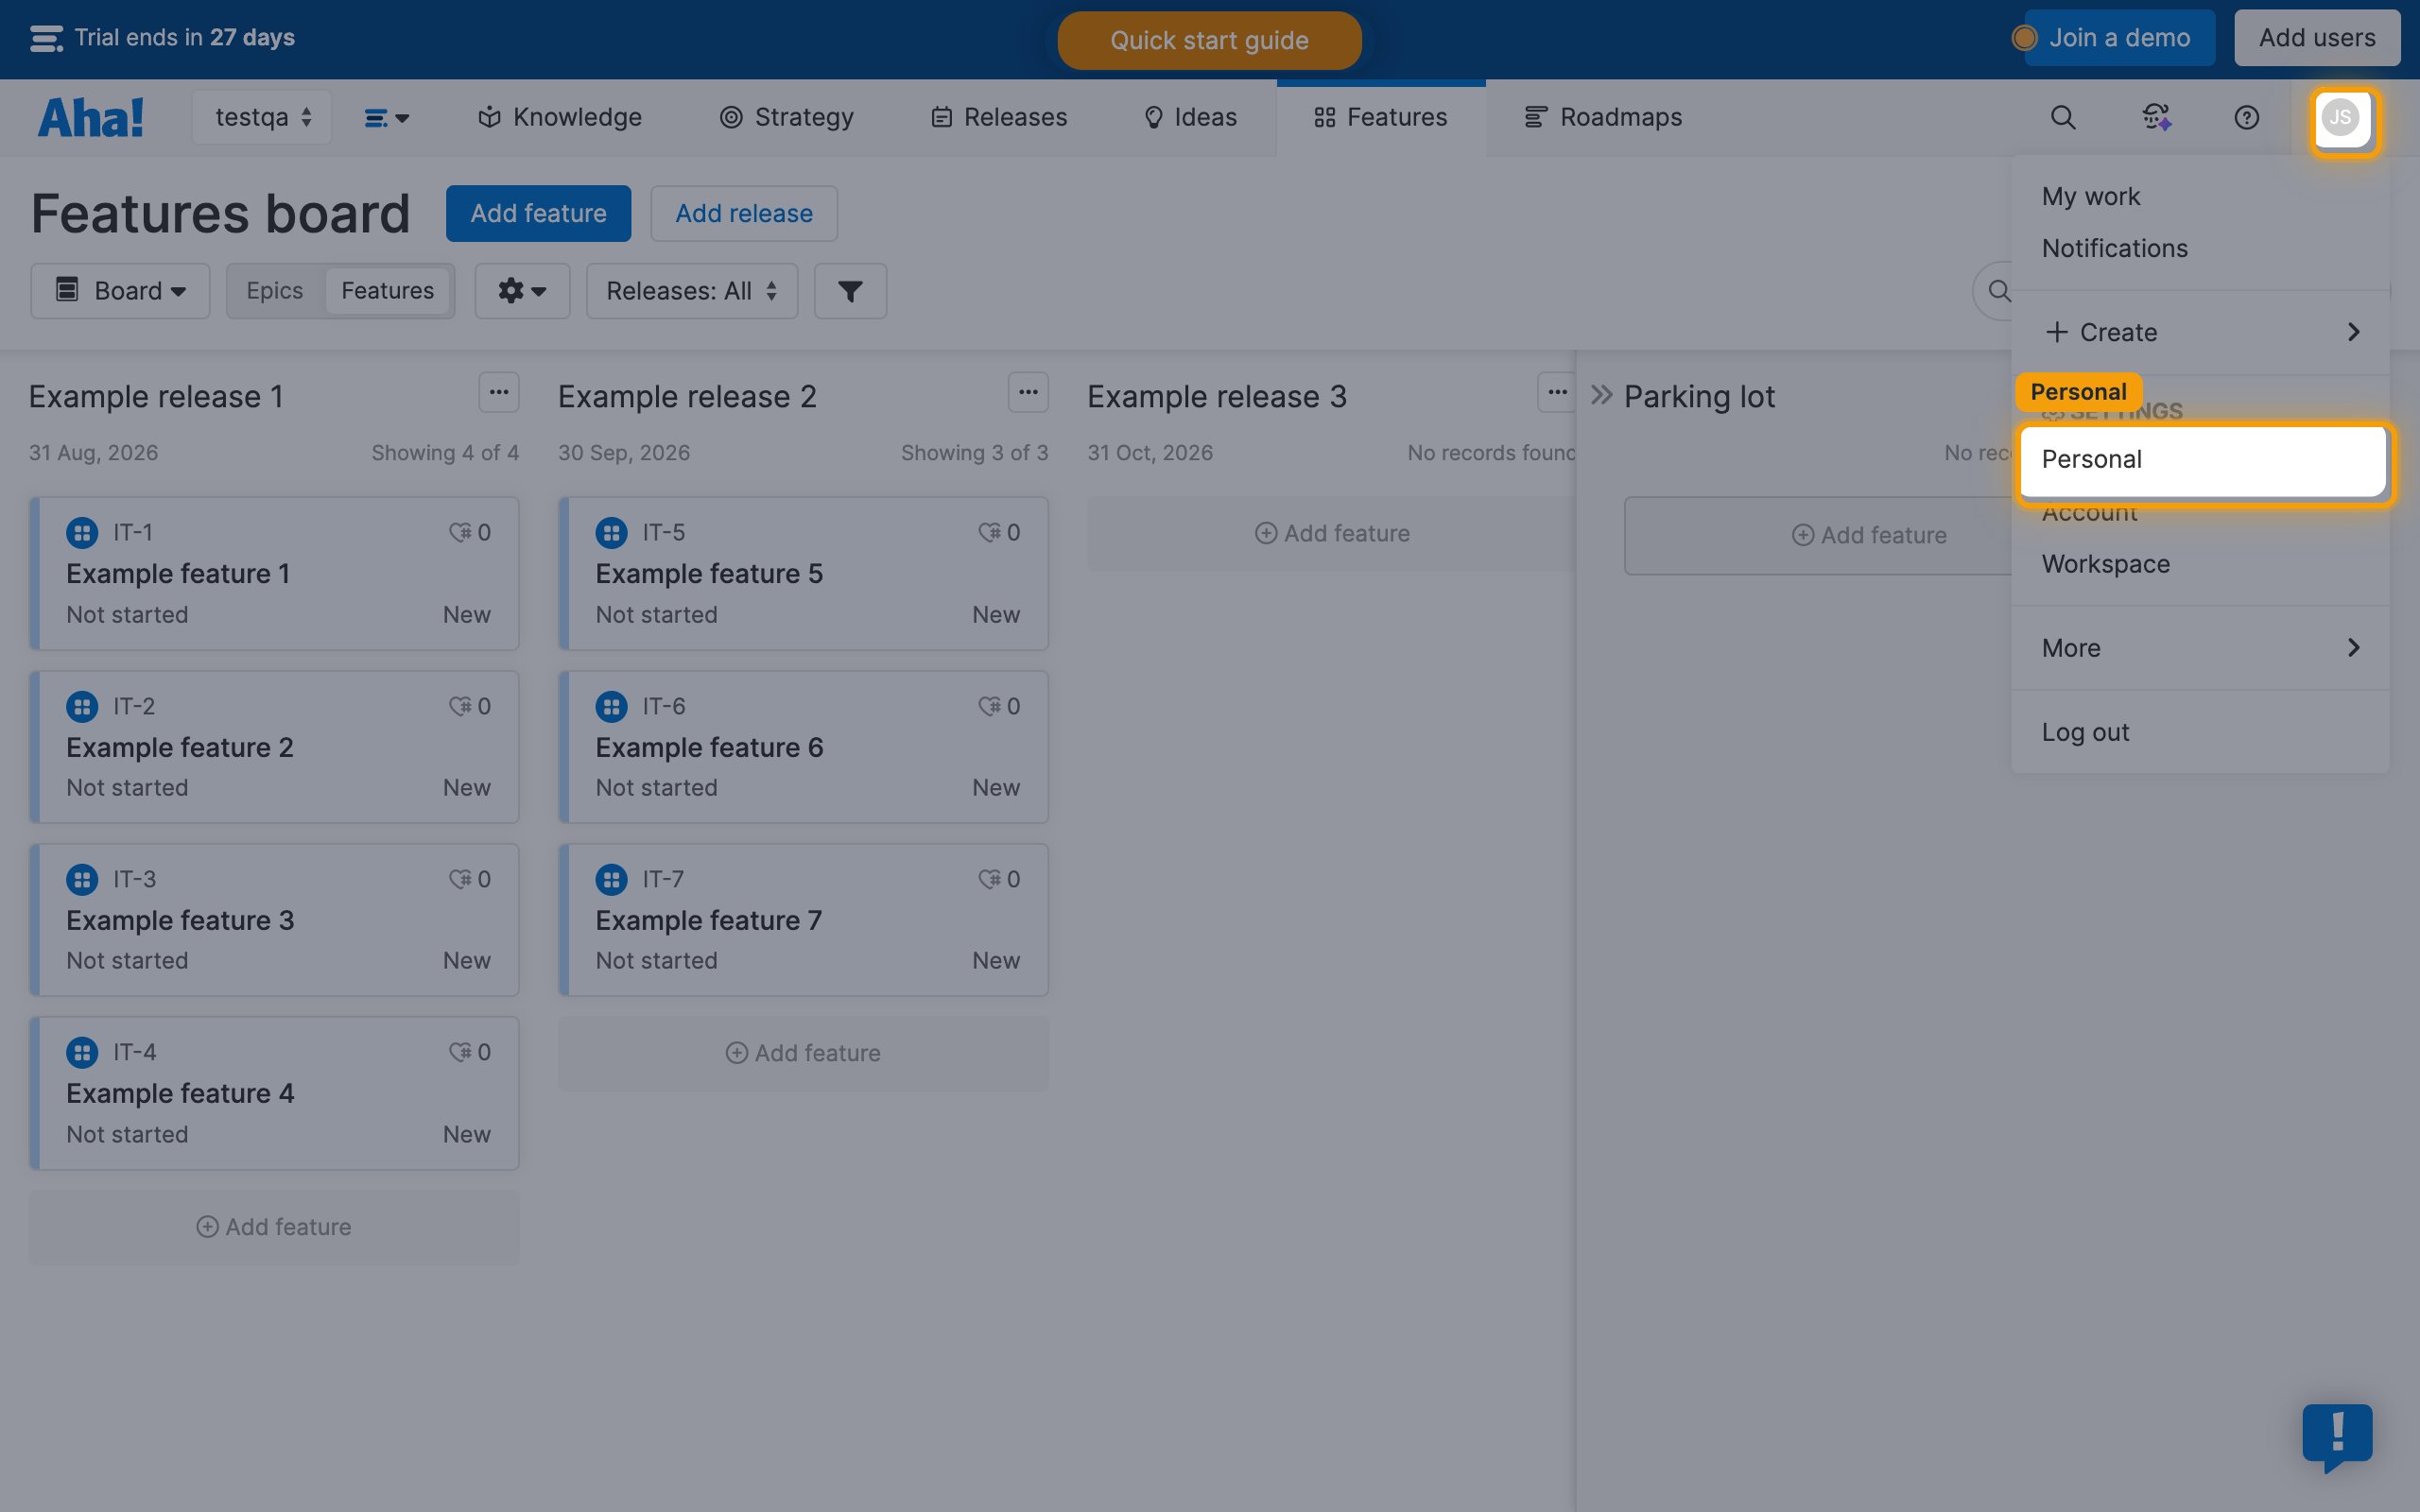
Click your profile icon in the top right corner, then click Personal under Settings in the dropdown menu.
Open the Developer tab
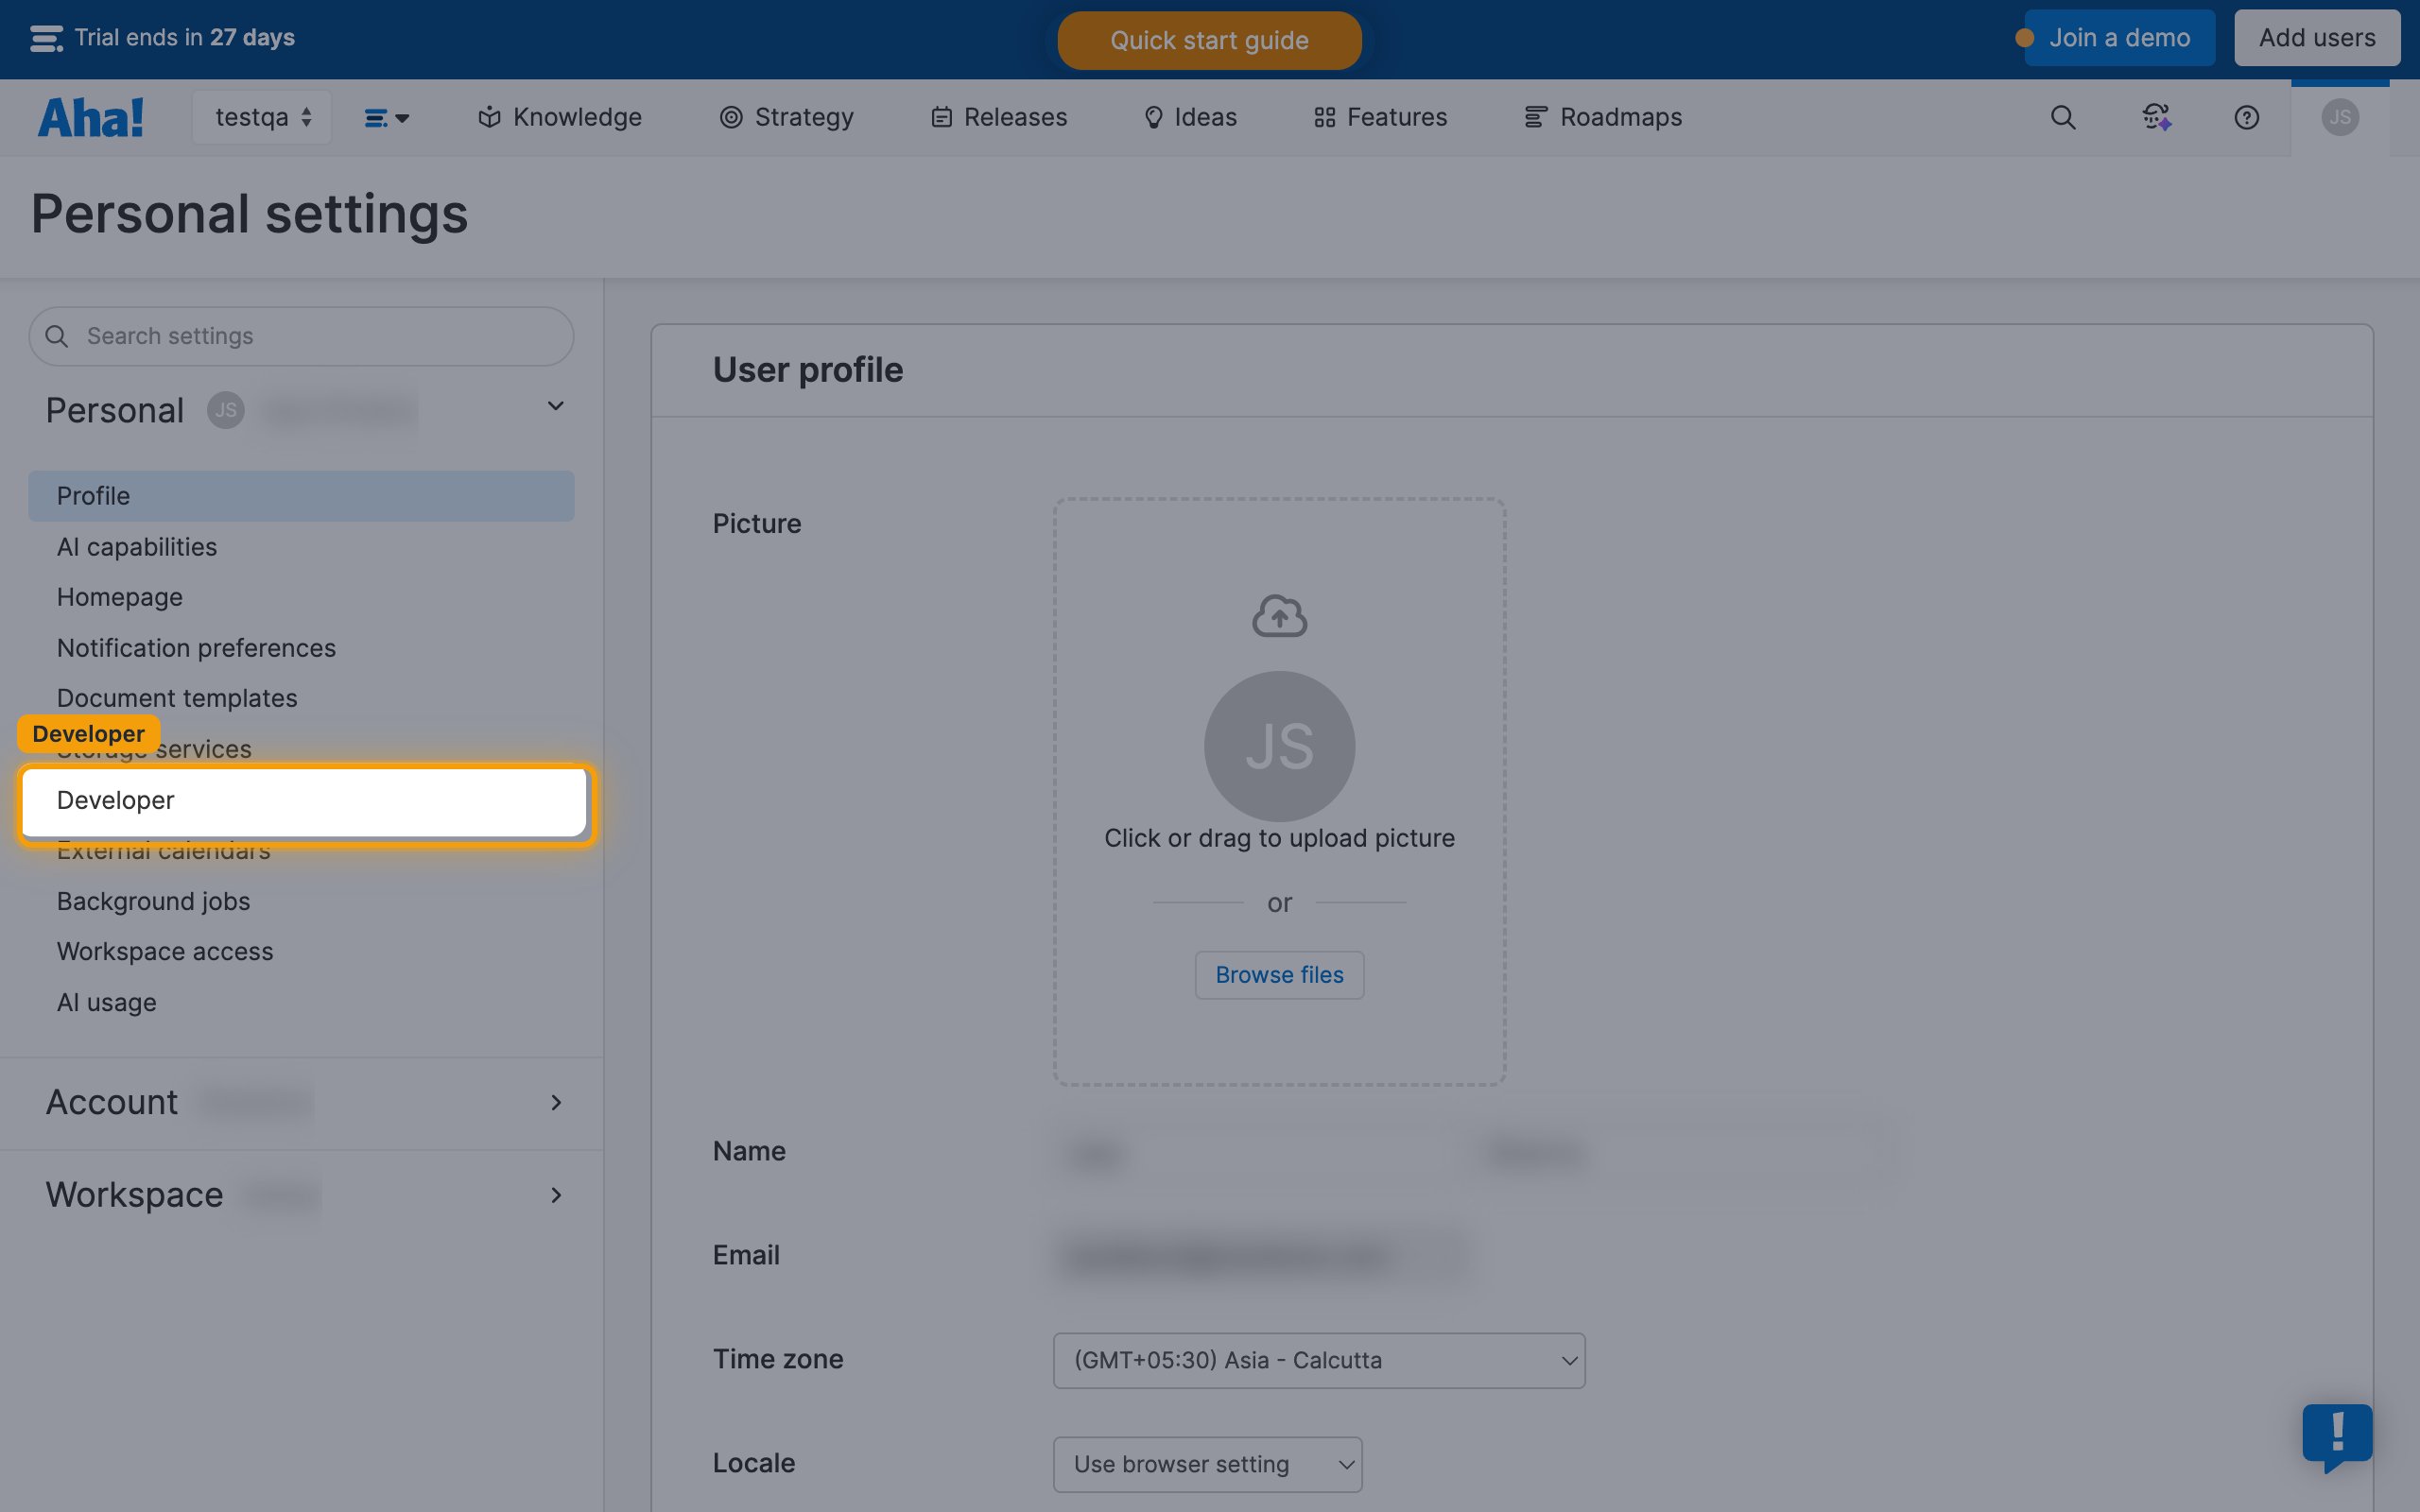
On the Personal settings page, click Developer in the left sidebar.
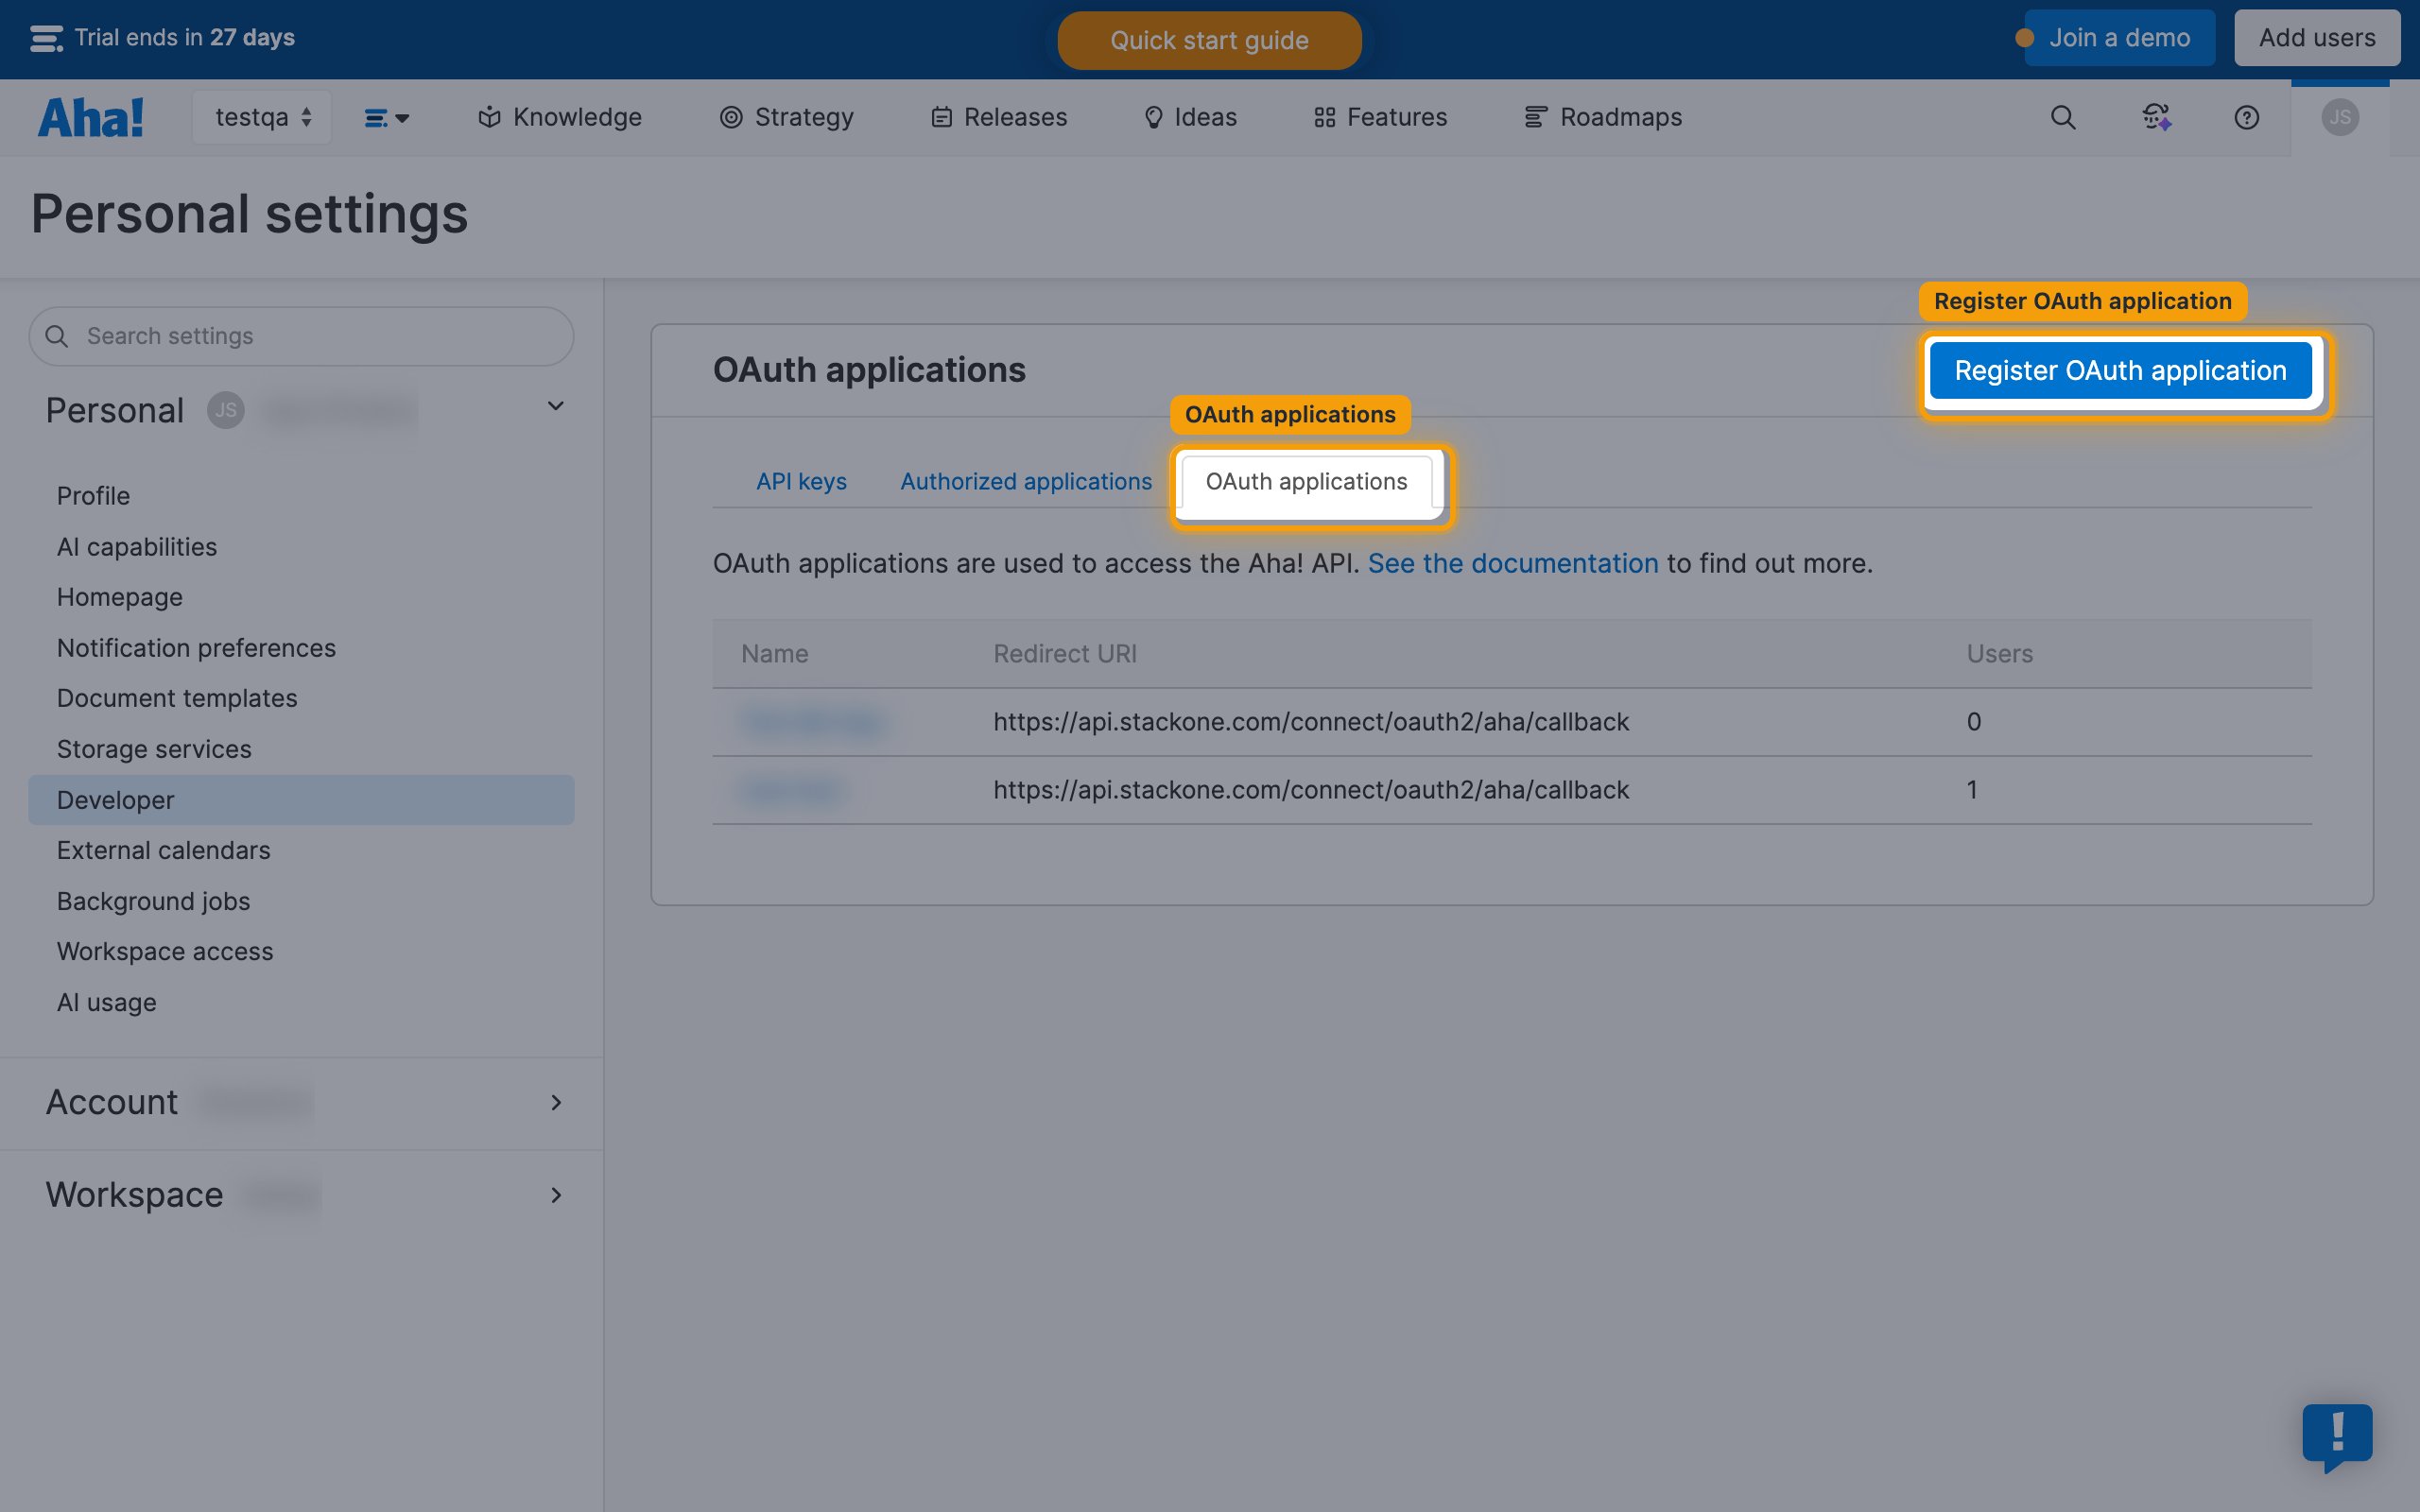
Register the OAuth application
On the Developer page, select the OAuth applications tab, then click Register OAuth application.
- Enter a Name for the application (e.g., “StackOne Integration”).
- Enter the Redirect URI:
https://api.stackone.com/connect/oauth2/aha/callback. - Click Create to register the application.
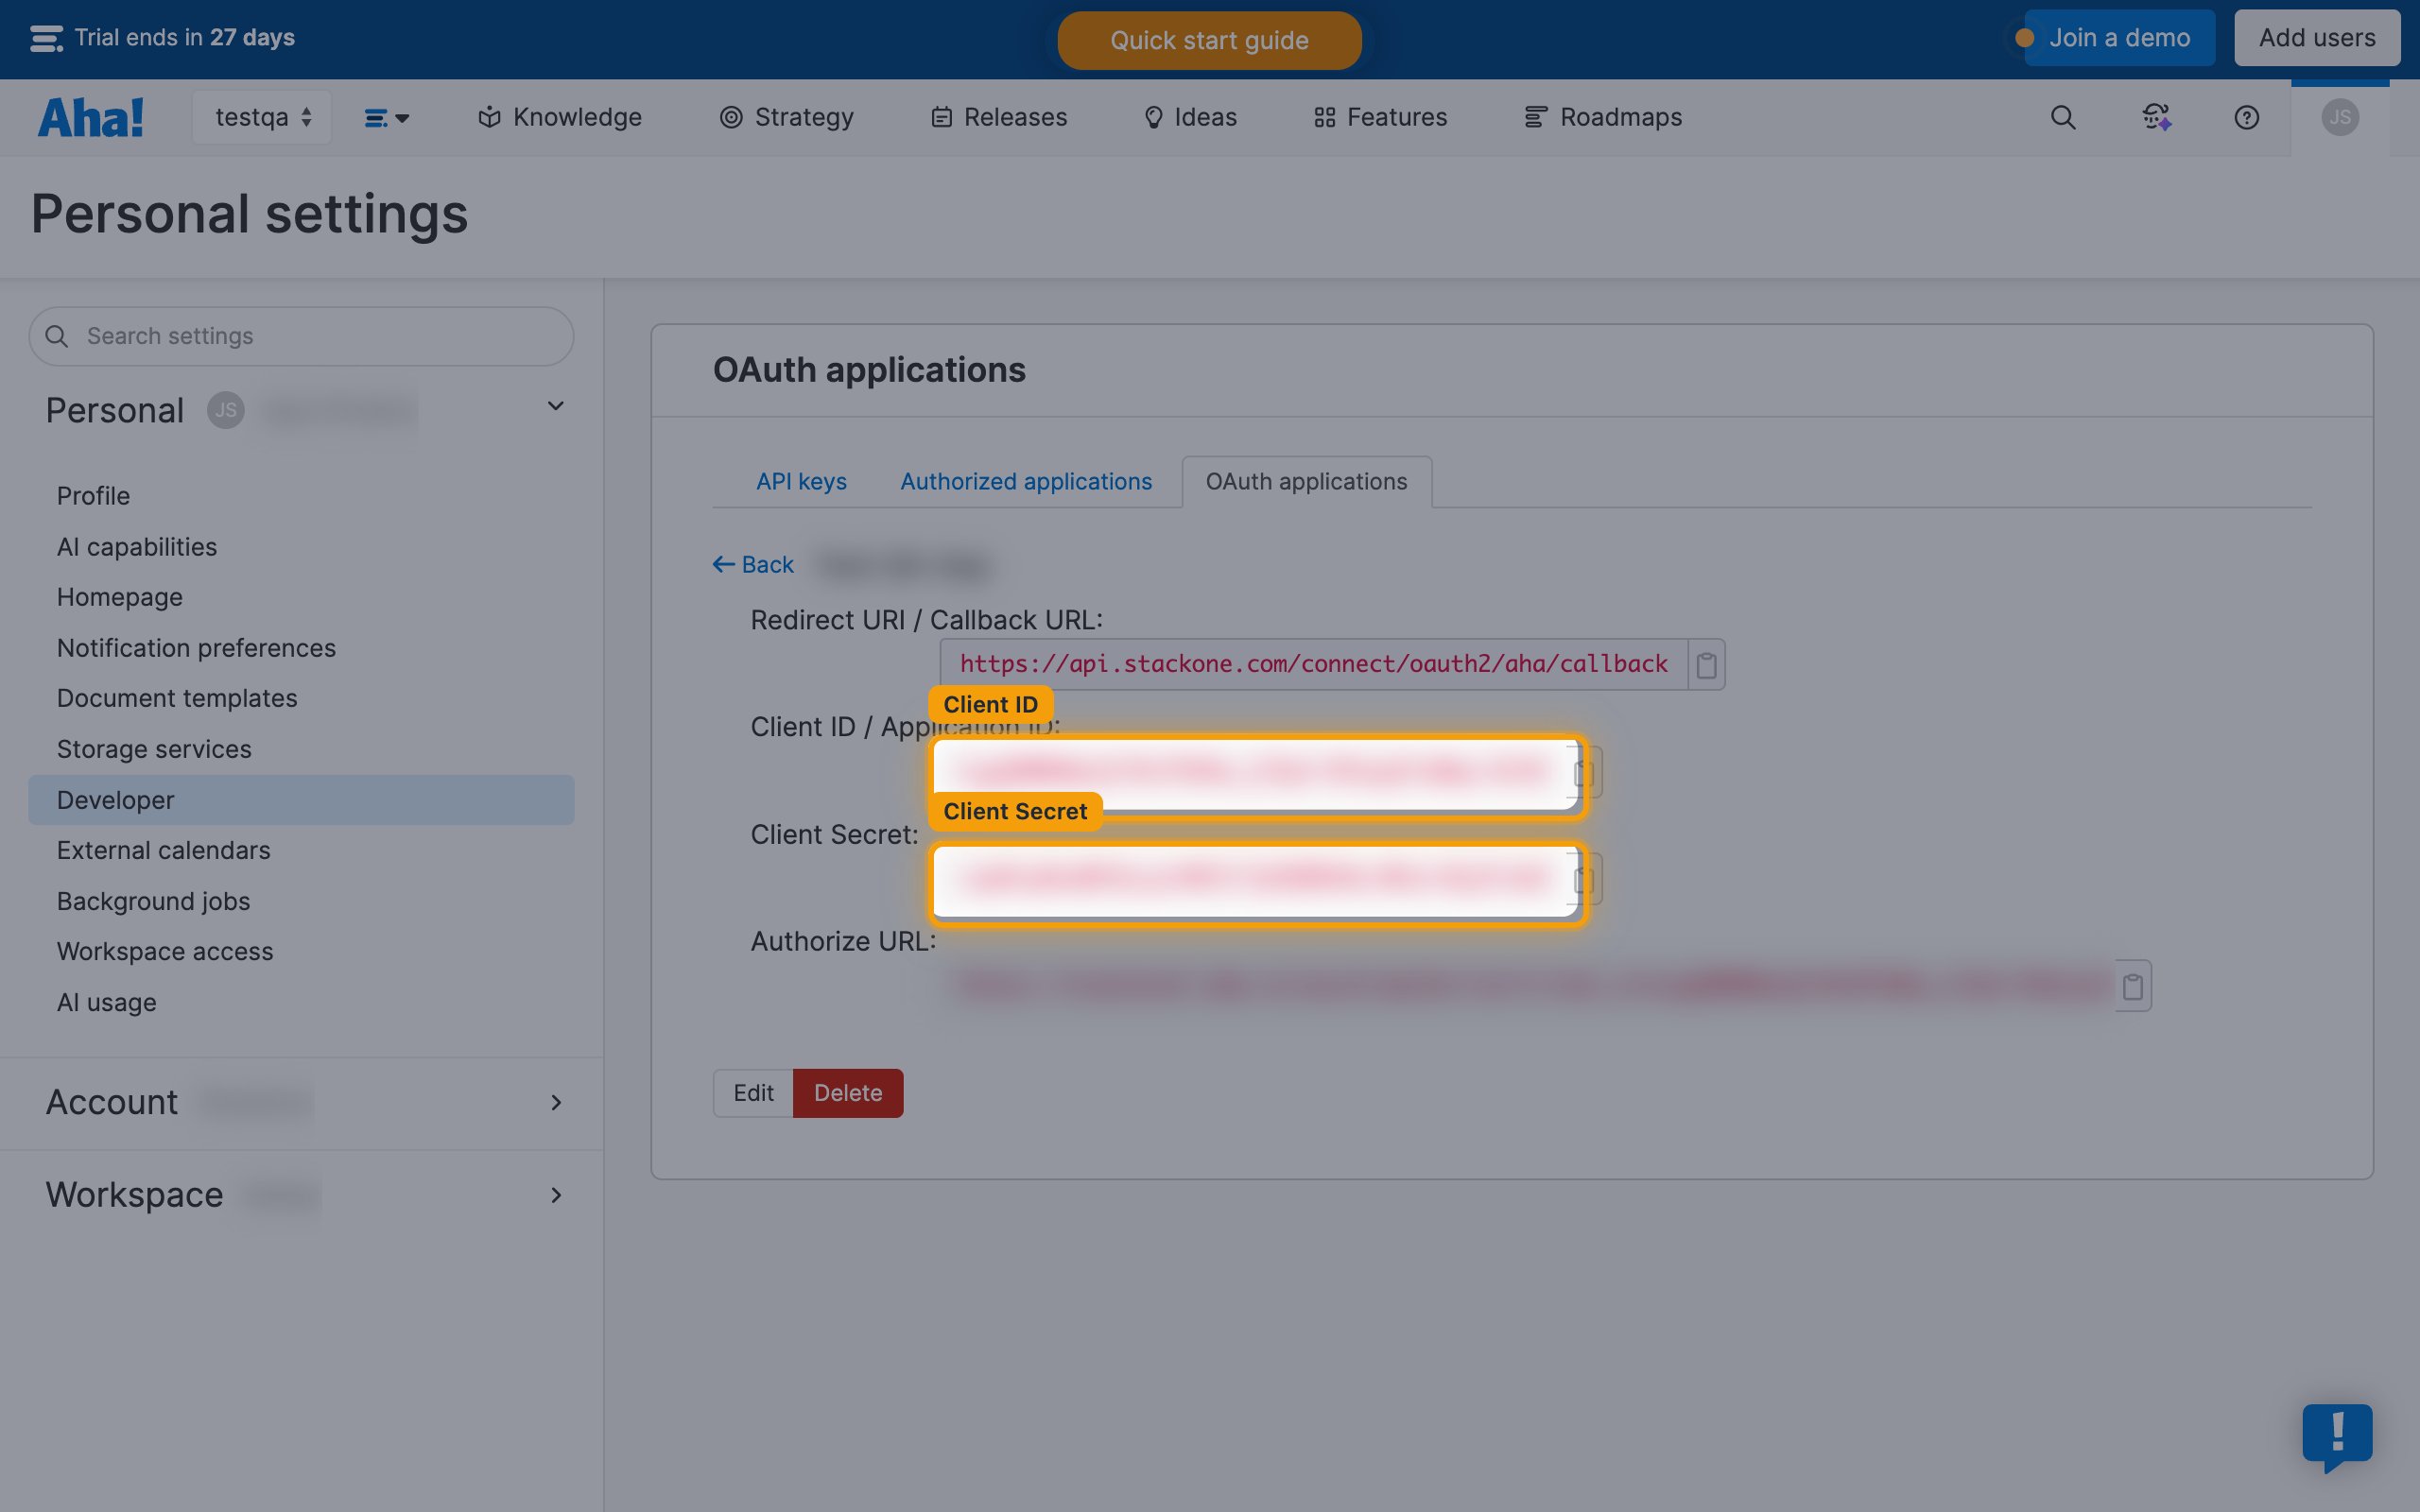
Copy your credentials
Copy the Client ID / Application ID and the Client Secret from the application details page.
Creating the StackOne Connector Profile
To create the Connector Profile in StackOne for Aha!:Open the connector
Choose actions and events
- Click Add Profile.
- If the connector offers more than one authentication method, set the Auth Method filter to OAuth 2.0.
- Select the actions, and any events, to enable for this Connector Profile.
- Click Continue.
Set up authentication
- Select Authentication Type as OAuth 2.0.
- Fill out the fields using details retrieved from your provider:
- Aha! Subdomain
- Client ID
- Client Secret
- Click Create Profile.