

Find your subdomain
Look at the address bar when signed in to Zendesk. Your subdomain is the first part of the URL, so copy the Subdomain across.
- Format:
https://{subdomain}.zendesk.com - Example: if your URL is
https://acme.zendesk.com/agent/home, your Subdomain isacme
Registering an OAuth client
Register the OAuth client in your own Zendesk account.
1
Enter the client details
Sign in to your Zendesk account.
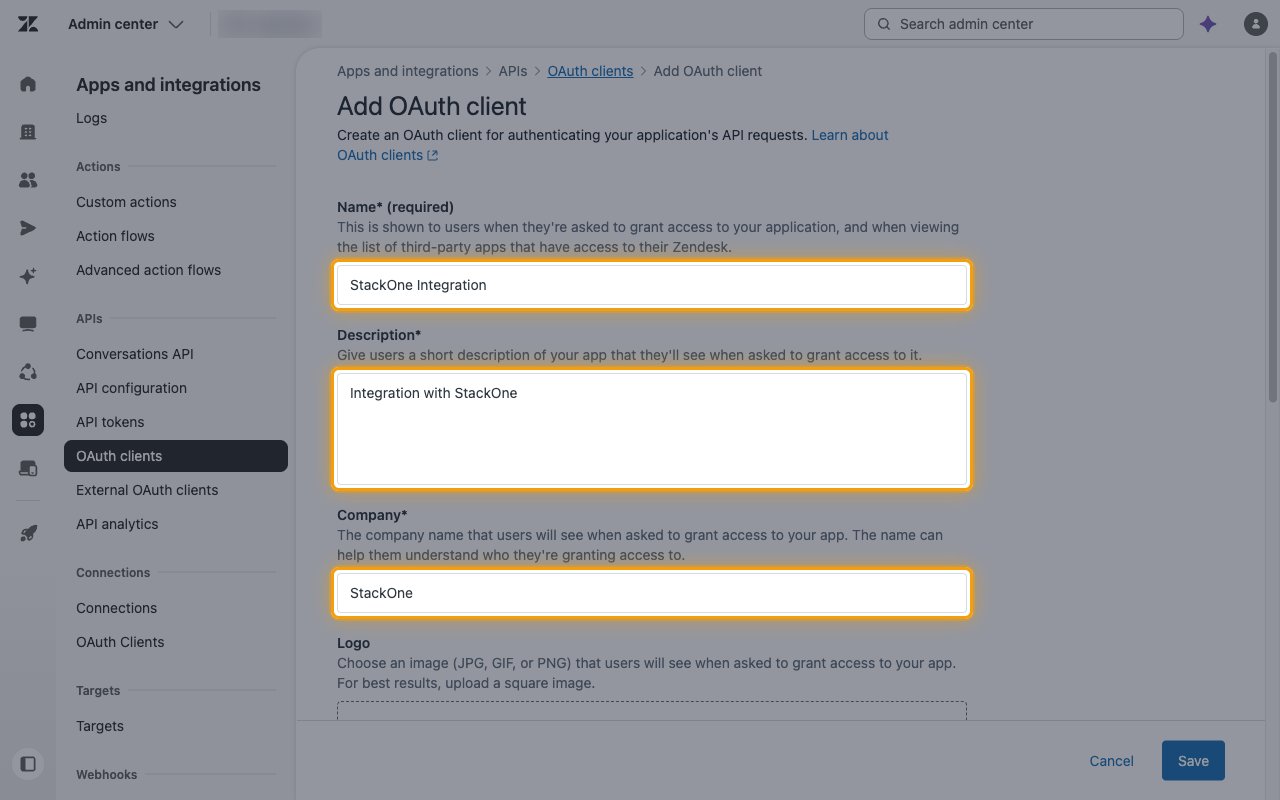
Zendesk shows these details to users when they are asked to grant access.
- In the top bar, click the product switcher labeled Support.
- Select Admin center.
- In the sidebar, select Apps and integrations > APIs > OAuth clients.
- Click Add OAuth client.
- Name:
StackOne Integration - Description: Short summary of your app
- Company: Your company name
- Logo: Your company logo
2
Set the identifier, client kind, and redirect URL
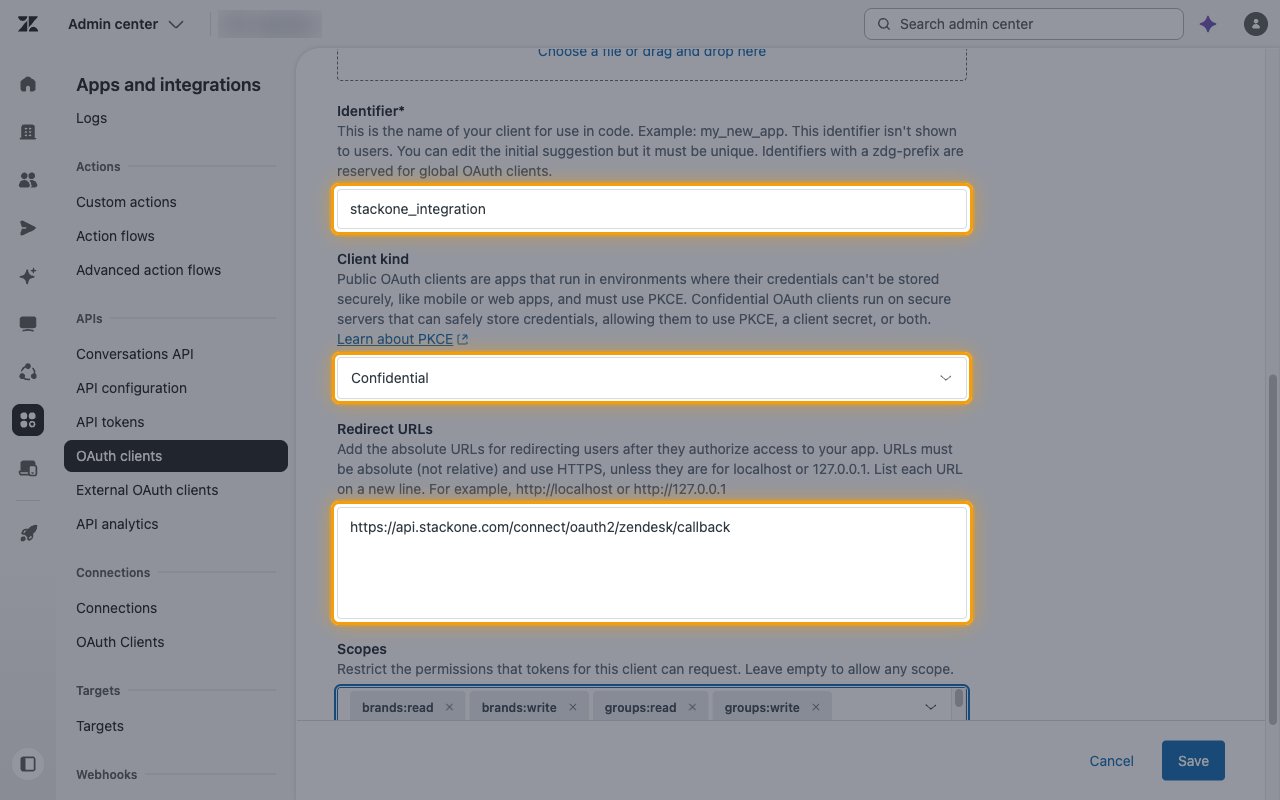
Zendesk fills in the Identifier from the name. It must be unique.
- Client kind: Confidential
- Redirect URLs: the Callback URL from your Connector Profile
3
Select scopes
Enables actions: Add Tags, Check Brand Host Mapping Validity, Check Host Mapping Validity, Count Organizations, Count Tags, Count Tickets, Count Users, Create Brand, Create Group, Create Group Membership, Create Organization, Create Organization Membership, Create Ticket, Create Ticket Field, Create Ticket Form, Create Trigger, Create User, Delete Brand, Delete Brand Logo, Delete Group, Delete Group Membership, Delete Organization, Delete Organization Membership, Delete Ticket, Delete Ticket Field, Delete Ticket Form, Delete Ticket Trigger, Delete User, List Audits For Ticket, List Brands, List Group Memberships, List Groups, List Organization Memberships, List Organizations, List Resource Tags, List Search Results, List Tags, List Ticket Comments, List Ticket Fields, List Ticket Forms, List Ticket Triggers, List Tickets, List Users, Merge Tickets Into Target Ticket, Remove Tags, Search Organizations, Search Tags, Search Ticket Triggers, Search Users, Set Tags, Show Attachment, Show Brand, Show Group, Show Group Membership, Show Organization, Show Organization Membership, Show Self, Show Ticket, Show Ticket Field, Show Ticket Form, Show Ticket Trigger, Show User, Update Brand, Update Brand Logo, Update Group, Update Organization, Update Ticket, Update Ticket Field, Update Ticket Form, Update Ticket Trigger, Update User, Upload Files
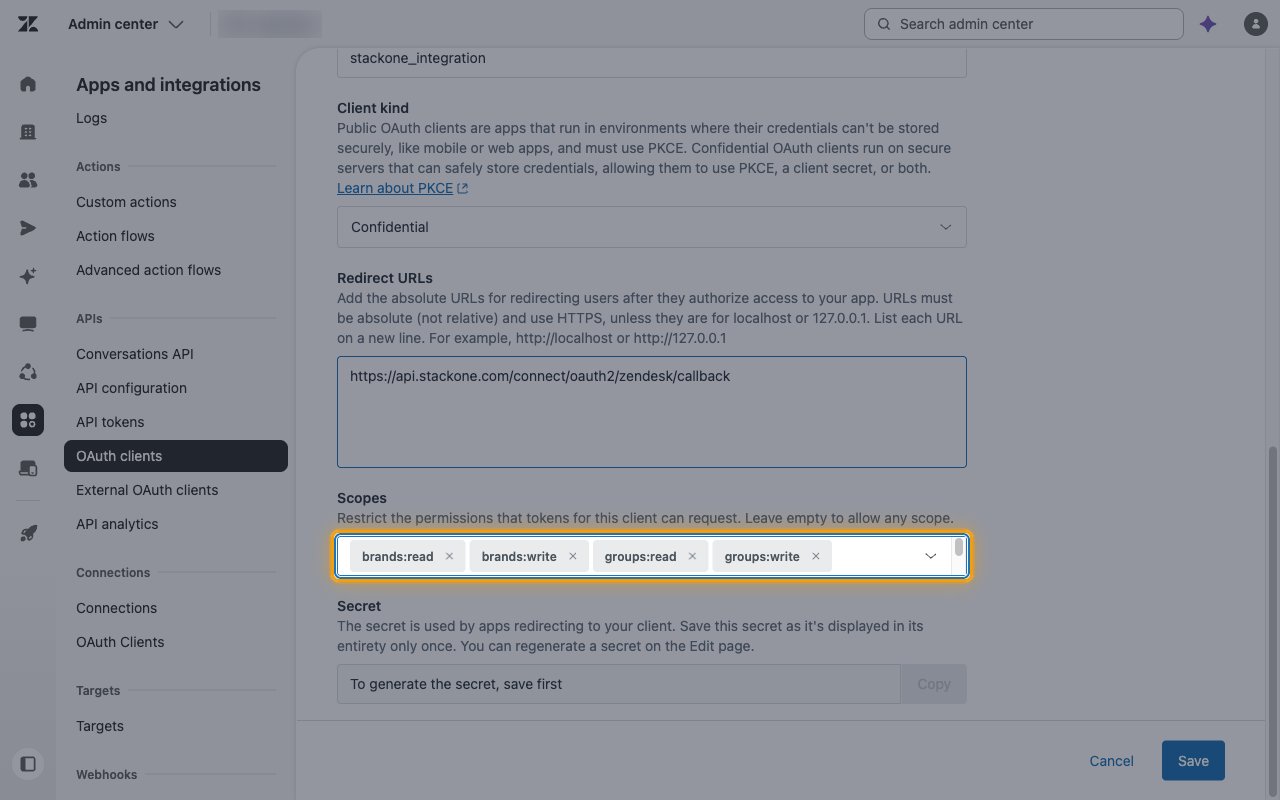
In Scopes, click Select scopes.
- Select each scope listed.
4
Save and copy the secret
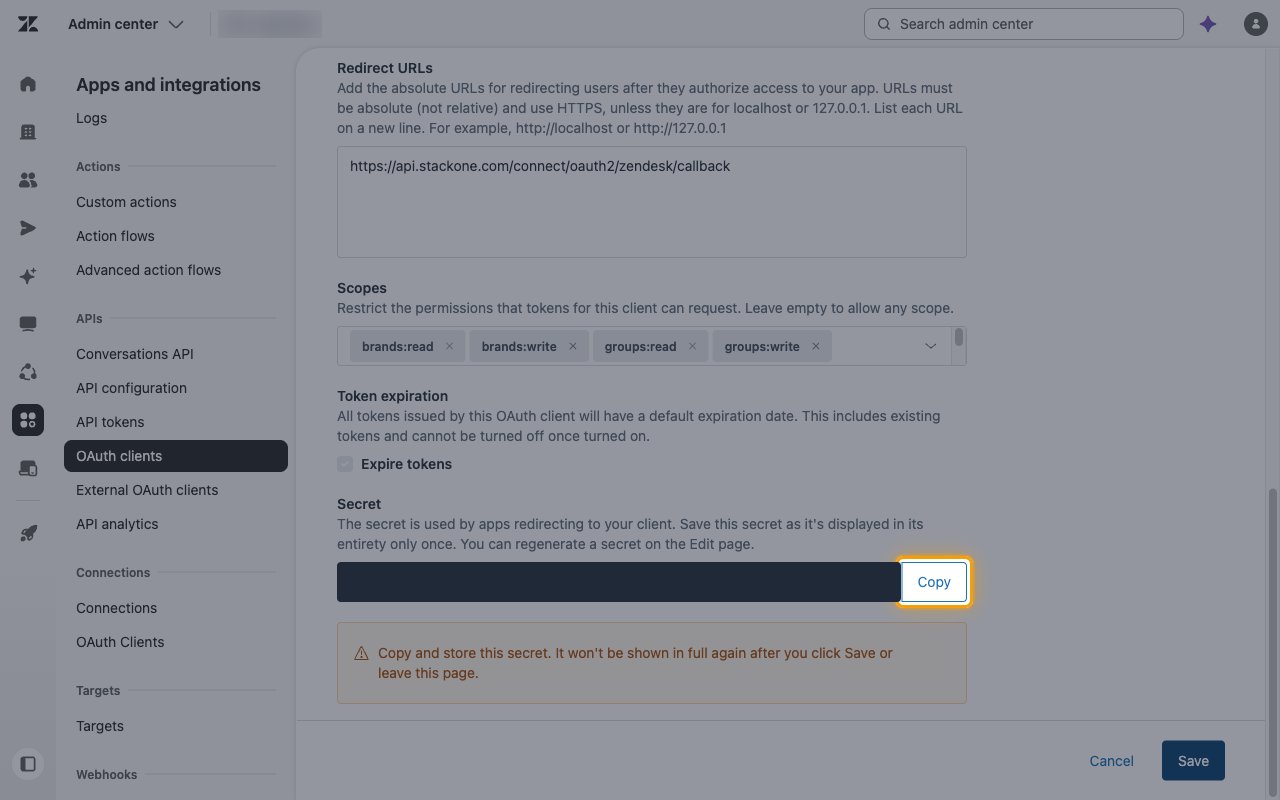
Click Save. The Secret field now shows the generated secret.
- Click Copy next to Secret. Zendesk shows the secret in full only once.
- Click Save again to finish creating the client.
5
Copy the client credentials
Use the Identifier and Secret from the OAuth client you just saved.
- Copy the Identifier across to Client ID.
- Copy the Secret across to Client Secret.
Link the Account
1
Connect
- Click Connect.
- If applicable, the provider will redirect you to a sign-in or authorization page. Complete the provider’s authorization flow.
- Once authorization is successful, you will see a confirmation popup.
2
Use Actions
Connect an AI platform to the linked account’s actions. See AI Platforms.Other ways to call actions are listed in Protocols & SDKs.
Next Steps
Webhooks setup
Configure receiving Events for Zendesk into StackOne.