

Prerequisites
The connector should already be set up, with a Connector Profile and a Linked Account. See Getting Started on the Wistia connector page.Copy your Native Webhook URL
The Native Webhook URL is the endpoint Wistia sends events to. It is generated per connection and shown on the connected account.
- Open the connected Wistia account in StackOne Hub.
- Copy the read-only Native Webhook URL value.
- Note: This URL is only available after the account has been connected.
Open Webhooks in Wistia
Wistia webhooks are managed under your account settings.
Sign in to Wistia
Sign in to your Wistia account.
Open the Webhooks settings
Click your account avatar in the top-right corner and select Settings, then in the left Settings sidebar click Webhooks (listed below API Home).
- You can also go straight to the page at
https://<your-account>.wistia.com/account/webhooks.
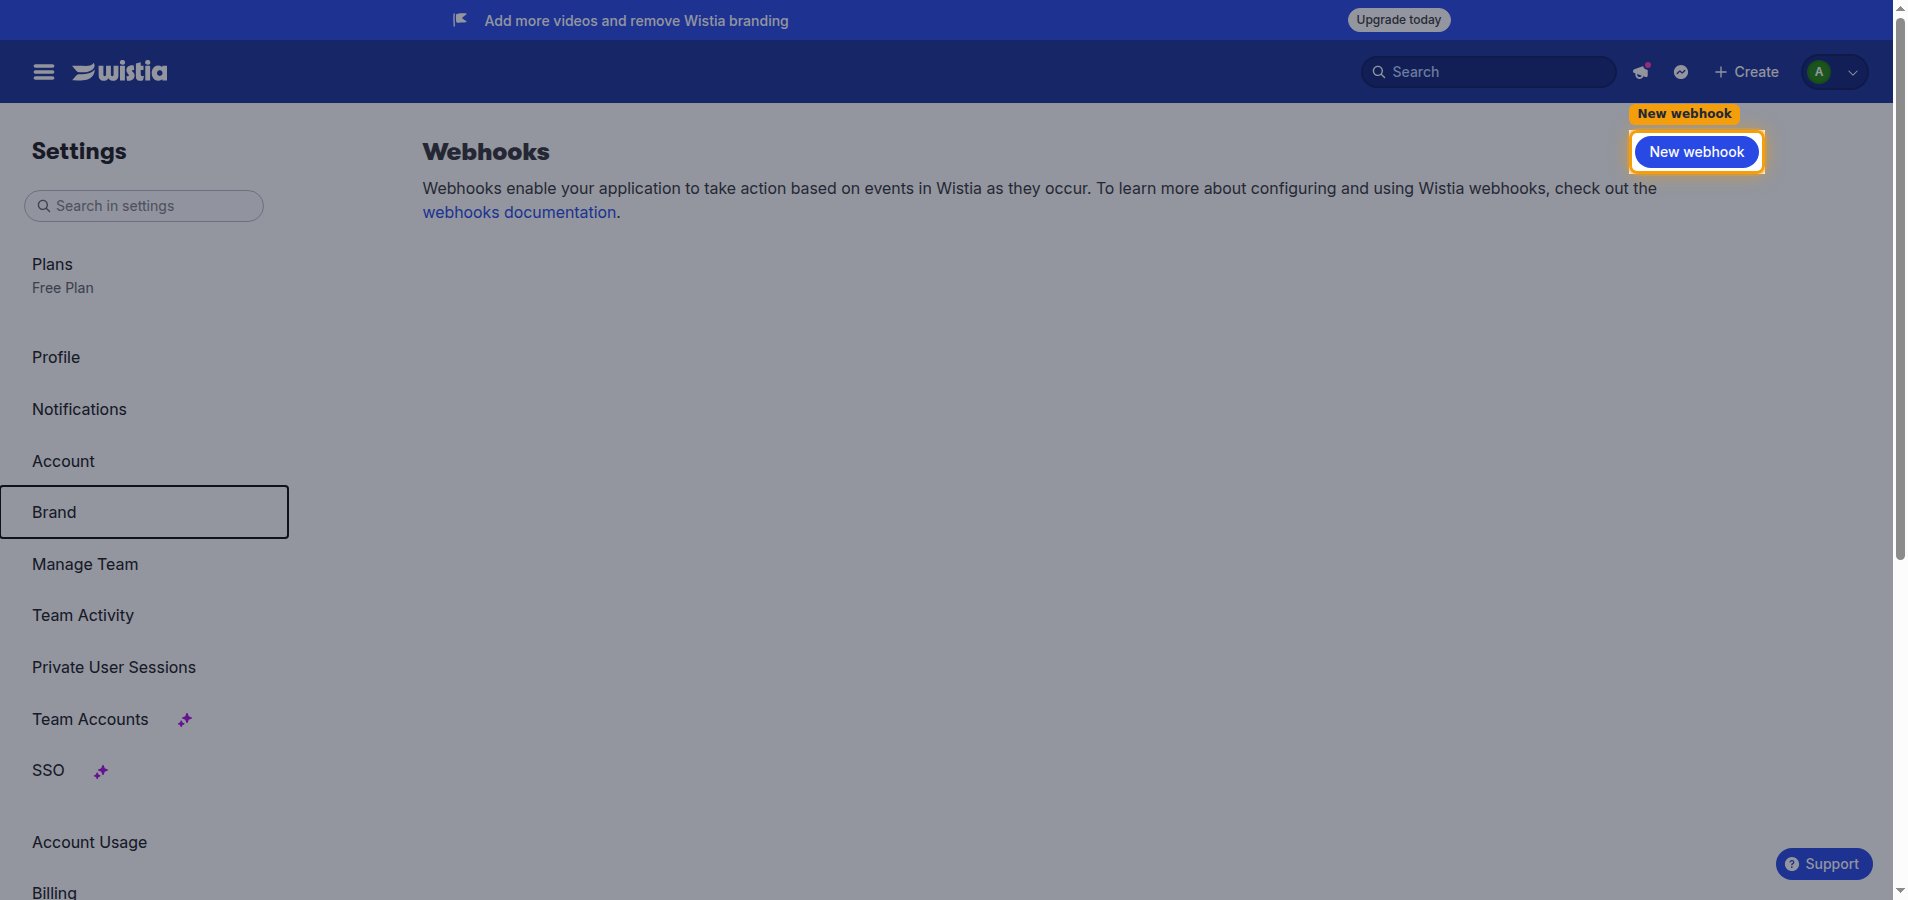
Create a new webhook
Click New webhook to open the webhook configuration form.
Configure and save the webhook
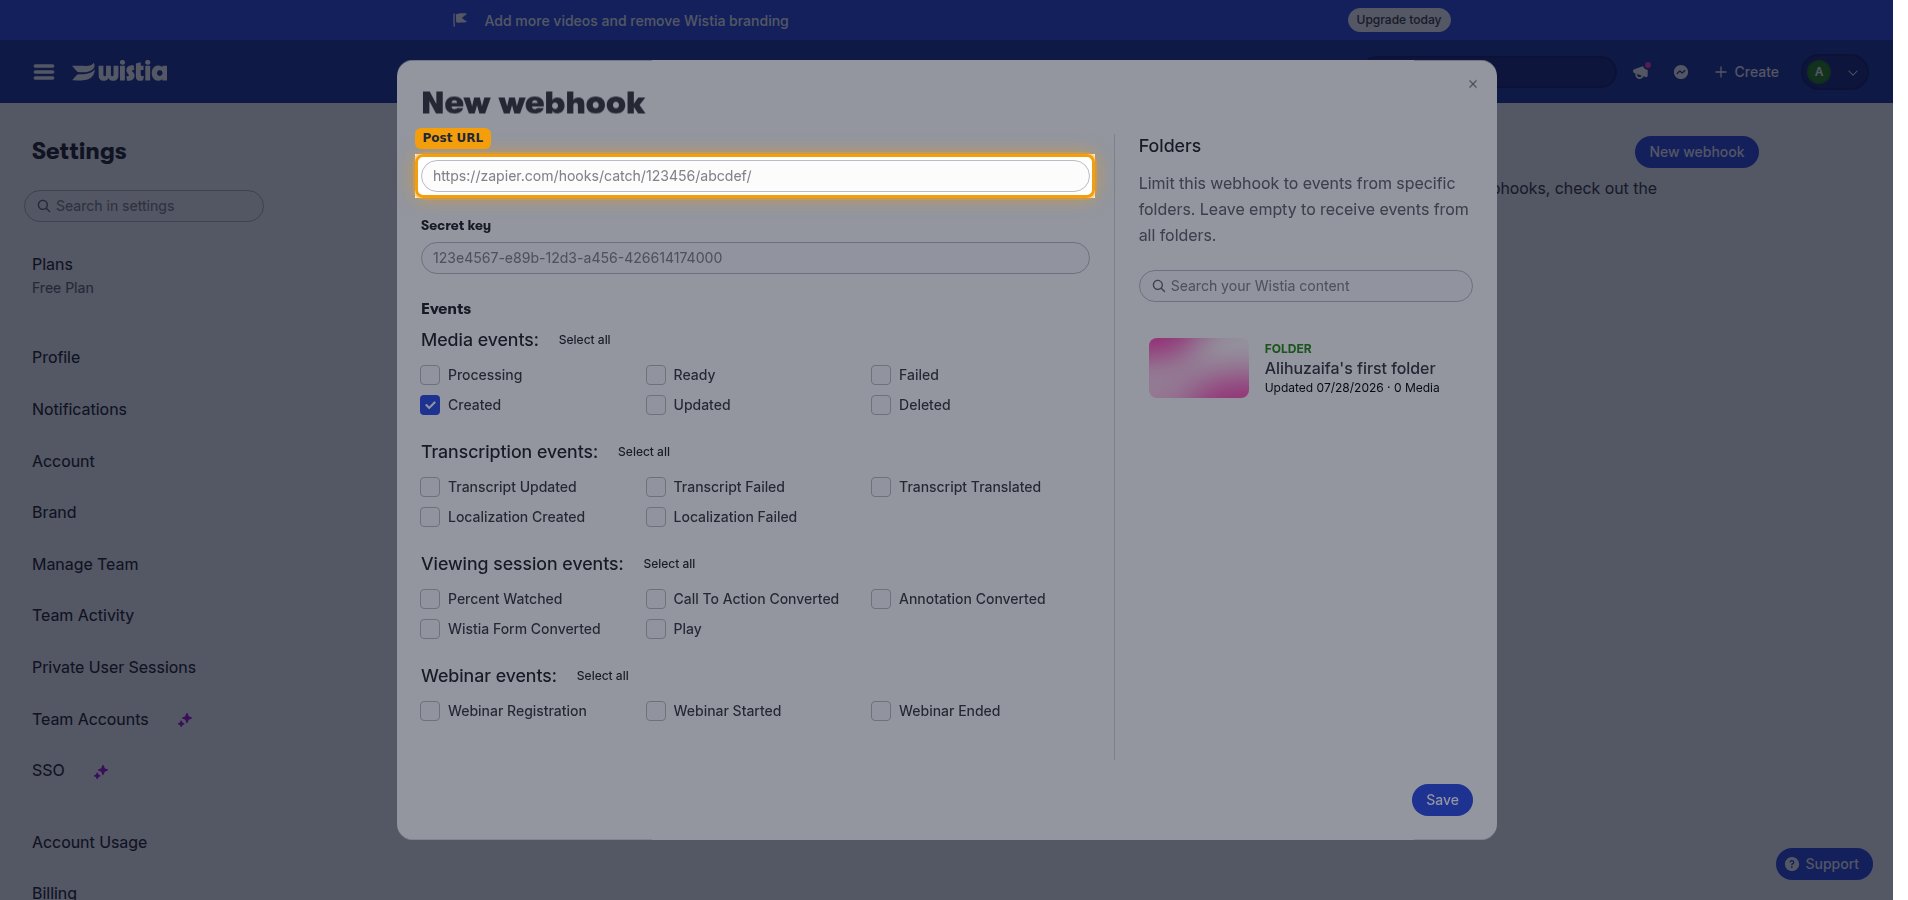
Enter the StackOne endpoint, set a secret, and choose which events to receive.
Paste the Native Webhook URL
In the Post URL field, paste the Native Webhook URL you copied from StackOne.
Set the Secret key
In the Secret key field, enter a secret value of your choice. Wistia uses it to sign every delivery (HMAC-SHA256 hex) in the X-Wistia-Signature header so the payloads can be verified as authentic.
- Choose a strong, random value — for example a UUID like
123e4567-e89b-12d3-a456-426614174000. - Paste the same value into the Webhook Secret Key field on the connected Wistia account in StackOne Hub and save, so the key is stored and available for verifying delivery authenticity.
Select the events to receive
Under Events, tick the checkboxes for the events you want delivered. Use Select all on a group to enable every event in that group.
- Media events: Processing, Ready, Failed, Created, Updated, Deleted.
- Transcription events: Transcript Updated, Transcript Failed, Transcript Translated, Localization Created, Localization Failed.
- Viewing session events: Percent Watched, Call To Action Converted, Annotation Converted, Wistia Form Converted, Play.
- Webinar events: Webinar Registration, Webinar Started, Webinar Ended.
- Optional: under Folders, limit the webhook to specific folders. Leave empty to receive events from all folders.
Save the webhook
Click Save. Wistia begins delivering the selected events to your Native Webhook URL, signed with your Secret key.