

Retrieve your Windsor.ai API key
Windsor.ai authenticates every request with a single API key that belongs to your Windsor.ai
account. It is always available from your account settings — you can reveal, copy, or reset it at
any time, so there is nothing to create first.
Sign in and open Settings
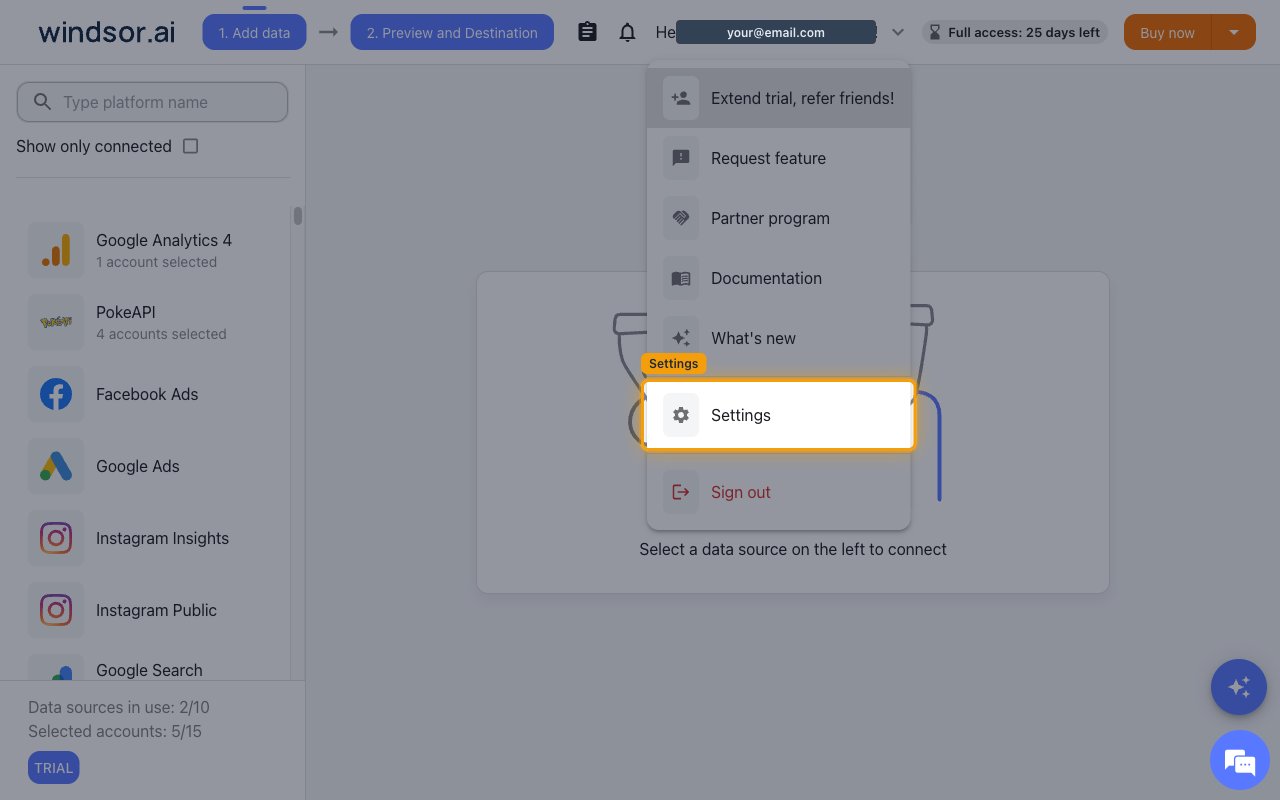
Sign in to the Windsor.ai onboarding app, then click Hello [your email]! in the top-right corner of the header to open the account menu and choose Settings.
- The account menu also contains Extend trial, refer friends!, Request feature, Partner program, Documentation, What’s new and Sign out — the entry you need is Settings.
Copy your API key
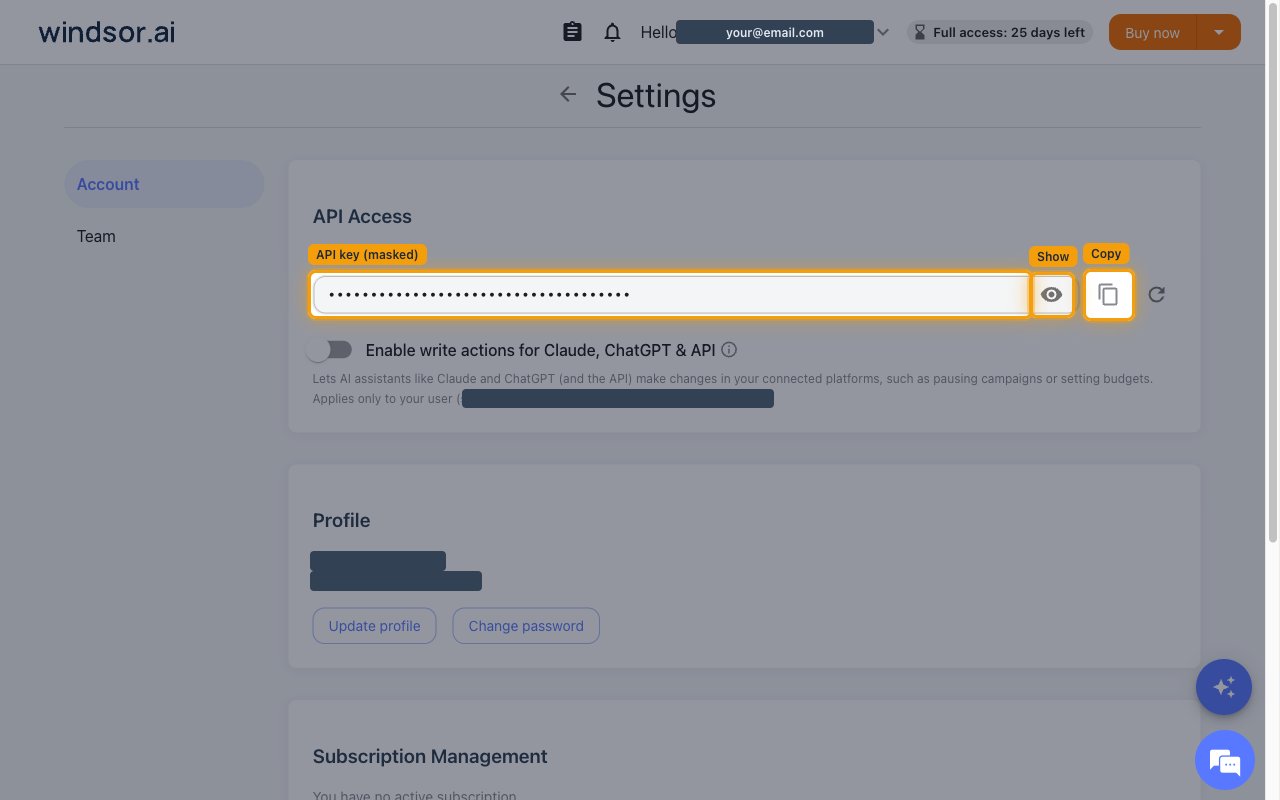
The Settings page opens on the Account tab. In the API Access section at the top, the API key: field holds your key, masked by default. Click the eye icon to reveal it, or click the copy icon beside it to copy the value straight to your clipboard.
- This is the value for the API Key field in StackOne Hub — the single credential that authenticates every Windsor.ai request.
- Treat the key like a password. It is not tied to a single machine, so anyone holding it can read your Windsor.ai data.
- The third icon resets the key. Resetting issues a new key and immediately invalidates the old one, which breaks any existing connection still using it.
Optional — enable write actions
Read-only actions work as soon as the key is connected. Actions that change something on a
connected platform — such as pausing a campaign or setting a budget — are turned off by default
and must be enabled before they will run.
Turn on write actions
In the same API Access section, switch on Enable write actions for Claude, ChatGPT & API. Windsor.ai describes it as Lets AI assistants like Claude and ChatGPT (and the API) make changes in your connected platforms, such as pausing campaigns or setting budgets.
- The setting applies only to your own user, not to the rest of your team — each member enables it separately.
- Leave it off if you only need to read reporting data. With it off, write requests are rejected with an authorization error.
Linking the Account from the Hub
Navigate to the Hub
Fill out the fields
- API Key
Connect
- Click Connect
- If applicable, the provider will redirect you to a sign-in or authorization page. Complete the provider’s authorization flow.
- Once authorization is successful, you will see a confirmation popup
If the account linking is successful, you will see the newly linked account in your Accounts page.