

Create a system user
A system user represents your business rather than a person, so its token keeps working without anyone signing in again.
Open System users
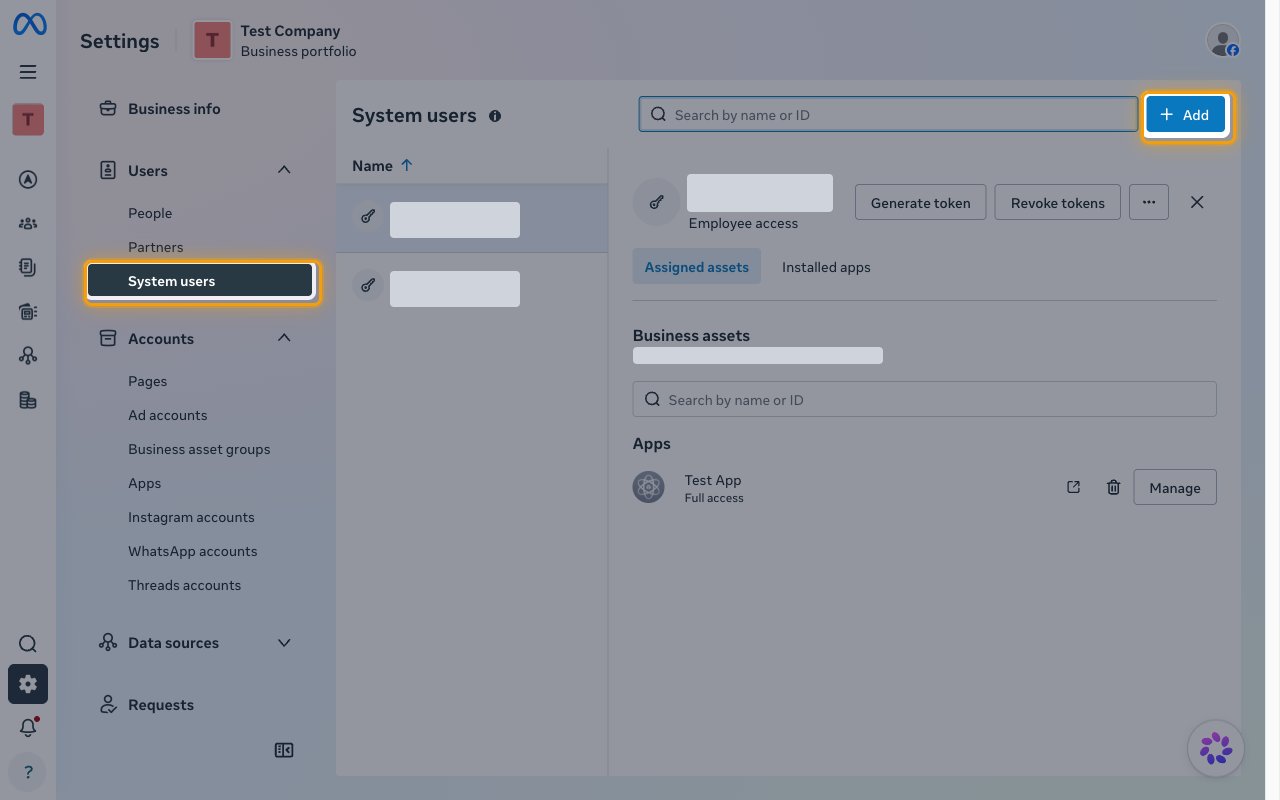
Accept the policy if prompted
The first time you add a system user, Meta asks you to accept its non-discrimination policy on behalf of your system users. Read it and click I Accept.
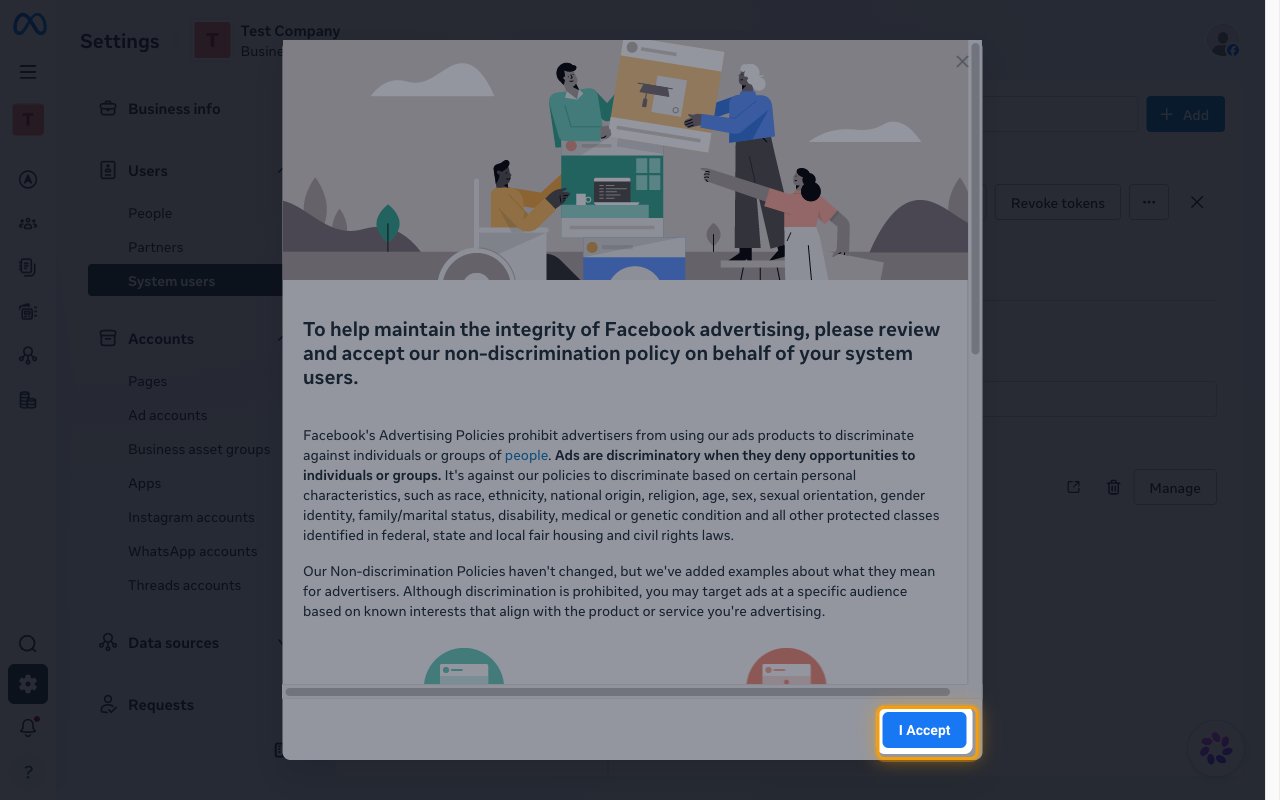
Name the system user and choose its role
In Create system user, enter a name and choose the role, then click Create system user.
- System user name:
StackOne Integration - Choose Admin under System user role to give the system user access to every WhatsApp Business Account the business portfolio owns. Adding users to a WhatsApp Business Account also requires an Admin system user.
- Keep Employee to limit the system user to the WhatsApp Business Accounts you assign to it in the next section.
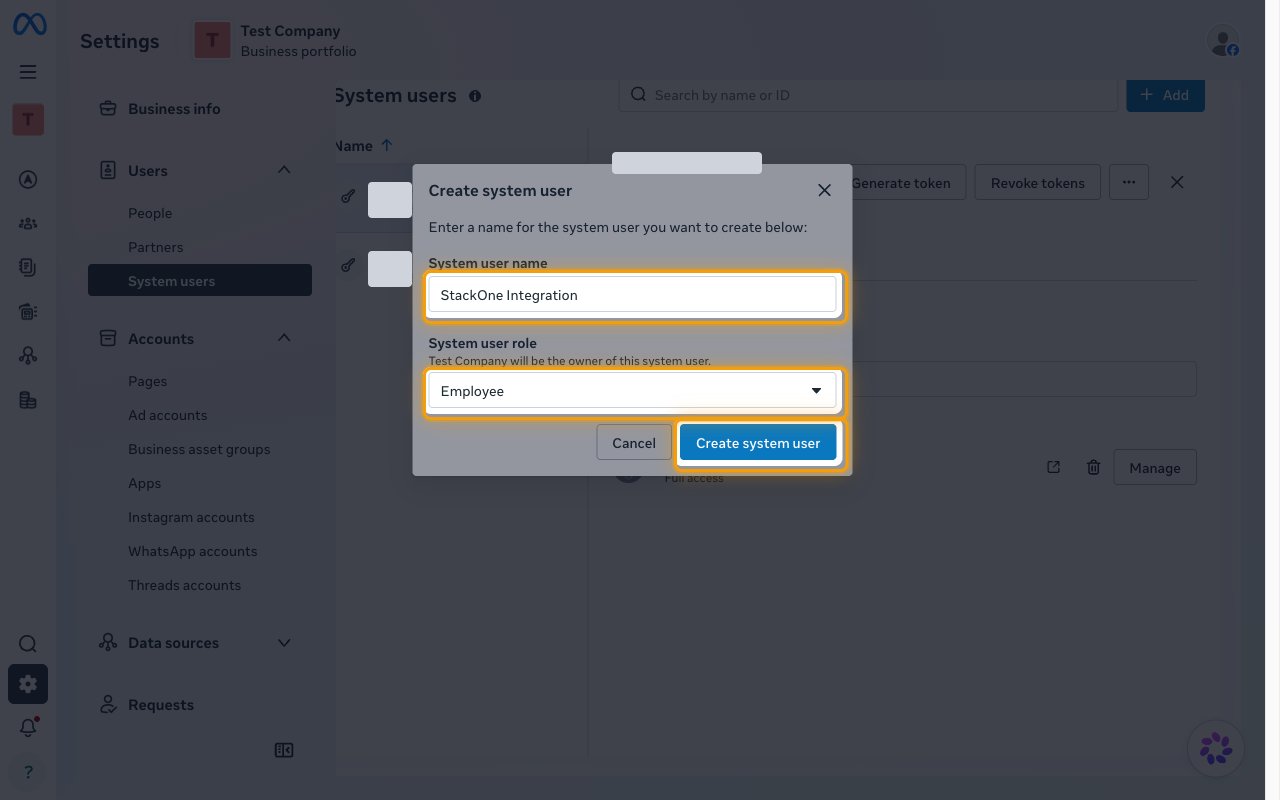
Give the system user access to your WhatsApp account
The system user can only act on the WhatsApp Business Account and Meta app assigned to it.
Open the WhatsApp account
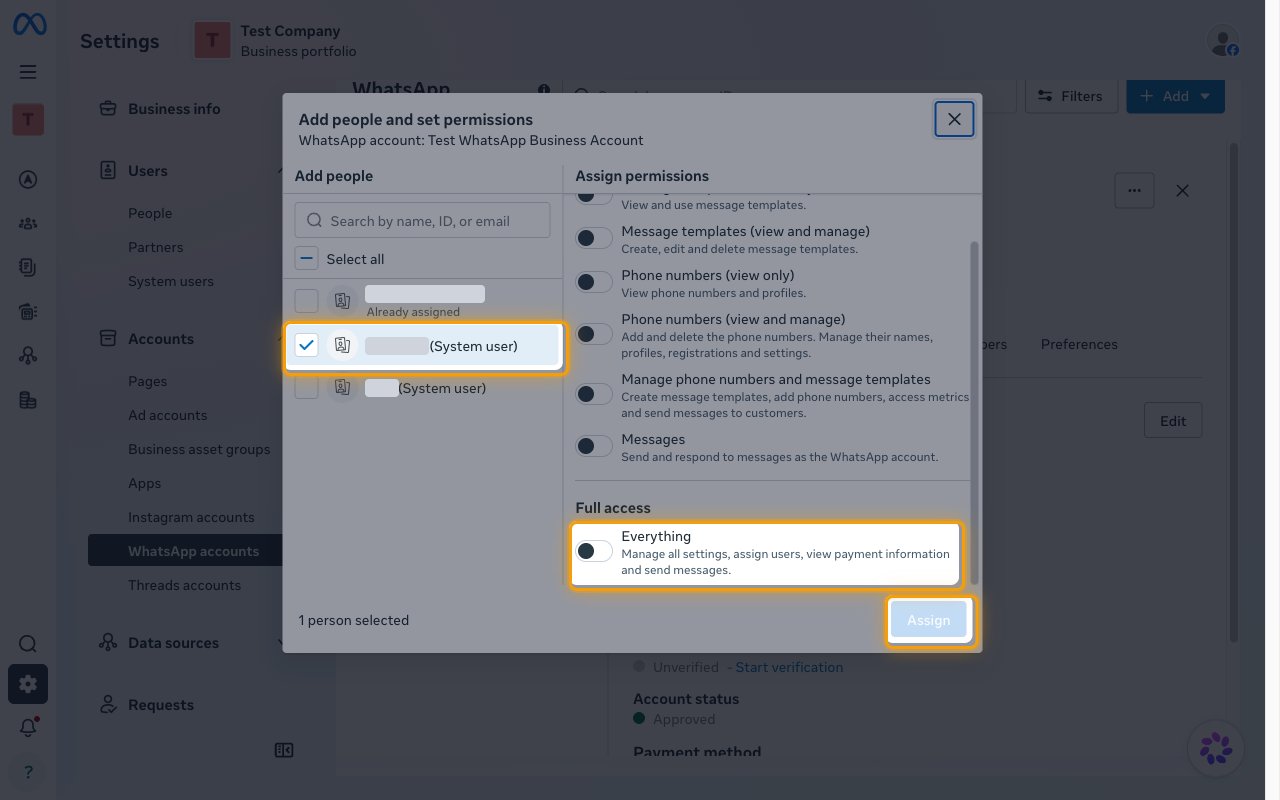
In Business Settings, open Accounts > WhatsApp accounts, select your WhatsApp account, and click Assign people.
Grant full access
In Add people and set permissions, select your system user (it is labeled (System user)).
- Under Full access, turn on Everything.
- Click Assign.
Open your Meta app
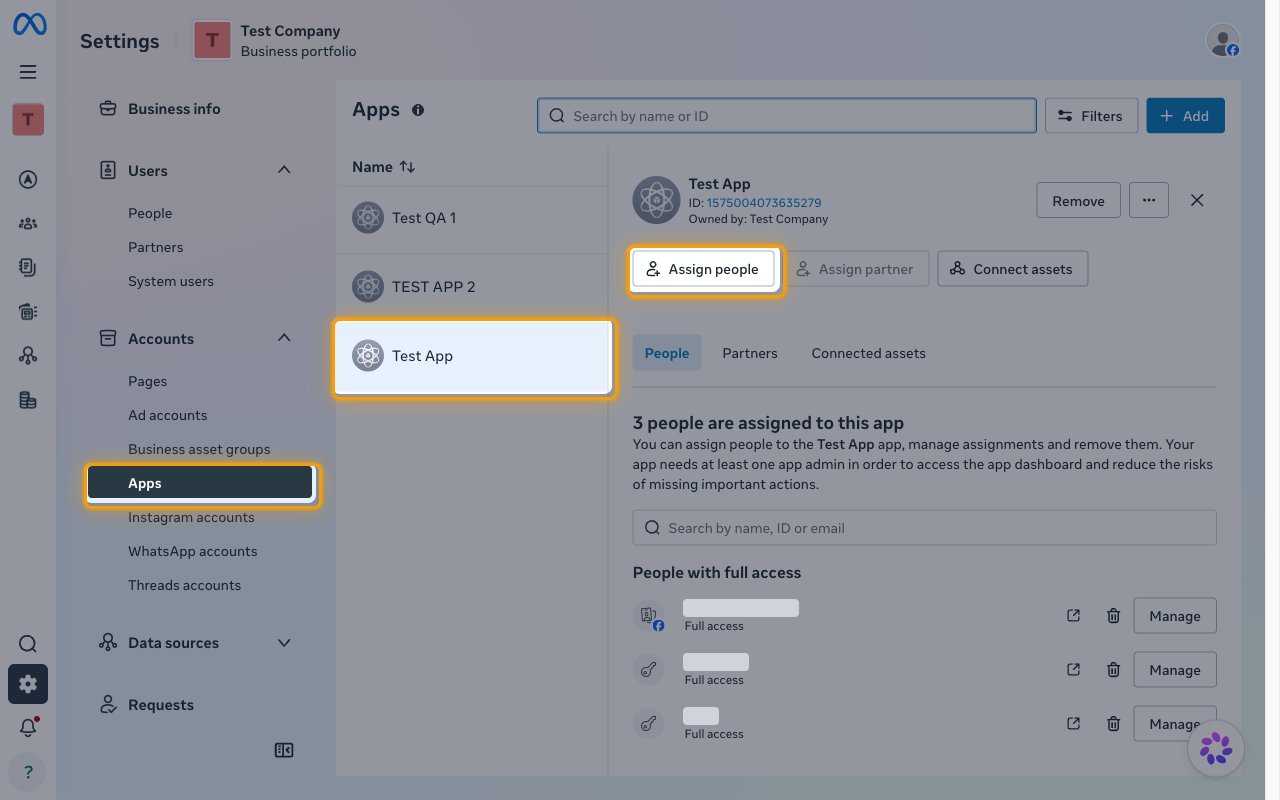
A new system user has no app assigned, and Generate token stays unavailable for it until it has access to your Meta app. In Business Settings, open Accounts > Apps, select your Meta app, and click Assign people.
Assign the app to the system user
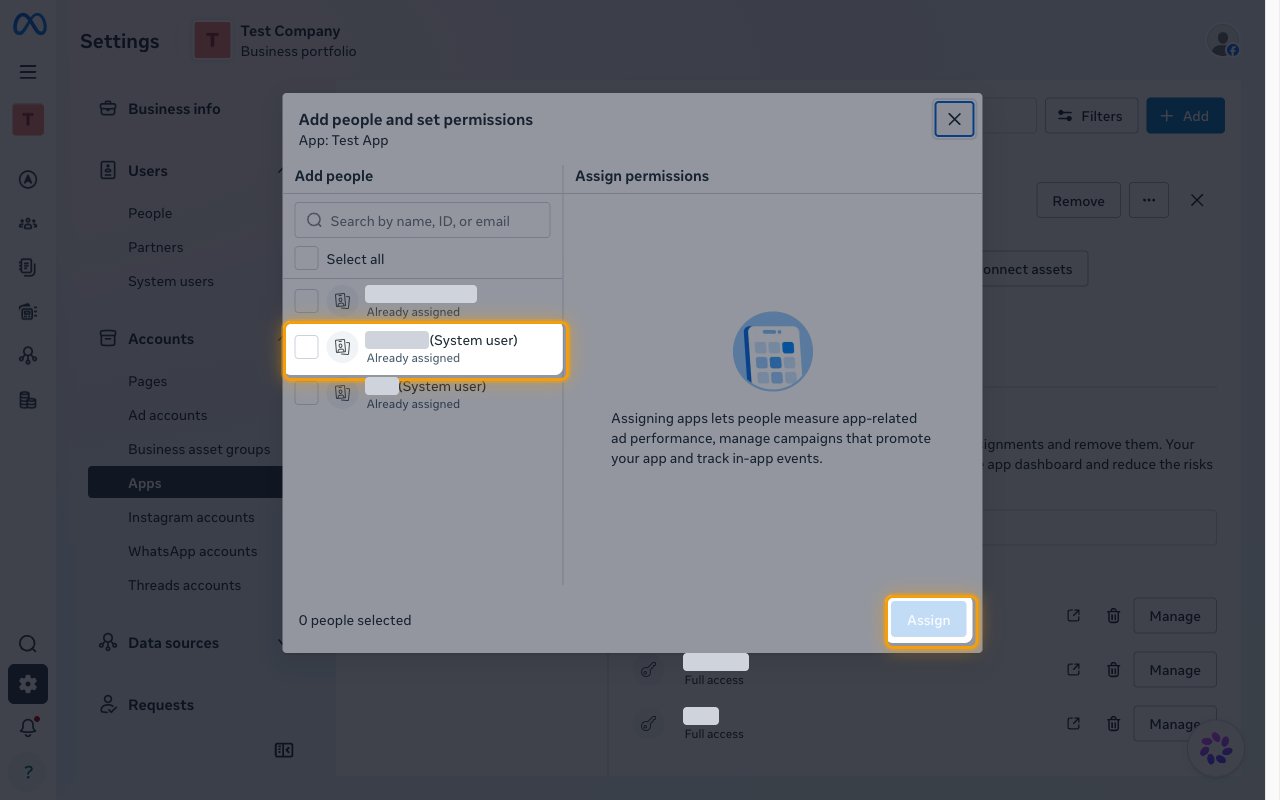
In Add people and set permissions, select your system user (it is labeled (System user)), give it full access to the app, and click Assign.
- The system user then appears under People with full access with Full access, and Generate token becomes available for it in Users > System users.
- A system user that is already assigned shows Already assigned in this list.
Add the app permissions
The token can only include permissions that are added to your Meta app. Permissions that are not added do not appear when you generate the token.
Check the permissions
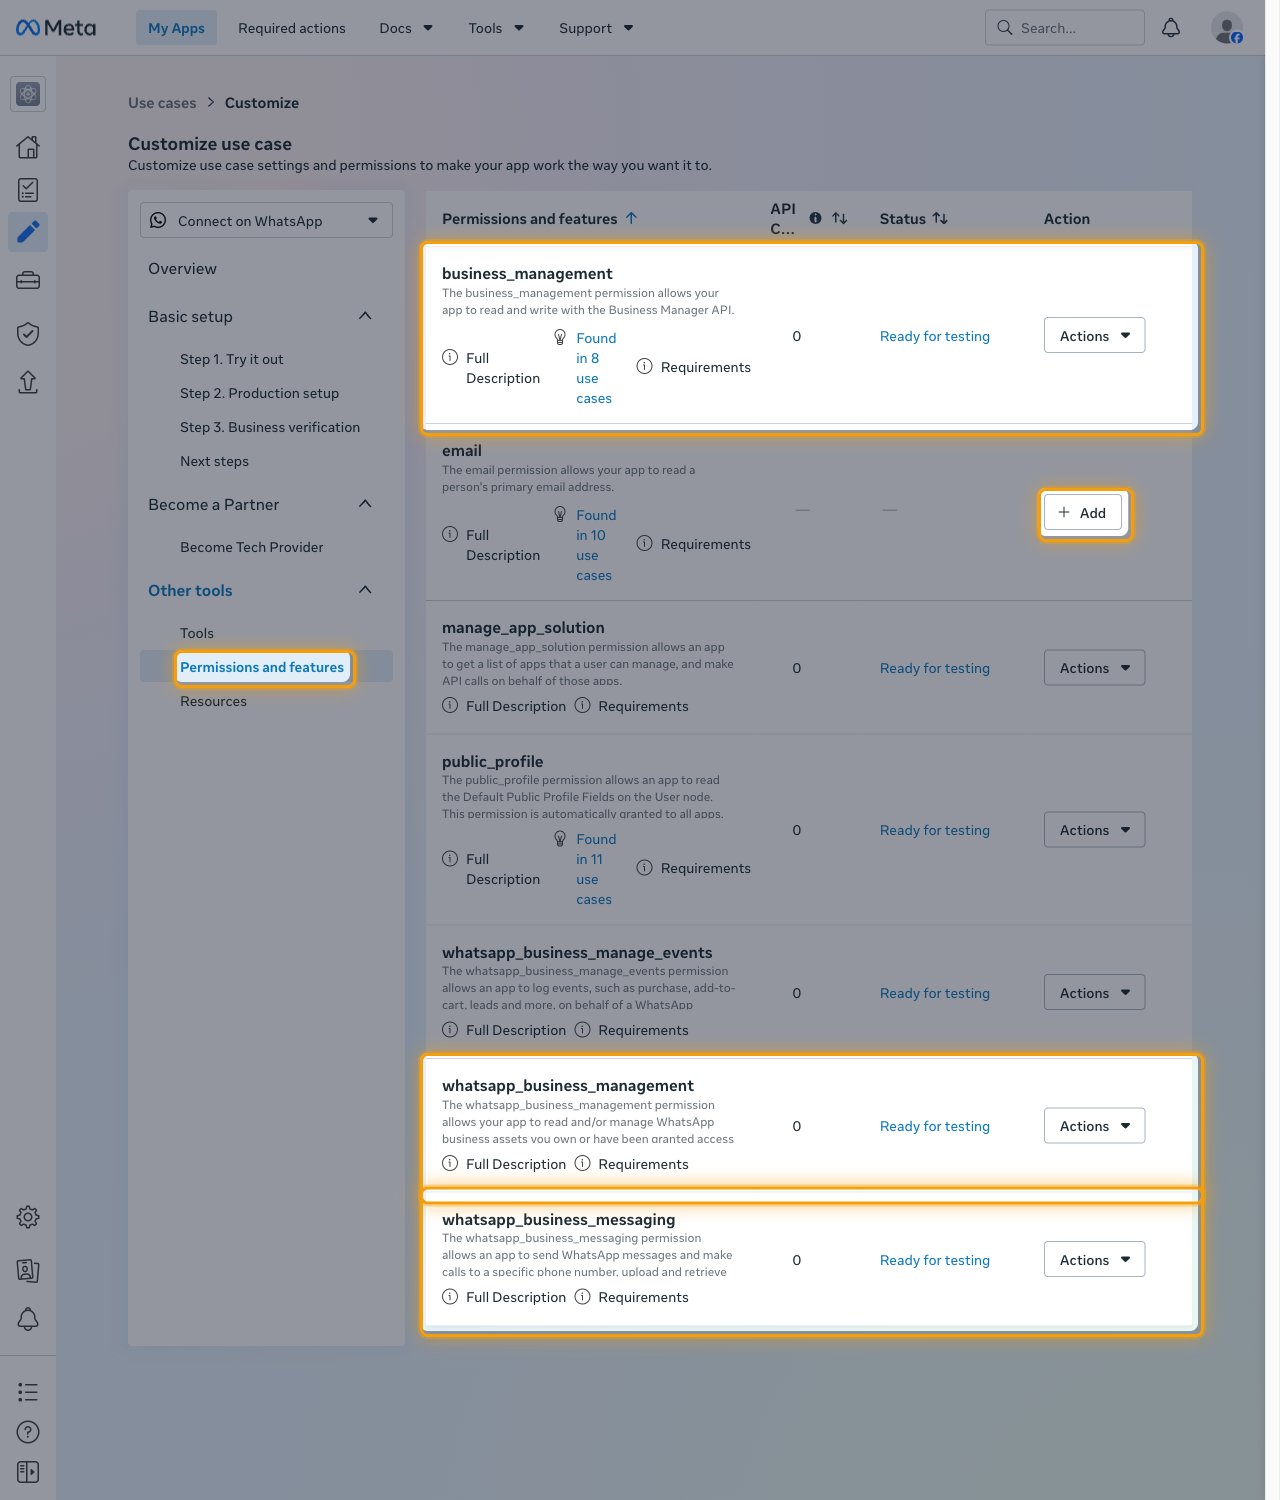
In your app on Meta for Developers, open Use cases, customize Connect on WhatsApp, and under Other tools select Permissions and features.
- Check that
business_management,whatsapp_business_management, andwhatsapp_business_messagingshow Ready for testing. - For any of them that shows Add instead, click Add.
Generate the access token
The access token authenticates StackOne requests to the WhatsApp Cloud API on behalf of the system user.
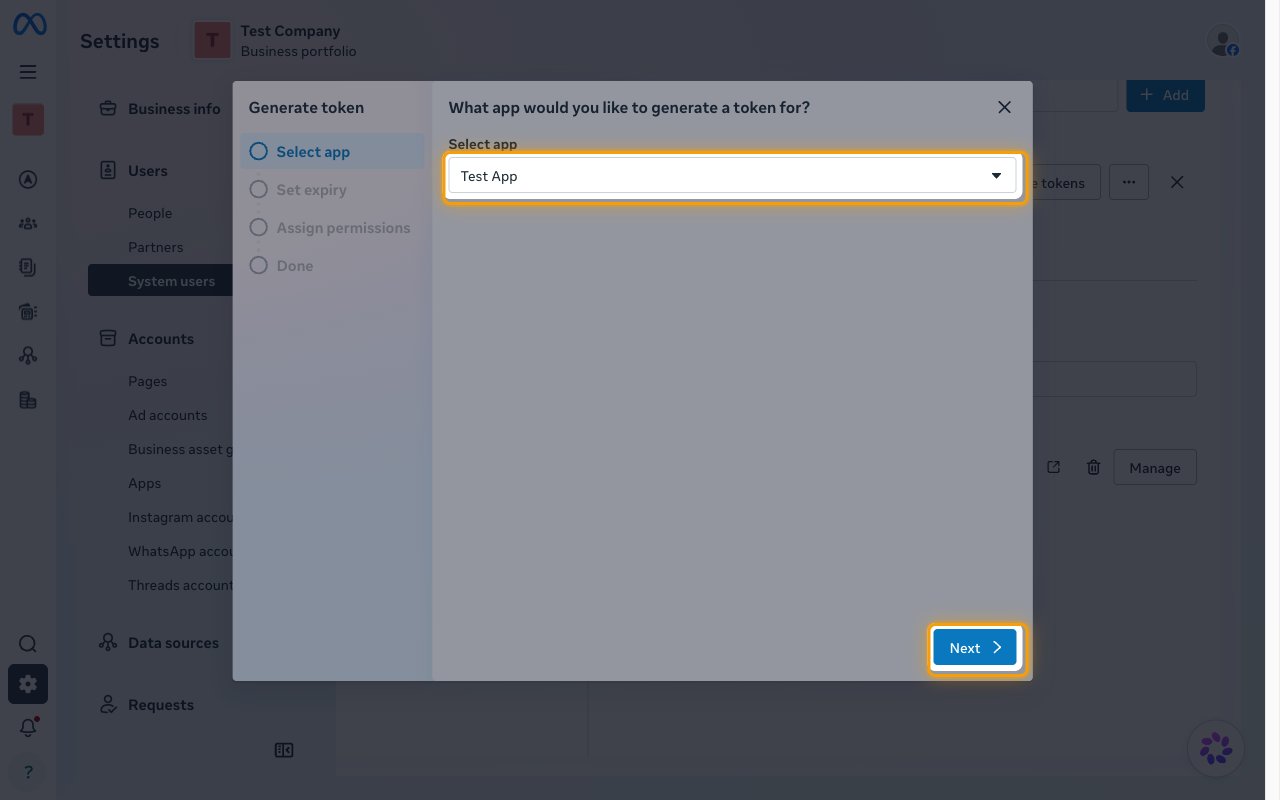
Select the app
In Users > System users, select your system user and click Generate token. In Select app, choose your Meta app and click Next.
Set the token expiry
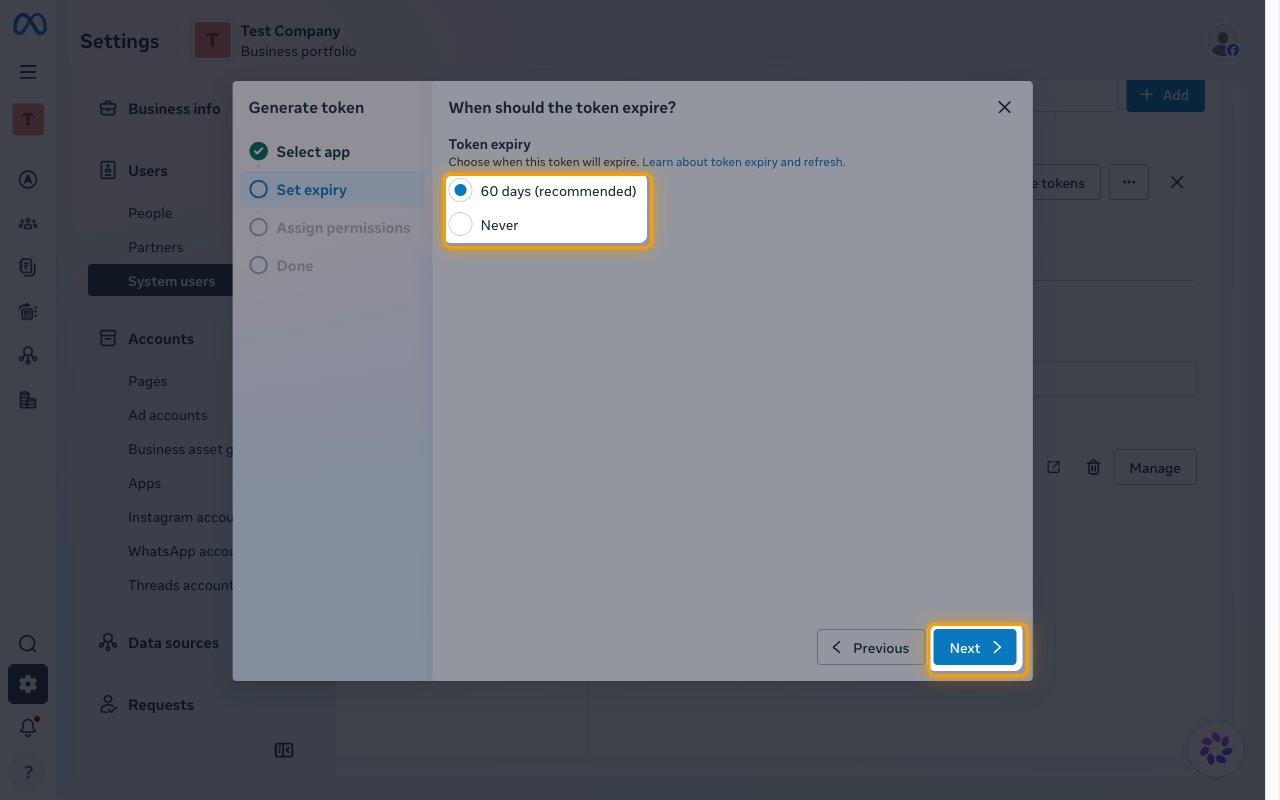
Under Token expiry, choose Never for a token that does not expire, or 60 days (recommended) if you will rotate it, then click Next.
- A 60-day token stops working when it expires. Generate a new one and update the Access Token field in StackOne Hub before then.
Assign the permissions
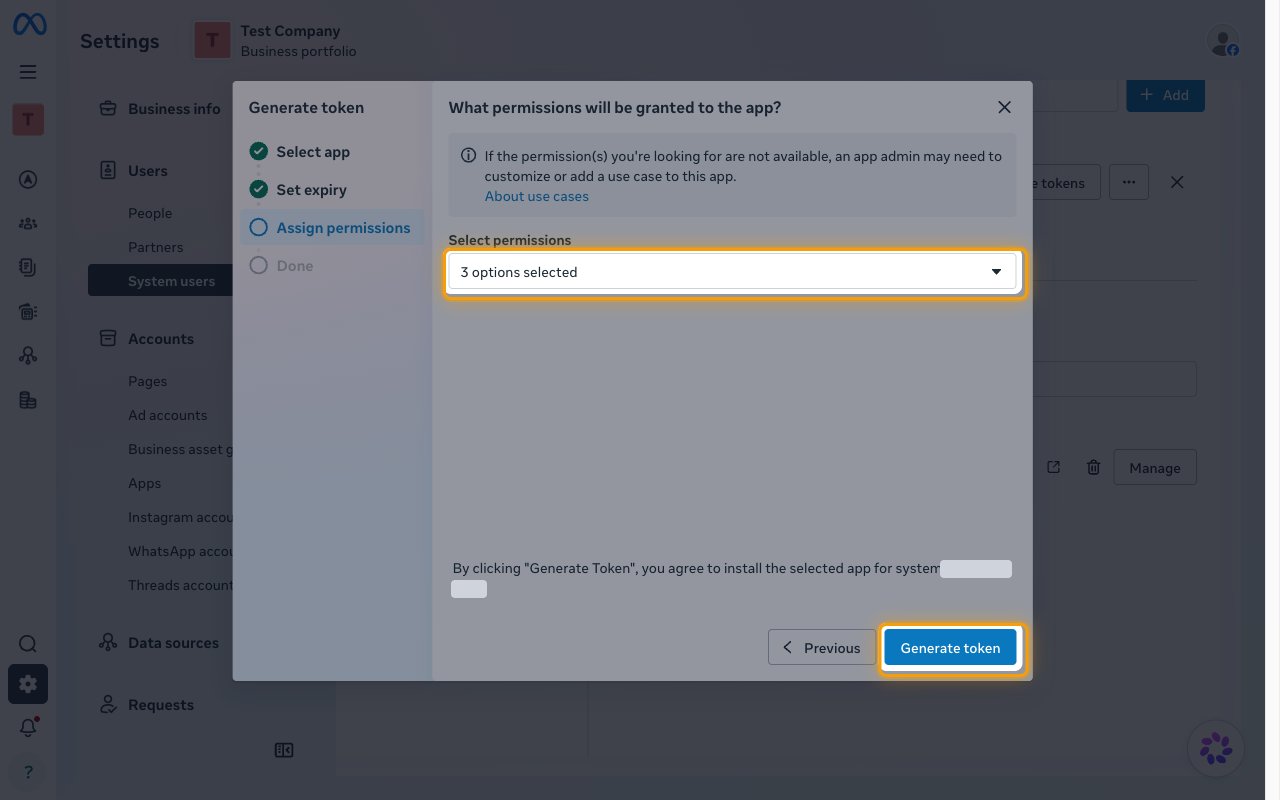
Under Select permissions, select the permissions below, then click Generate token. Copy the token and paste it into the Access Token field in StackOne Hub. Store it securely for use later.
Find your WhatsApp Business Account ID
The WhatsApp Business Account ID (WABA ID) identifies the WhatsApp account whose phone numbers, templates, and webhooks the connection uses.
Copy the ID in Business Settings
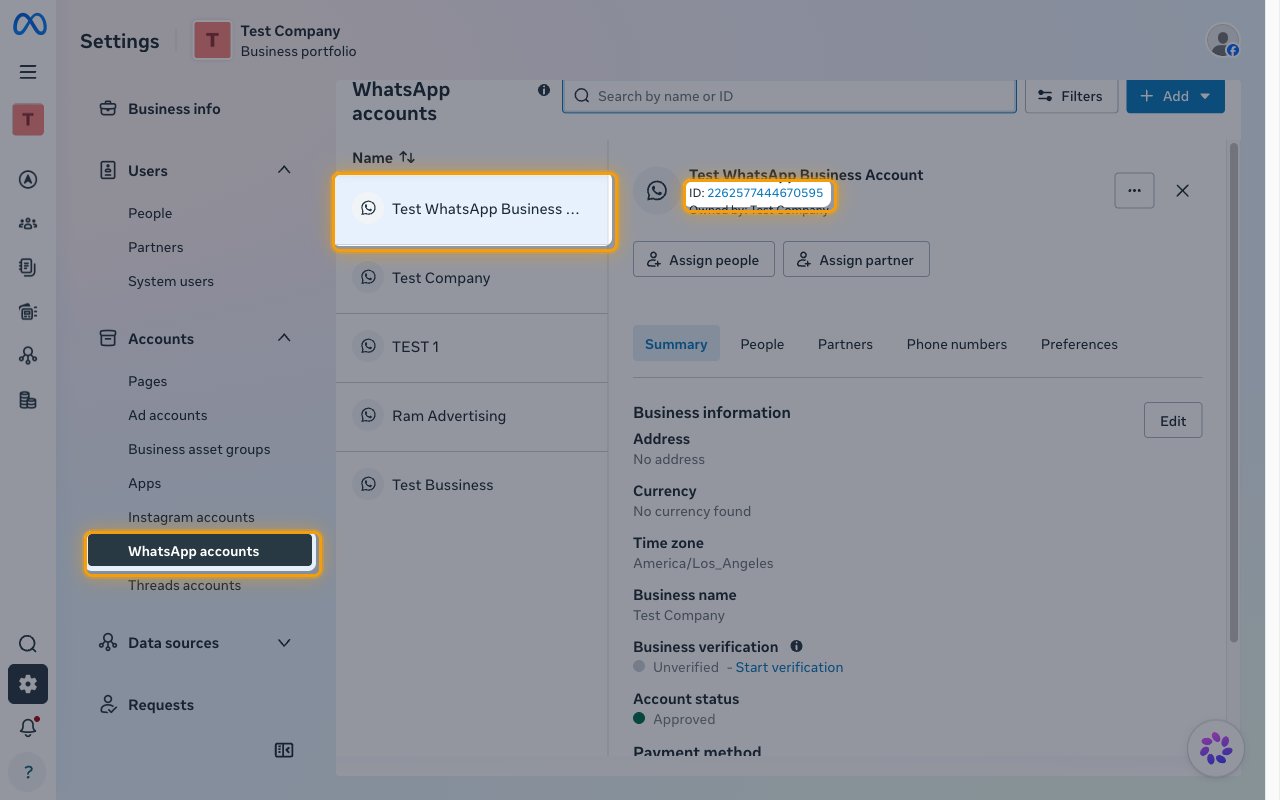
In Business Settings, open Accounts > WhatsApp accounts and select your WhatsApp account.
- Copy the number shown after ID: and paste it into the WhatsApp Business Account ID field in StackOne Hub.
- Format: a numeric ID such as
102290129340398
Find your Phone Number ID (optional)
The Phone Number ID is the ID Meta assigns to a business phone number, not the phone number itself. When it is set, actions that send messages, upload media, or manage a phone number use it by default. Leave it empty to pass phone_number_id on each action instead, or look it up later with the Get WhatsApp Business Account Phone Numbers action.
Open the Phone numbers tab
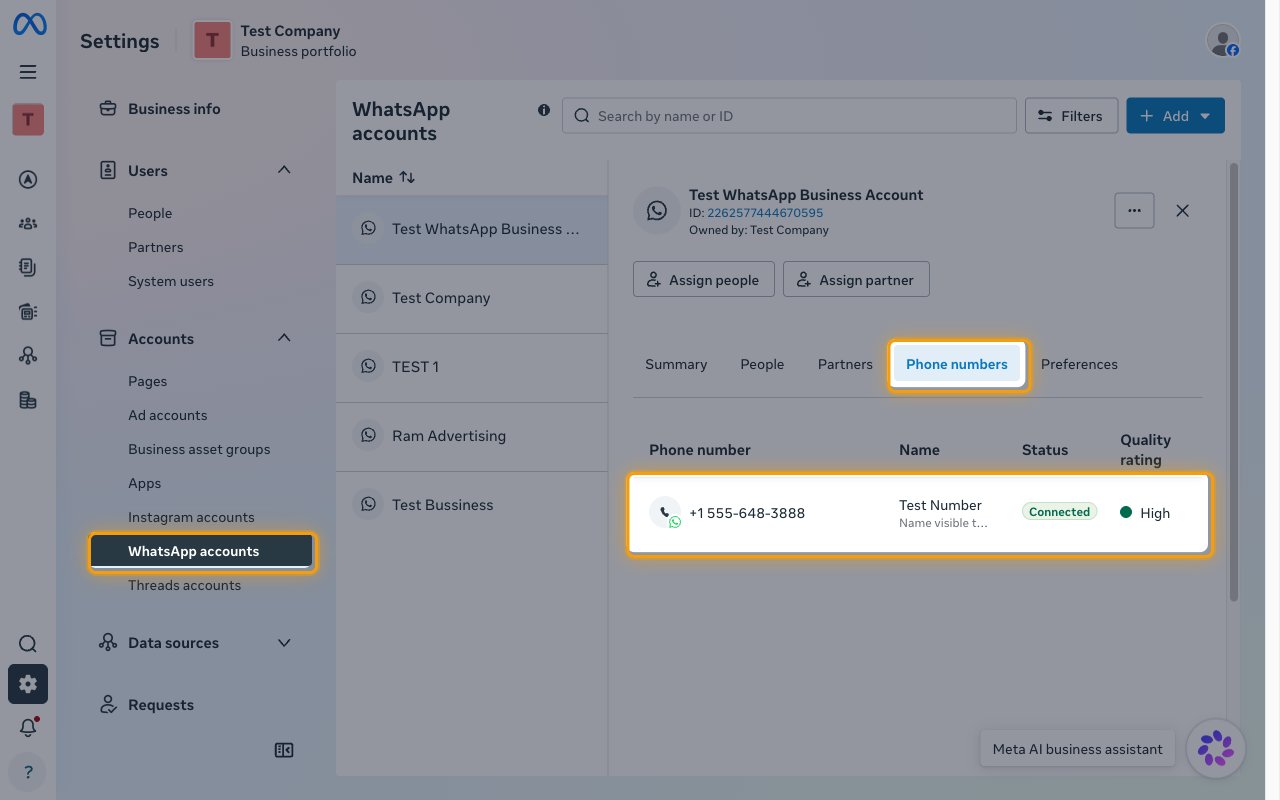
In Business Settings, open Accounts > WhatsApp accounts, select the same WhatsApp account you used for the WABA ID, and open the Phone numbers tab.
- Click the phone number you want to send from.
Copy the Phone Number ID
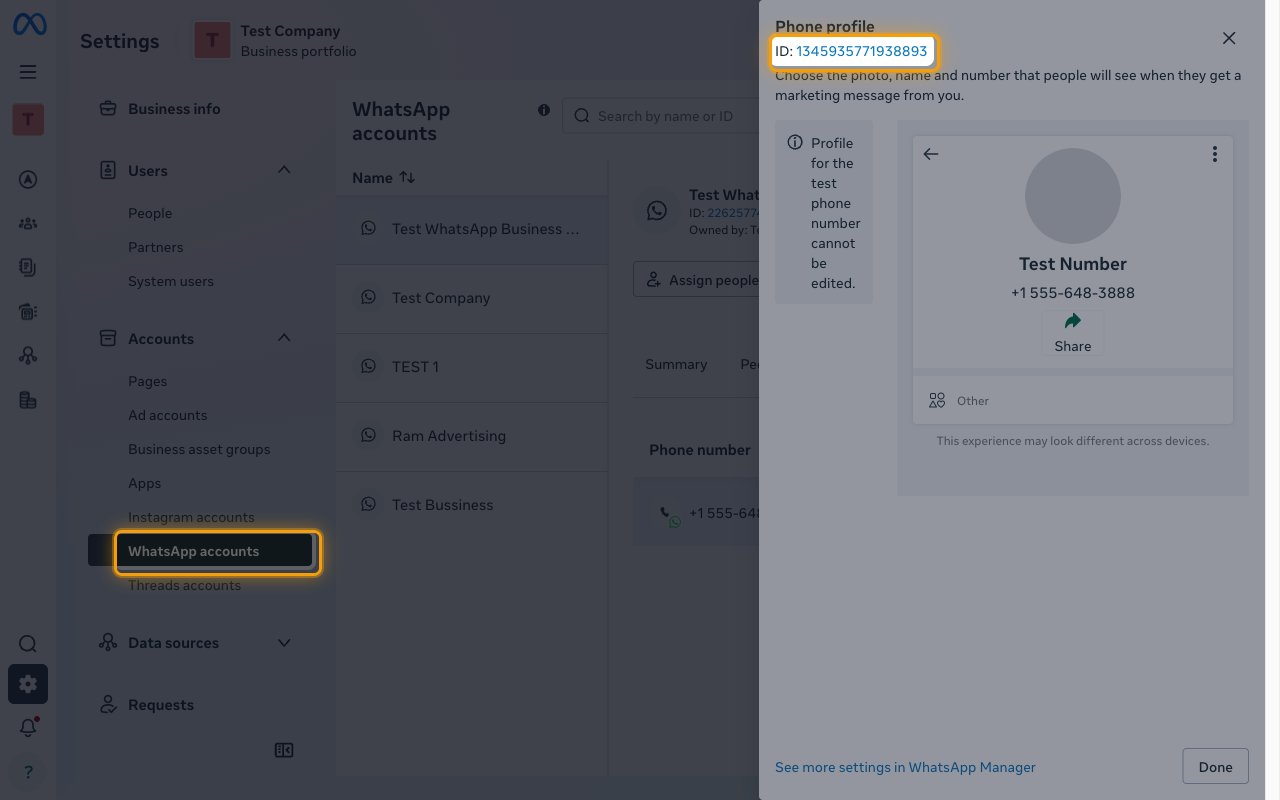
The Phone profile panel opens with the Phone Number ID shown after ID:.
- Copy the number shown after ID: and paste it into the Phone Number ID field in StackOne Hub.
- Click Done to close the panel.
- Format: a numeric ID such as
106540352242922
Use your Native Webhook URL
Native Webhook URL is generated by StackOne for this account after it connects and identifies the account to StackOne. To receive WhatsApp events, set it as the callback URL in your Meta app’s WhatsApp webhook configuration and subscribe to the webhook fields you need, as described in the WhatsApp Business events setup guide.
Linking the Account from the Hub
Navigate to the Hub
Fill out the fields
- Access Token
- WhatsApp Business Account ID
- Phone Number ID (Optional)
Connect
- Click Connect
- If applicable, the provider will redirect you to a sign-in or authorization page. Complete the provider’s authorization flow.
- Once authorization is successful, you will see a confirmation popup
If the account linking is successful, you will see the newly linked account in your Accounts page.
Next Steps
Webhooks setup
Configure receiving Events for WhatsApp Business into StackOne.