

Get your API key
WeatherAPI.com issues a single API key per account and shows it on the dashboard — there is no separate app or credential to create.
Sign in to your account
Open the WeatherAPI.com dashboard and sign in. If you do not have an account yet, create one from the WeatherAPI.com signup page first — the key is generated automatically when the account is created.
Copy your API key
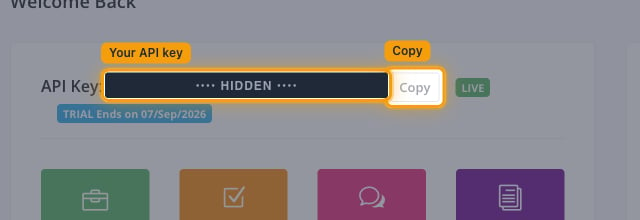
The dashboard opens on Welcome Back. Your key is shown on the same line as the API Key: label, with a plan badge (LIVE) beside it.
- Click Copy next to the key to copy it to your clipboard.
- Copy the full value with no leading or trailing spaces.
- The key stays visible on this dashboard, so it can be retrieved again at any time — it is not shown only once. That makes exposure, not loss, the risk to guard against.
Paste the key into StackOne Hub
Paste the value into the API Key field in StackOne Hub to finish connecting the account.
- API Key — the single key that authorises every request. WeatherAPI.com sends it as a query parameter, so it is the only credential this connection needs.
Keep your key secure
The same dashboard lets you replace the key if it leaks.
Generate a replacement key
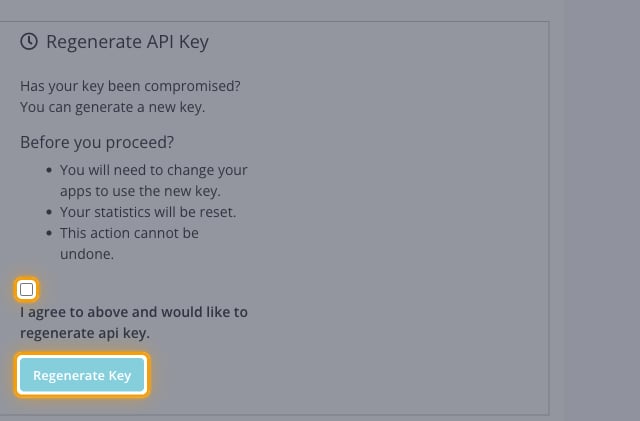
Scroll to Regenerate API Key, which asks Has your key been compromised? and offers to generate a new key. Read the Before you proceed? notes first, then tick I agree to above and would like to regenerate api key. and click Regenerate Key.
- You will need to change your apps to use the new key. — update the key in StackOne Hub immediately afterwards, or the connection will start failing.
- Your statistics will be reset.
- This action cannot be undone.
Linking the Account from the Hub
Navigate to the Hub
Fill out the fields
- API Key
Connect
- Click Connect
- If applicable, the provider will redirect you to a sign-in or authorization page. Complete the provider’s authorization flow.
- Once authorization is successful, you will see a confirmation popup
If the account linking is successful, you will see the newly linked account in your Accounts page.