

Create the personal access token
A personal access token acts as the UiPath user who creates it, with that user’s roles and the scopes chosen for the token.
Open your preferences
Sign in to your UiPath Automation Cloud account as the user the connection should act as.
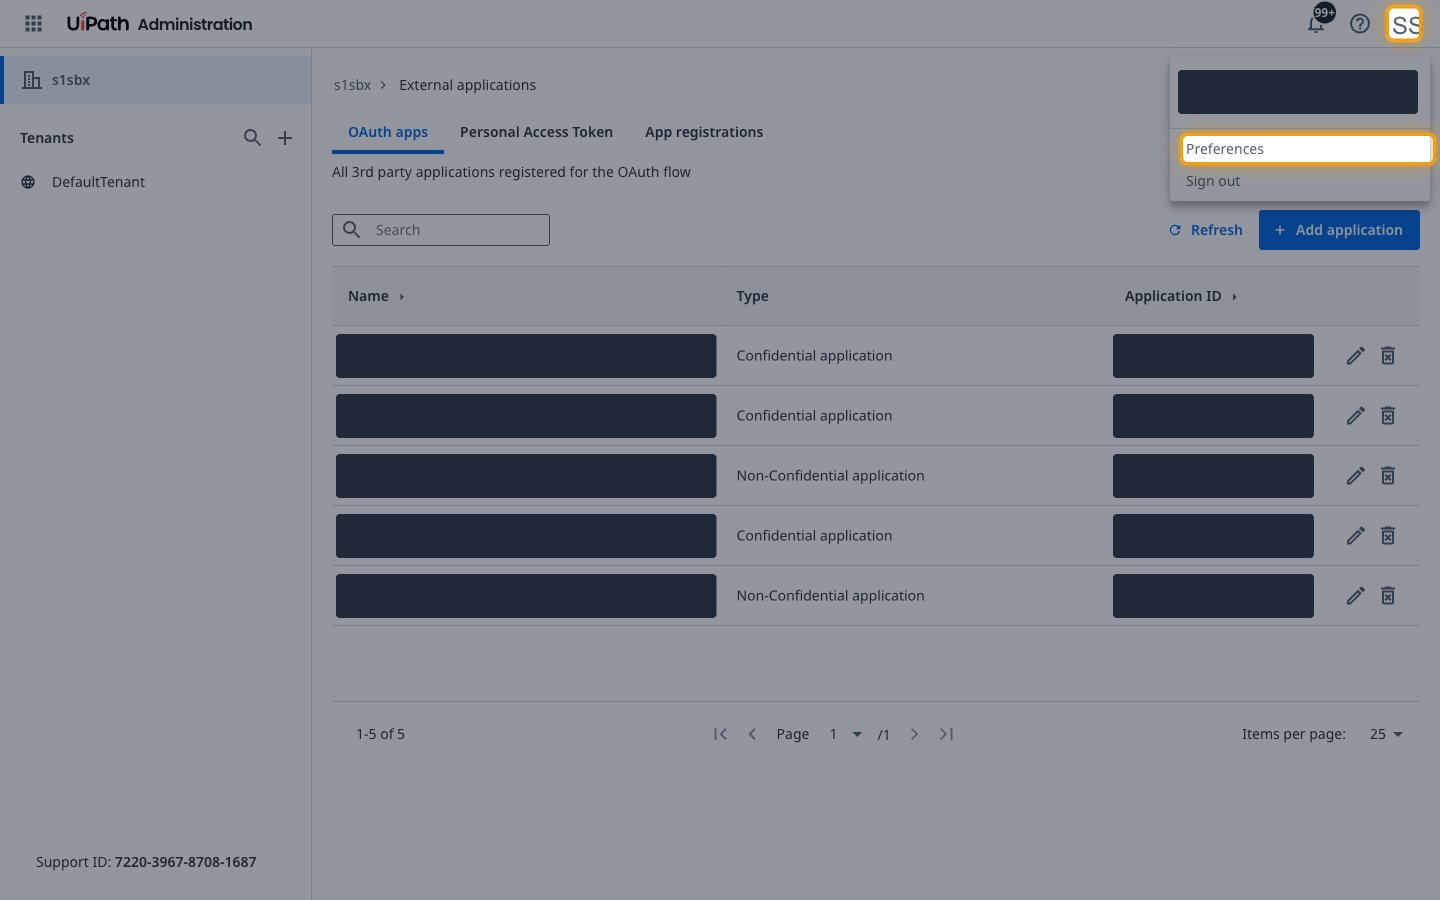
- Click your initials at the top right.
- Select Preferences.
Start a new token
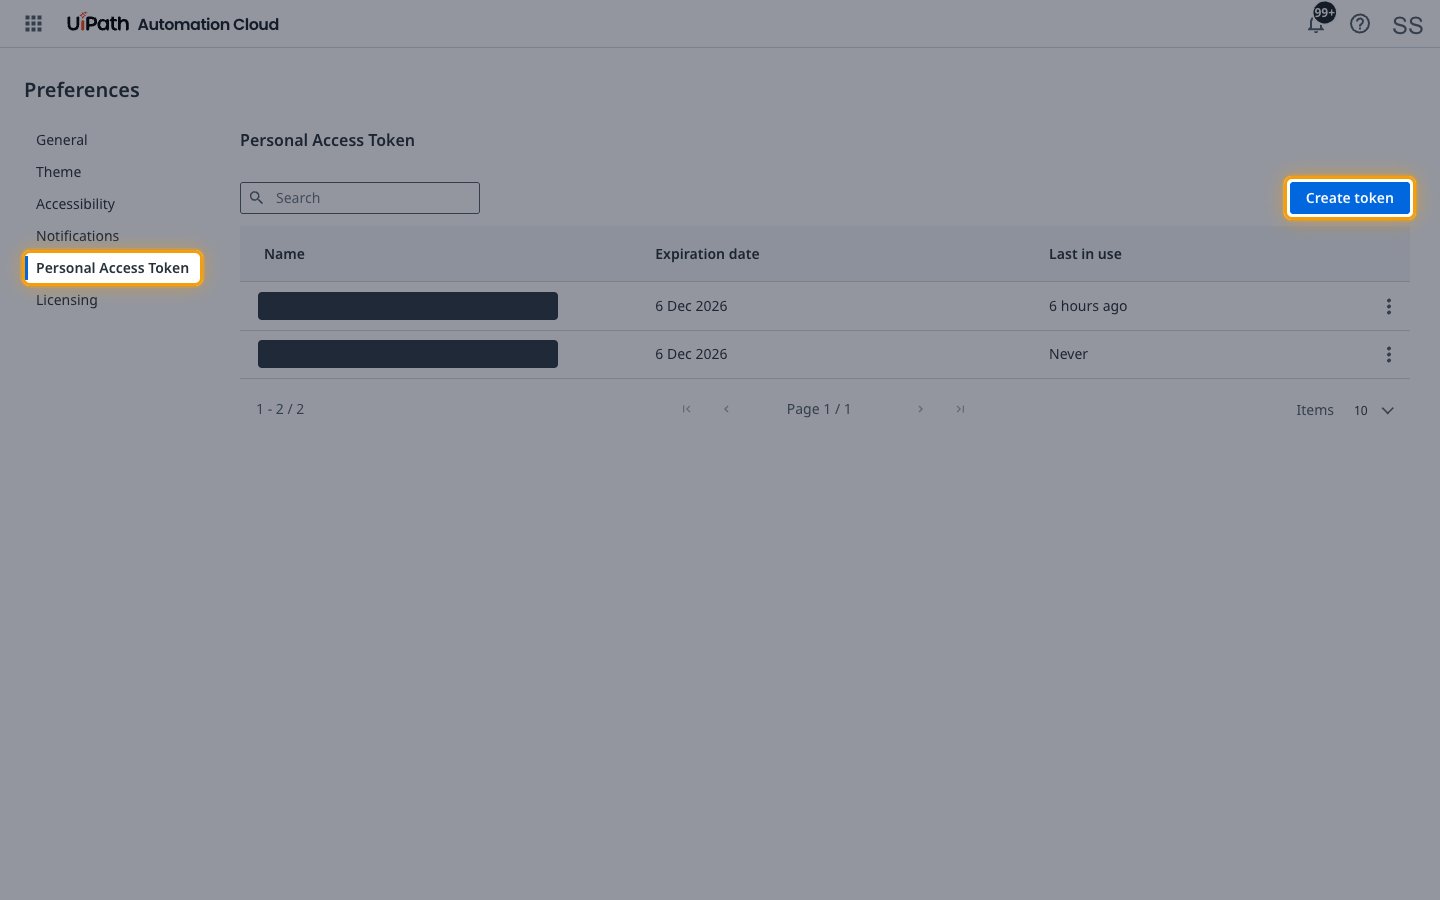
Open the Personal Access Token tab.
- Click Create token.
Name the token
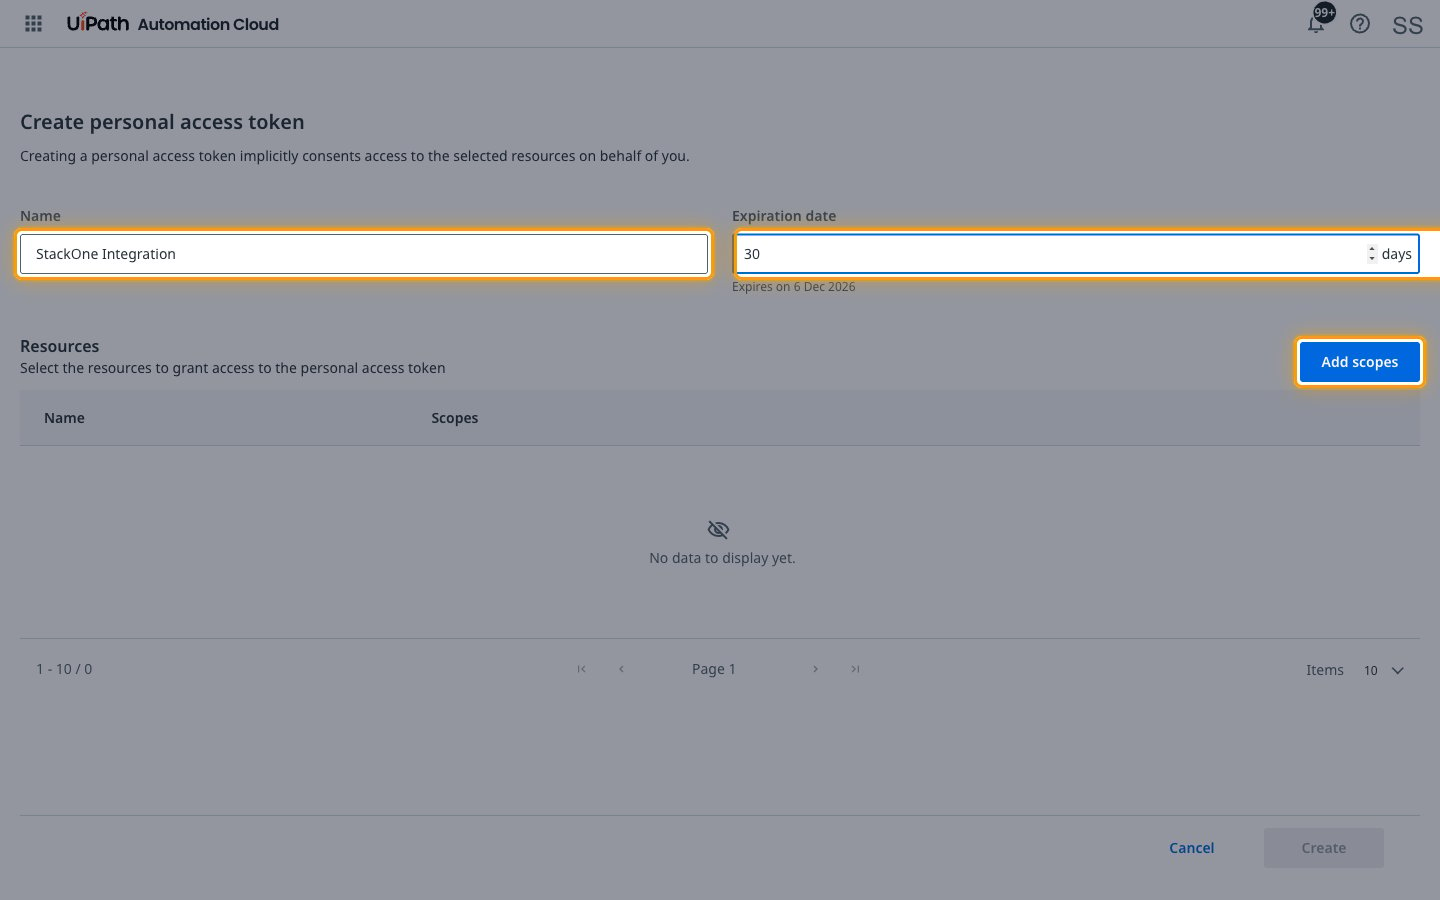
Fill in the top of the Create personal access token page.
- Name:
StackOne Integration - Expiration date: Number of days until the token expires
Add the Platform Management scopes
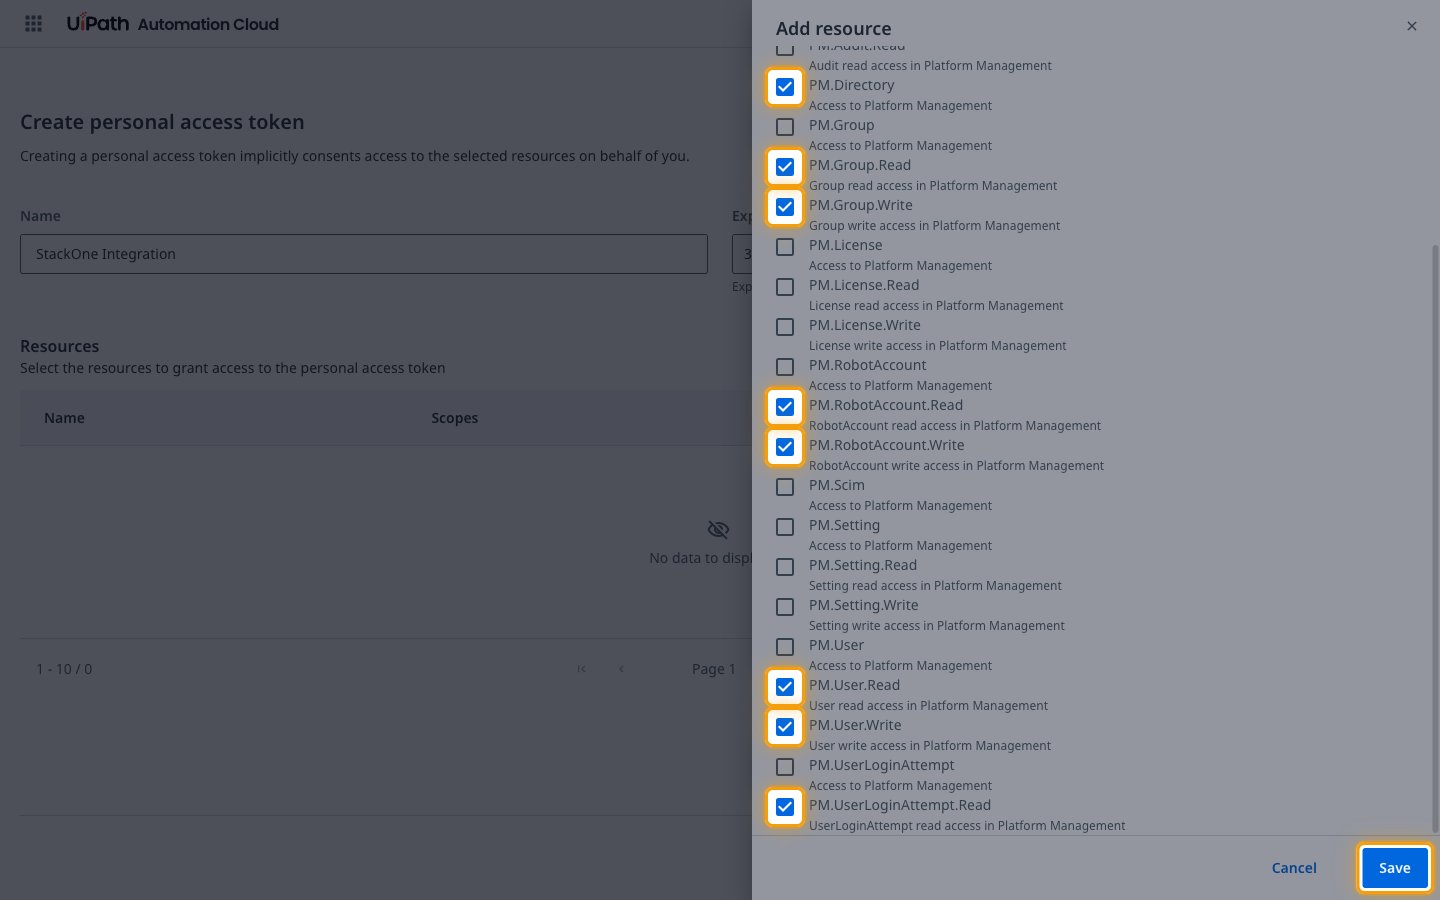
Under Resources, click Add scopes.
- In Resource, select Platform Management.
- Tick each scope listed.
- Click Save.
Add the Orchestrator scopes
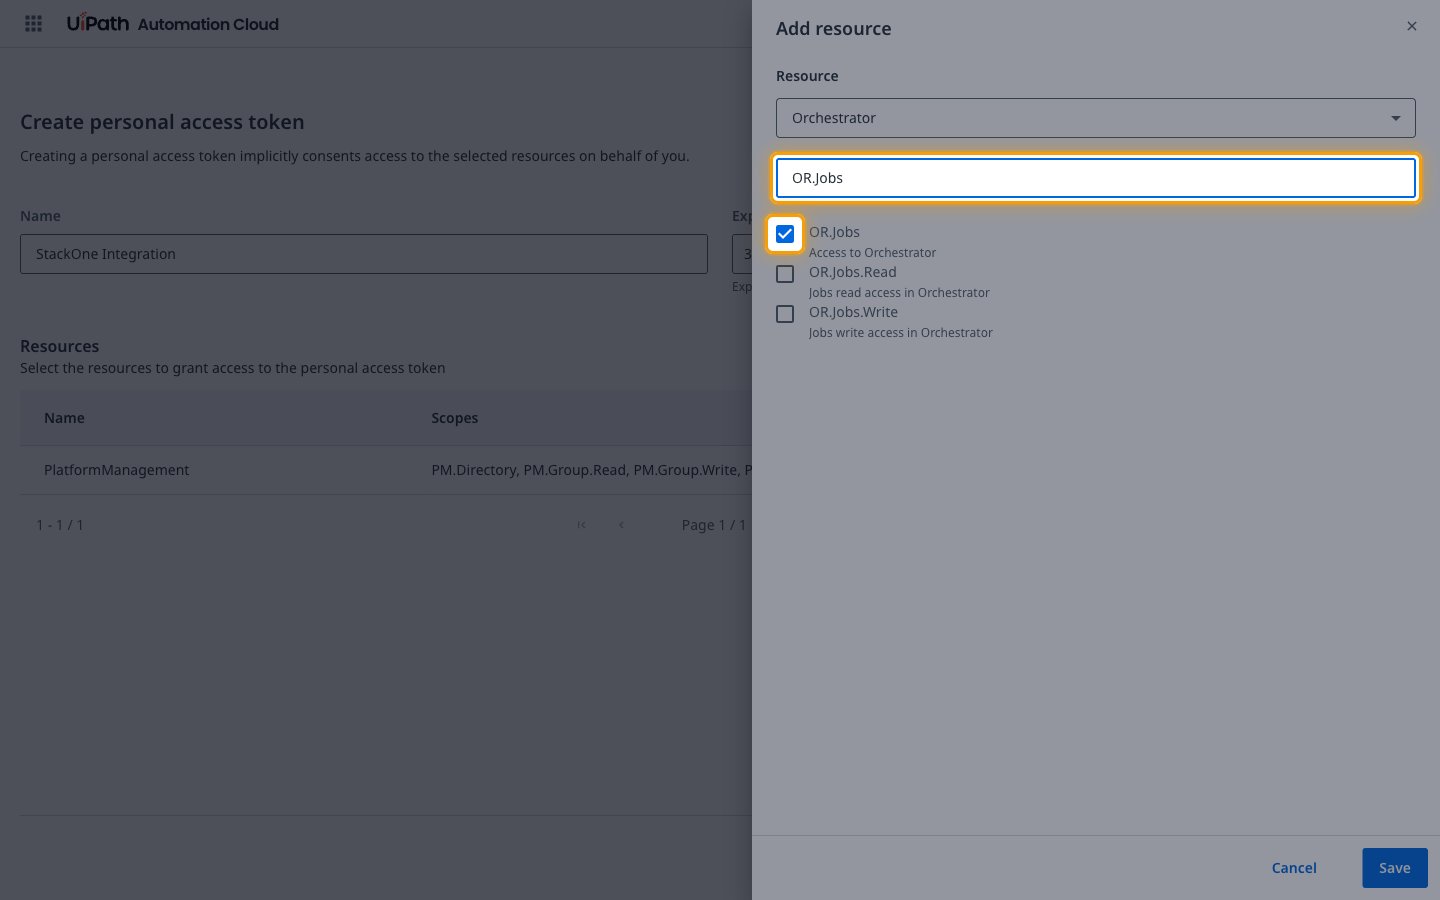
Under Resources, click Add scopes again.
- In Resource, select Orchestrator.
- Tick
OR.Folders,OR.Execution,OR.Jobs,OR.Queues,OR.Assets,OR.Robots,OR.Machines,OR.Tasks,OR.Buckets,OR.WebhooksandOR.Monitoring.Read. - Type each name in Search and tick the entry with exactly that name.
- Click Save.
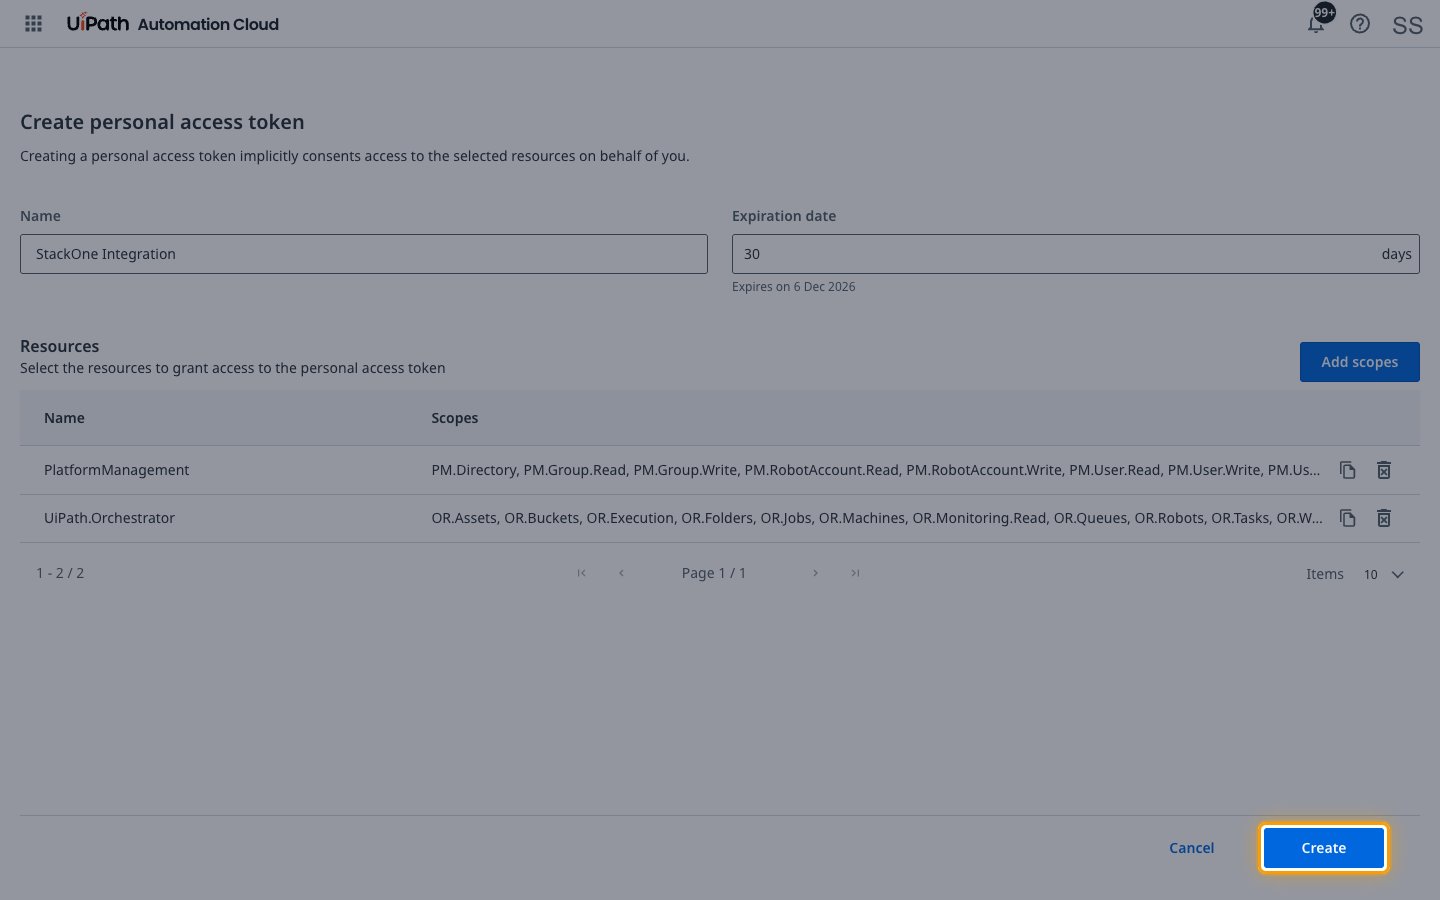
Create the token
Check that Resources lists both resources, then click Create.
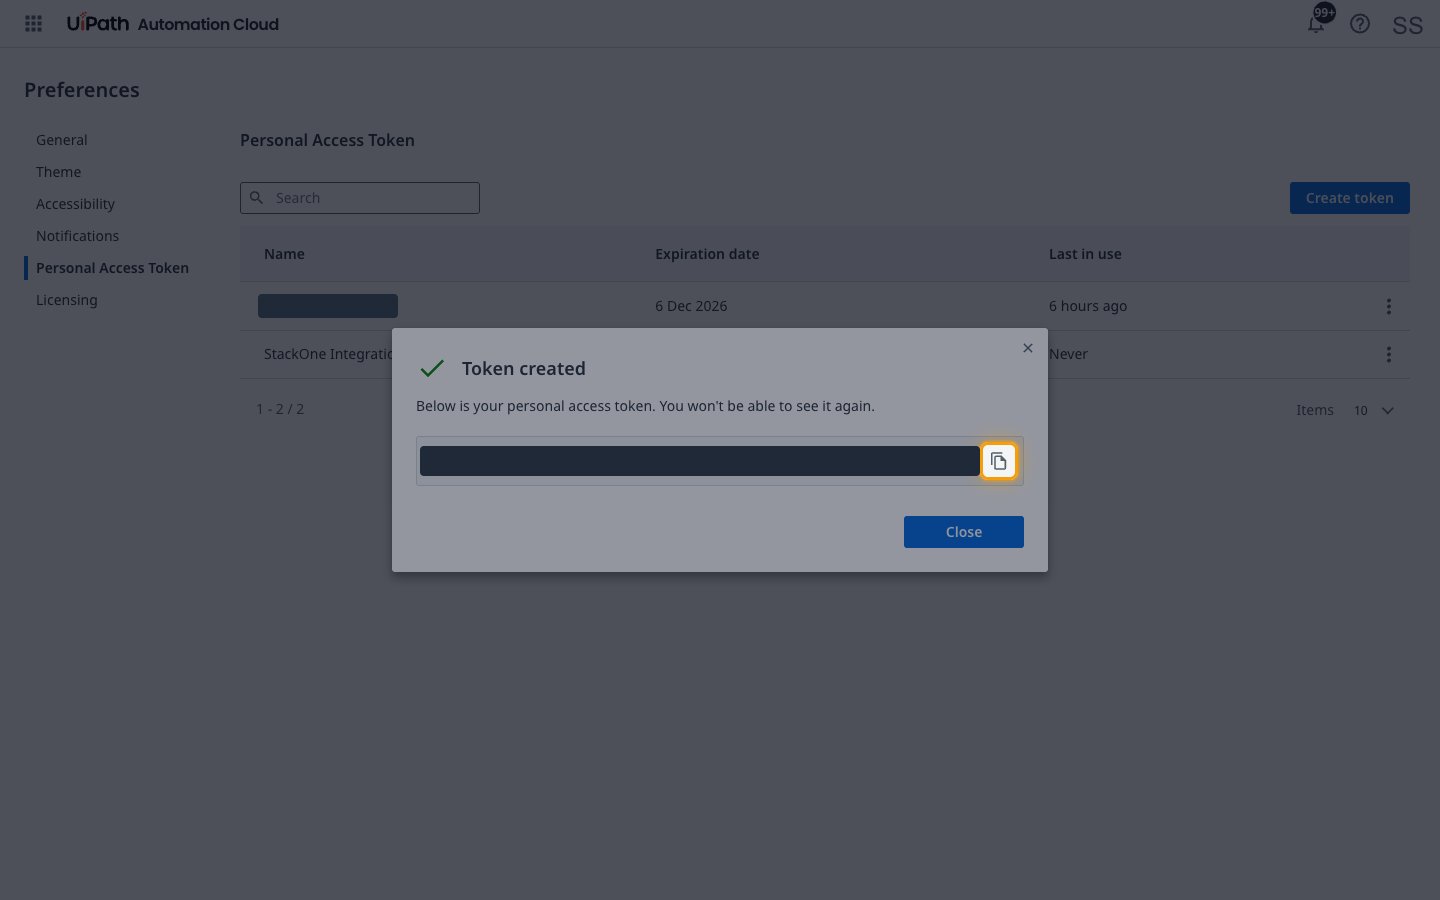
Copy the token
The Token created window shows the token.
- Click the copy button next to it.
- Copy the Personal Access Token across.
- The token is only displayed once and cannot be retrieved later.
Find your Cloud Type
The Cloud Type is the UiPath cloud your organization signs in to.
- Look at the address in your browser when you are signed in to UiPath.
cloud.uipath.comis Automation Cloudgovcloud.uipath.usis Automation Cloud Public Sector{name}.dedicated.uipath.comis Automation Cloud Dedicated- Leaving Cloud Type empty uses Automation Cloud.
- Select the matching Cloud Type.
Find your Dedicated Cloud Name
The Dedicated Cloud Name is the first part of your Automation Cloud Dedicated address. Skip it for the other clouds.
- Format:
{name}from{name}.dedicated.uipath.com - Example:
acme - Use letters, digits and hyphens only.
- Copy the Dedicated Cloud Name across.
Find your Organization Name
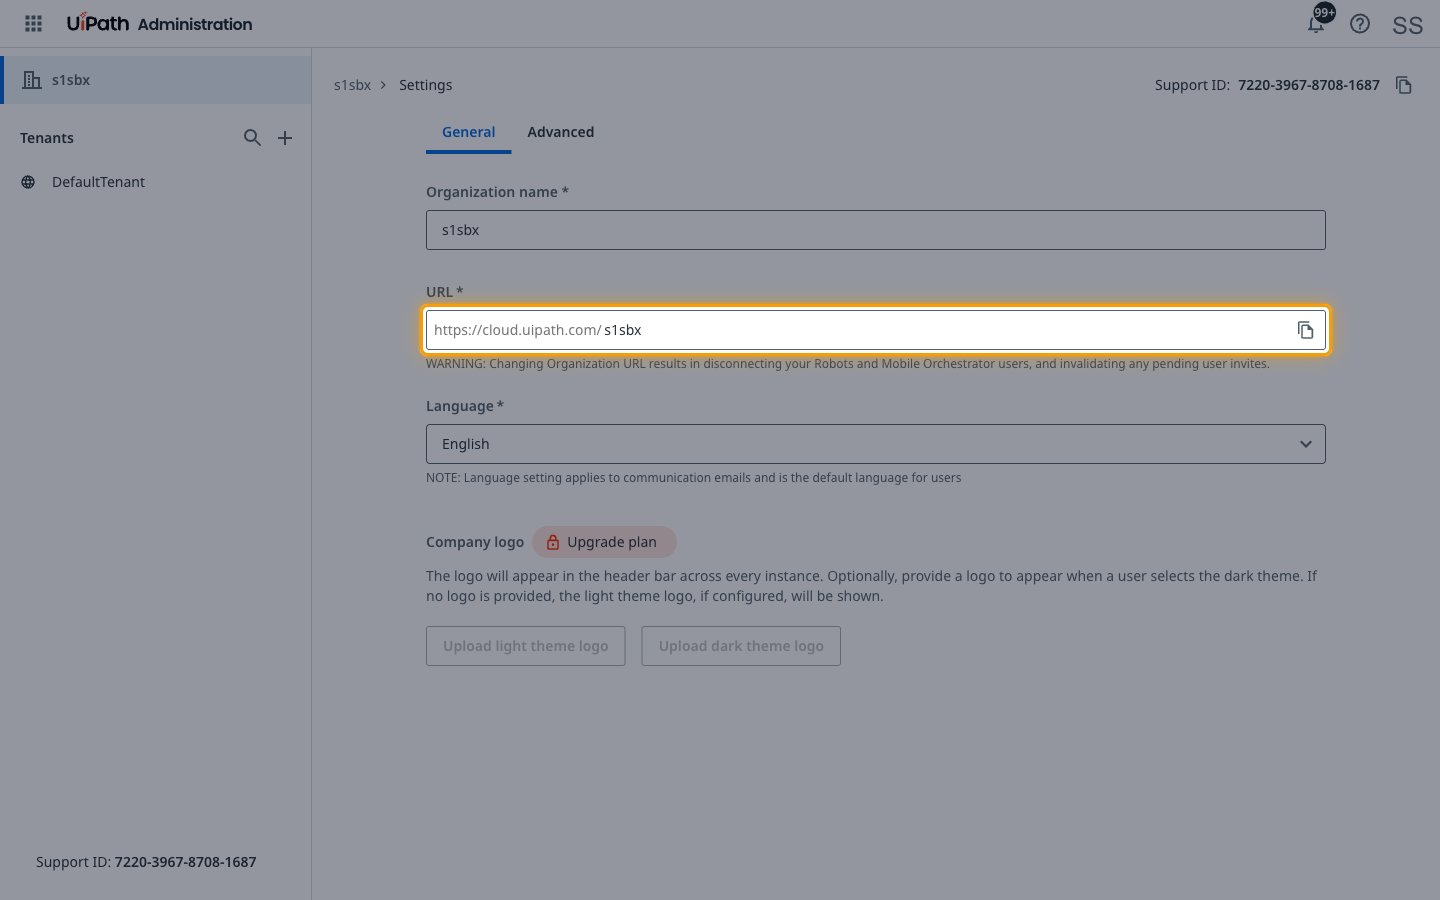
The Organization Name is your organization’s URL name.
Copy the URL name
In Admin, open Settings. On the General tab, the URL field shows the name after https://cloud.uipath.com/.
- It is not the Organization name field above it, which is a display name.
- Format:
https://cloud.uipath.com/{organization}/{tenant} - Example:
https://cloud.uipath.com/acmecorp/DefaultTenantgivesacmecorp - Copy the Organization Name across.
Find your Tenant Name
The Tenant Name is the Orchestrator tenant the actions run in.
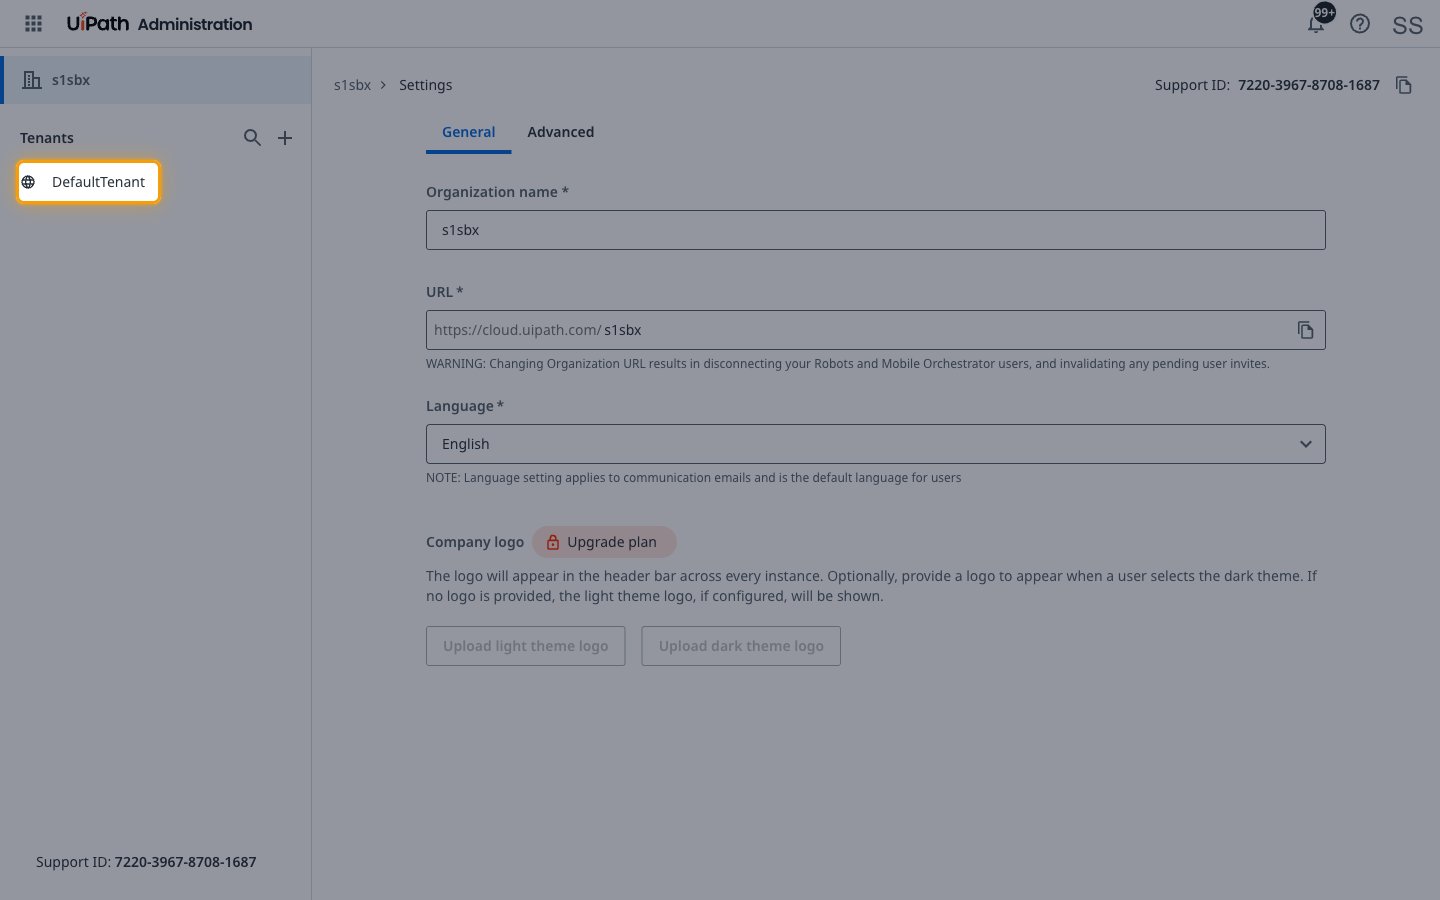
Copy the tenant name
In Admin, your tenants are listed under Tenants in the left panel.
- Format:
https://cloud.uipath.com/{organization}/{tenant}/orchestrator_ - Example:
https://cloud.uipath.com/acmecorp/DefaultTenant/orchestrator_givesDefaultTenant - Copy the Tenant Name across.
Find your Organization ID
The Organization ID is the ID UiPath calls the partitionGlobalId. It is a GUID.
Check the sign-in address
Sign in to UiPath and look at the address you land on. It holds organizationId= followed by the ID.
- Format:
xxxxxxxx-xxxx-xxxx-xxxx-xxxxxxxxxxxx - The address can change too fast to read.
- Copy the Organization ID across.
Find it with the browser developer tools
Open the developer tools before you sign in, switch to the Network tab and turn on recording.
- Sign in to UiPath Automation Cloud and select your tenant.
- After the page loads, find a request such as the Settings API request.
- Copy the ID that follows
partitionGlobalIdin its Request URL. - Copy the Organization ID across.
Link the Account
Connect
- Click Connect.
- If applicable, the provider will redirect you to a sign-in or authorization page. Complete the provider’s authorization flow.
- Once authorization is successful, you will see a confirmation popup.
Use Actions
Next Steps
Webhooks setup
Configure receiving Events for UiPath into StackOne.