

Create a Ticketmaster developer account
The Ticketmaster Discovery API is authenticated with an API key that comes from a free
Ticketmaster developer account. Start by opening the developer portal and signing in.
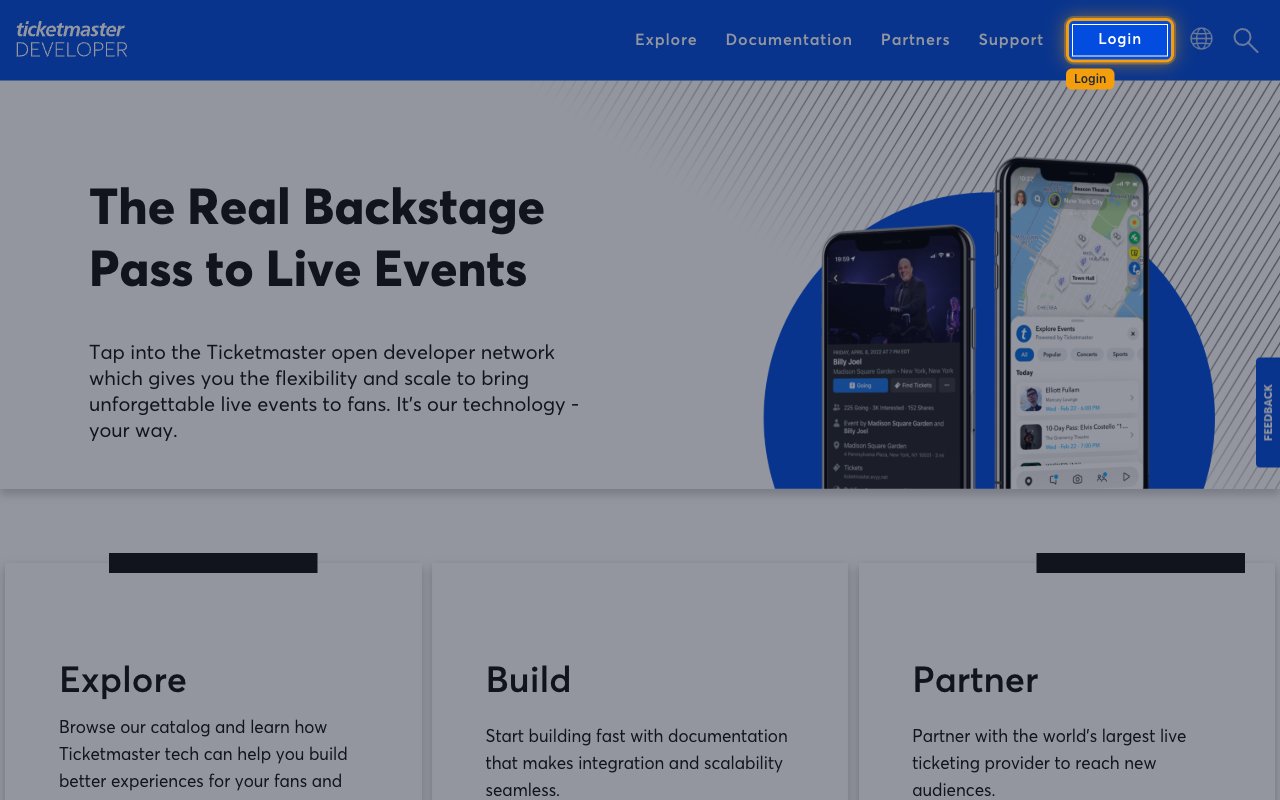
Open the developer portal
Go to the Ticketmaster Developer Portal and click
Login in the top navigation bar.
Create an account
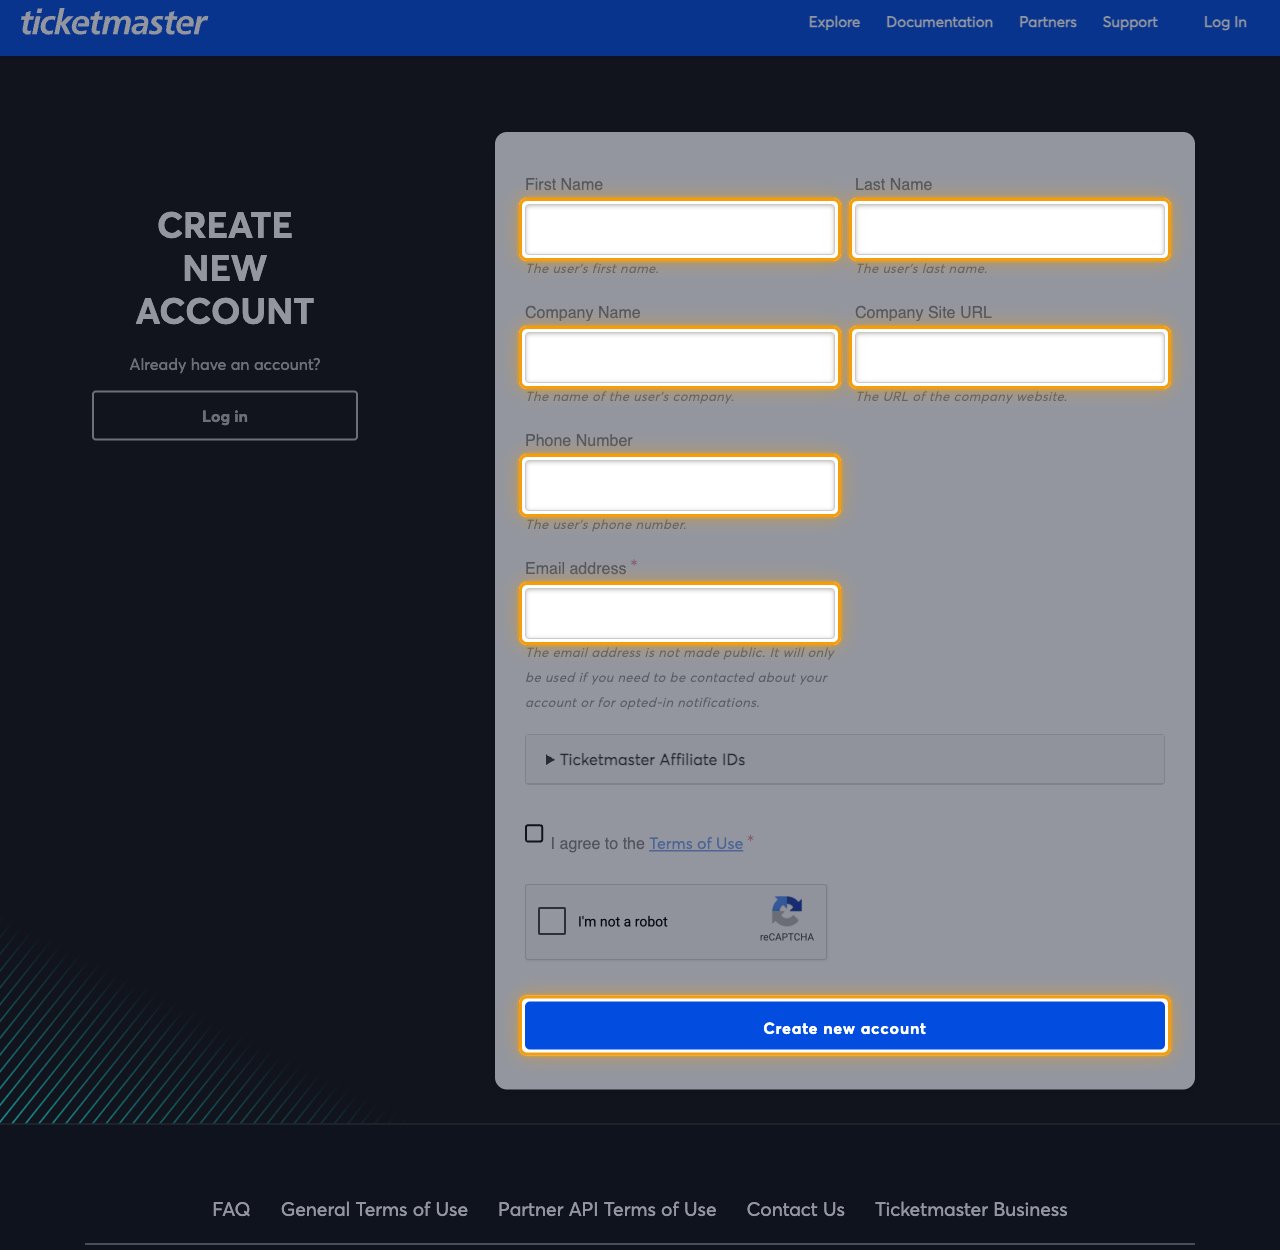
If you do not have a developer account yet, open the Ticketmaster developer account
registration page and complete
the Create New Account form:
- First Name and Last Name — your name.
- Company Name and Company Site URL — your organization and its website.
- Phone Number — a contact number.
- Email address — the address the account is registered to. This is required, and it is where account e-mails are sent.
- Tick I agree to the Terms of Use, complete the I’m not a robot check, then click Create new account.
Sign in to the portal
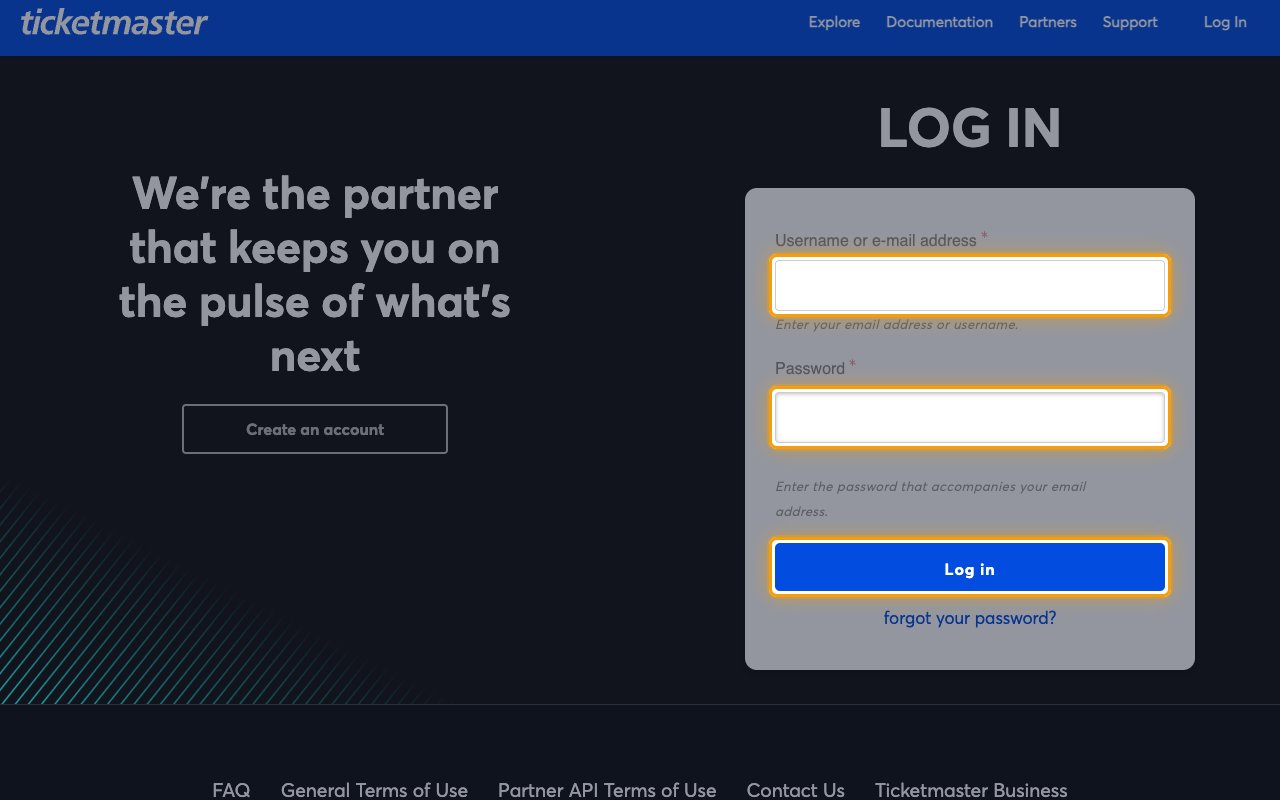
Open the Ticketmaster developer sign-in page and fill in the Log In form, then click Log in.
- Username or e-mail address — the e-mail address or username of your developer account.
- Password — the password for that account.
Create an app and copy your API key
Your API key lives on an app in the developer portal. Every app carries its own Consumer
Key, which is the value StackOne uses as the API key.
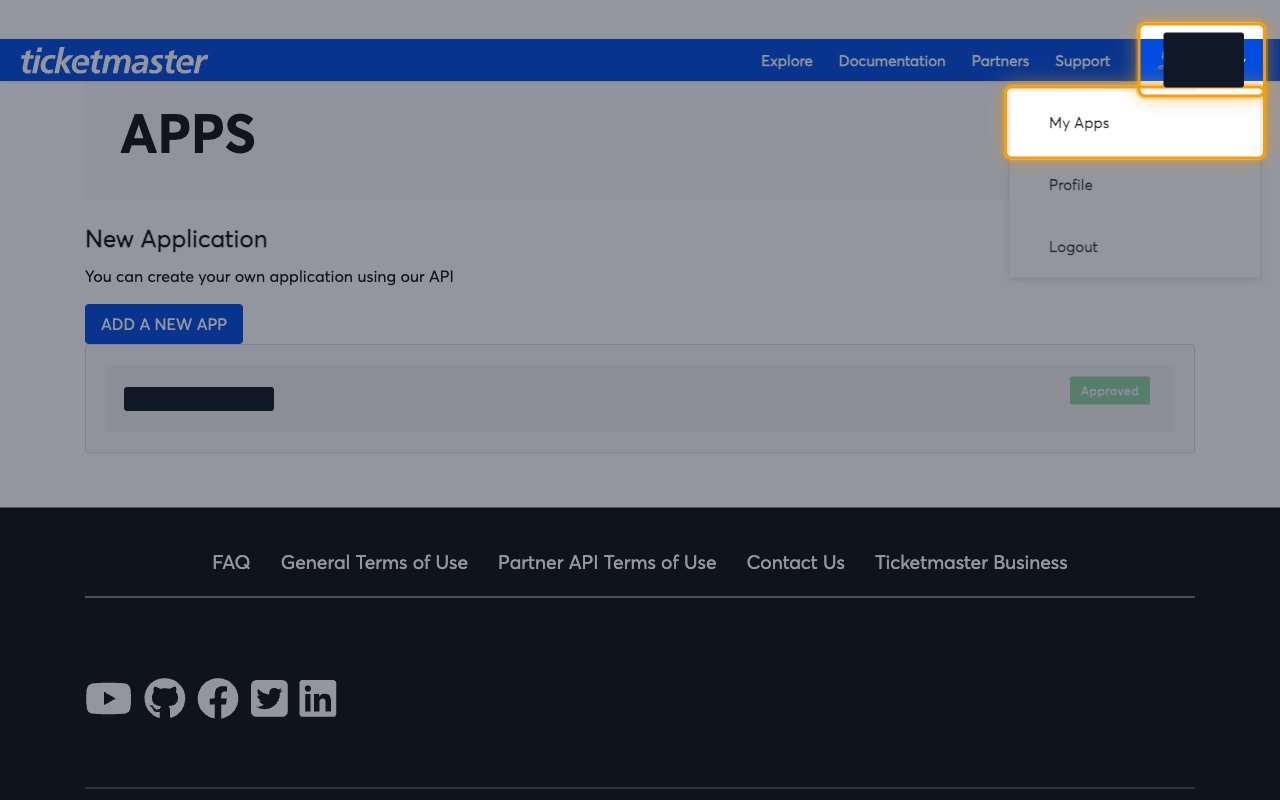
Open My Apps
Click your account name in the top-right corner of the portal, then click My Apps to
open the Apps page.
Add a new app
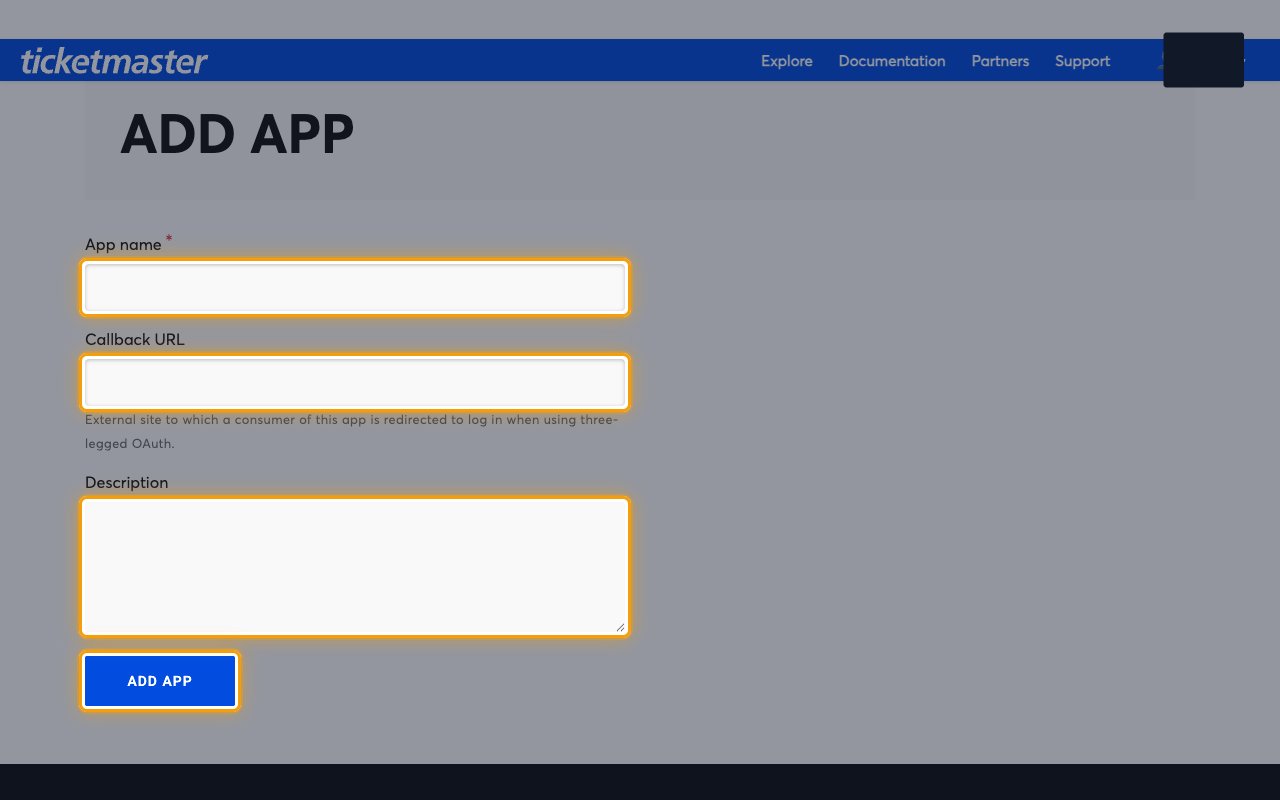
On the Apps page, click ADD A NEW APP under New Application, then complete the
Add App form and click ADD APP.
- App name — a name for the app, for example
StackOne Integration. This field is required. - Callback URL — used only for three-legged OAuth, so leave it empty for the Discovery API.
- Description — an optional note describing what the app is for.
Verify the app was created
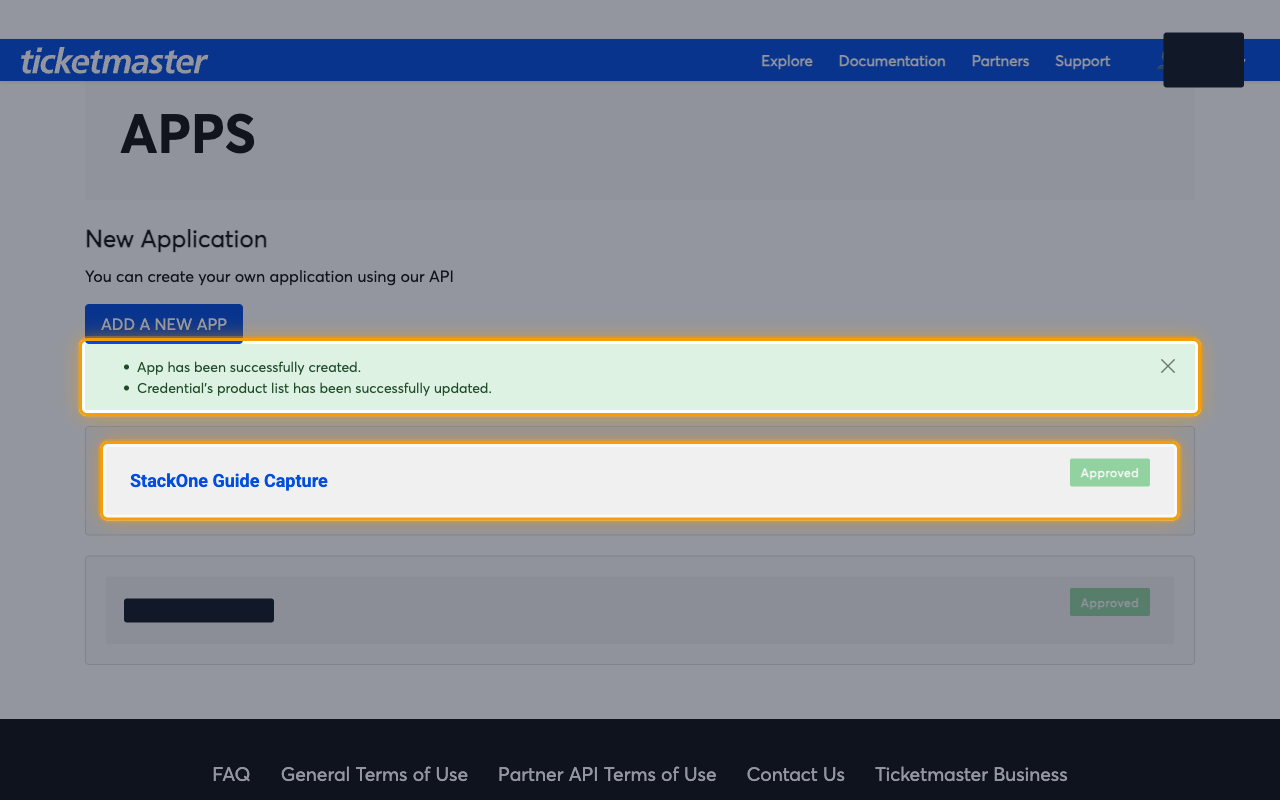
The Apps page confirms App has been successfully created. and
Credential’s product list has been successfully updated. The new app appears in the
list marked Approved, and its API key is ready to use straight away.
Open the app credentials
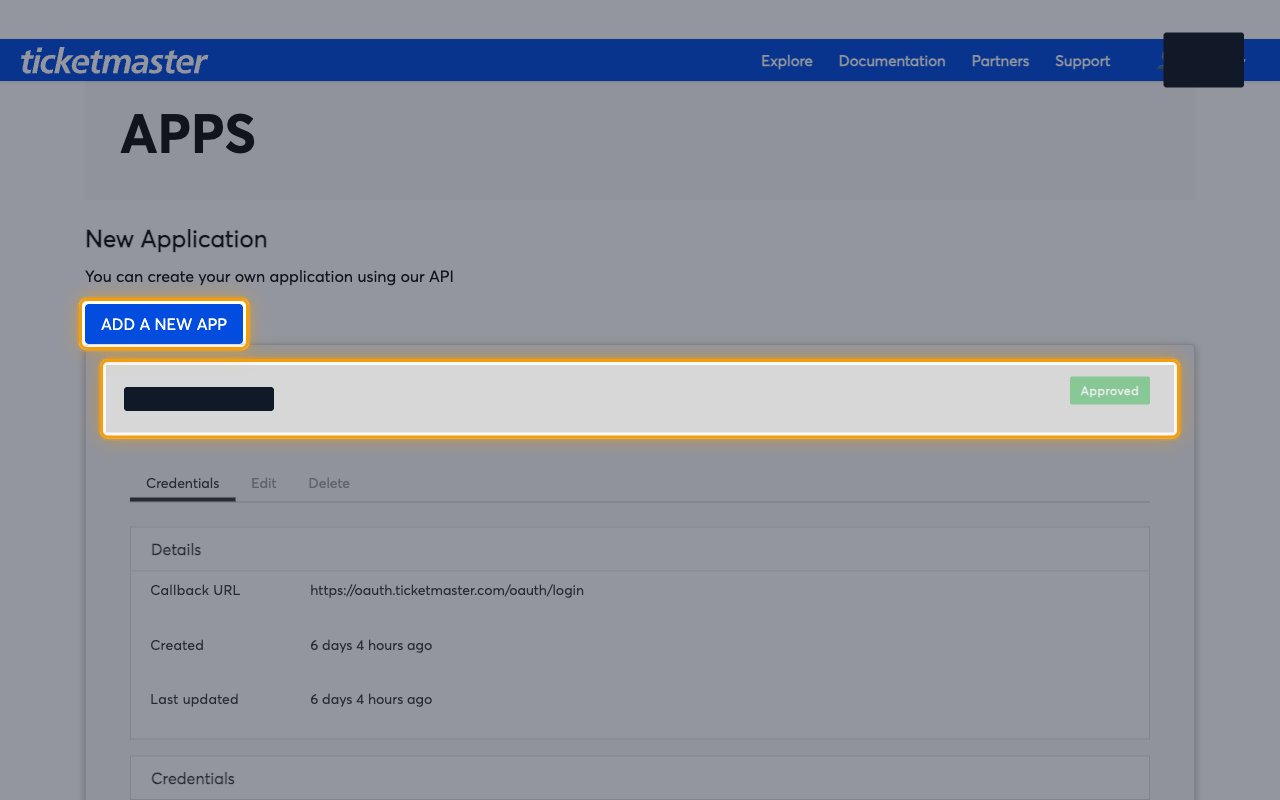
Click the app’s name in the list to expand it. The Credentials tab opens by default and shows a Details panel with the app’s Callback URL, Created and Last updated values.
Copy the Consumer Key
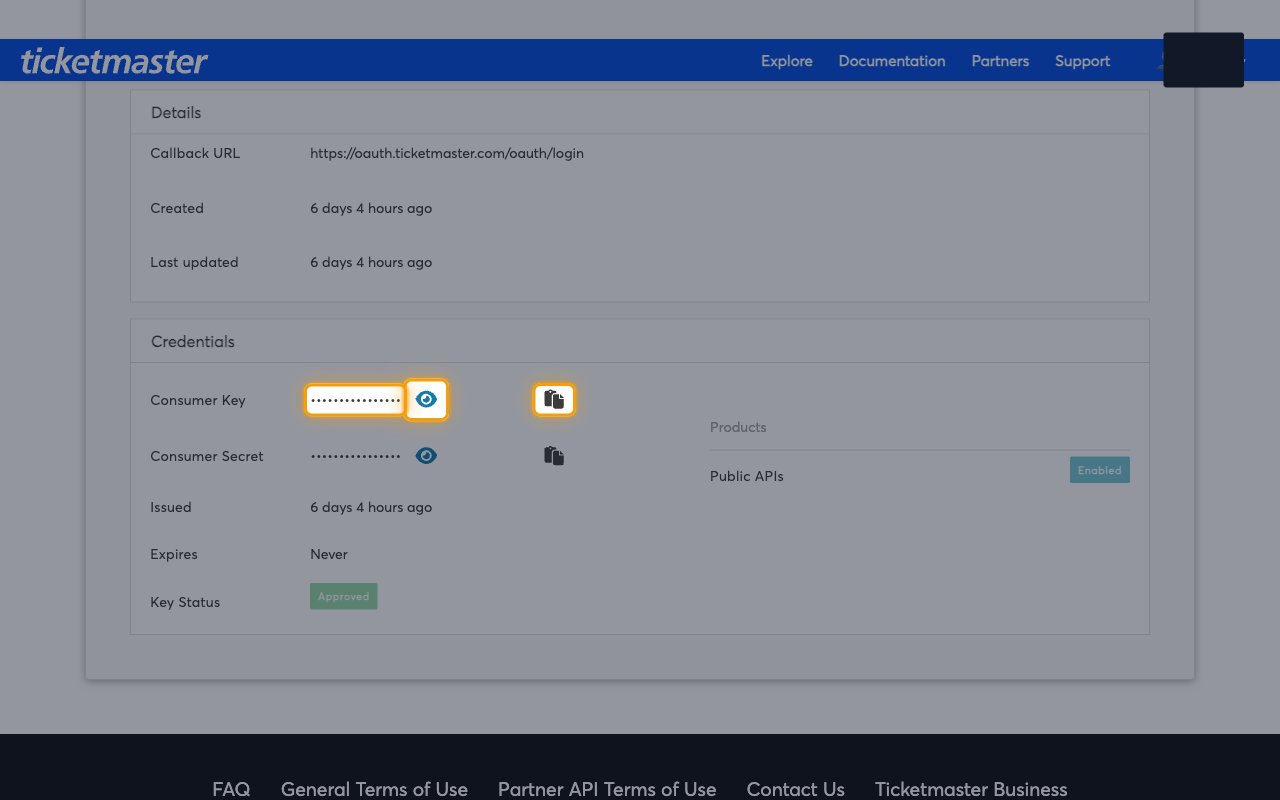
Scroll to the Credentials panel. Click Toggle key visibility next to
Consumer Key to reveal the value, or click Click to copy to copy it straight to
your clipboard. This Consumer Key is your API key.
- Expires shows Never and Key Status shows Approved, so you can come back to this panel and copy the key again whenever you need it.
- Under Products, Public APIs shows Enabled, which is the access the Discovery API needs.
Connect Ticketmaster in StackOne
Finish the connection by entering the key you copied in StackOne Hub.
Enter the API key
Paste the copied value into the API Key field in StackOne Hub and complete the
connection.
- API Key — the Consumer Key of your app from the developer portal’s My Apps page.
Linking the Account from the Hub
Navigate to the Hub
Fill out the fields
- API Key
Connect
- Click Connect
- If applicable, the provider will redirect you to a sign-in or authorization page. Complete the provider’s authorization flow.
- Once authorization is successful, you will see a confirmation popup
If the account linking is successful, you will see the newly linked account on your Accounts page.