

Before you begin
Make sure you can reach your TalentLyft integration settings before generating a token.
- An active TalentLyft account that can open Settings → Integrations
- Sign in at the TalentLyft dashboard
Open the Access token settings
The access token is generated from the Integrations page in your TalentLyft account settings.
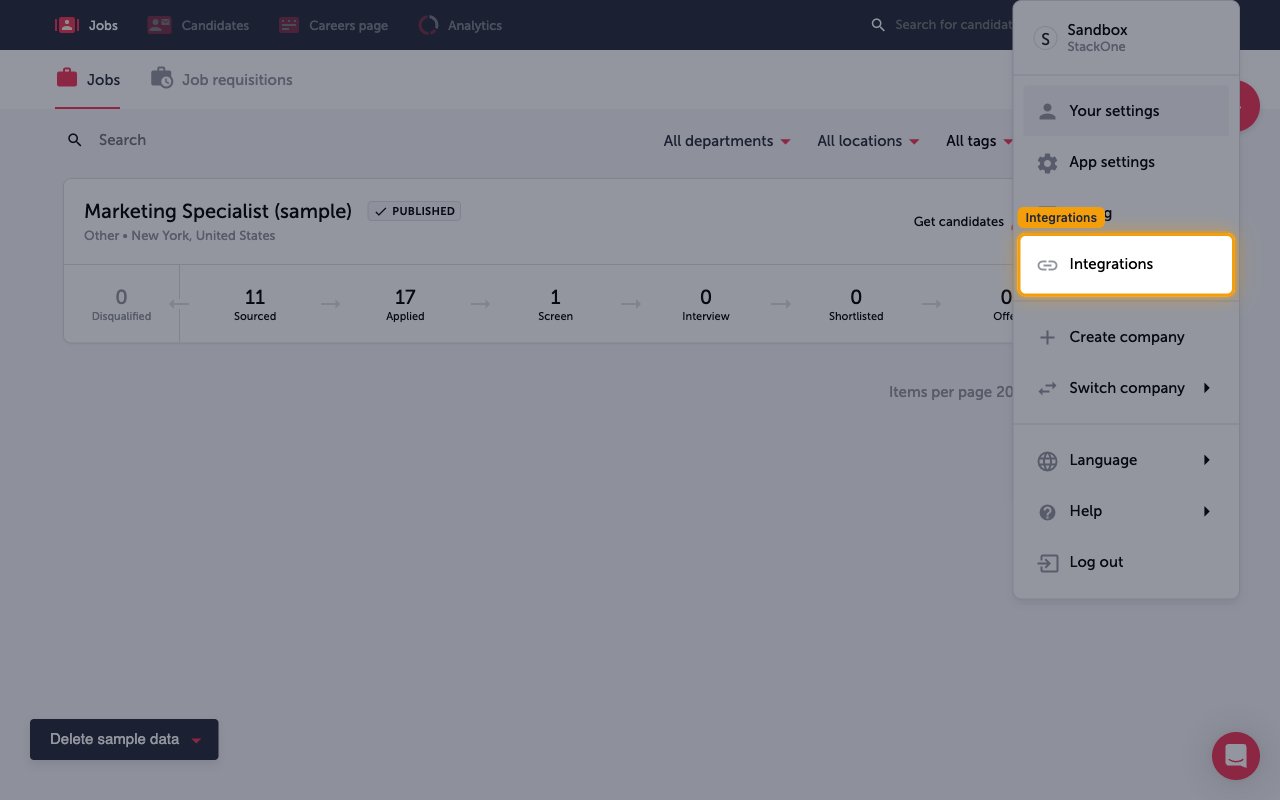
Open the profile menu
In the top-right corner of the TalentLyft dashboard, click your Profile icon, then select Integrations from the menu.
Open the Access token settings
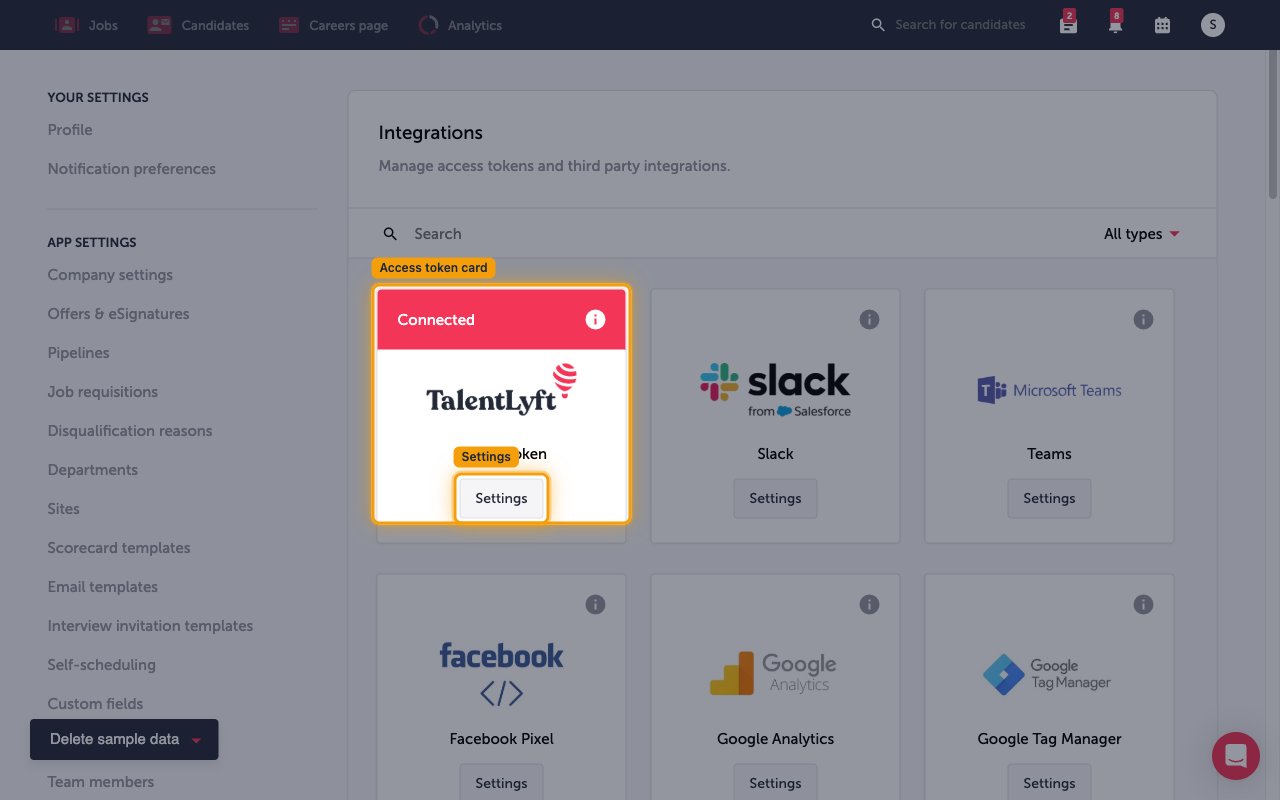
On the Integrations page (“Manage access tokens and third party integrations”), find the Access token card and click Settings on it.
Generate the access token
Generate the token and copy its value so you can paste it into StackOne.
Generate and copy the token
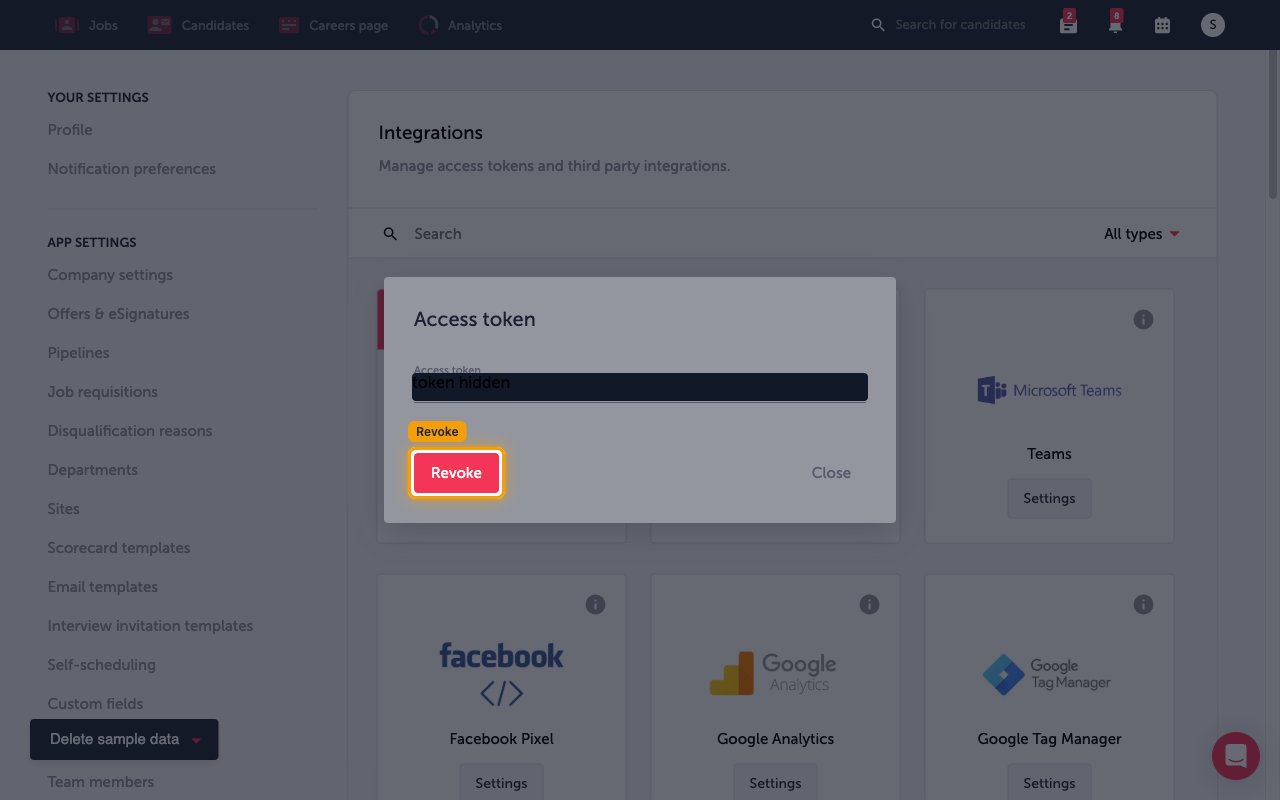
In the Access token dialog, create the token and copy the value shown in the Access token field.
- If no token exists yet, click Generate to create one.
- If a token already exists, the dialog shows Revoke and Close instead of Generate. Click Revoke to remove the current token, then reopen the dialog and click Generate to create a new one.
- Copy the value shown in the Access token field immediately.
- The token grants full API access to your TalentLyft data — store it securely.
Paste the token into StackOne
Paste the copied value into the Access Token field in StackOne Hub to complete the connection.
Linking the Account from the Hub
Navigate to the Hub
Fill out the fields
- Access Token
Connect
- Click Connect
- If applicable, the provider will redirect you to a sign-in or authorization page. Complete the provider’s authorization flow.
- Once authorization is successful, you will see a confirmation popup
If the account linking is successful, you will see the newly linked account in your Accounts page.
Next Steps
Webhooks setup
Configure receiving Events for TalentLyft into StackOne.