

Find your Snyk region
Snyk hosts accounts in several regional data centers, and a token only works against
its own region. Your region is shown in your browser’s address bar whenever you are
signed in to Snyk — it is the host in the URL, the part between https:// and the first/. Match that host to the Region you select below.
- Sign in to Snyk and look at your browser’s address bar.
- Example: if the address bar shows
https://app.snyk.io/..., the host isapp.snyk.io— choose US (SNYK-US-01) — api.snyk.io. app.snyk.io→ US (SNYK-US-01) — api.snyk.ioapp.us.snyk.io→ US (SNYK-US-02) — api.us.snyk.ioapp.eu.snyk.io→ EU (SNYK-EU-01) — api.eu.snyk.ioapp.au.snyk.io→ AU (SNYK-AU-01) — api.au.snyk.io
Create a Personal Access Token
A Personal Access Token authenticates every REST API request and can carry an expiry date.
You can have up to three active tokens.
Sign in to Snyk
Sign in to your Snyk account with a user that has the access you want the integration to have.
Open Personal Access Tokens
The Personal Access Tokens page lives inside Account settings, which you open from your profile menu at the bottom of the left sidebar.
- At the bottom of the left sidebar, click your profile name to open the account menu, then click Account settings.
- On the Account settings page, click Personal Access Tokens in the left sidebar.
- As a shortcut, go straight to the Personal Access Tokens page to skip the menu.
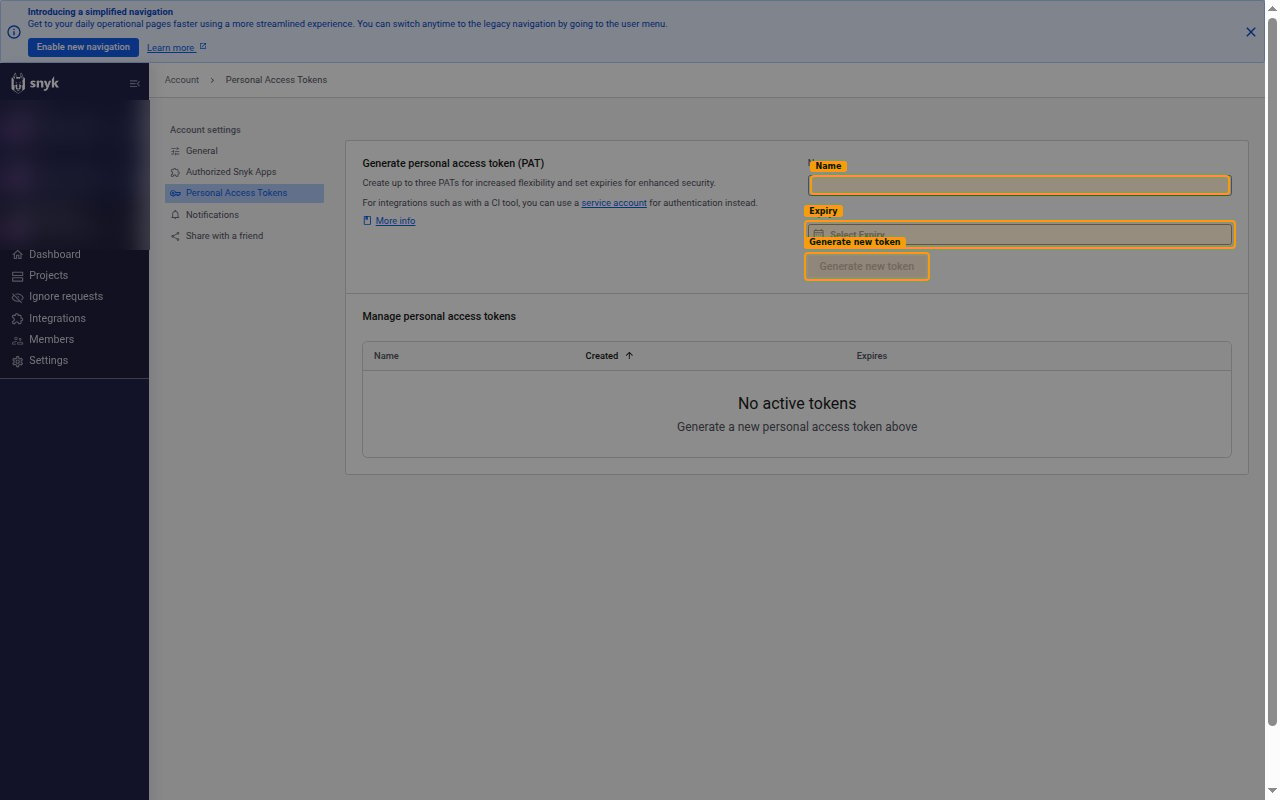
- Under Generate personal access token (PAT), enter a name in the Name field.
Set an expiry
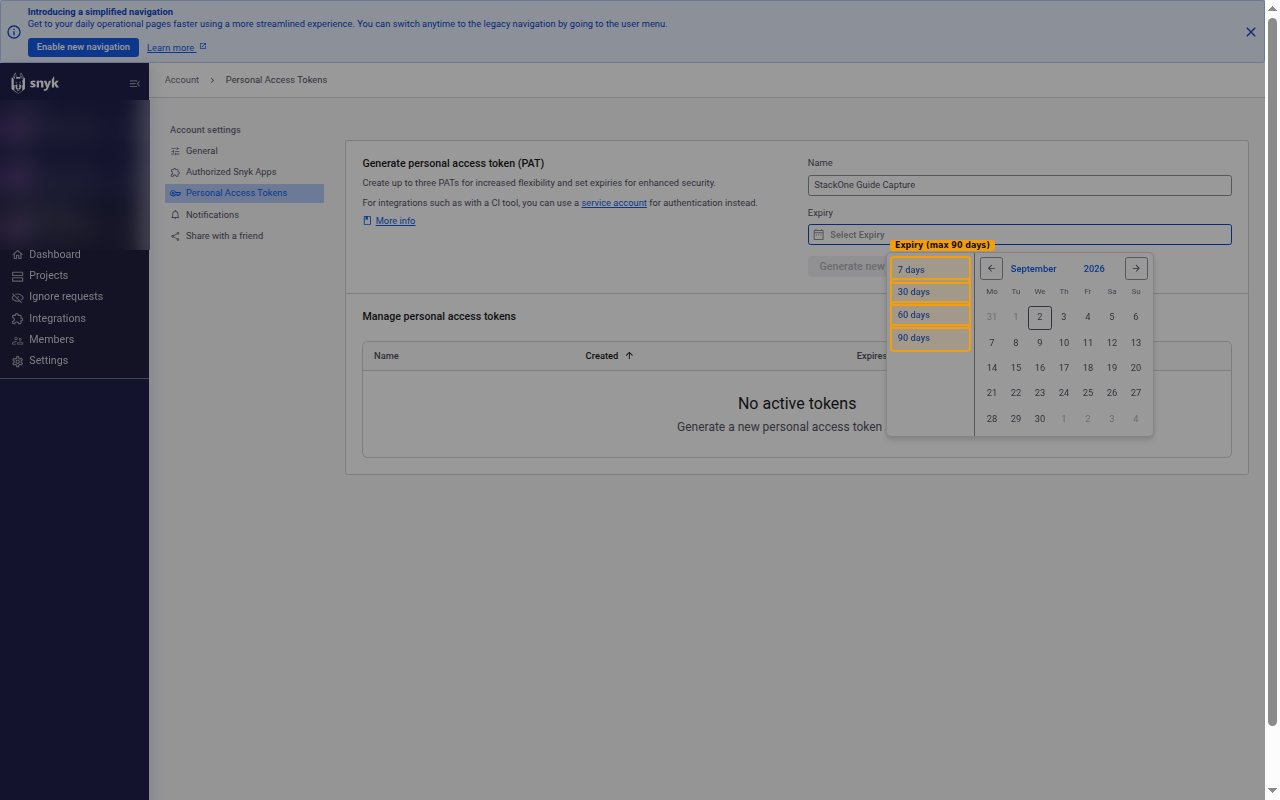
Open the Expiry picker and choose how long the token stays valid.
- Choose one of 7 days, 30 days, 60 days, or 90 days, or pick a date from the calendar.
- The maximum expiry is 90 days ahead.
Generate and copy the token
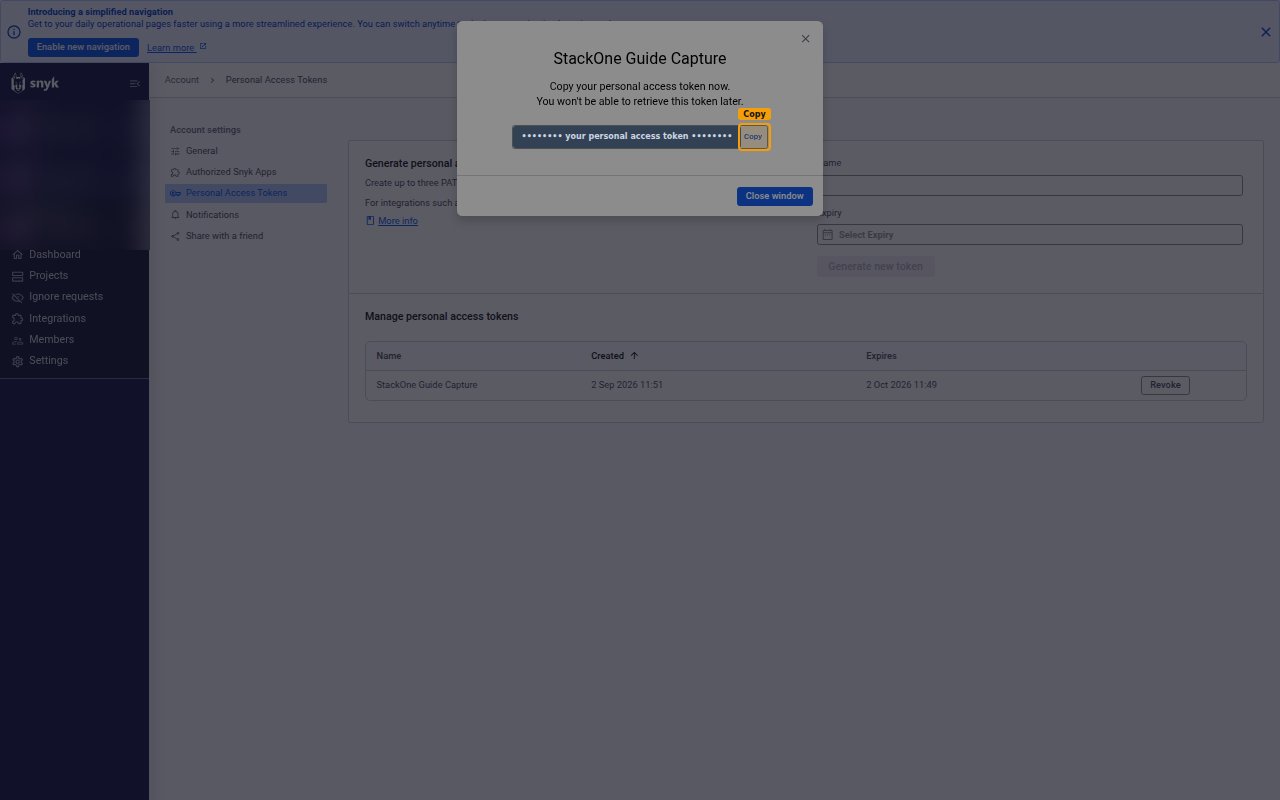
Click Generate new token, then copy the value from the dialog.
- In the dialog, the message reads Copy your personal access token now. and You won’t be able to retrieve this token later.
- Click Copy, then store the token securely — the token is shown only once and cannot be retrieved later.
- You provide this token together with the matching Region you identified above.
Find your Organization ID
If you plan to enable webhook events, StackOne needs your Snyk Organization ID to provision the webhook subscription. It is not required for any other actions.
Copy your Organization ID
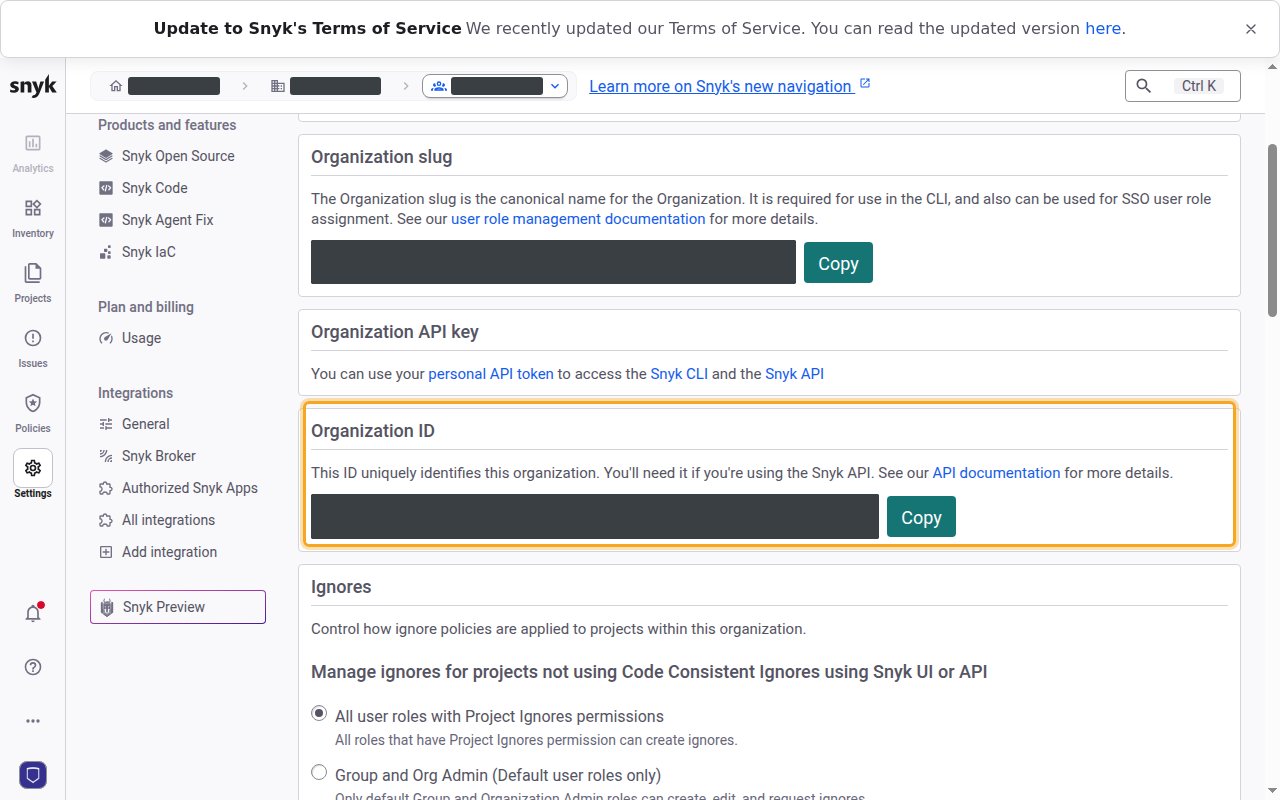
Open your organization’s Settings page and select General, then scroll to the Organization ID section and click Copy. Paste the value into the Organization ID field in StackOne Hub.
- The Organization ID is a UUID that uniquely identifies your organization.
- As a shortcut, open the General settings page at the
/manage/settingspath for your organization and scroll to the Organization ID section.
Linking the Account from the Hub
Navigate to the Hub
Fill out the fields
- Region
- Personal Access Token
- Organization ID (Optional)
Connect
- Click Connect
- If applicable, the provider will redirect you to a sign-in or authorization page. Complete the provider’s authorization flow.
- Once authorization is successful, you will see a confirmation popup
If the account linking is successful, you will see the newly linked account in your Accounts page.
Next Steps
Webhooks setup
Configure receiving Events for Snyk into StackOne.