

Create a Slack app
Create a Slack app in the workspace you want to connect.
Sign in to Slack
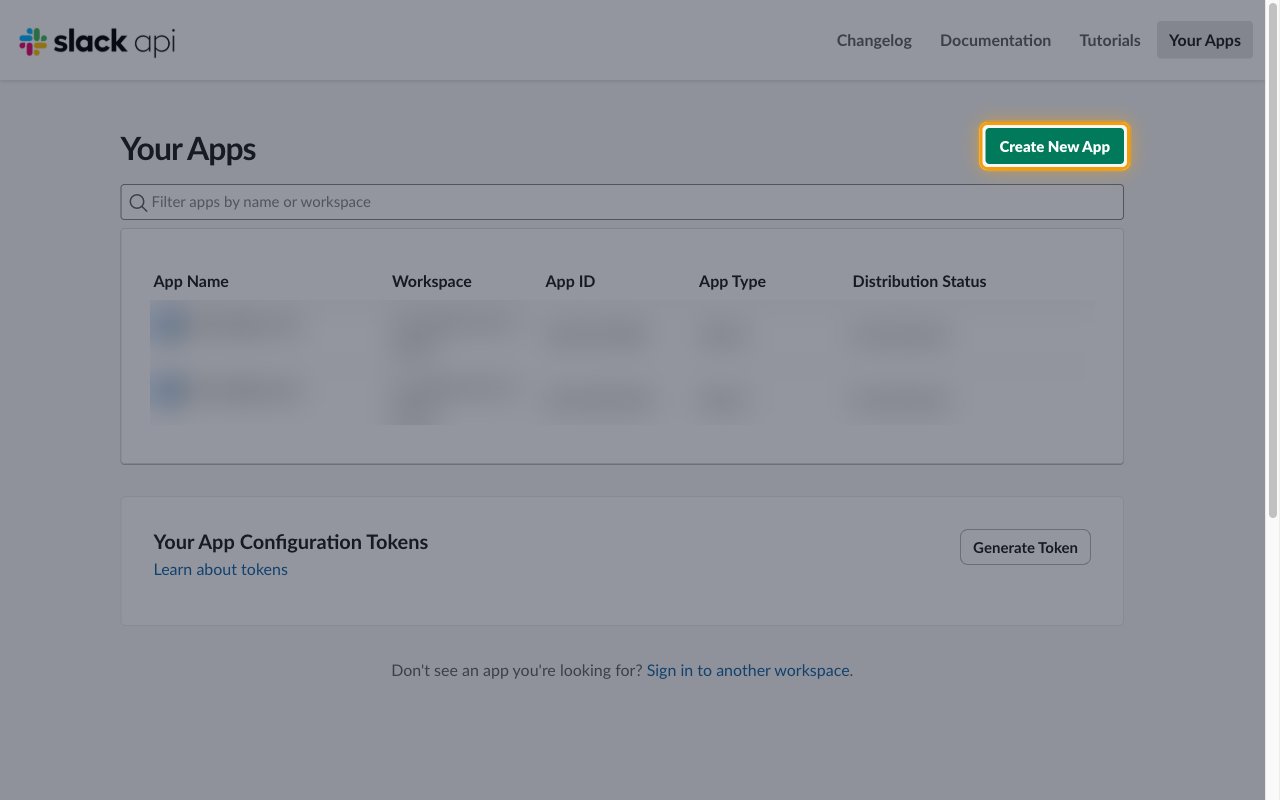
Choose a blank app
In the Create new app dialog, under Or start your own way, select Blank app.
- Click Continue.
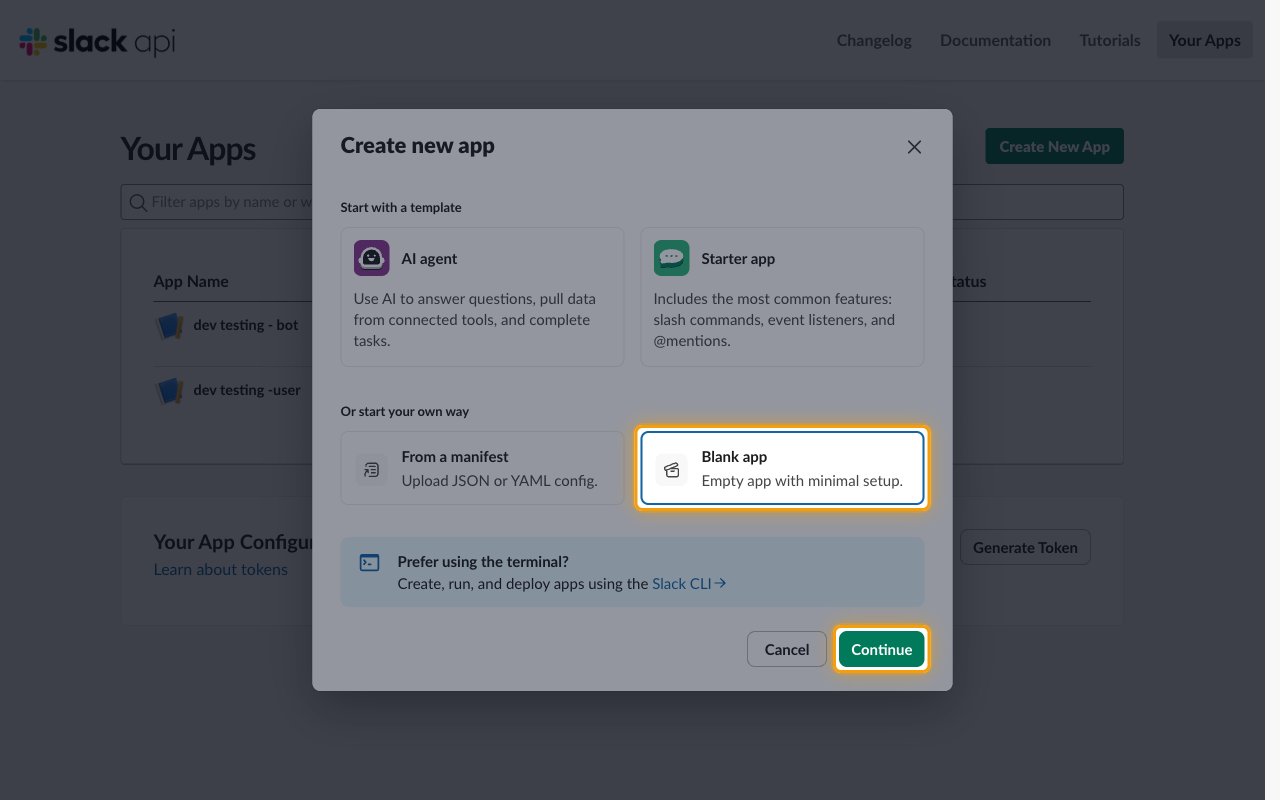
Name the app and pick a workspace
In the Create from scratch dialog, enter the app details.
- App name:
StackOne Integration - Select your workspace from the Workspace dropdown.
- Click Create. Slack opens the OAuth & Permissions page of your new app.
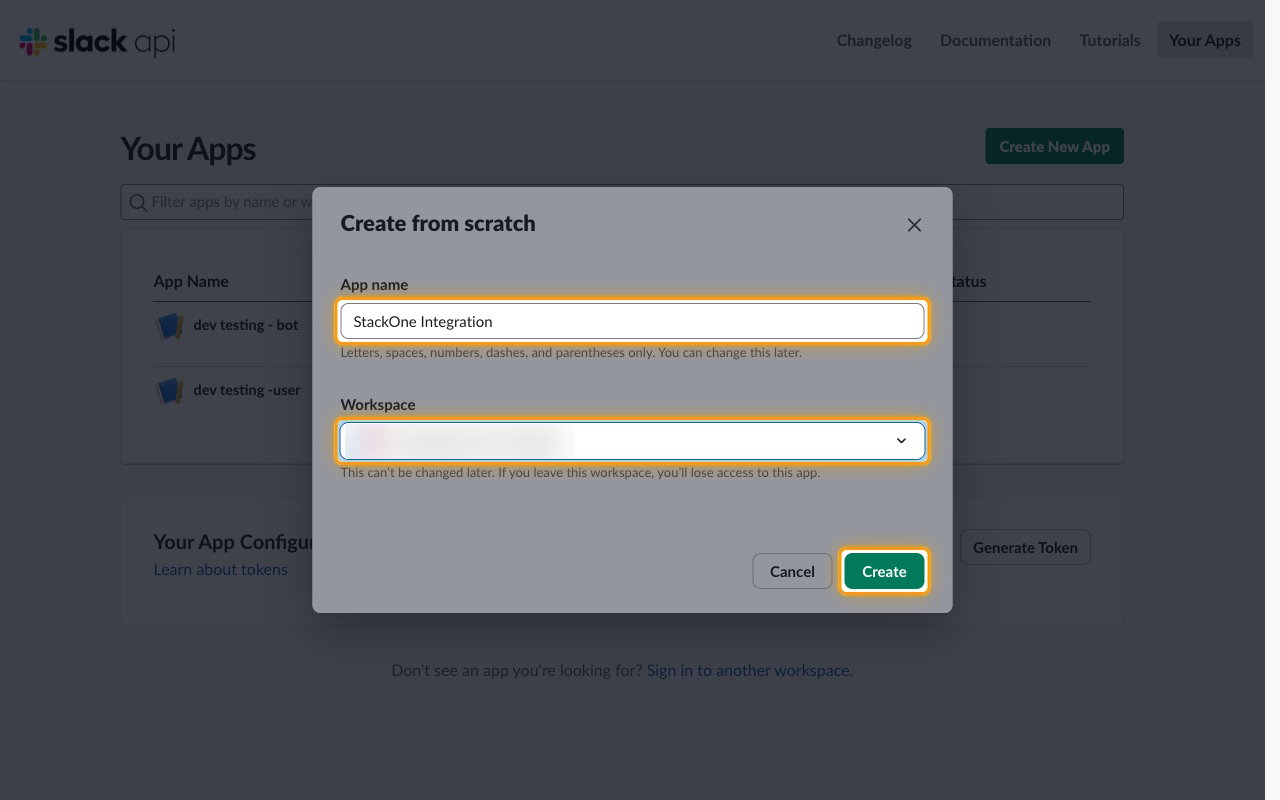
Add scopes and install the app
Grant the scopes StackOne needs, then install the app to generate the token.
Add bot token scopes
On the OAuth & Permissions page, scroll to Scopes. Under Bot Token Scopes, click Add an OAuth Scope and add each scope StackOne needs, one at a time. At minimum add users:read, which StackOne uses to verify the connection:
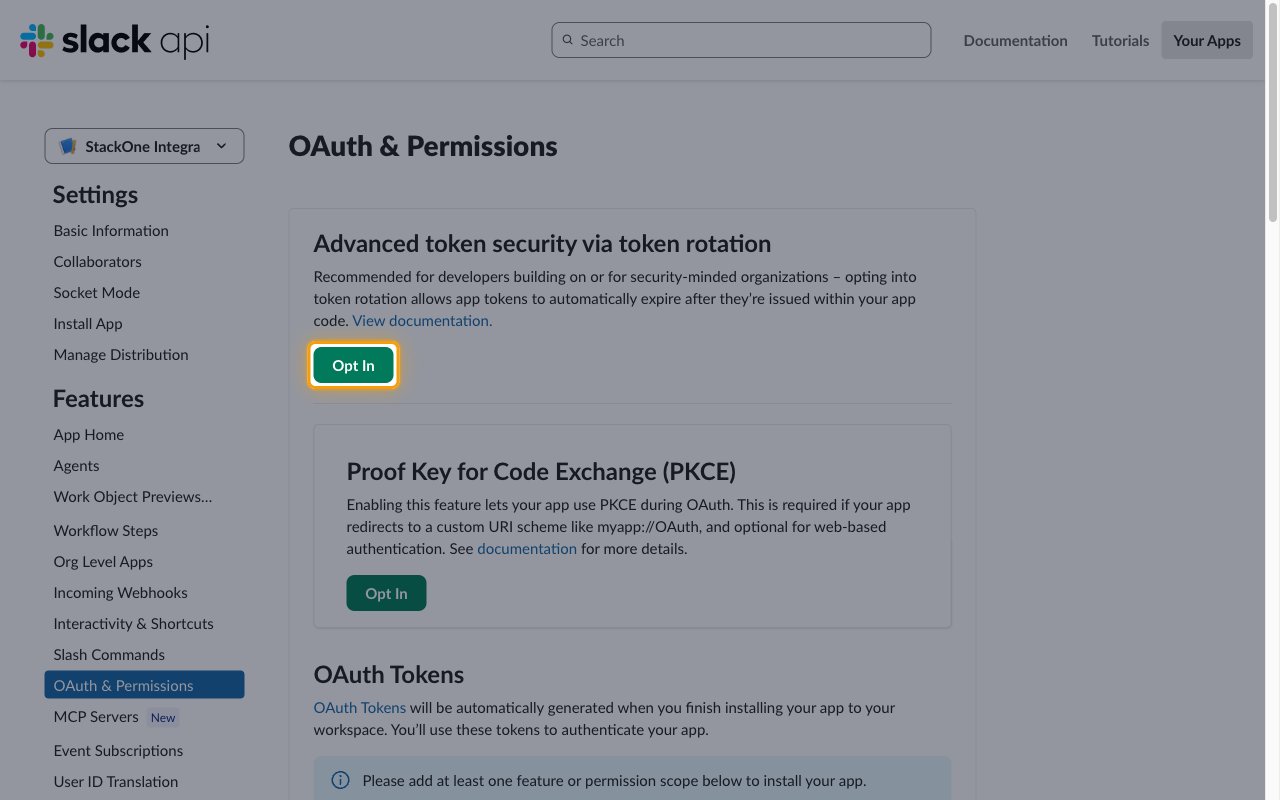
Check that token rotation is off
Scroll to the top of the OAuth & Permissions page. Under Advanced token security via token rotation, the Opt In button must still be shown. Don’t click it.
- Once turned on, token rotation cannot be turned off. If your app already uses it, create a new app instead.
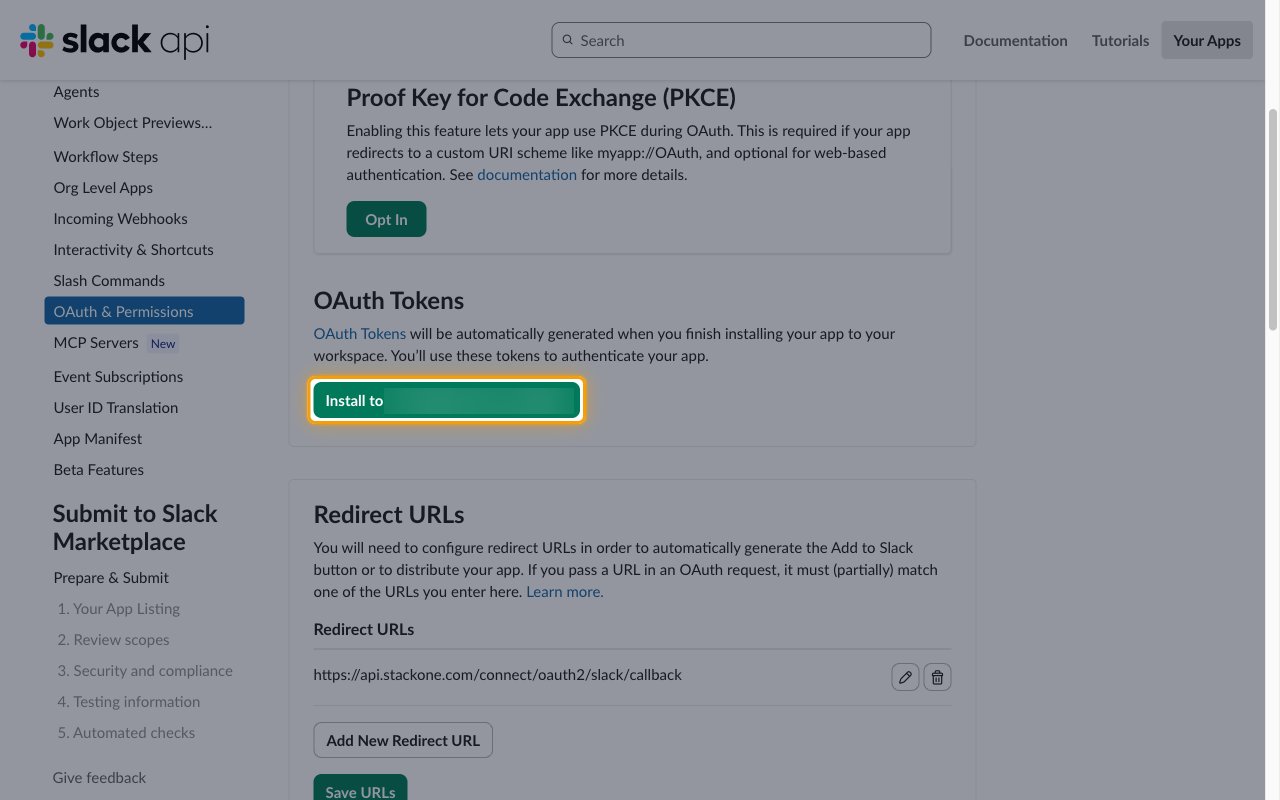
Install the app
Under OAuth Tokens, click the Install to button, which is followed by your workspace name.
- The button stays disabled until at least one scope has been added.
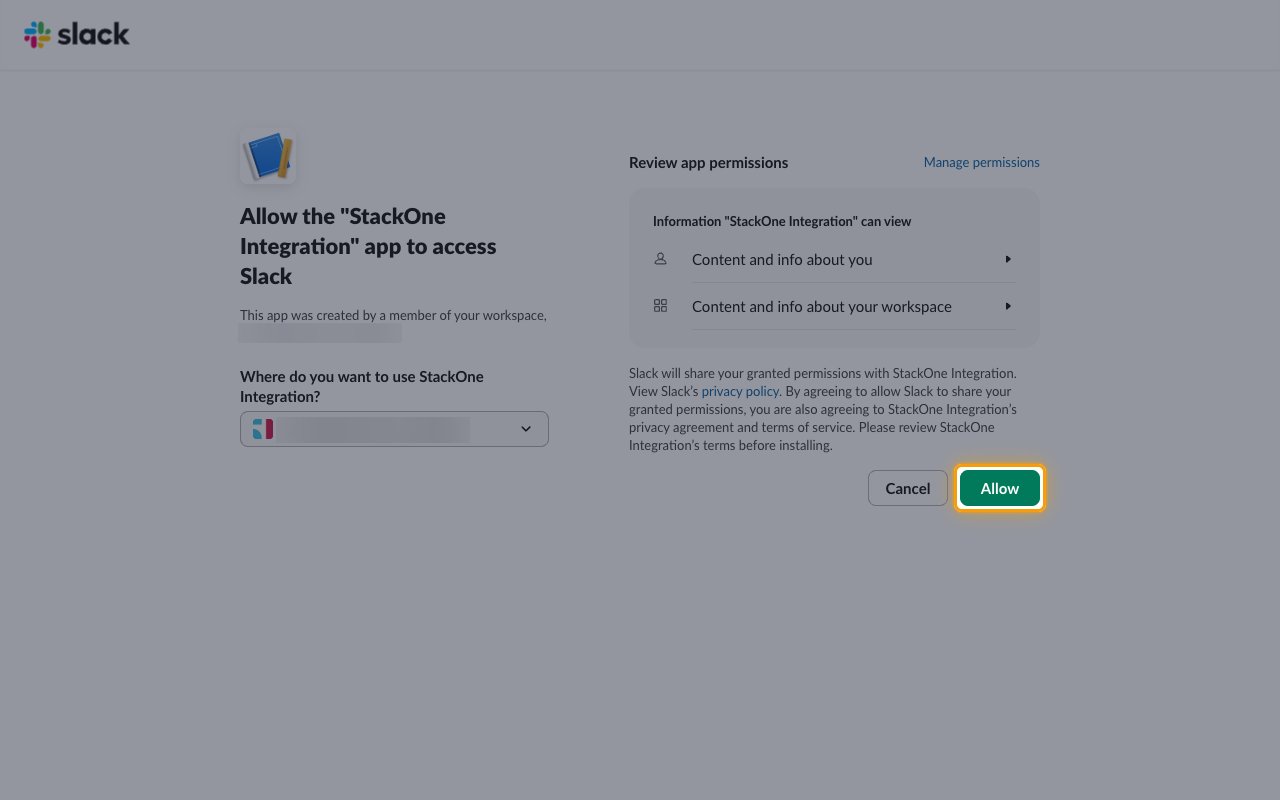
Approve the app
On the Allow the “StackOne Integration” app to access Slack page, review the permissions and click Allow.
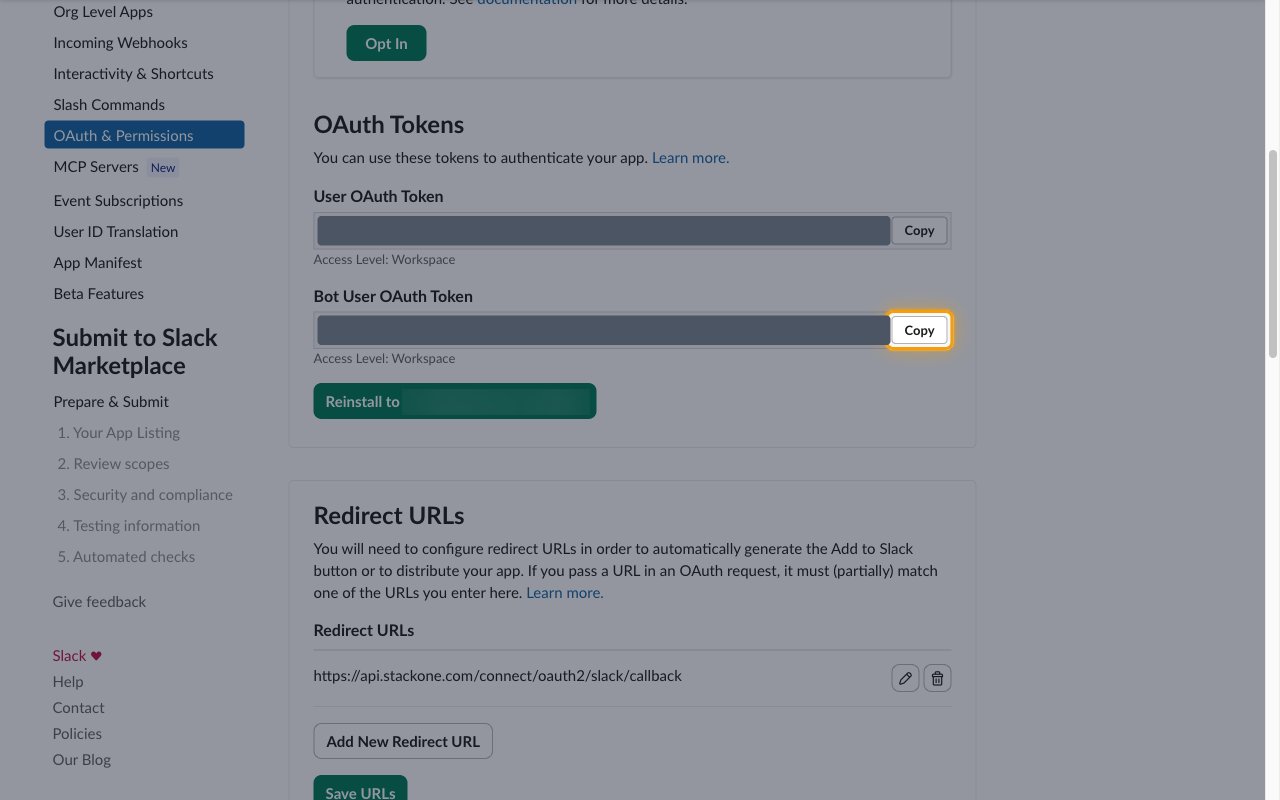
Copy the Bot User OAuth Token
Slack returns to OAuth & Permissions. Under OAuth Tokens, click Copy next to Bot User OAuth Token and paste it into the Bot User OAuth Token field in StackOne Hub.
- Format:
xoxb-...— a token that starts withxoxe.means token rotation is on and won’t work here - Treat the token like a password and store it securely. Anyone who has it can call Slack as your app.
- If you add or change scopes later, click Reinstall to followed by your workspace name, then copy the new token.
Linking the Account from the Hub
Navigate to the Hub
Fill out the fields
- Bot User OAuth Token
Connect
- Click Connect
- If applicable, the provider will redirect you to a sign-in or authorization page. Complete the provider’s authorization flow.
- Once authorization is successful, you will see a confirmation popup
If the account linking is successful, you will see the newly linked account in your Accounts page.