

Register an application in Microsoft Entra ID
An app registration in Microsoft Entra ID holds the credentials and the Microsoft Graph application permissions for SharePoint. Application permissions apply without a signed-in user, so no redirect URI is needed.
Create the app registration
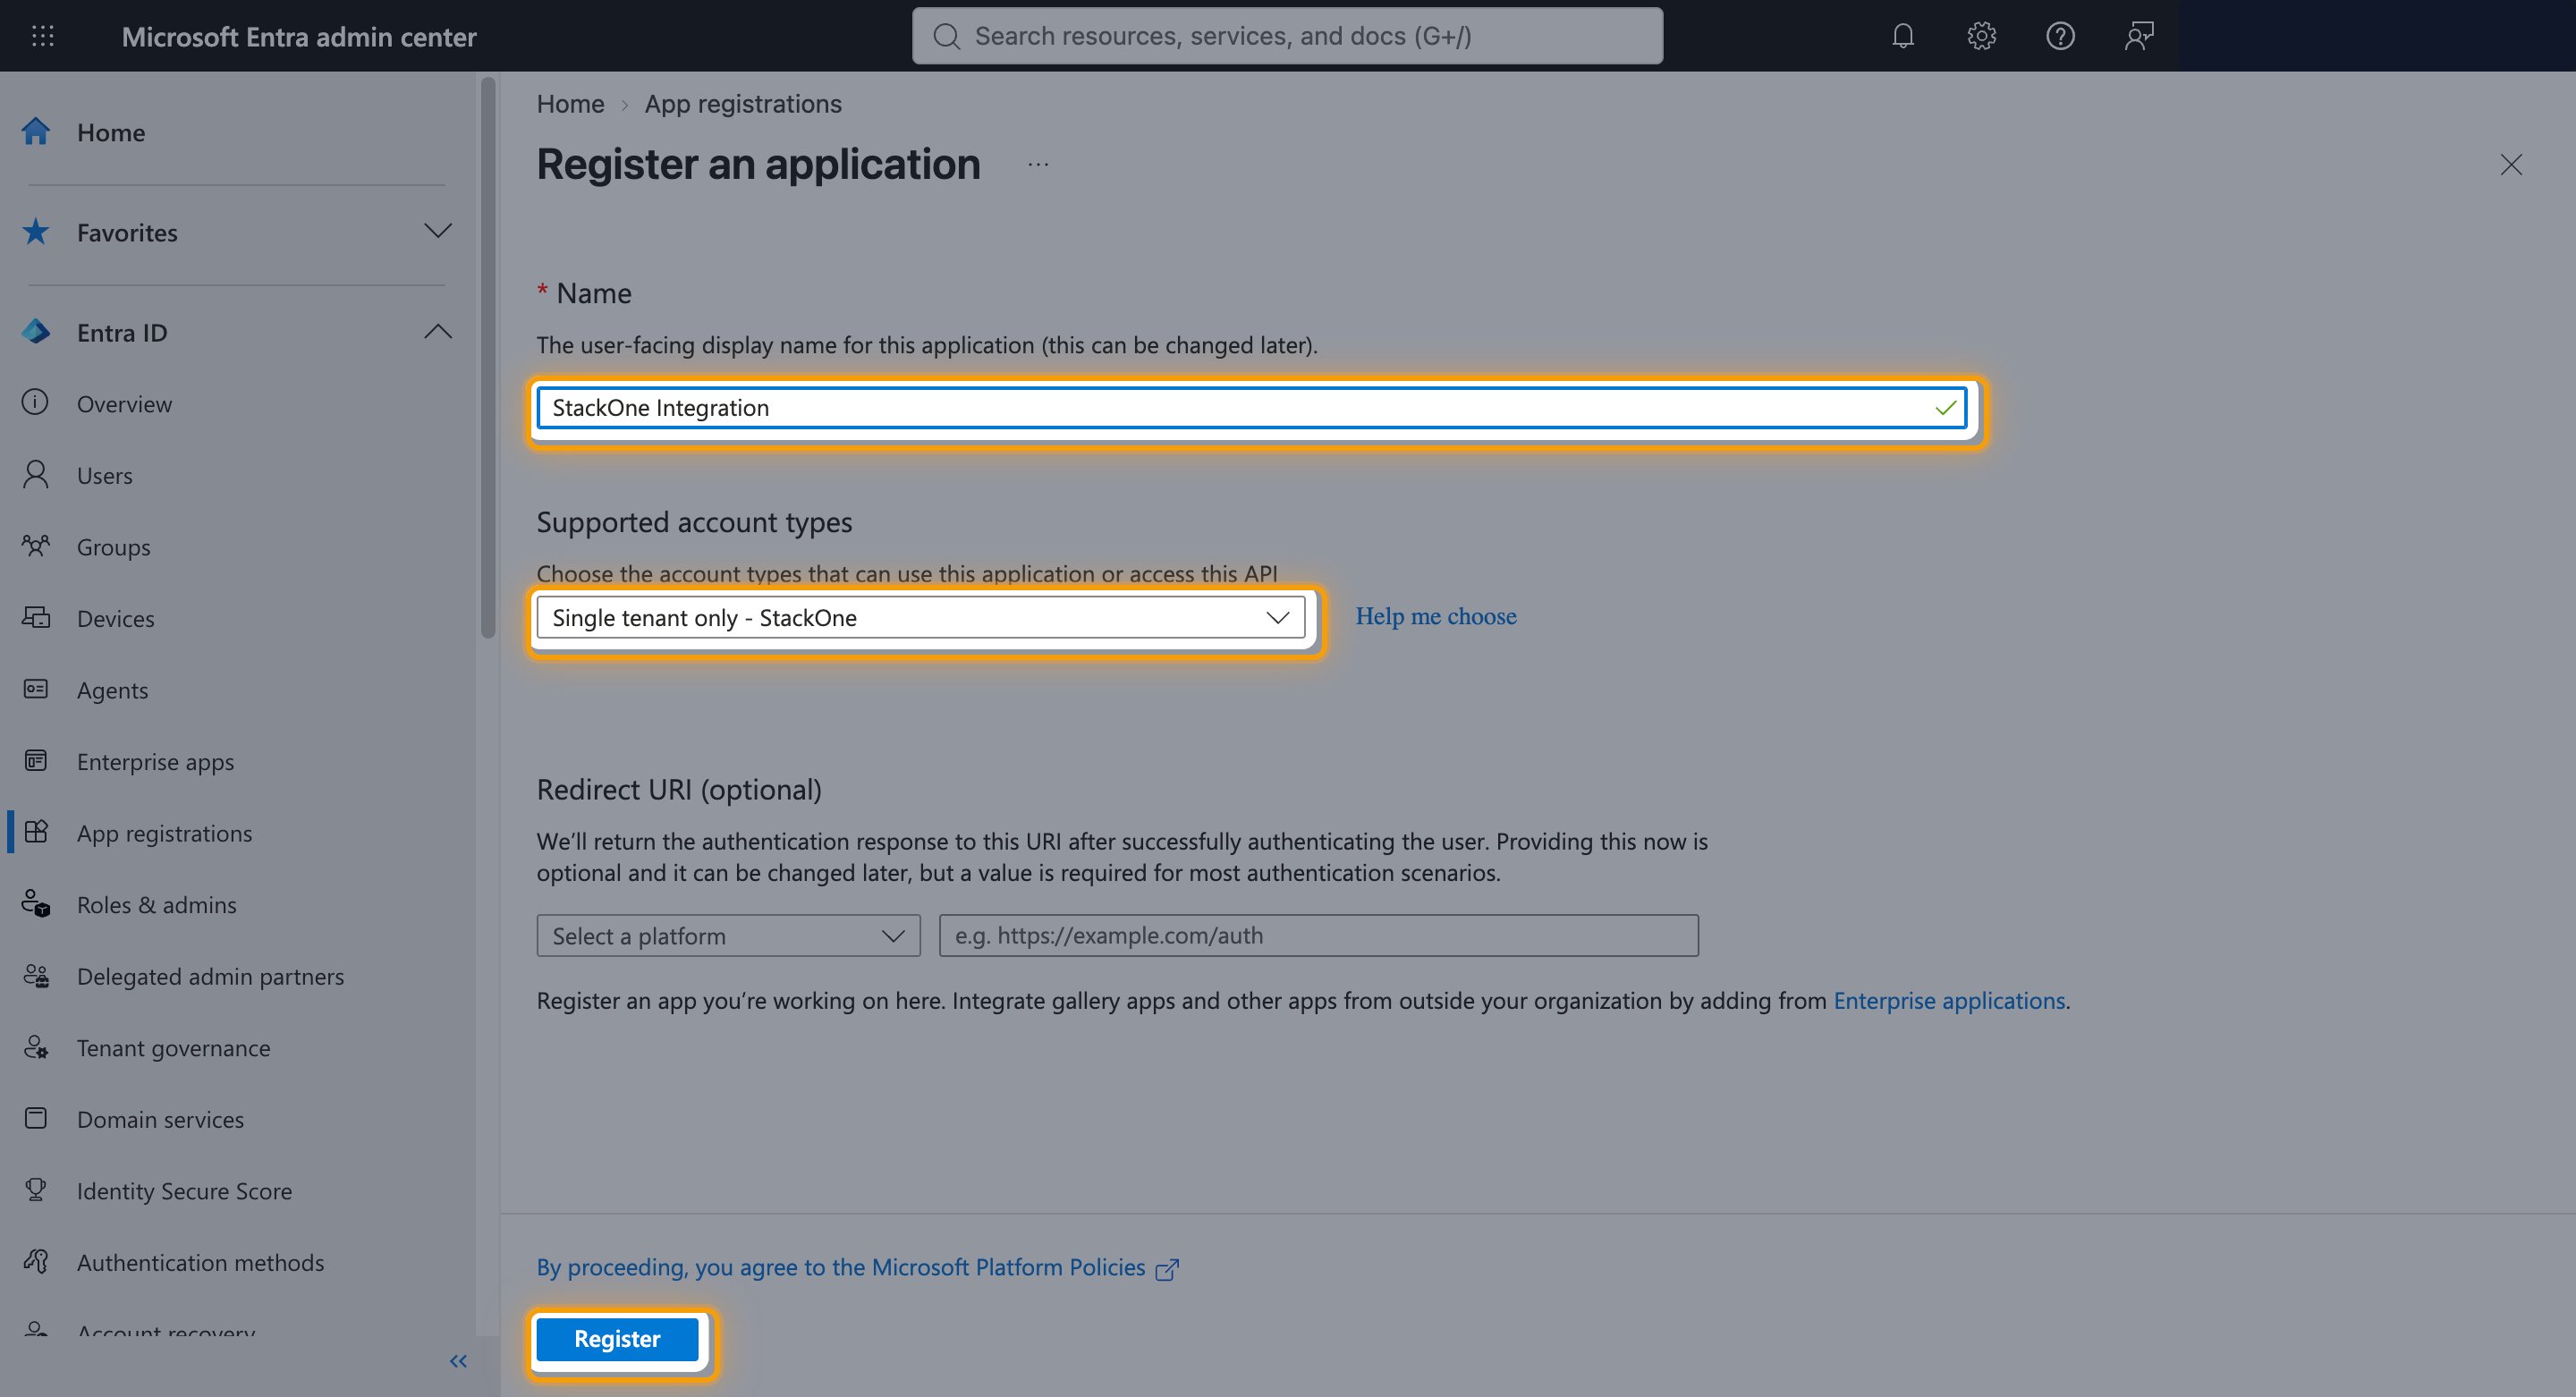
Sign in to the Microsoft Entra admin center, then open Entra ID > App registrations.
- Click New registration.
- Name:
StackOne Integration - Supported account types: Single tenant only
- Leave Redirect URI (optional) empty.
- Click Register.
Add the Microsoft Graph application permissions
Application permissions are granted to the application itself rather than to a user, so an administrator consents to them once and they apply across the tenant.
Select the permissions
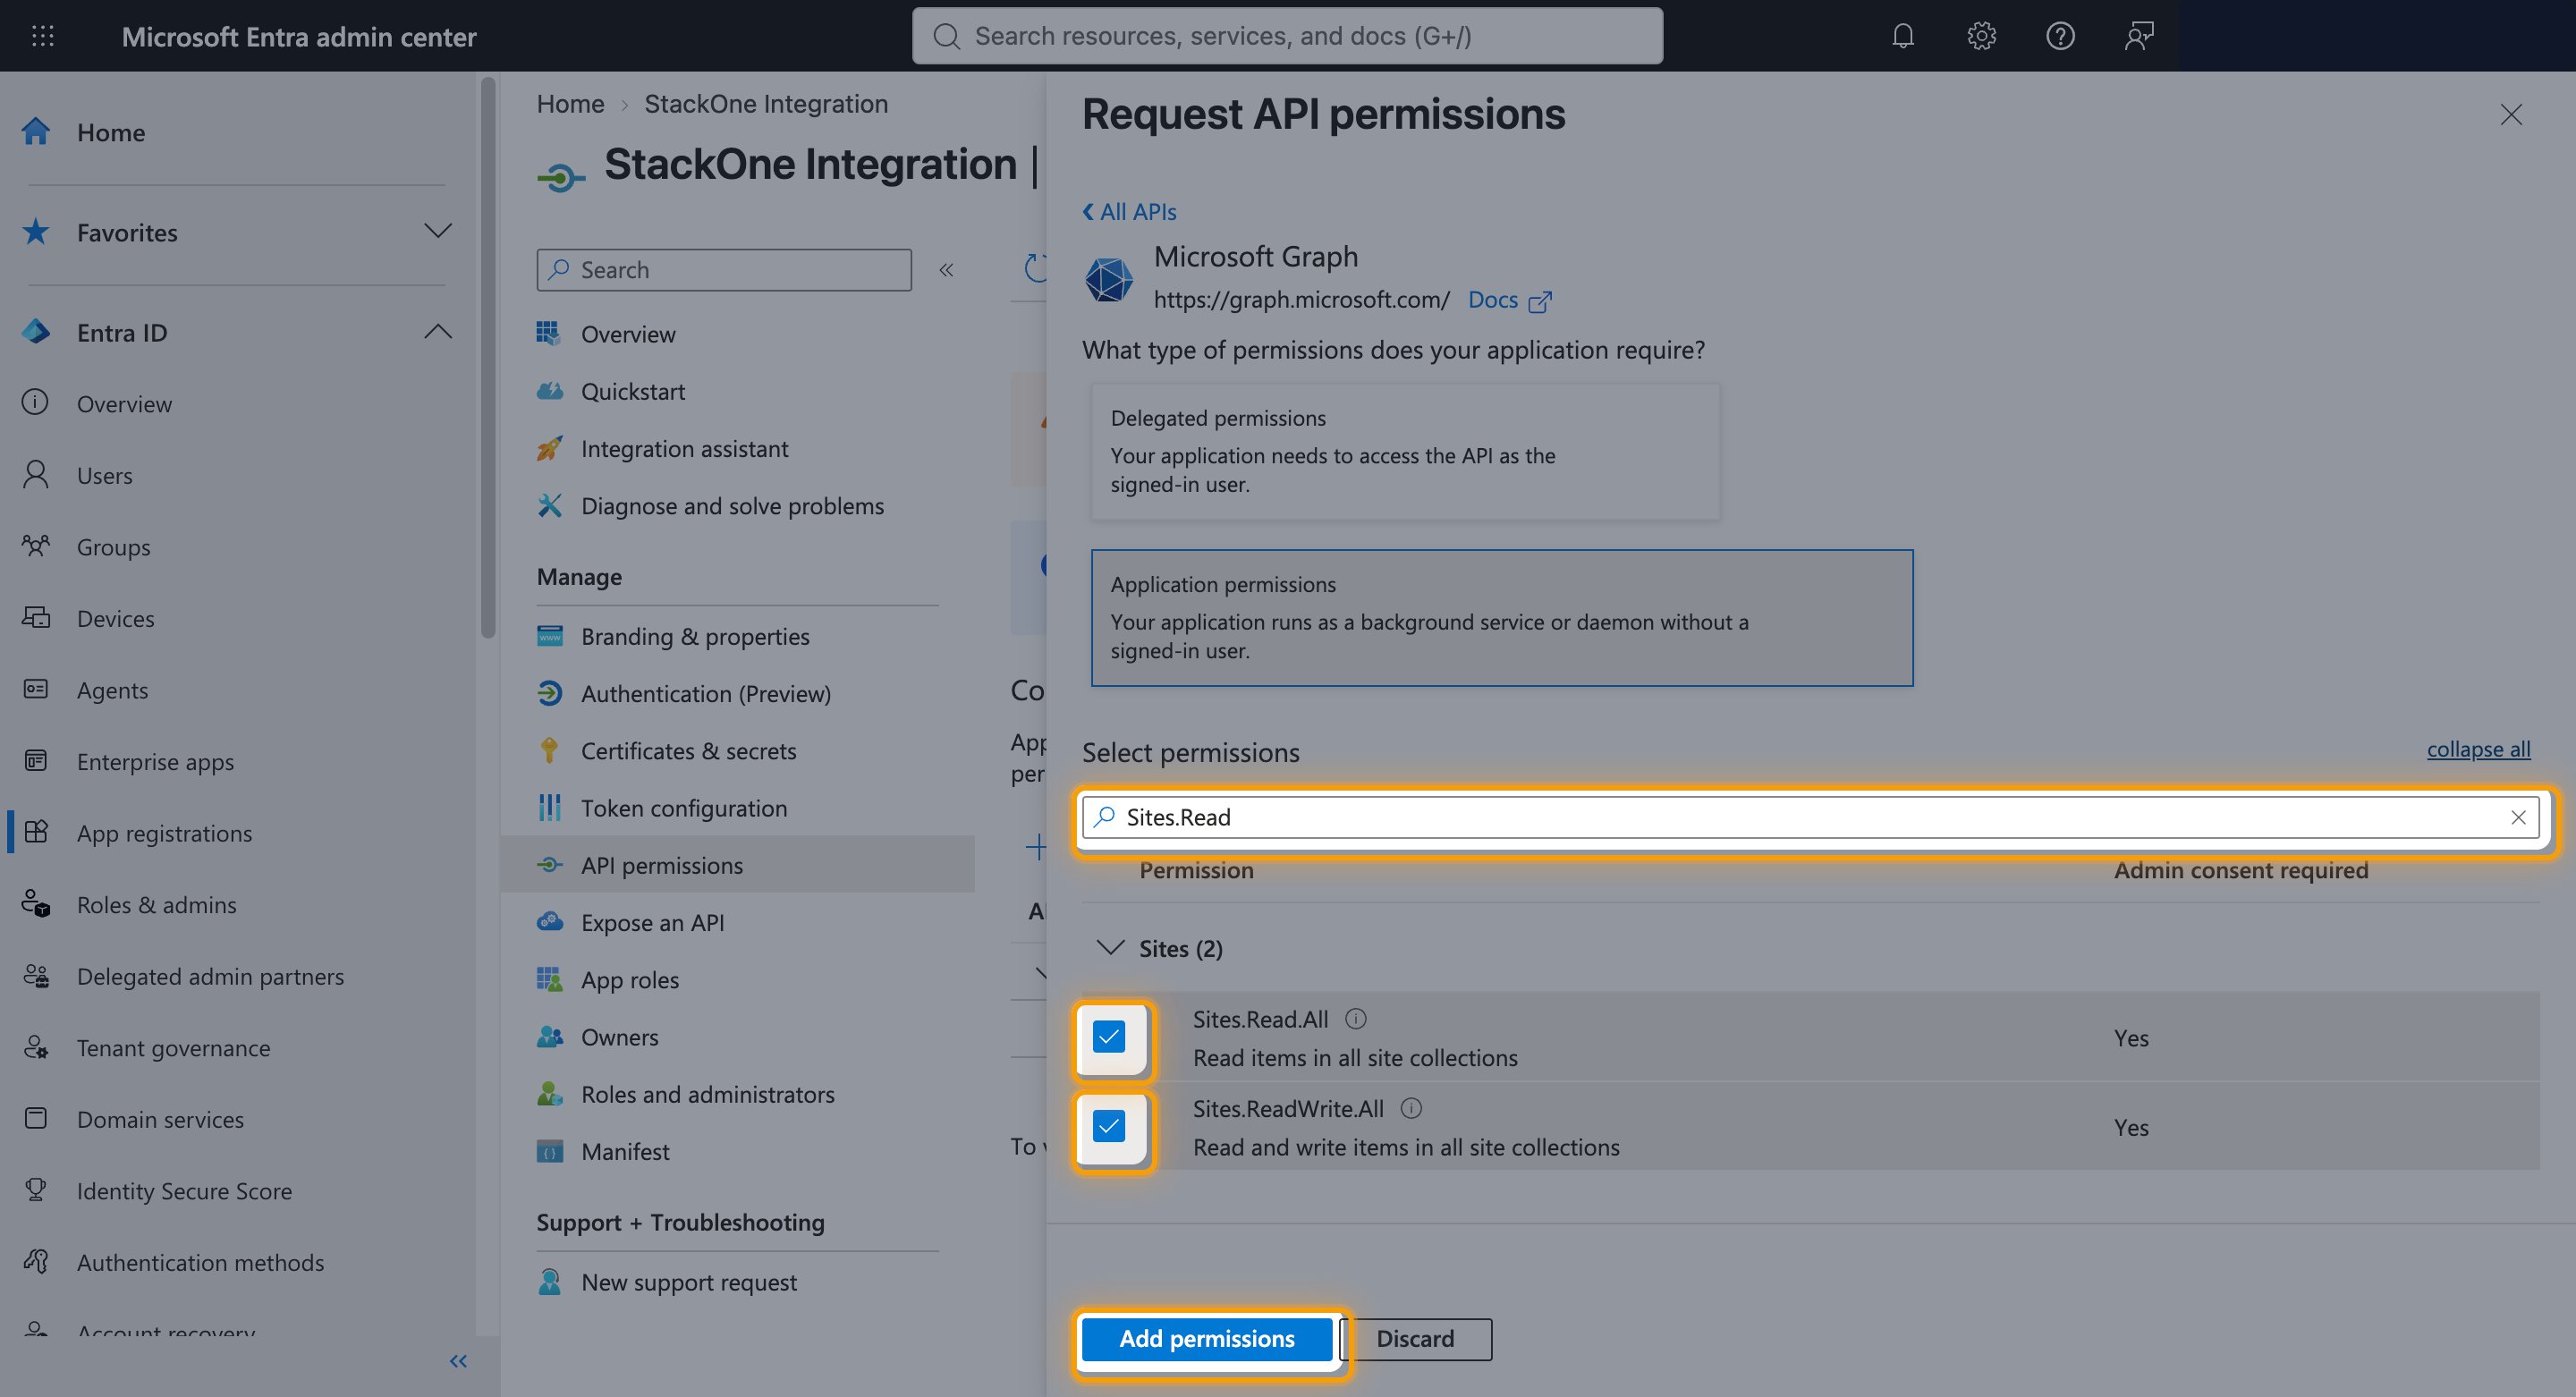
From the left menu under Manage, select API permissions.
- Click Add a permission.
- Select Microsoft Graph.
- Select Application permissions.
- Under Select permissions, filter the catalog and select the checkbox beside each permission.
- Click Add permissions.
Grant admin consent
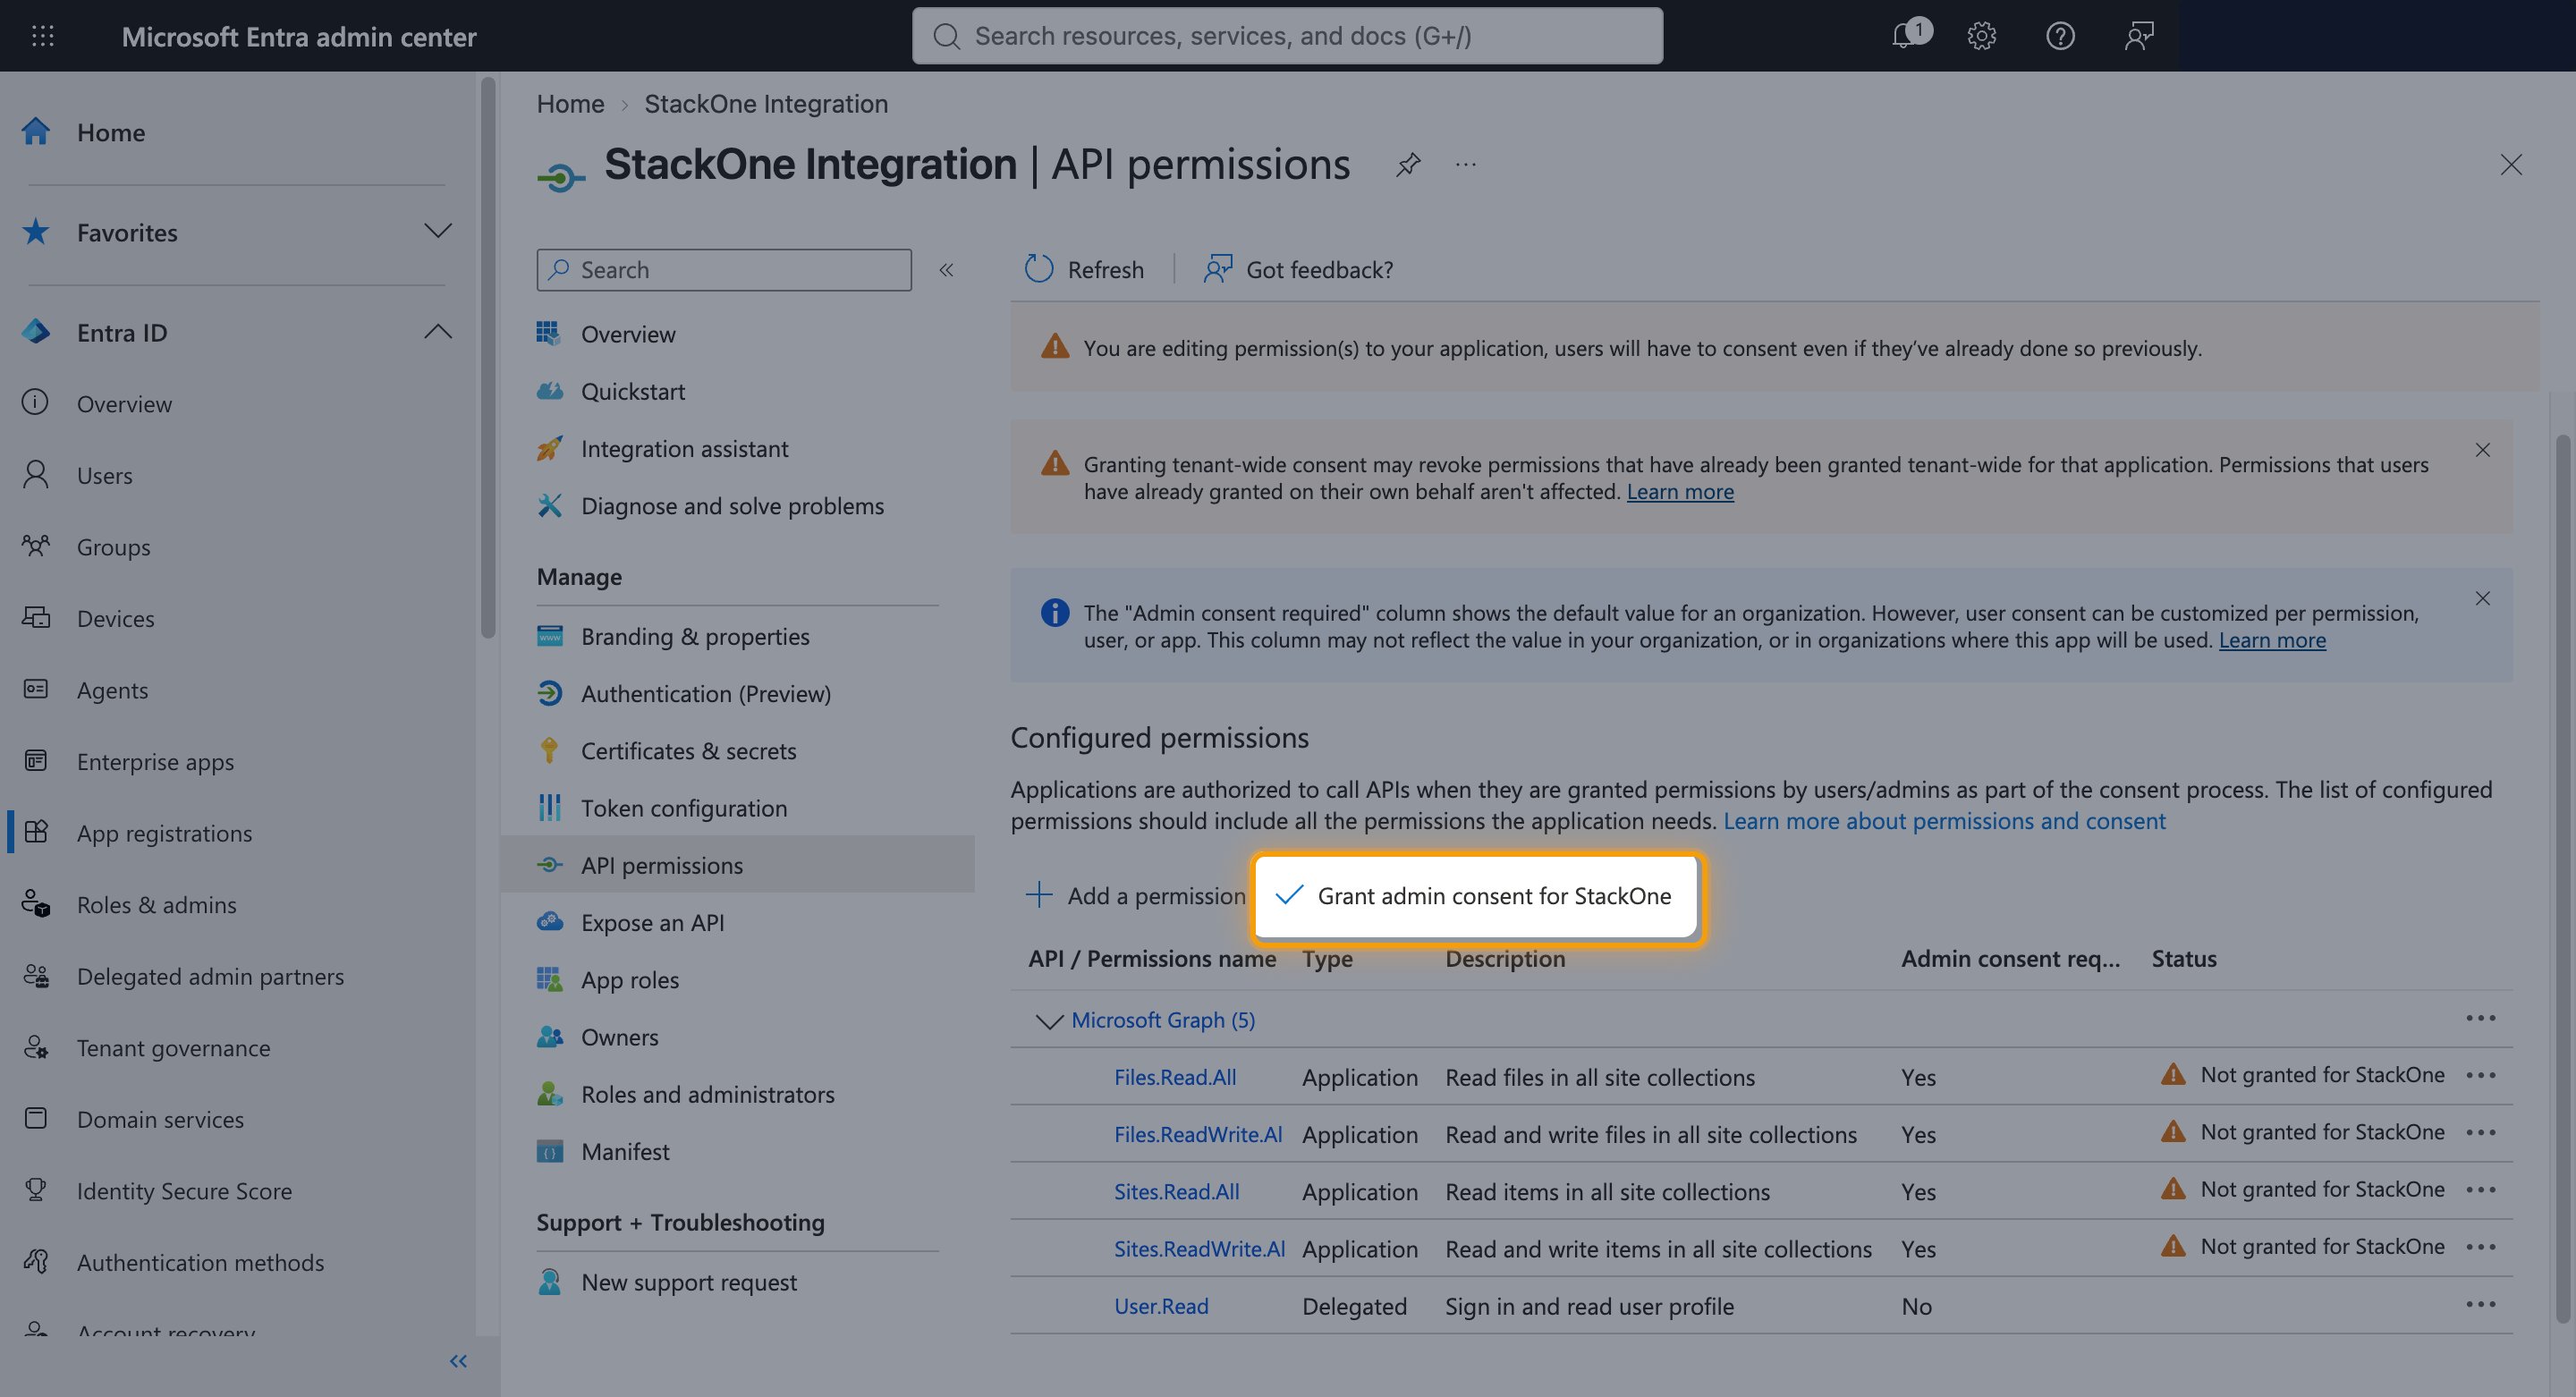
Application permissions take effect only once an administrator consents to them, which is why the Status column reads Not granted for [tenant name] until then.
- Click Grant admin consent for [tenant name].
- Click Yes on Grant admin consent confirmation.
- Check that the Status column reads Granted for [tenant name] for every permission.
Copy the credentials
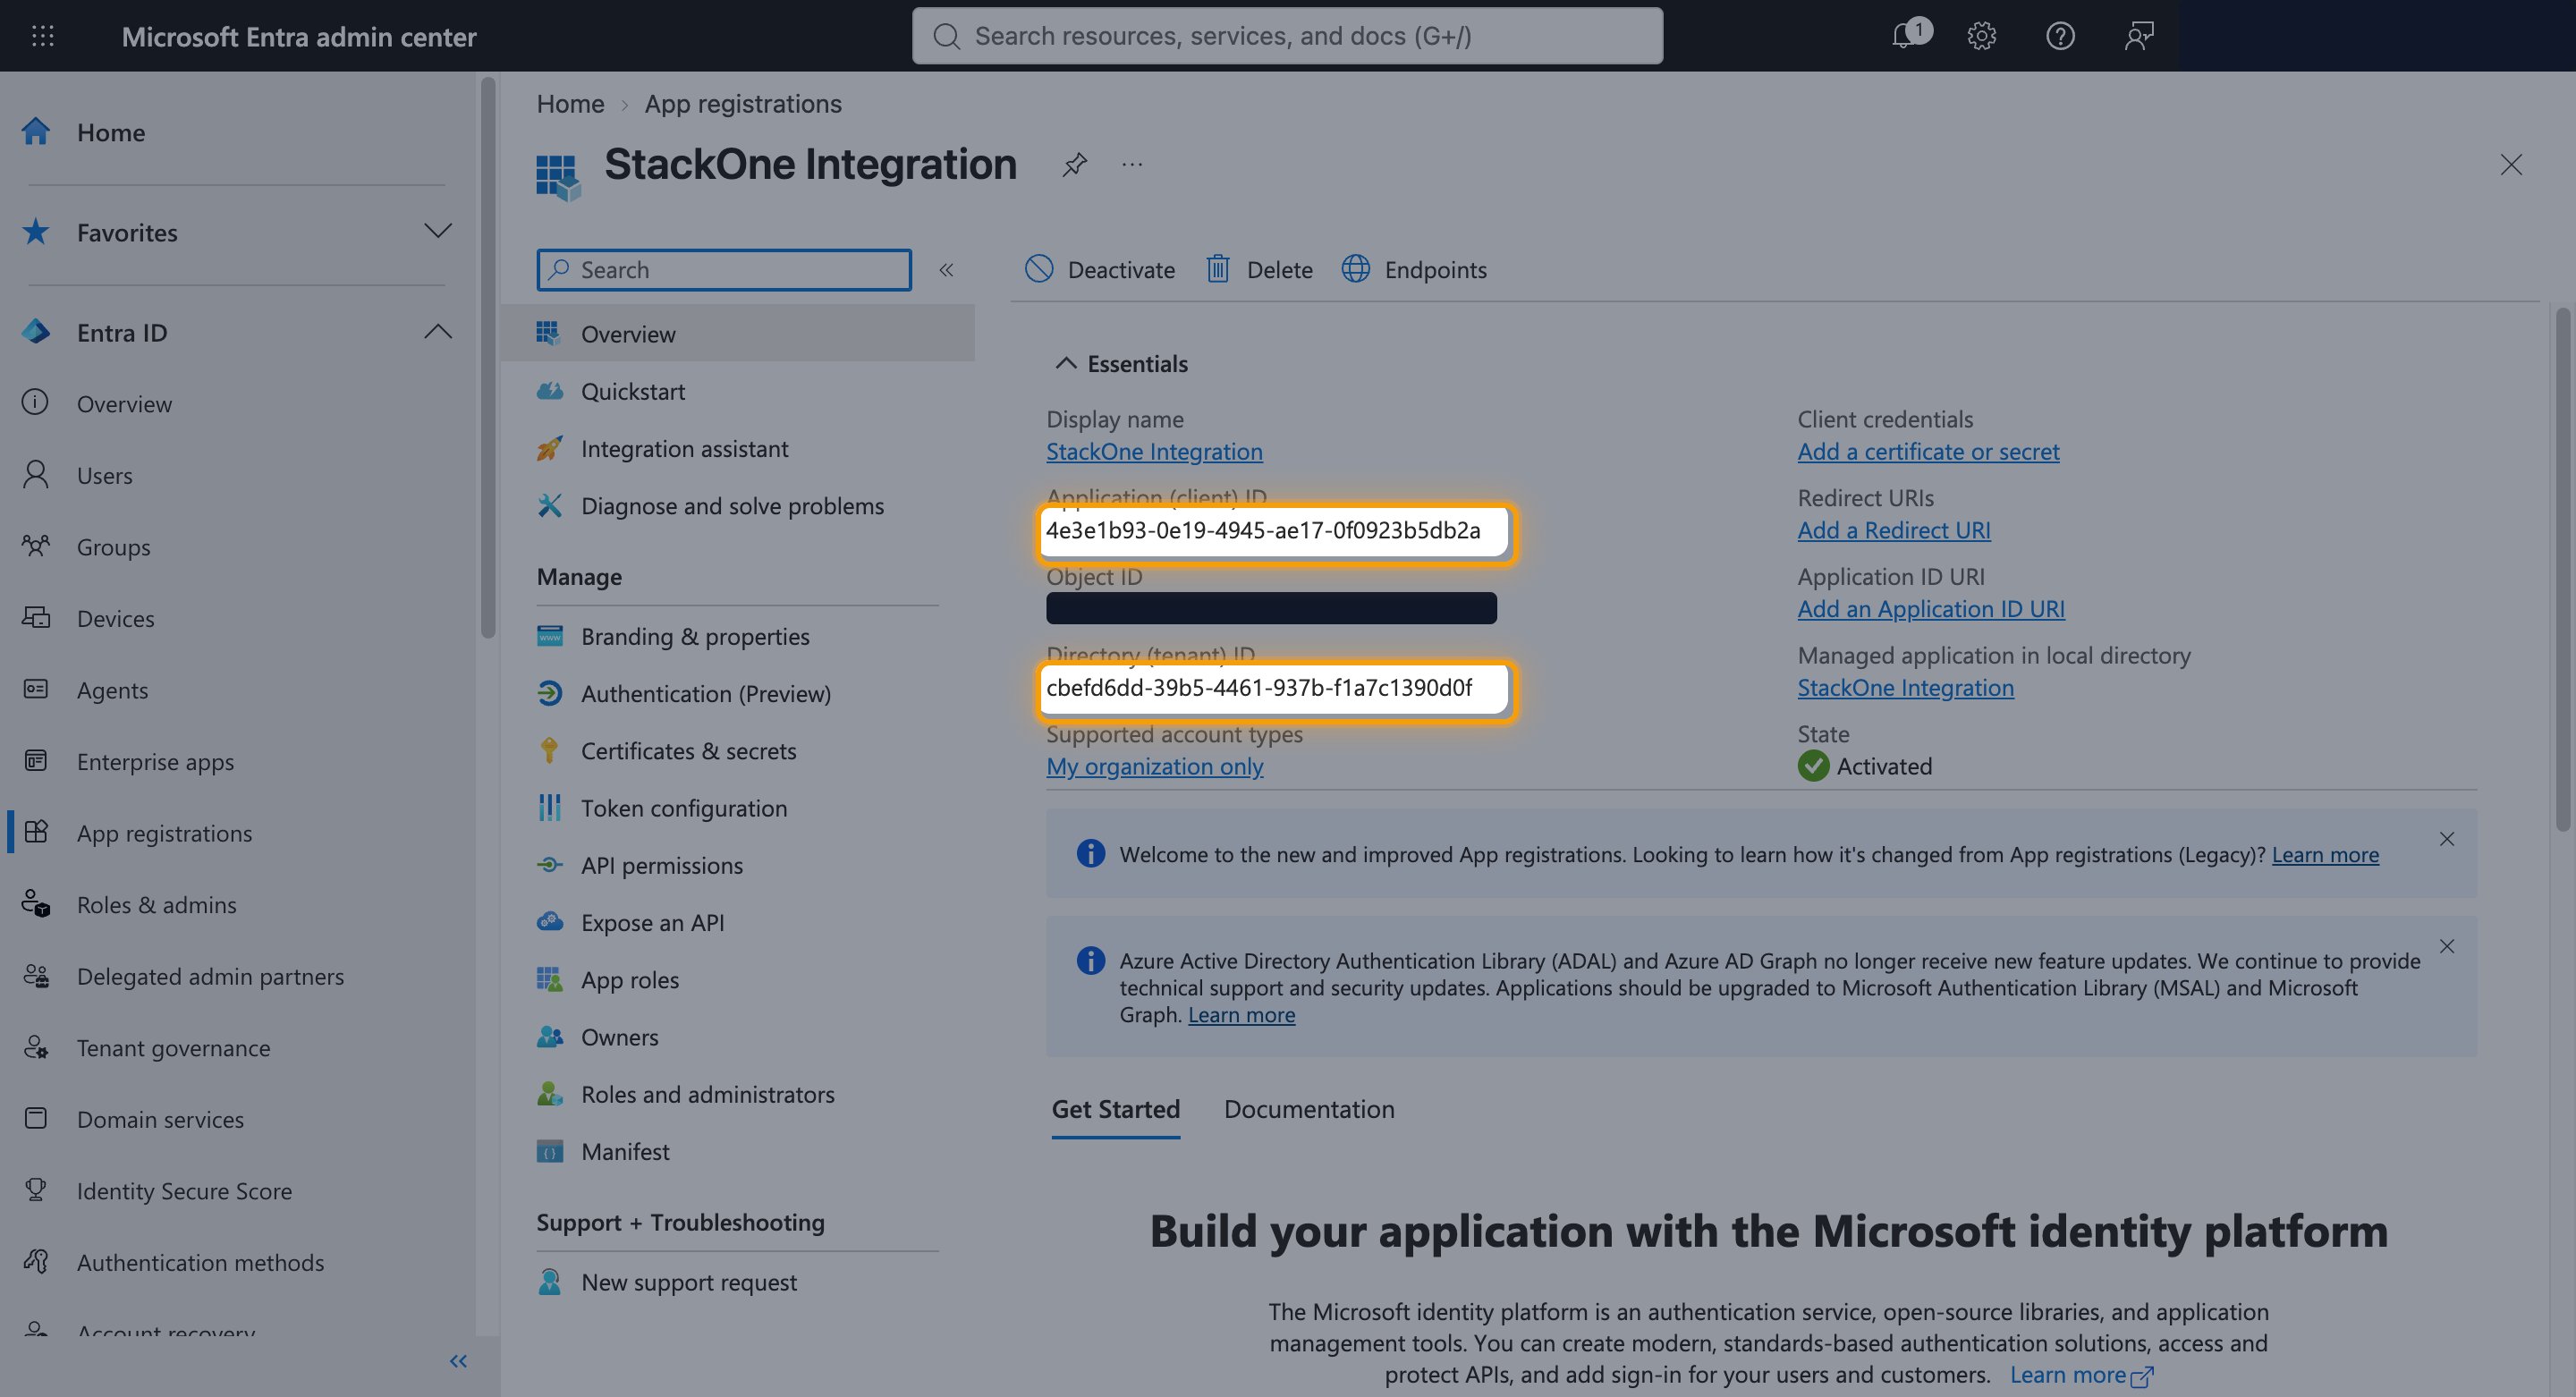
The application identifies itself with three values from the registration — two on the Overview page and a secret you create.
Copy the Client ID and Tenant ID
From the left menu, select Overview, then copy both values across.
- Client ID: the Application (client) ID
- Tenant ID: the Directory (tenant) ID
Create a client secret
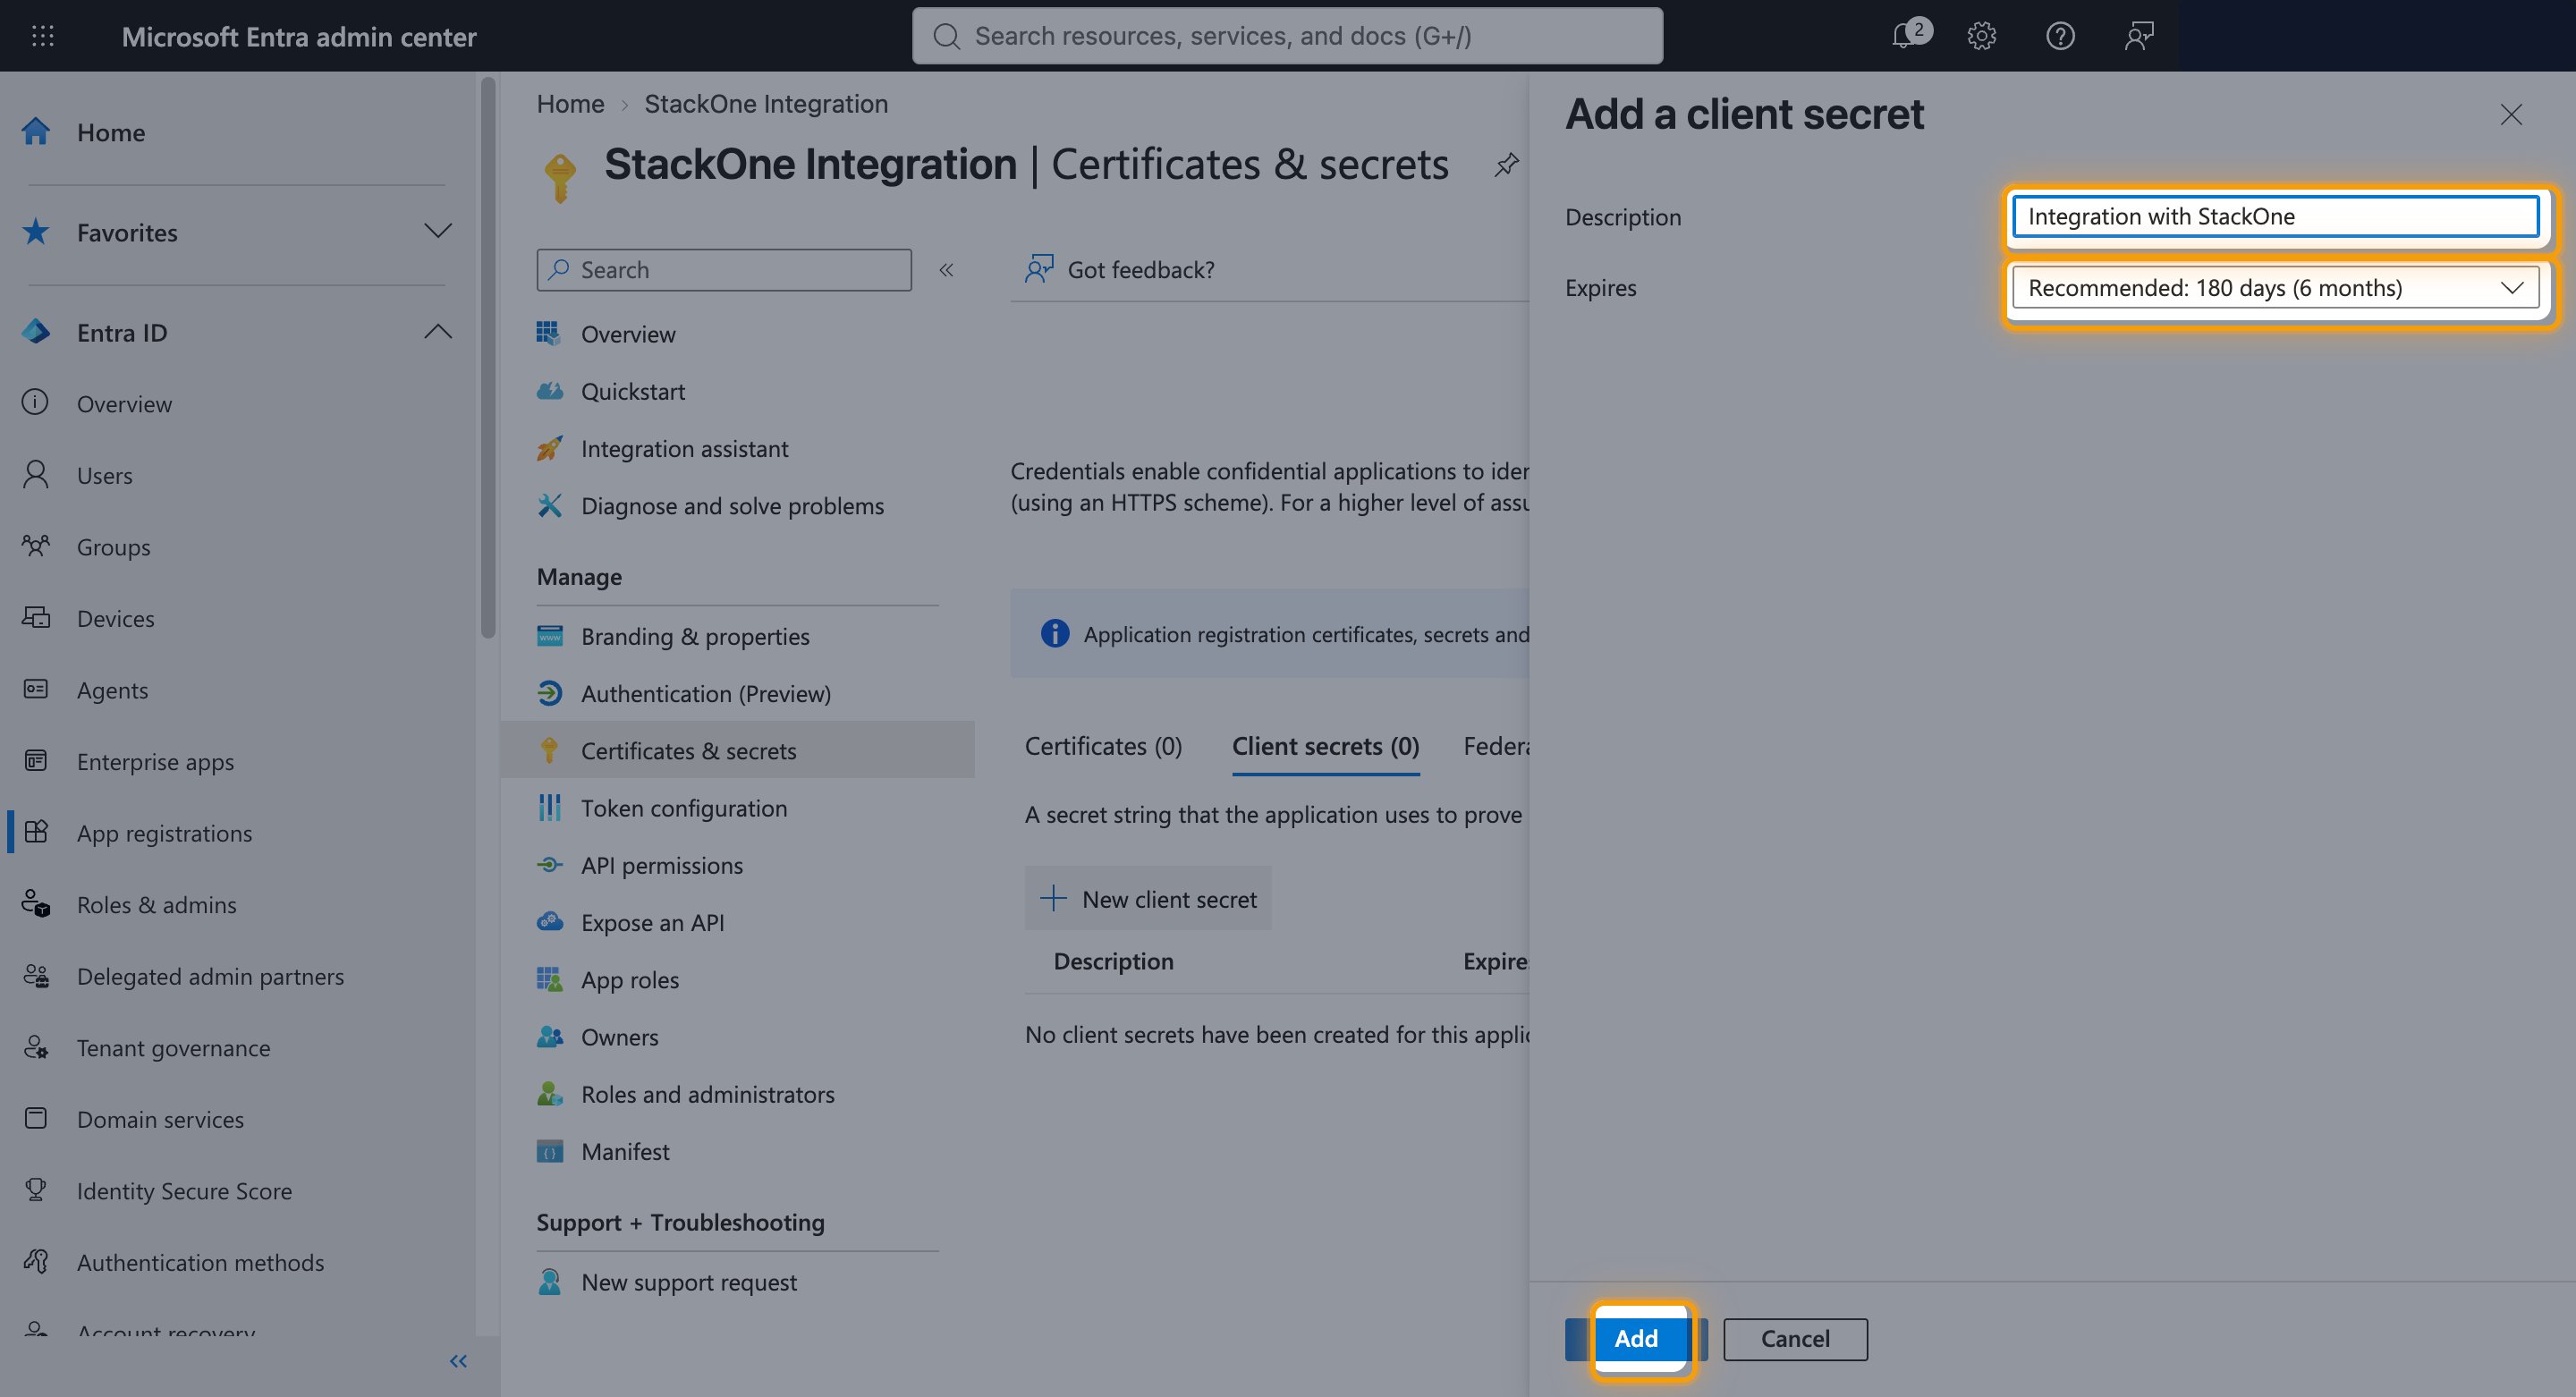
From the left menu under Manage, select Certificates & secrets, then open the Client secrets tab.
- Click New client secret.
- Description:
Integration with StackOne - Expires: how long the secret stays valid
- Click Add.
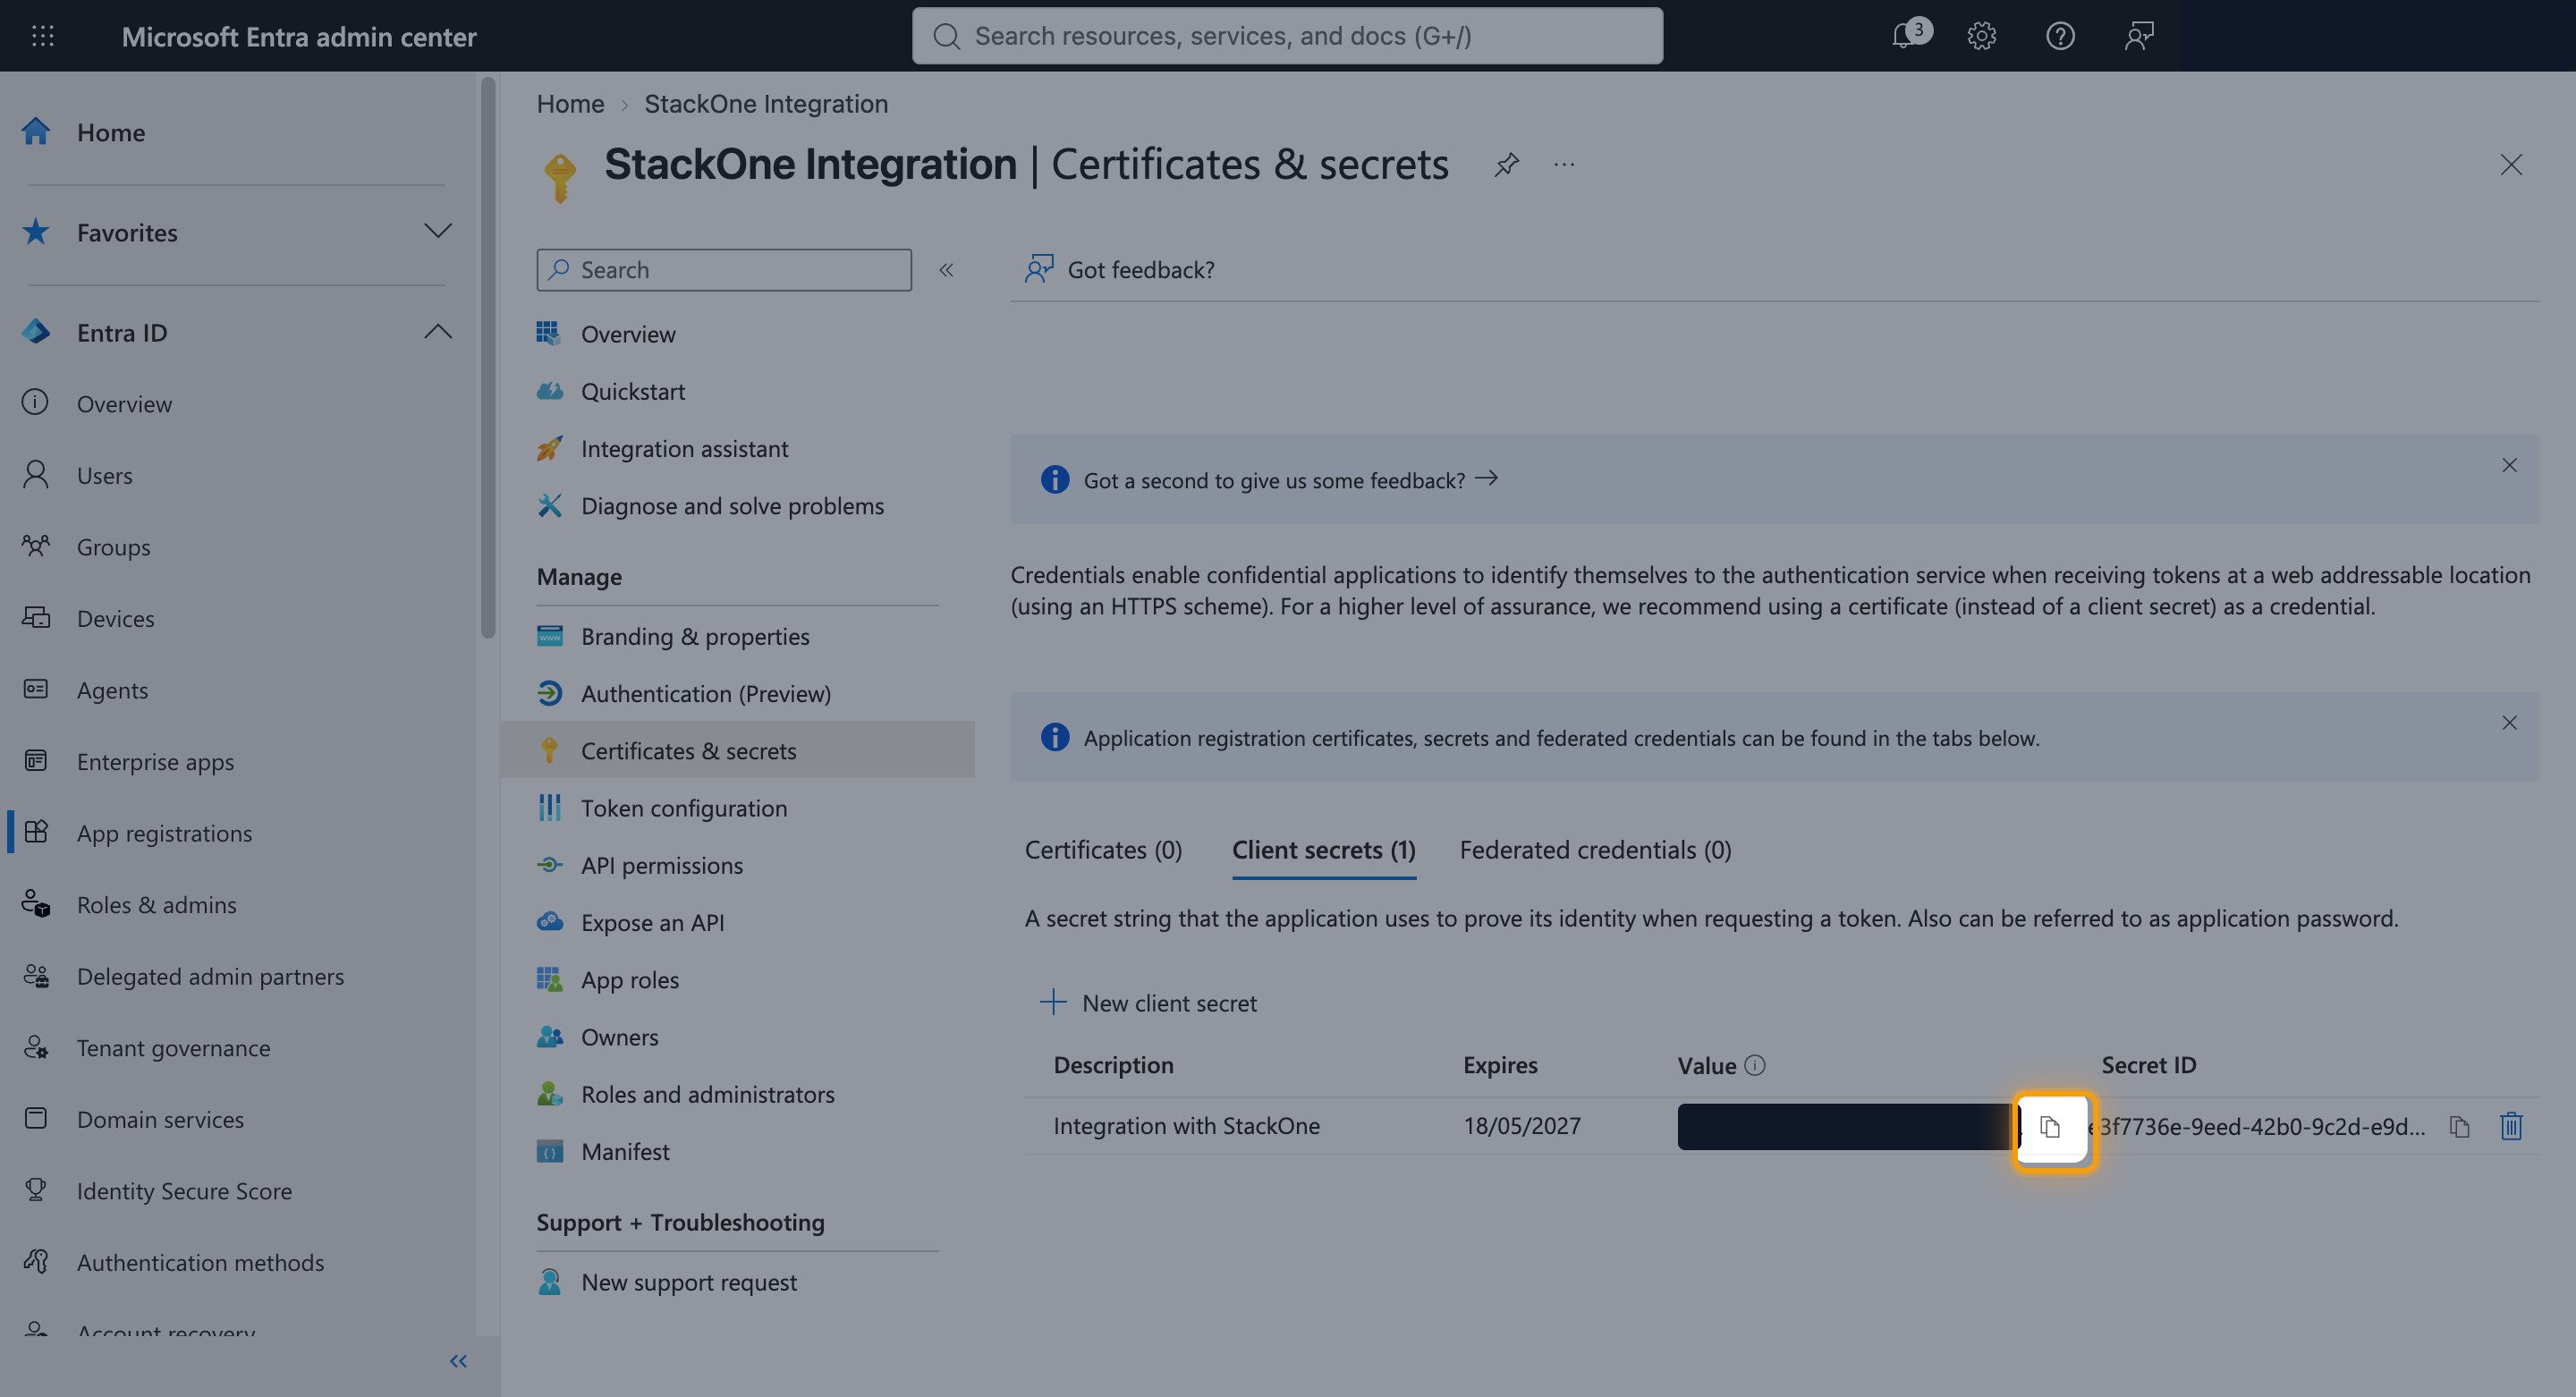
Copy the Client Secret
Copy the Value of the new secret across.
- The Value is only displayed when the secret is created and cannot be retrieved later.
Link the Account
Connect
- Click Connect.
- If applicable, the provider will redirect you to a sign-in or authorization page. Complete the provider’s authorization flow.
- Once authorization is successful, you will see a confirmation popup.
Use Actions