Client Credentials applications are private to your team and must be enabled by a Salesloft admin. They cannot be published as public integrations.

Create a Client Credentials application

Create a private OAuth application in Salesloft that issues tokens without a sign-in screen.

1

Go to the Salesloft Developer Portal

Sign in to the Salesloft Developer Portal as an admin and click Manage Apps in the top navigation bar.
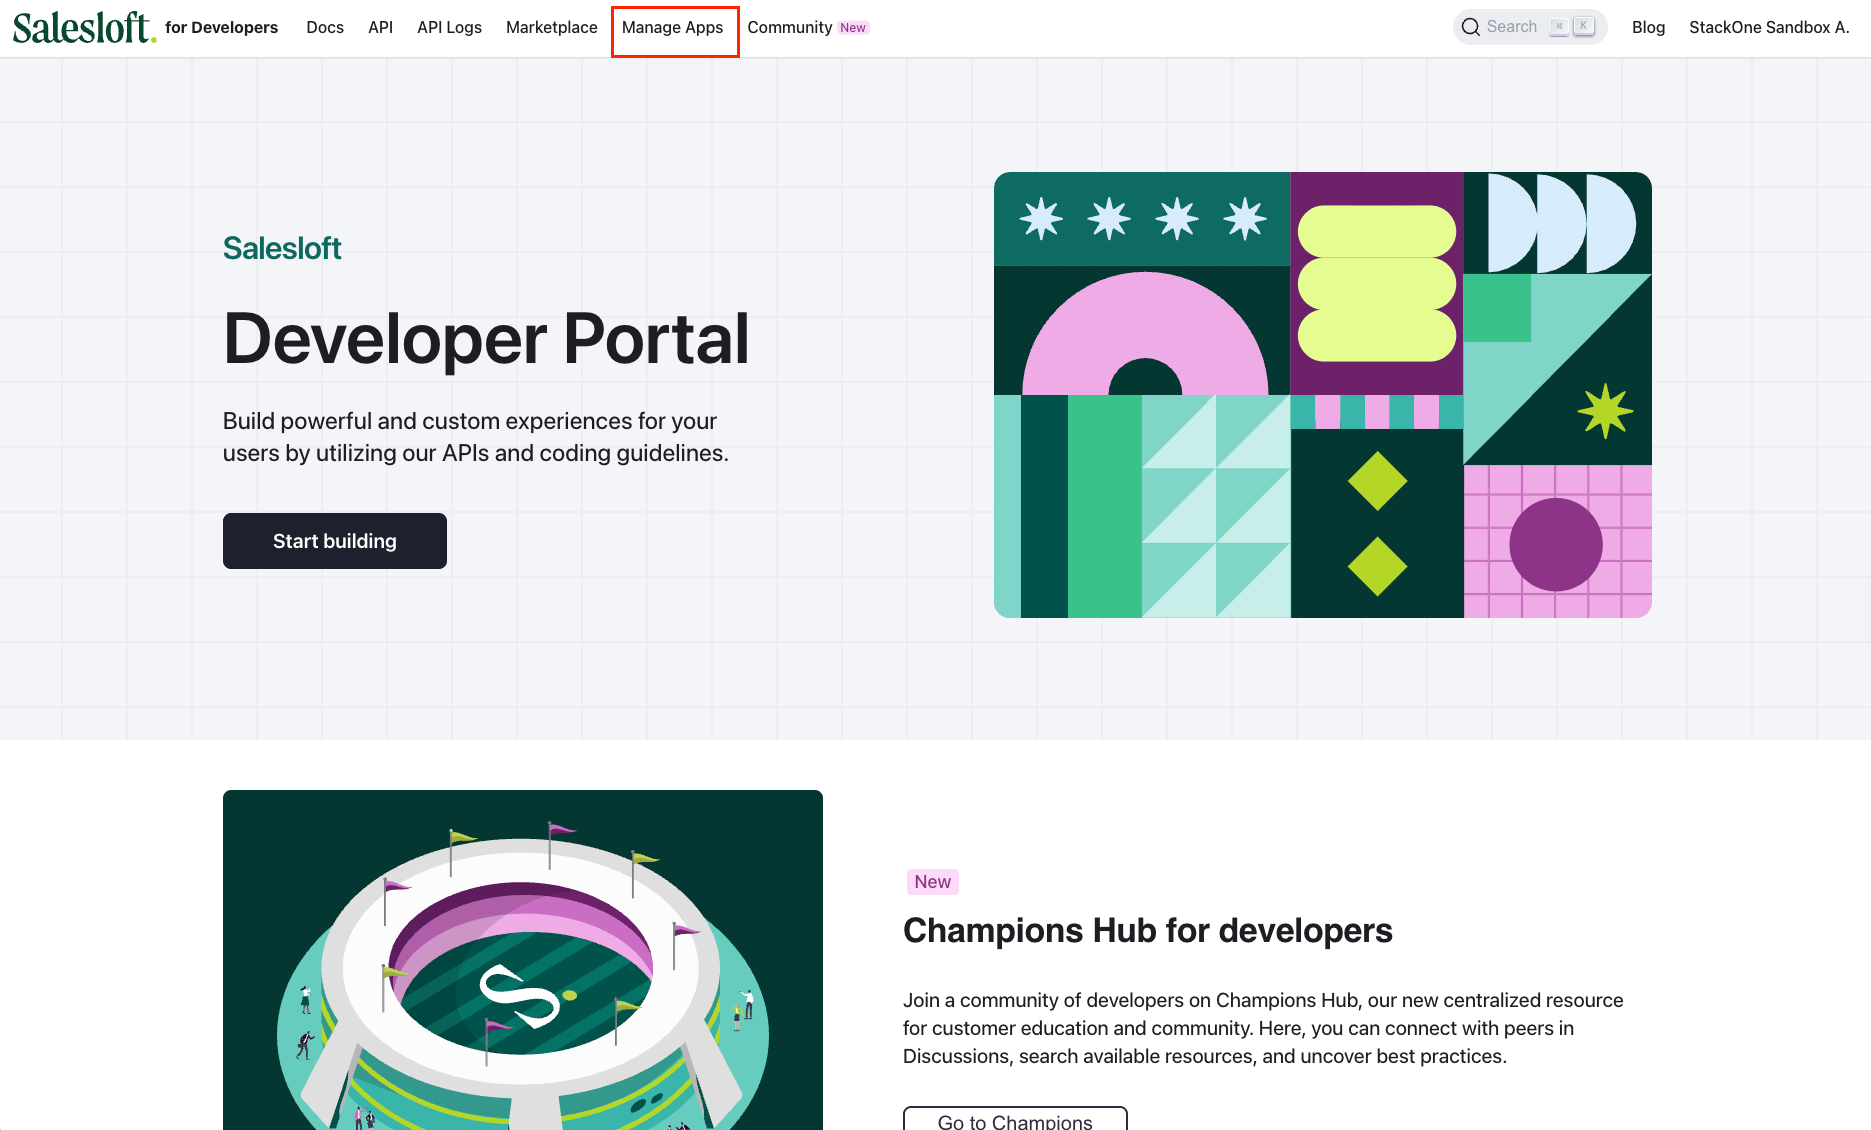
Developer Portal Manage Apps
2

Create a new OAuth application

You are redirected to the Salesloft OAuth Applications page. In the OAuth Applications section, click Create New.
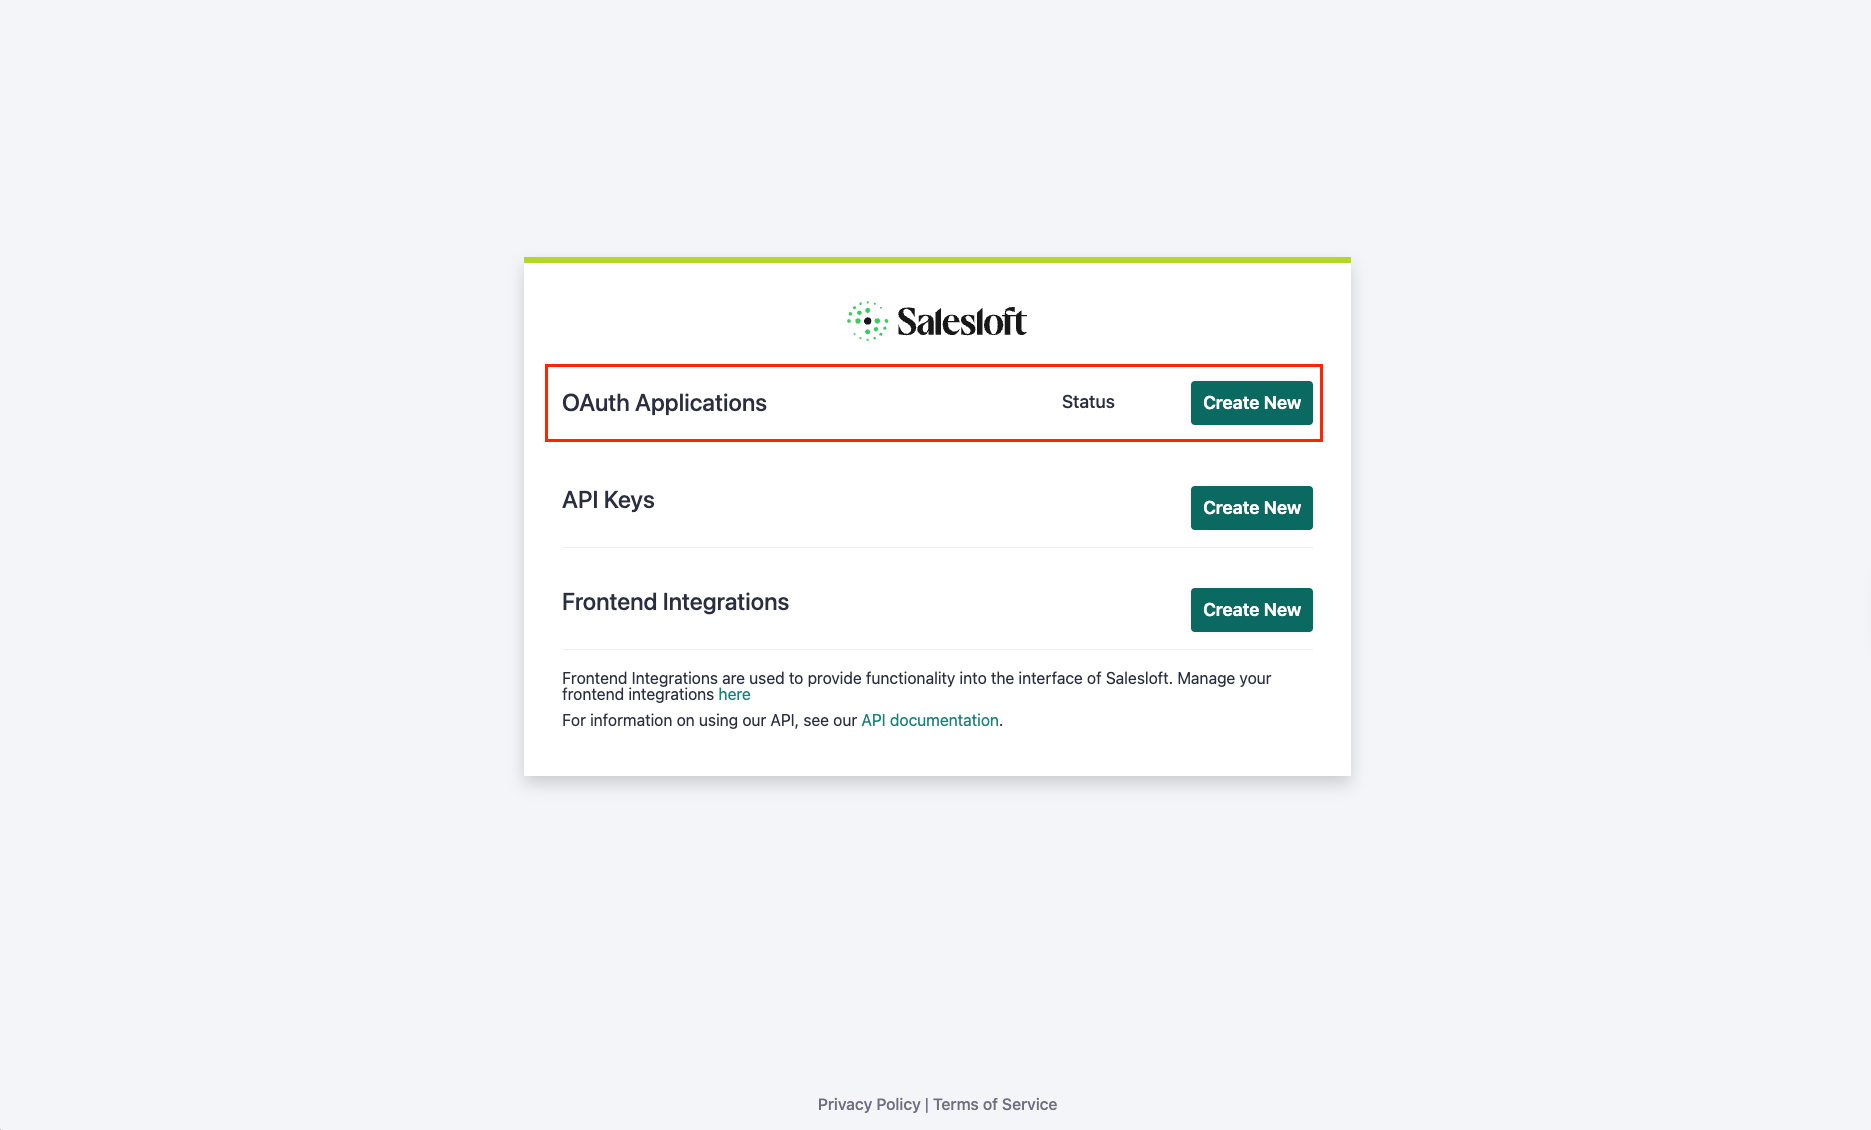
OAuth Applications Create New
3

Fill in the application details

Enables actions: Create A Cadence Import, Create A Cadence Membership, Create A Call, Create A Call Data Record, Create A Custom Field, Create A Note, Create A Person, Create A Person Stage, Create A Task, Create An Account, Create An Email Template, Create An Import, Delete A Cadence Membership, Delete A Custom Field, Delete A Note, Delete A Person, Delete A Person Stage, Delete A Task, Delete An Account, Delete An Import, Fetch A Cadence, Fetch A Call, Fetch A Note, Fetch A Person, Fetch A Person Stage, Fetch A Task, Fetch An Account, Fetch An Email Template, Get Unified Credentials, Get Unified Group, Get Unified Organization, Get Unified Role, Get Unified User, List Account Stages, List Account Tiers, List Accounts, List Actions, List Activity Histories, List Cadence Memberships, List Cadence Steps, List Cadences, List Call Data Records, List Call Dispositions, List Call Sentiments, List Calls, List Custom Fields, List Email Template Attachments, List Email Templates, List Imports, List Notes, List People, List Person Stages, List Tags, List Tasks, List Unified Groups, List Unified Organizations, List Unified Resource Users, List Unified Roles, List Unified Users, List Users, Update A Note, Update A Person, Update A Person Stage, Update A Task, Update An Account, Update An Email Template

On the New application page, complete the form.

  • Optionally click Upload Logo to add a logo (SVGs with a 1:1 aspect ratio).
  • Enter a Name and Description, e.g. StackOne Integration (Client Credential).
  • Leave Application Type as Private Application.
  • Set Grant Type to Client Credentials.
  • Under Scopes, select the scopes listed below, or click Select all. email_contents is under Privileged scopes, which are hidden by default.
  • Submit the form to create the application.
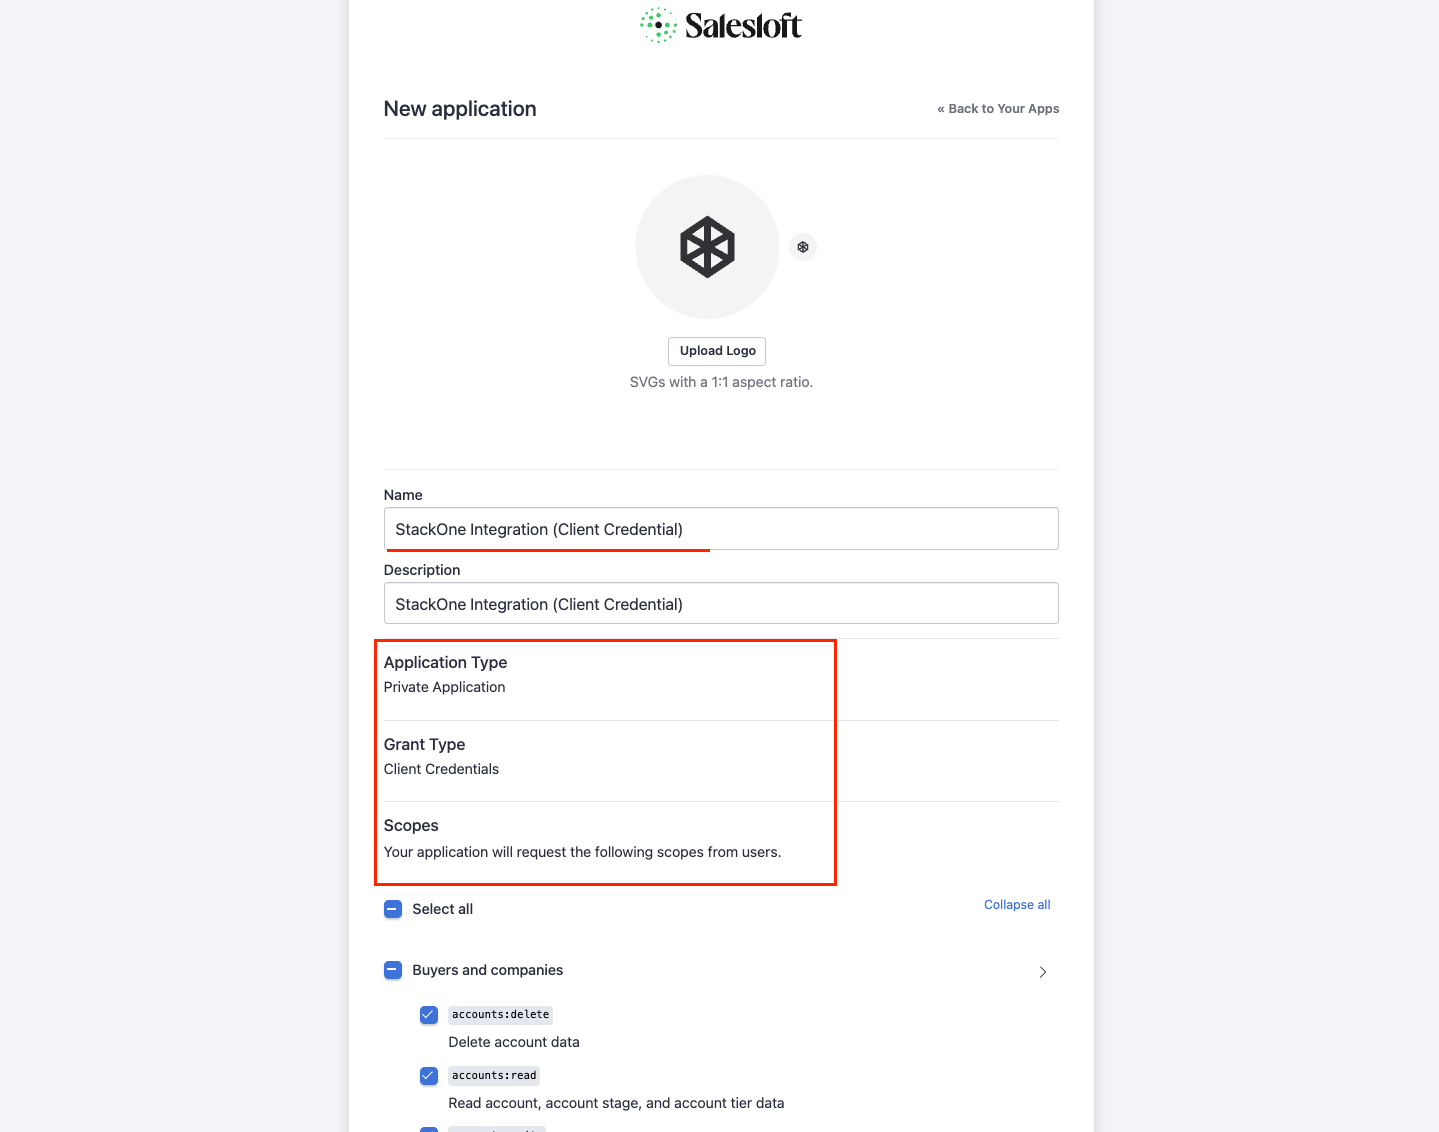
New application form
4

Enter the credentials when linking the account

Salesloft opens the Your Application page for the new application. When linking the account, enter the Application Id in Client ID and the Secret in Client Secret. Leave Scopes empty to request every scope above, or enter a space-separated subset that the application has enabled.
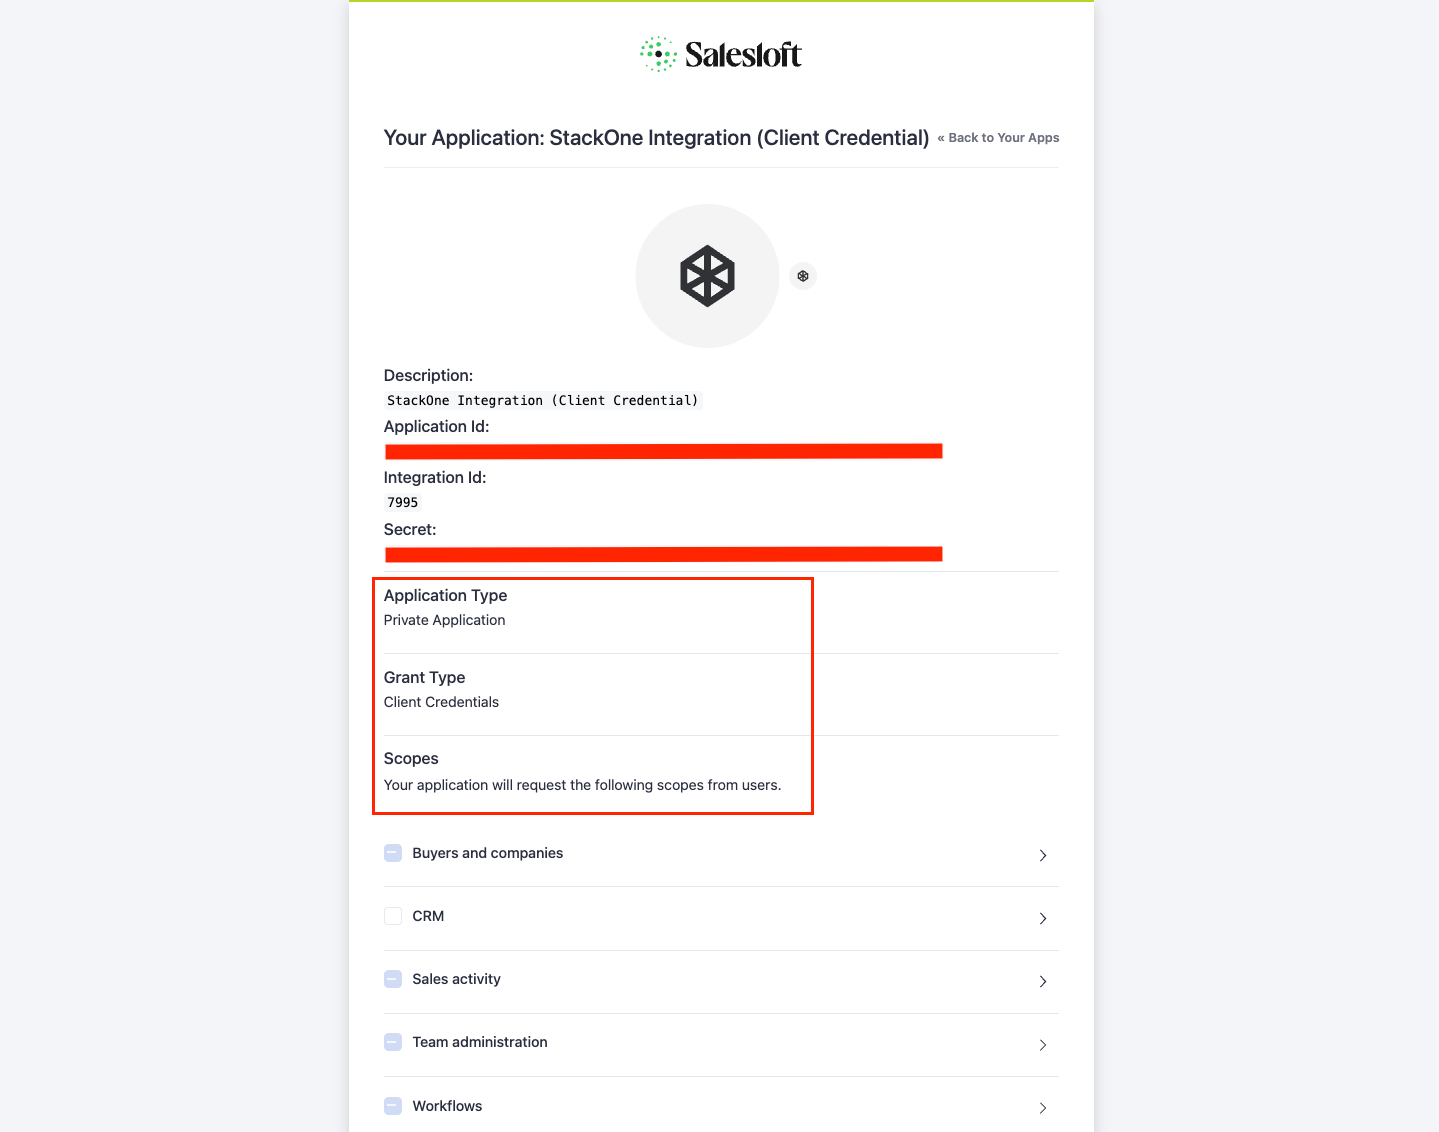
Application Id and Secret
1

Connect

  • Click Connect.
  • If applicable, the provider will redirect you to a sign-in or authorization page. Complete the provider’s authorization flow.
  • Once authorization is successful, you will see a confirmation popup.
2

Use Actions

Connect an AI platform to the linked account’s actions. See AI Platforms.Other ways to call actions are listed in Protocols & SDKs.

Next Steps

Webhooks setup

Configure receiving Events for Salesloft into StackOne.