

Connect Request Tracker with an authentication token
StackOne connects to your self-hosted Request Tracker (RT) instance using two values: your Instance URL and an authentication token created inside RT. You will sign in to RT, create the token under your account settings, and paste both values into StackOne Hub.
Sign in to Request Tracker
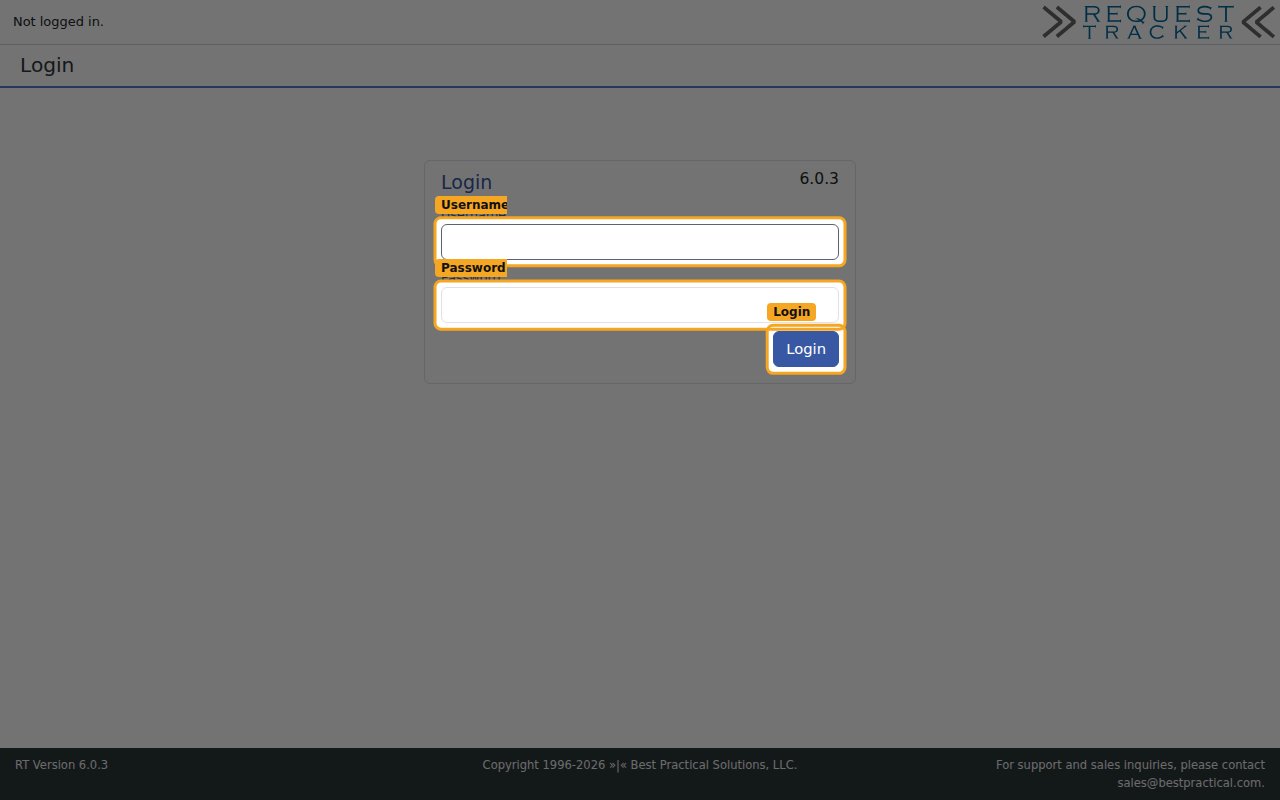
Open your organization’s RT instance in a browser by navigating to its URL (for example, https://rt.example.com), then sign in with your RT username and password on the Login screen. That address is your Instance URL. Your account needs permission to see and act on the tickets, queues, and users you want StackOne to access — the token inherits your own permissions.
- Your Instance URL is the base address of your RT instance shown in the browser address bar.
- Format:
https://{your-rt-host} - Example:
https://rt.example.com - Paste this value into the Instance URL field in StackOne Hub.
Open your authentication tokens
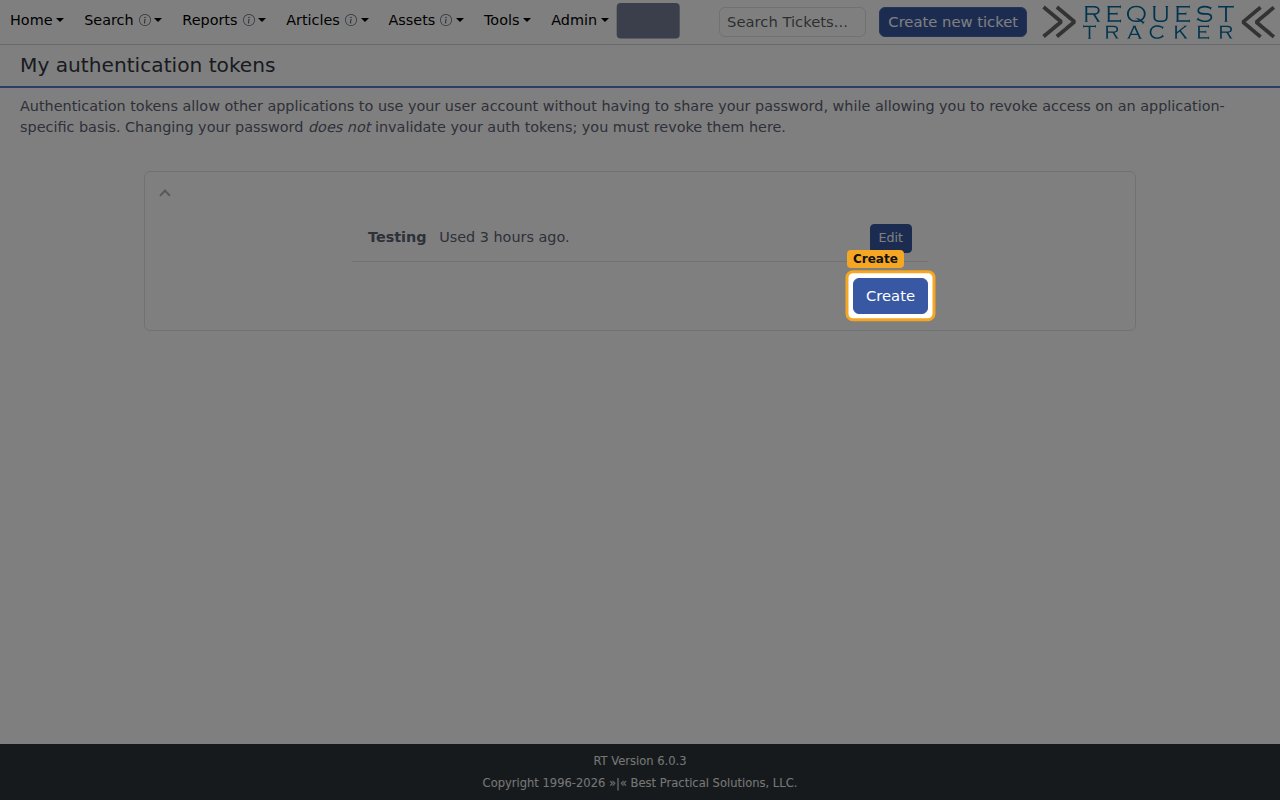
In the top-right corner, click your user initials (for example, ER) to open the menu, hover over Settings, then select Auth Tokens. This opens the My authentication tokens page, which lists your existing tokens. Click Create to add a new one.
Create the authentication token
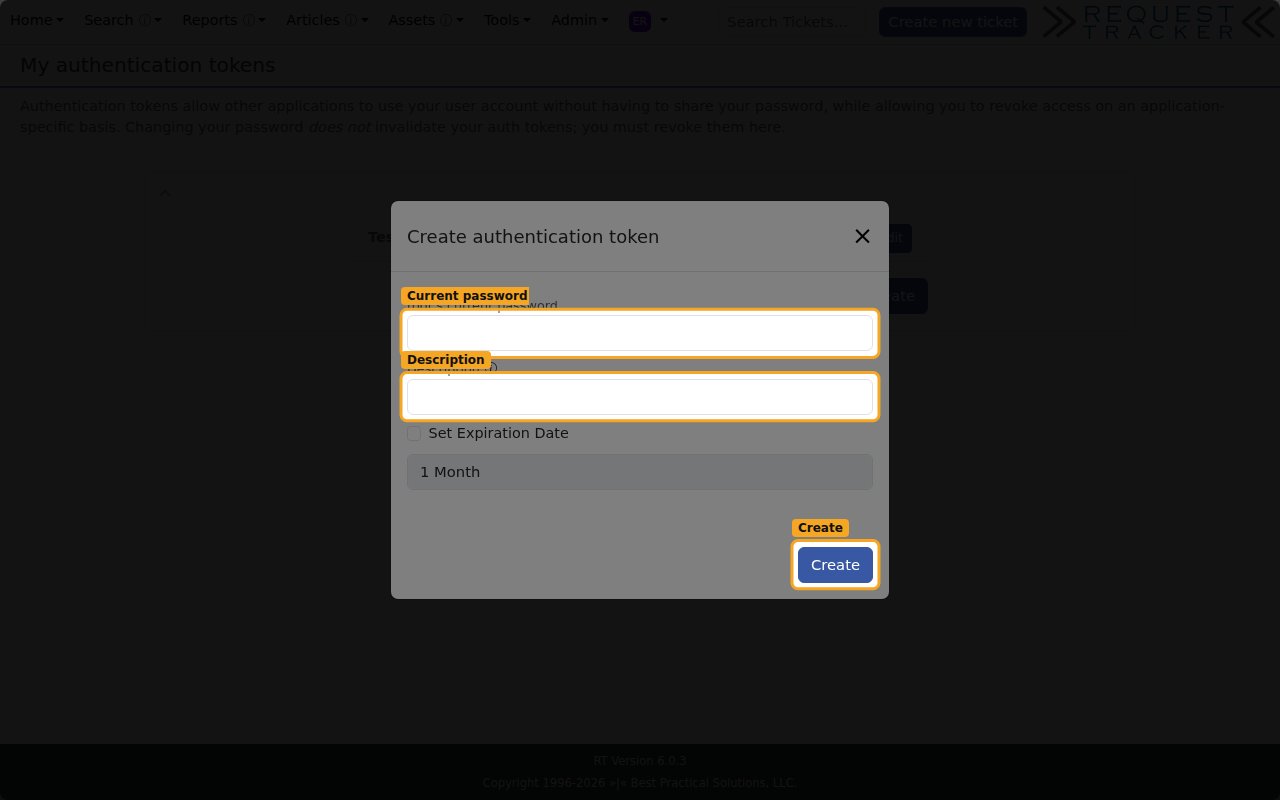
In the Create authentication token dialog, enter your account password in the current-password field, then type a Description so you can recognize the token later (for example, StackOne). Optionally tick Set Expiration Date to choose an expiry; leave it unchecked for a non-expiring token. Click Create.
Copy the token into StackOne Hub
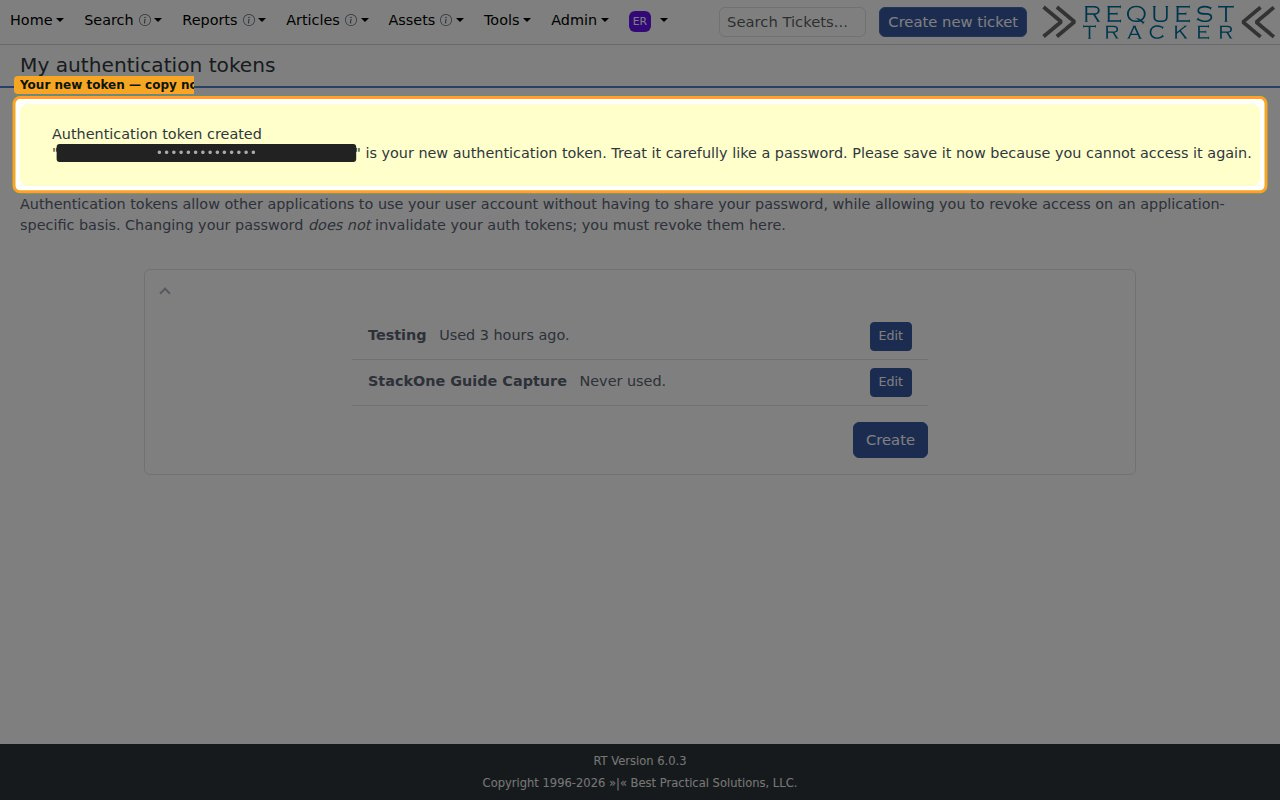
RT shows the message Authentication token created with your new token value. Copy the token immediately — this is the only time it is displayed.
- The token is shown only once and cannot be retrieved later — copy it before leaving the page.
- This is your API Token — paste it into the API Token field in StackOne Hub.
- RT states you must save it now because you cannot access it again; if you lose it, create a new token.
Linking the Account from the Hub
Navigate to the Hub
Fill out the fields
- Instance URL
- API Token
Connect
- Click Connect
- If applicable, the provider will redirect you to a sign-in or authorization page. Complete the provider’s authorization flow.
- Once authorization is successful, you will see a confirmation popup
If the account linking is successful, you will see the newly linked account on your Accounts page.