

Create a Ramp developer app
The Client Credentials grant connects your own Ramp business without a user sign-in. Create a developer app in Ramp, check its grant type and scopes, then copy its credentials.
1
Create the app
Sign in to Ramp for the environment you are connecting, then open Company > Developer:
- Production: Ramp dashboard
- Sandbox: Ramp sandbox dashboard
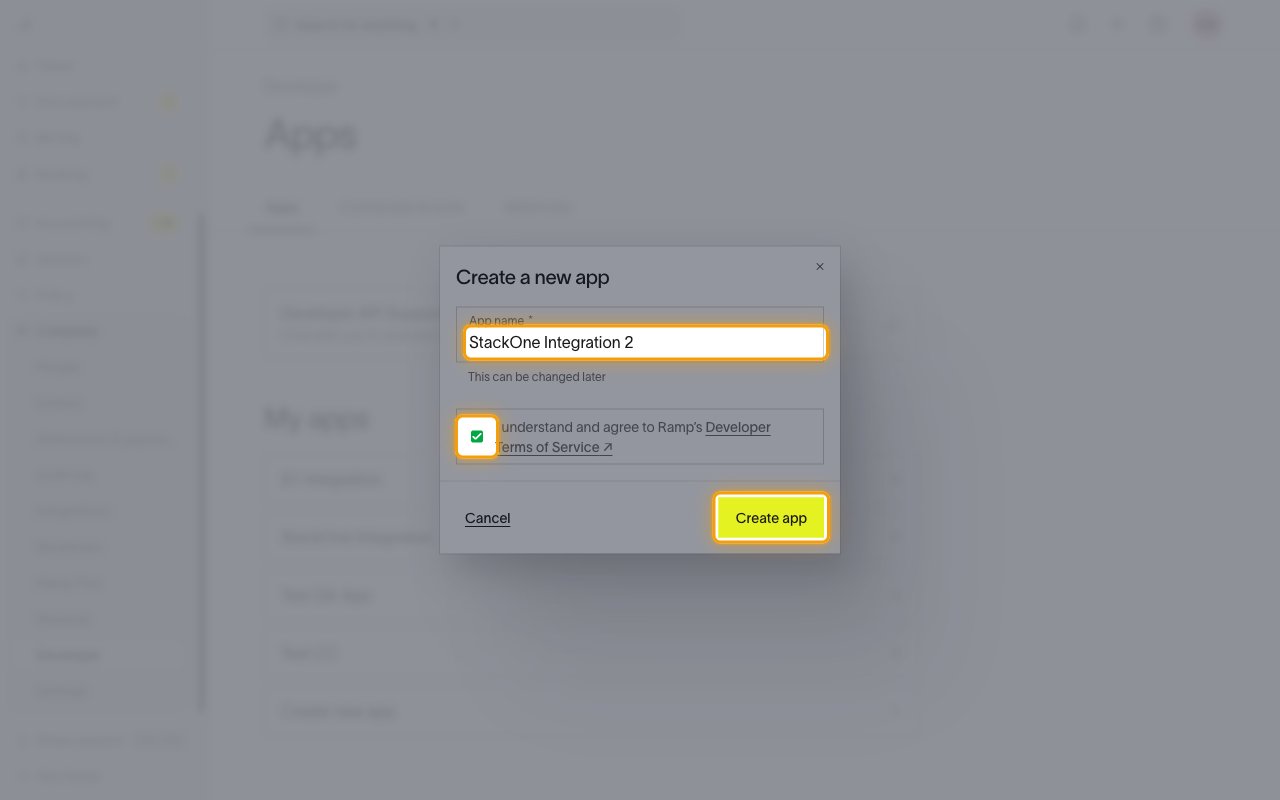
- On the Apps tab, click Create new app.
- App name:
StackOne Integration - Check I understand and agree to Ramp’s Developer Terms of Service.
- Click Create app.
- If Ramp asks you to confirm it’s you, enter the code it emails you.
2
Enable the Client credentials grant
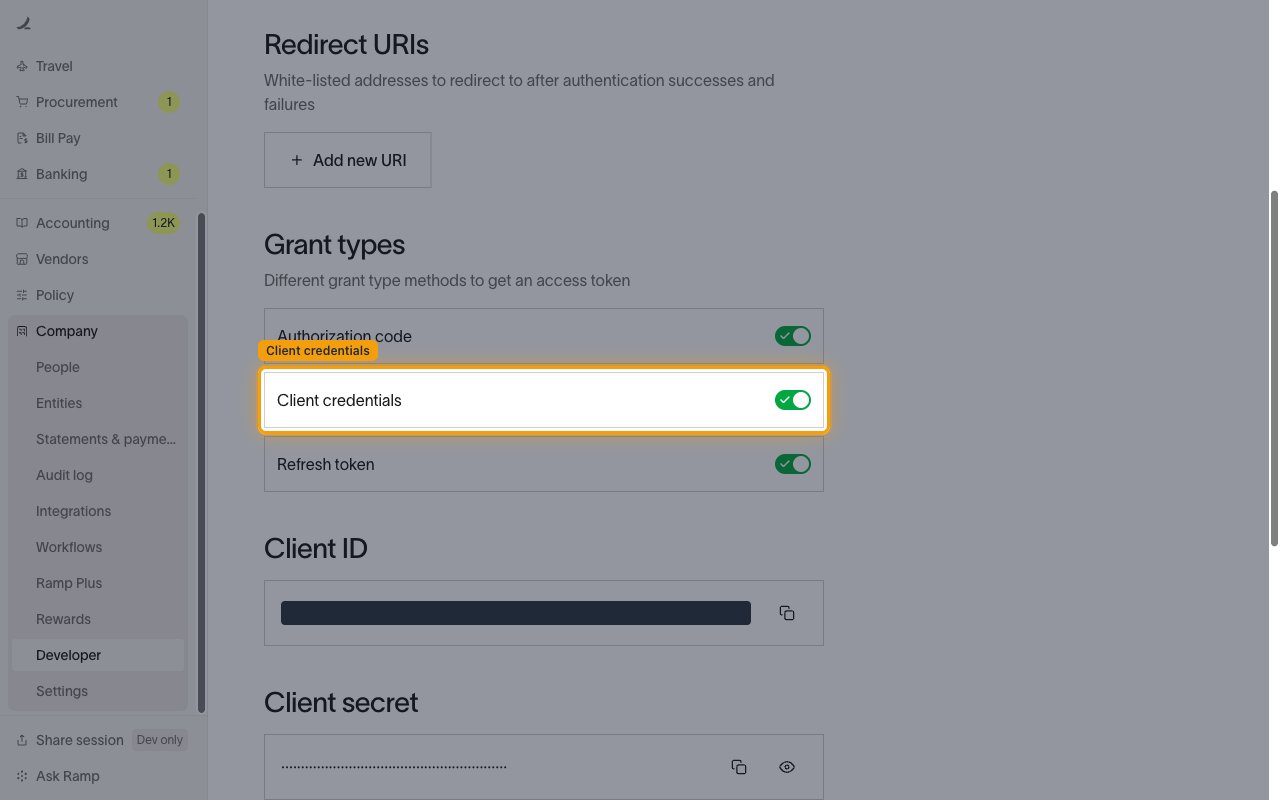
On the app page, under Grant types, make sure Client credentials is turned on.
3
Add the scopes
Enables actions: Create A Department, Create A Location, Create A New Custom Accounting Field, Create A New Vendor, Create A Physical Card, Create A Spend Program, Create A User, Delete A Custom Accounting Field Option, Delete A General Ledger Account, Delete A Vendor, Fetch A Bill, Fetch A Custom Accounting Field, Fetch A Department, Fetch A Fund, Fetch A General Ledger Account, Fetch A Location, Fetch A Physical Card, Fetch A Receipt, Fetch A Reimbursement, Fetch A Spend Program, Fetch A Transaction, Fetch A Transaction Memo, Fetch A Transfer Payment, Fetch A Trip, Fetch A User, Fetch A Vendor, Fetch A Virtual Card, Fetch An Accounting Connection By ID, Fetch The Company Balance Information, Fetch The Company Information, Fetch User Creation Task Status, Get A Business Entity, List Accounting Connections, List All Trips For The Business, List Bills, List Business Entities, List Custom Accounting Fields, List Departments, List Funds, List General Ledger Accounts, List Locations, List Memos, List Merchants, List Options For A Given Custom Accounting Field, List Physical Cards, List Purchase Orders, List Receipts, List Reimbursements, List Repayments, List Spend Programs, List Transactions, List Transfer Payments, List Users, List Vendors, List Virtual Cards, Manage A User’s Invite Lifecycle, Post Accounting Coding Selections To An Object, Post Ready To Sync Status, Post Sync Status, Register A New API Based Accounting Connection, Update A Custom Accounting Field Option, Update A Department, Update A General Ledger Account, Update A Location, Update A Physical Card, Update A Transaction, Update A User, Update A Vendor, Upload A New Memo For A Transaction, Upload A Receipt, Upload General Ledger Accounts, Upload New Options, Upload Vendors
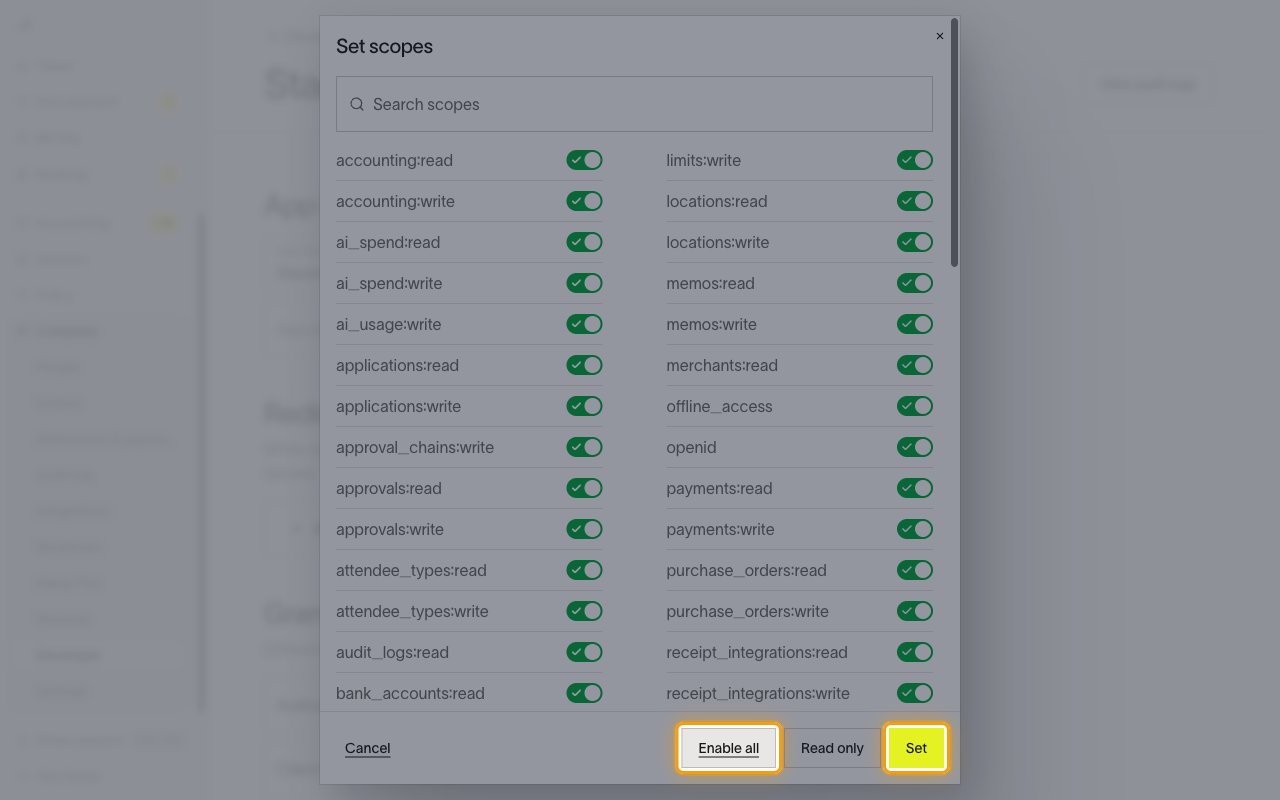
Under Scopes, click Configure allowed scopes.
- In the Set scopes dialog, turn on each scope listed, or click Enable all.
- Click Set.
4
Copy the credentials
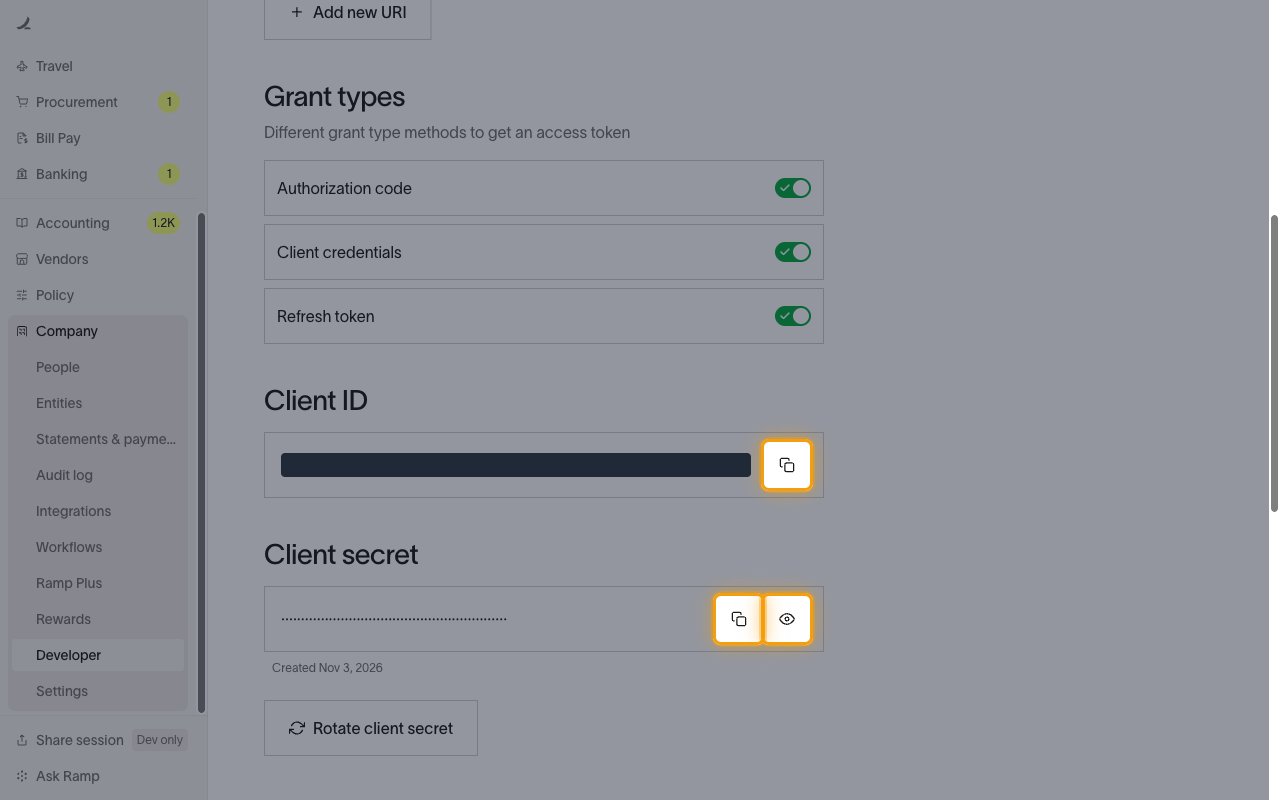
Copy the Client ID and Client secret across.
- Under Client ID, click the copy icon.
- Under Client secret, click the eye icon to show the secret.
- Click the copy icon next to the secret.
Link the Account
1
Connect
- Click Connect.
- If applicable, the provider will redirect you to a sign-in or authorization page. Complete the provider’s authorization flow.
- Once authorization is successful, you will see a confirmation popup.
2
Use Actions
Connect an AI platform to the linked account’s actions. See AI Platforms.Other ways to call actions are listed in Protocols & SDKs.
Next Steps
Webhooks setup
Configure receiving Events for Ramp into StackOne.