

Creating a machine-to-machine OAuth client
A machine-to-machine OAuth client lets StackOne authenticate with no signed-in user. Qlik creates a bot user for the client on its first token request and gives it Tenant Admin privileges, so anything this connection creates is owned by that bot user.
Create the OAuth client
Sign in to Qlik Cloud with a Tenant Admin account, then open the Administration activity center.
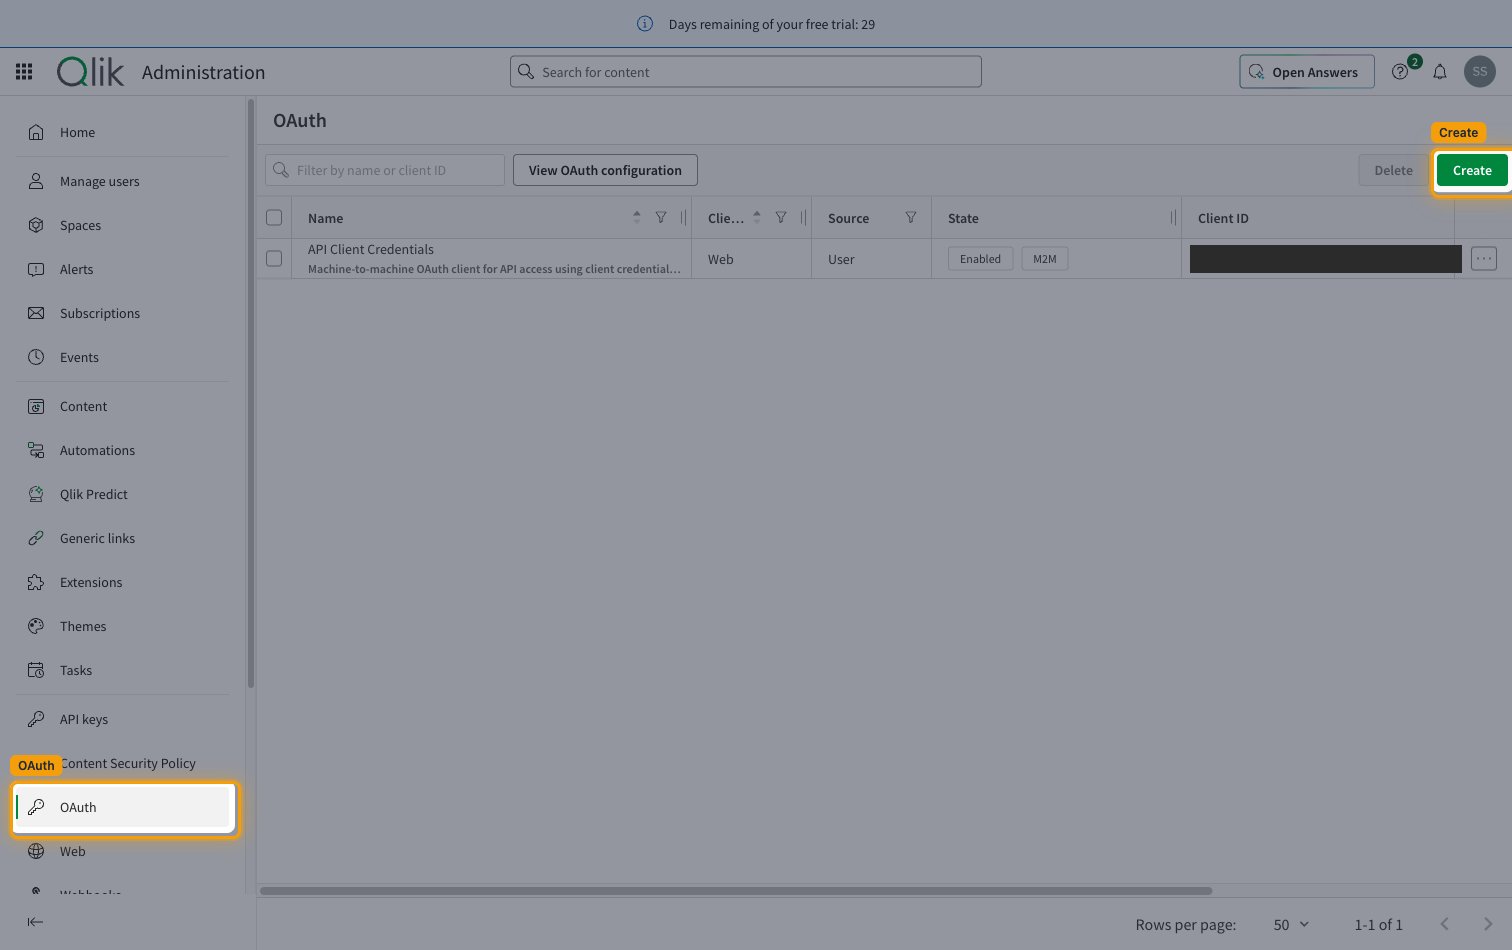
- In the left sidebar, click OAuth.
- Click Create.
Enter the client details
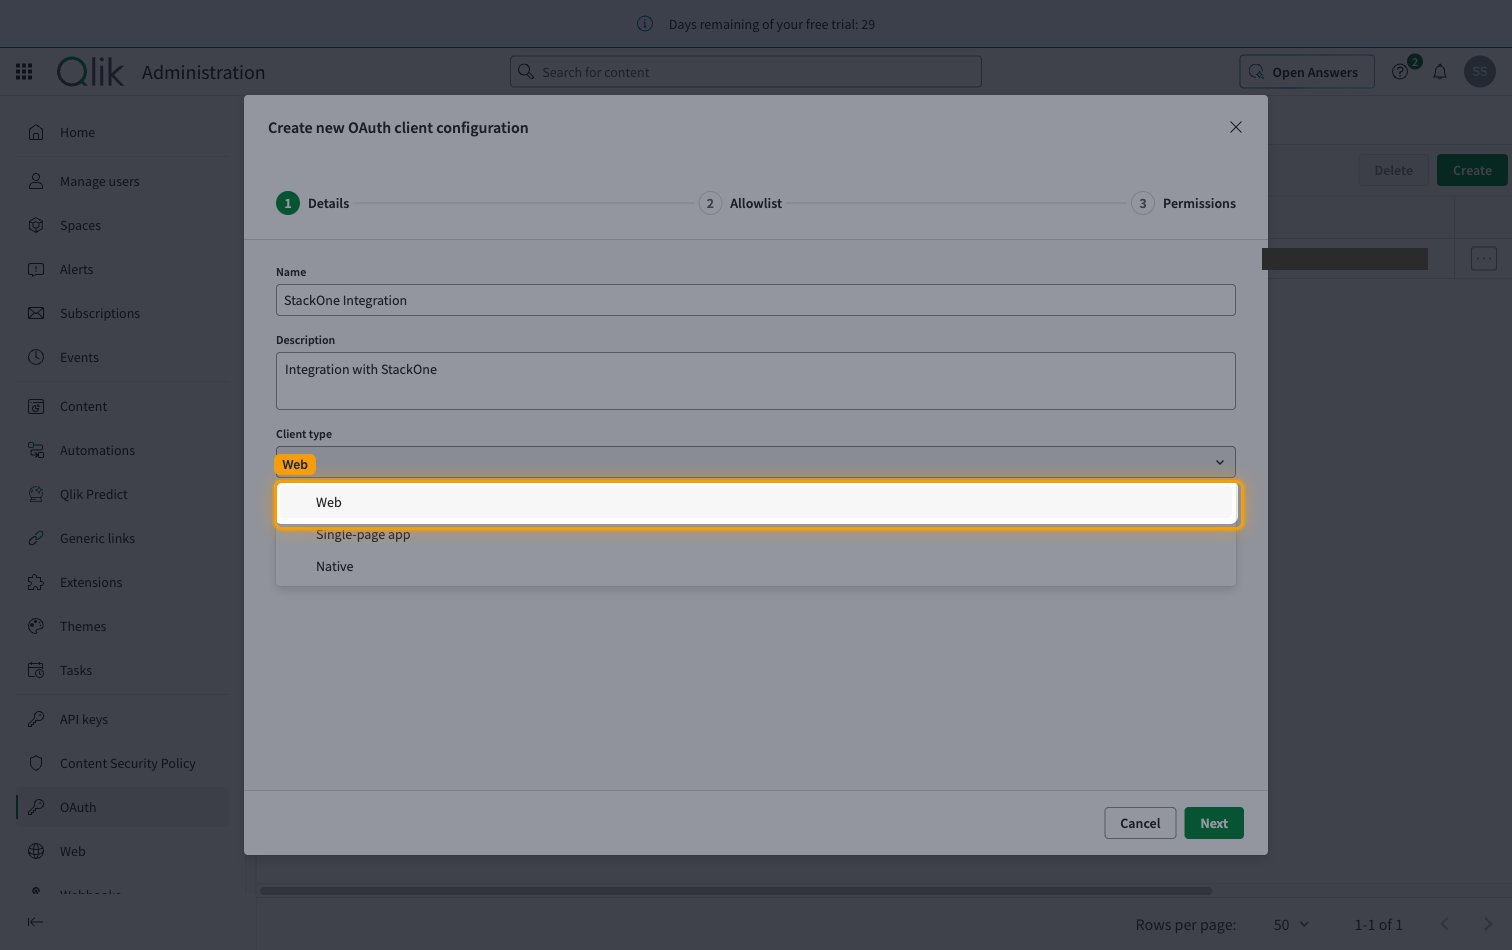
On the Details step of Create new OAuth client configuration, describe the client and choose its type.
- Name:
StackOne Integration - Description: what the client is used for
- Client type: Web
- Machine-to-machine clients are created from the Web client type. You can’t change the client type after the client is created.
- Click Next.
Review the allowlist
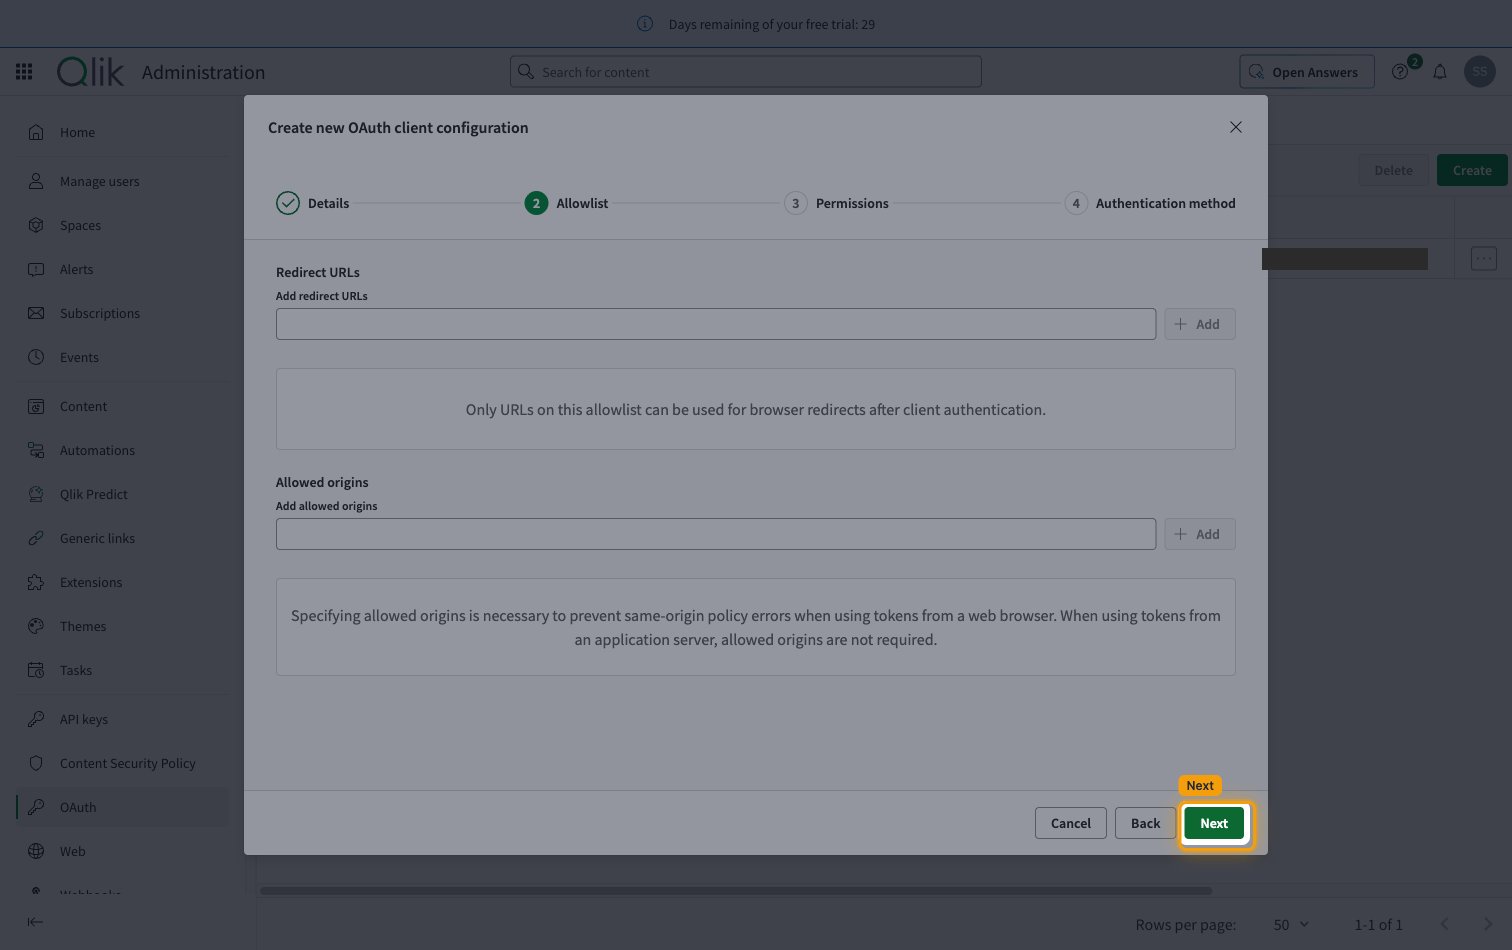
The Allowlist step sets Redirect URLs and Allowed origins, which only apply when a browser is redirected back to your application. The client credentials flow never redirects a browser, so both can stay empty.
- Click Next.
Add the permissions
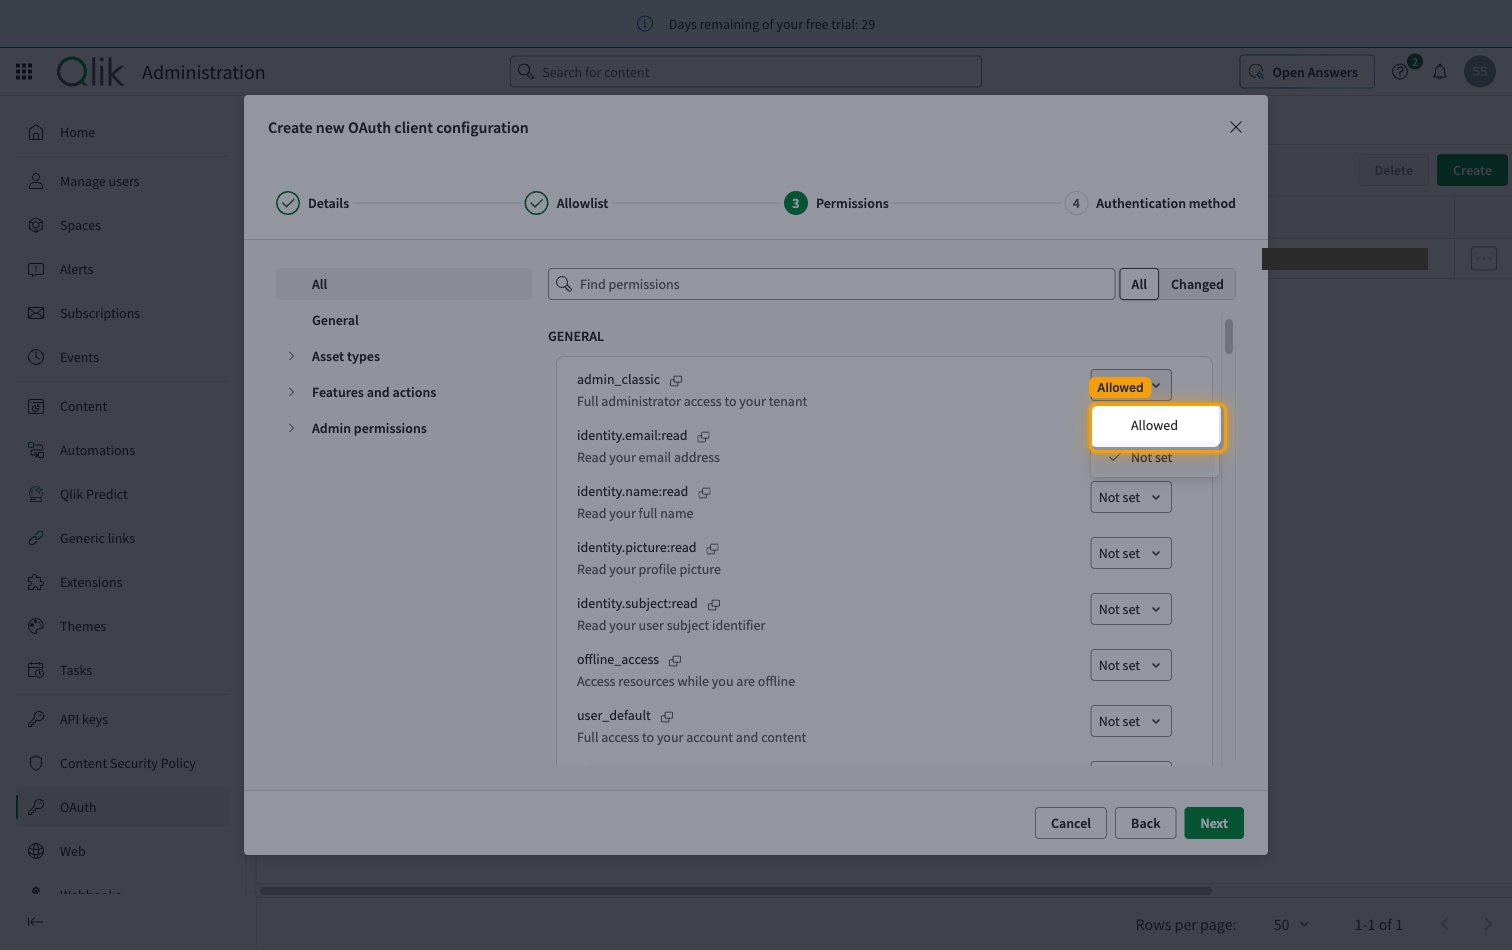
On the Permissions step, find each permission the integration needs and set it to Allowed. Setting user_default and admin_classic to Allowed covers every action this connector exposes, because they resolve to the full user and administrator permission sets. Set the narrower permissions instead if you prefer to grant least privilege.
- Leave offline_access as Not set — the client credentials flow issues a fresh access token on each exchange and never returns a refresh token.
- Click Next.
Enable machine-to-machine access
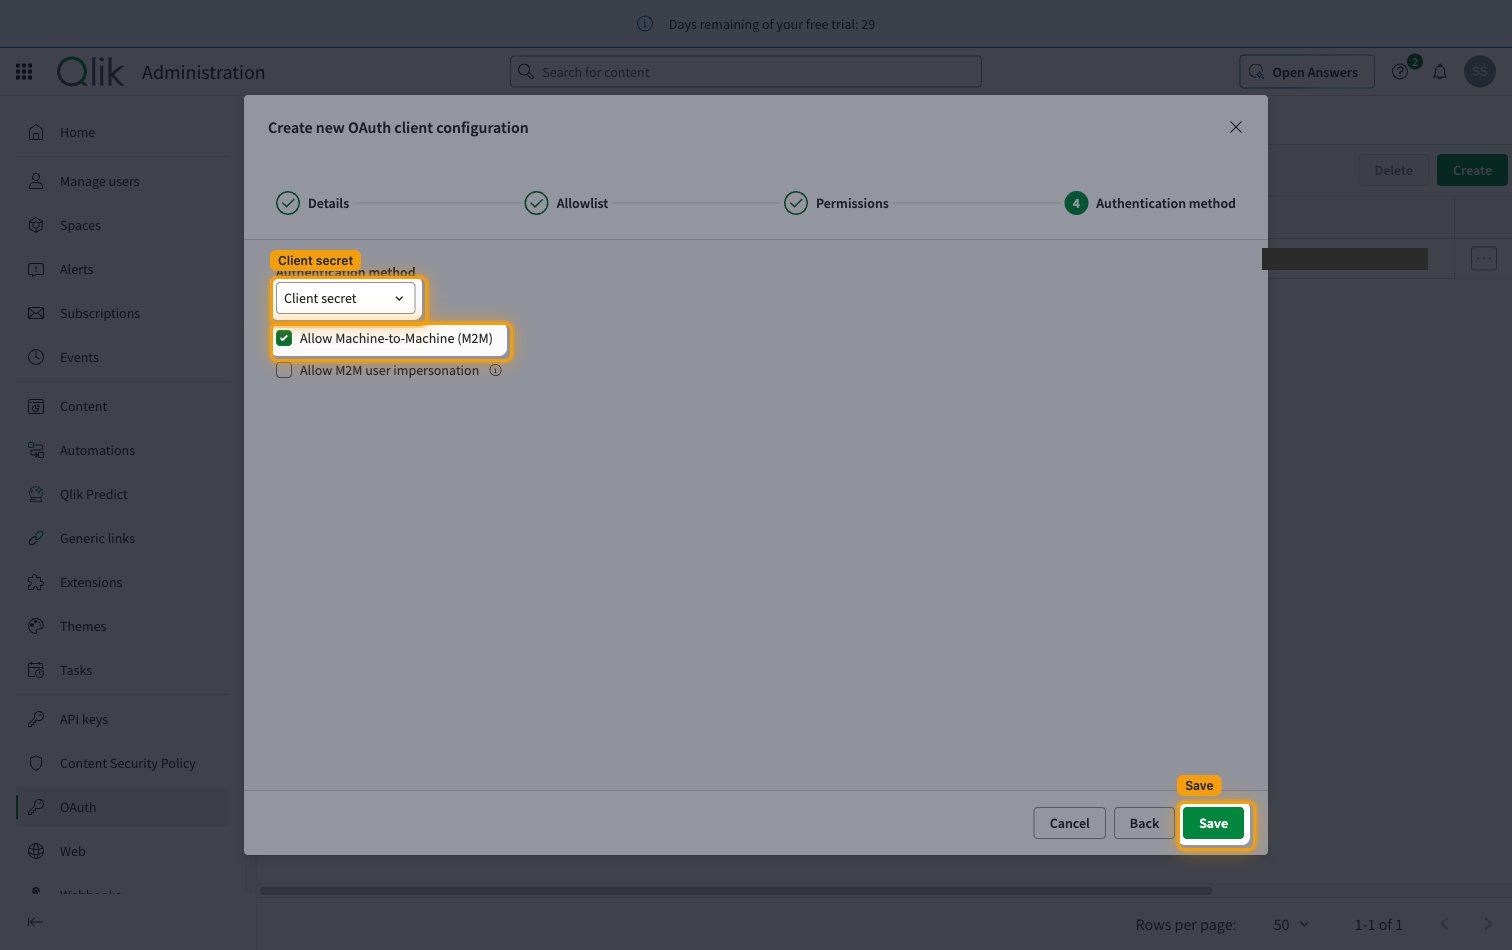
On the Authentication method step, turn the client into a machine-to-machine client.
- Authentication method: Client secret
- Select Allow Machine-to-Machine (M2M).
- Leave Allow M2M user impersonation cleared — it is only needed to act on behalf of a named Qlik user.
- Click Save.
Copy the client credentials
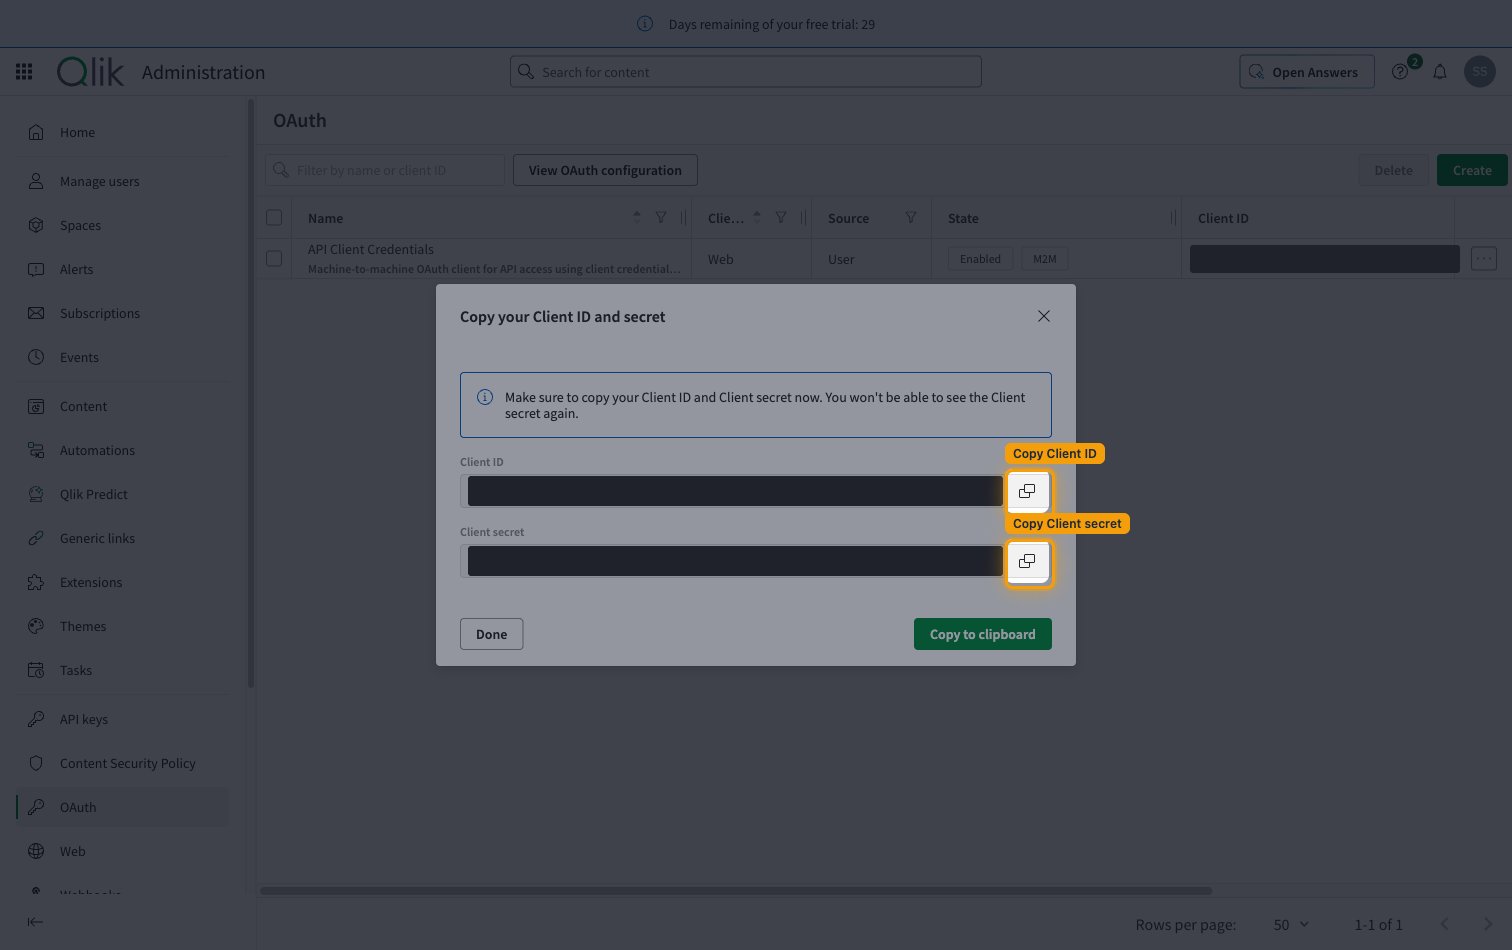
The Copy your Client ID and secret dialog appears once the client is created. Copy the Client ID and the Client secret into StackOne Hub.
- The Client secret is only displayed once and cannot be retrieved later.
- Click Done.
Set the consent method to Trusted
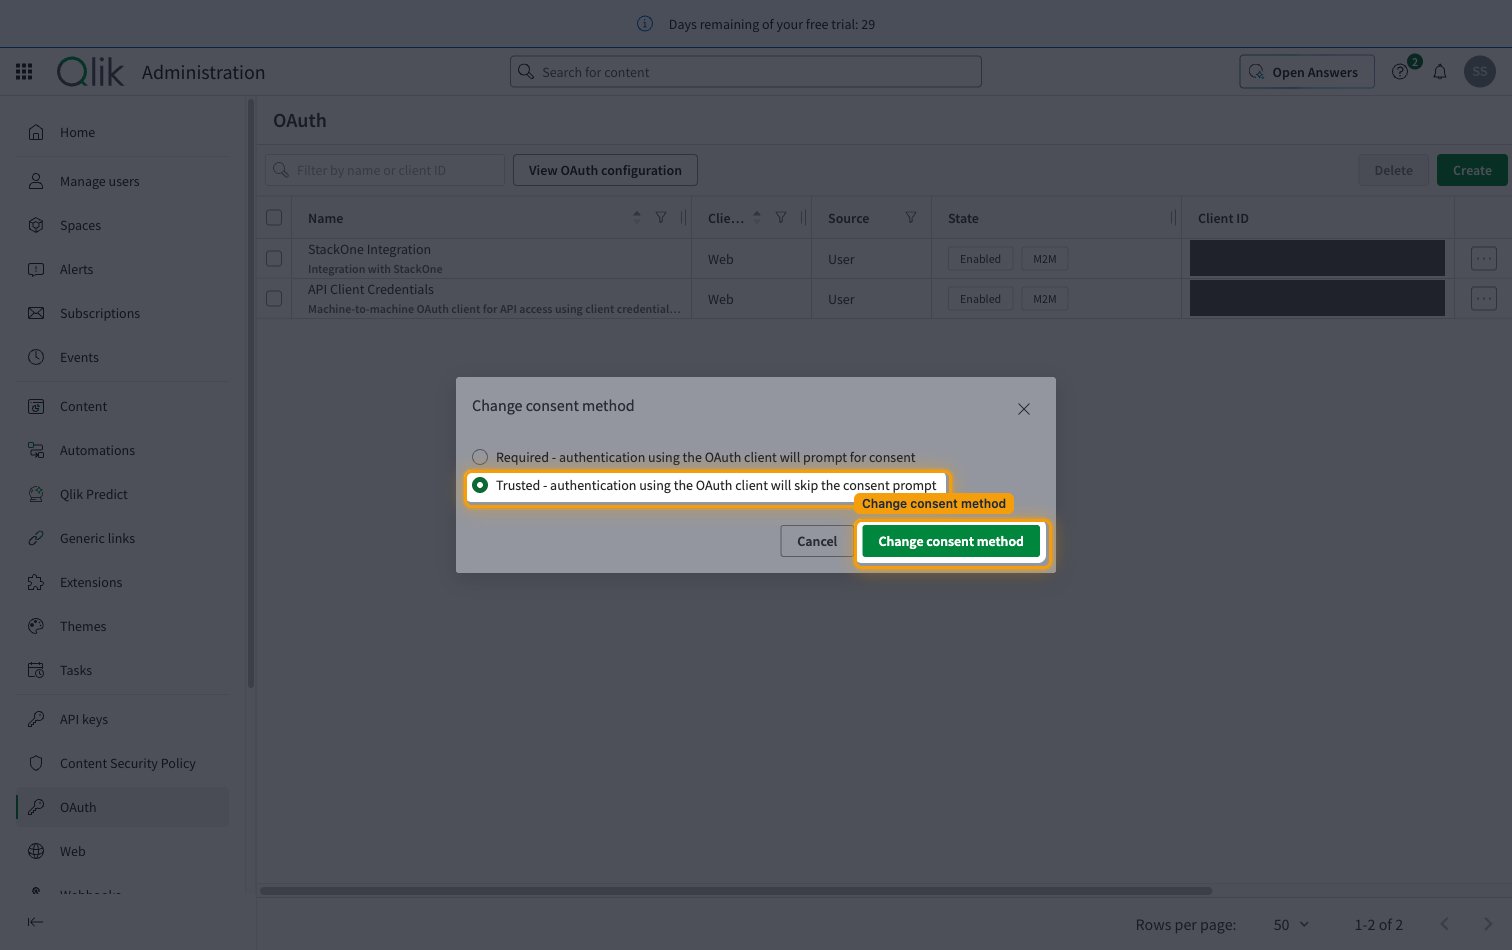
A new client starts on the Required consent method, which asks a signed-in user to approve the request. A machine-to-machine client has no user to ask, so it must be changed to Trusted before it can get a token.
- On the client’s row, click the action menu (⋯) at the end of the row and select Change consent method.
- Select Trusted - authentication using the OAuth client will skip the consent prompt.
- Click Change consent method.
Find your Tenant Name and Region
Your Tenant Name and Region both come from the address you use to reach Qlik Cloud. After signing in, read them from your browser’s address bar and enter them into StackOne Hub.
- Format:
https://{tenant-name}.{region}.qlikcloud.com - Example:
https://my-company.us.qlikcloud.com/hub - In that example, Tenant Name is
my-companyand Region isus.
Link the Account
Connect
- Click Connect.
- If applicable, the provider will redirect you to a sign-in or authorization page. Complete the provider’s authorization flow.
- Once authorization is successful, you will see a confirmation popup.
Use Actions
Next Steps
Webhooks setup
Configure receiving Events for Qlik into StackOne.