

Prerequisites
The connector should already be set up, with a Connector Profile and a Linked Account. See Getting Started on the Prismic connector page.Webhook setup
This connector uses Manual Webhooks. Prismic has no public API for managing webhooks, so you add one webhook per repository in the Prismic dashboard, pointing at the StackOne Native Webhook URL for the linked account.
Retrieve StackOne Native Webhook URL
The Native Webhook URL is generated once an account has been linked. Each linked Prismic repository has its own URL.
- Open the linked account in StackOne.
- Copy the value from Native Webhook URL.
Open webhook settings
Sign in to the Prismic dashboard and open the repository you linked to StackOne.
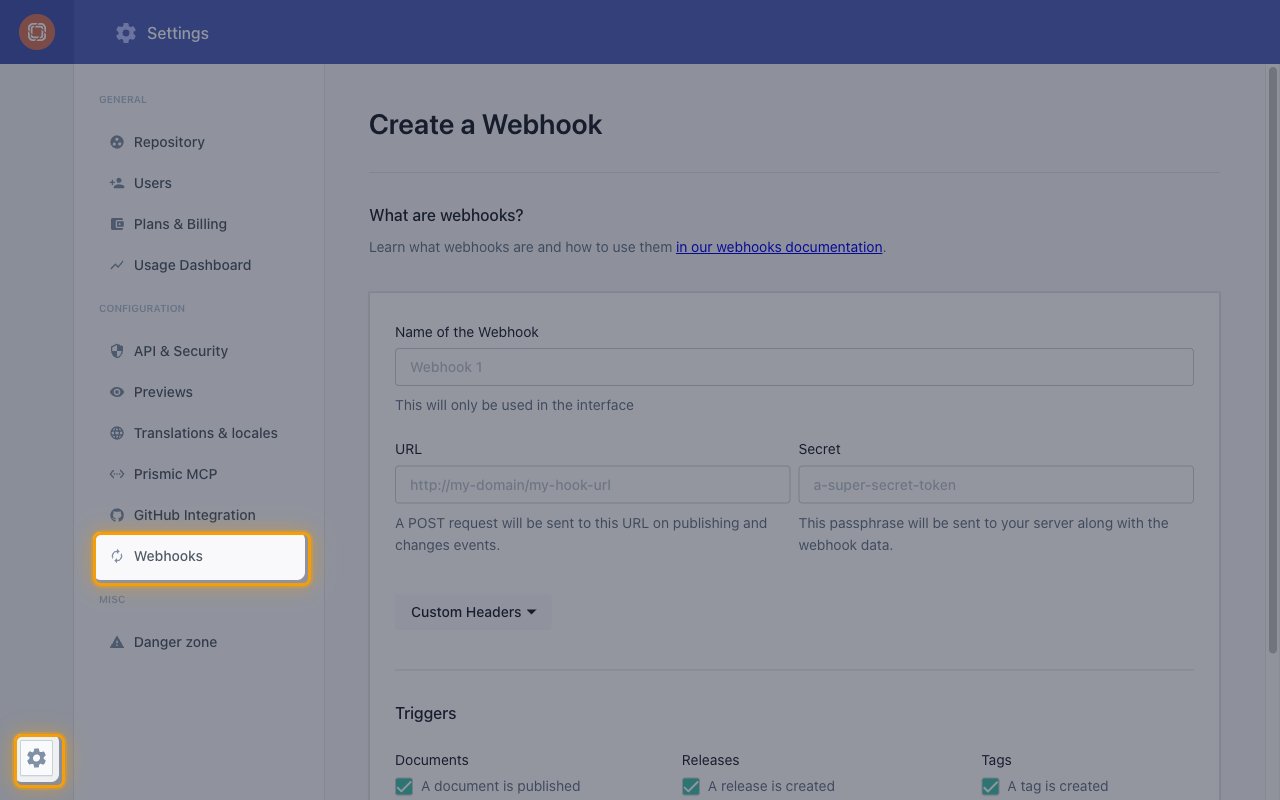
- Click the Settings gear icon at the bottom of the left sidebar.
- Under Configuration, select Webhooks.
- If the repository already has webhooks, click Create a webhook below the list.
Enter the webhook details
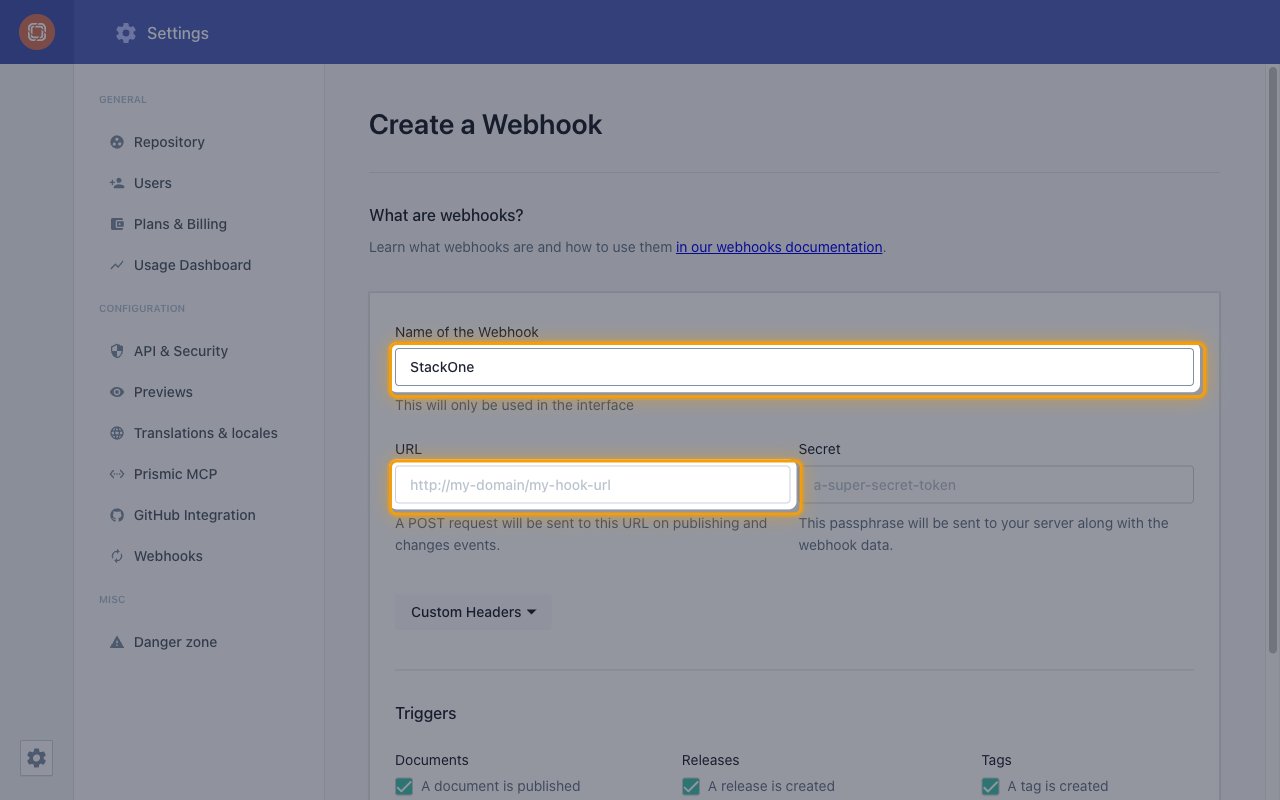
Fill in the Create a Webhook form.
- Name of the Webhook: enter a name such as
StackOne. It is only shown in the Prismic interface. - URL: paste the StackOne Native Webhook URL.
- Secret: leave empty. StackOne identifies the account from the Native Webhook URL.
- Leave Custom Headers empty.
Select the triggers and save
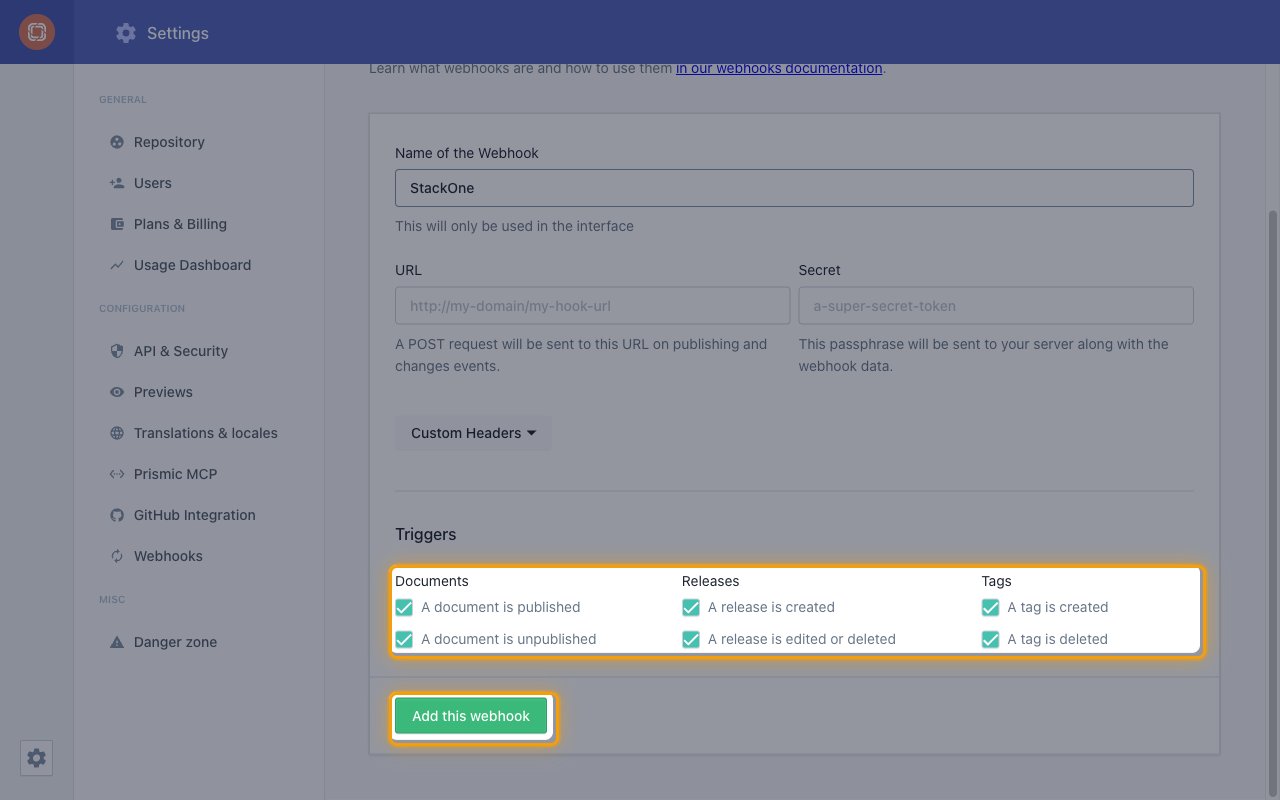
Under Triggers, keep every checkbox selected so StackOne receives all supported events, then click Add this webhook.
- Documents: A document is published and A document is unpublished.
- Releases: A release is created and A release is edited or deleted.
- Tags: A tag is created and A tag is deleted.
Available webhook events
The following Prismic events are supported. Only triggers selected on the Prismic webhook are delivered, and only events enabled in StackOne are forwarded to your application.
Document events
Events related to publishing documents.
- Document Published or Unpublished (
document.changed) — Fired when one or more documents are published or unpublished. Prismic sends the same payload for both, so check the documents listed in the event to see their current state.
Release events
Events related to releases (groups of document changes scheduled or published together).
- Release Created (
release.created) — Fired when a release is created. - Release Updated (
release.updated) — Fired when a release is edited, such as its name, schedule or documents. - Release Deleted (
release.deleted) — Fired when a release is deleted or published.
Tag events
Events related to document tags.
- Tag Created (
tag.created) — Fired when a new tag is added to the repository. - Tag Deleted (
tag.deleted) — Fired when a tag is no longer used by any published document.
Delivery format
Details of how Prismic delivers events to StackOne.
One change type per delivery
Every Prismic delivery has the type api-update, and StackOne works out the event from the payload. When one delivery covers several kinds of change, StackOne emits a single event, choosing in this order: release, then tag, then document. For example, publishing a document with a new tag produces tag.created, and publishing a release produces release.deleted. The full Prismic payload, including every changed document ID, is always included in the event data.
Test deliveries and retries
The Prismic test delivery (type test-trigger) is acknowledged but not forwarded as an event. If a delivery does not get a 200 response, Prismic retries every 10 minutes up to 5 times and disables the webhook after 5 consecutive failures. Prismic payloads carry no timestamp, so the event date is the time StackOne received the delivery.