

Create a Connect server environment
StackOne connects to 1Password through a self-hosted 1Password Connect server. First, create a
Secrets Automation workflow in your 1Password account to get the Connect server credentials.
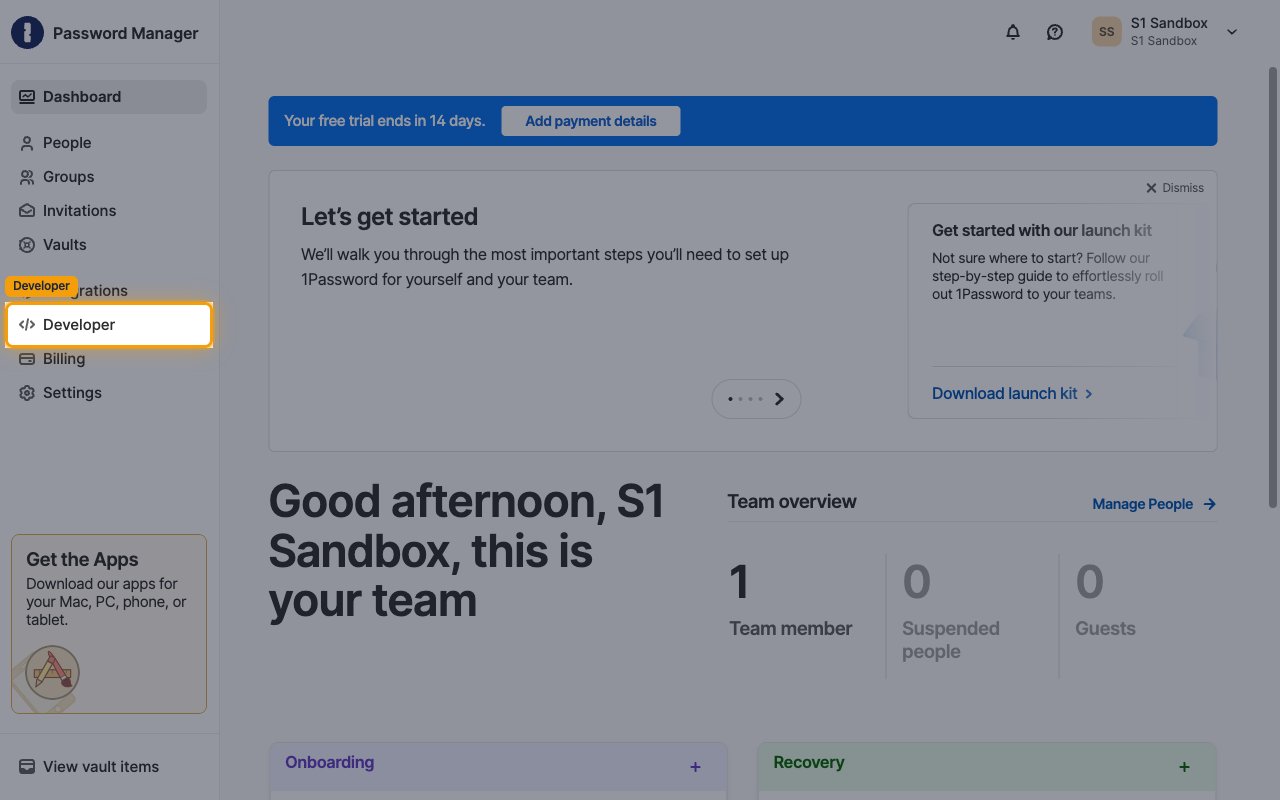
Open the Developer section
Sign in to your 1Password account on the 1Password sign-in page
as an owner or administrator, then select Developer in the sidebar.
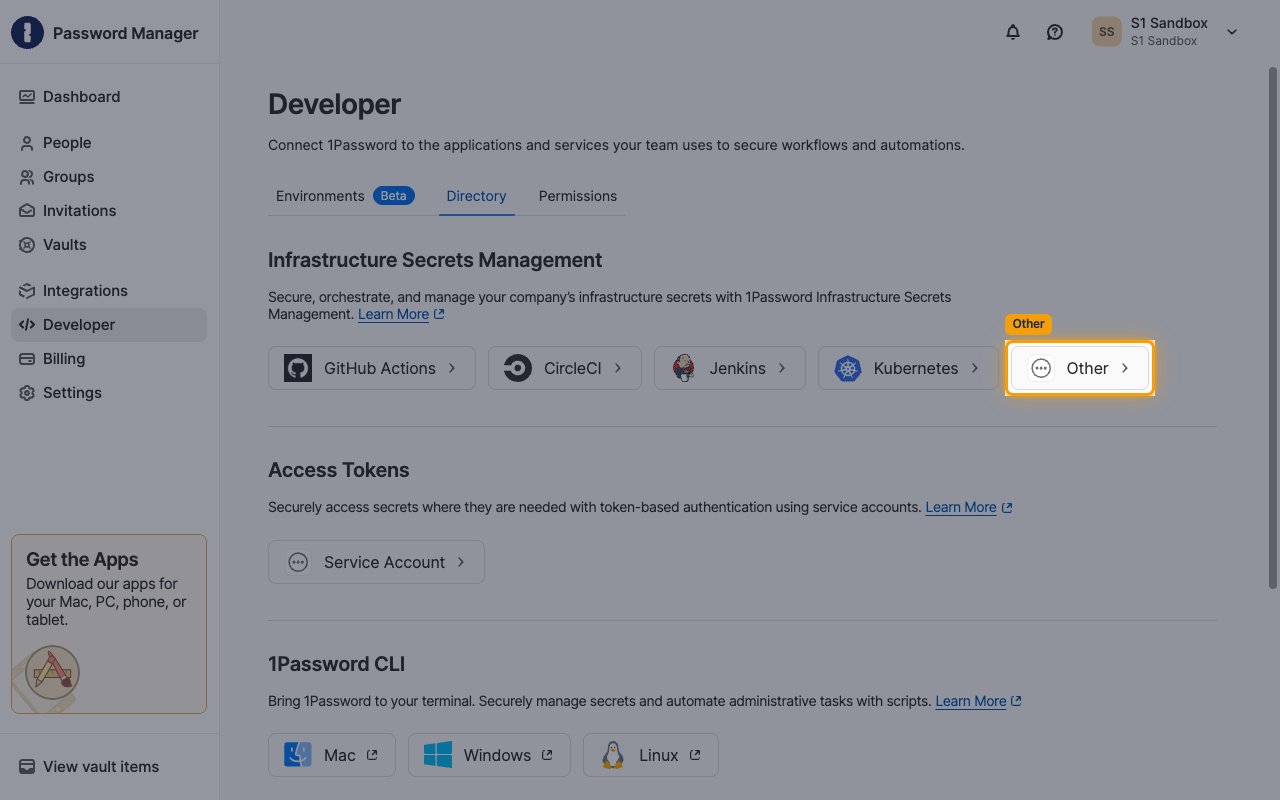
Open Infrastructure Secrets Management
On the Developer page, open the Directory tab. In the
Infrastructure Secrets Management section, select Other.
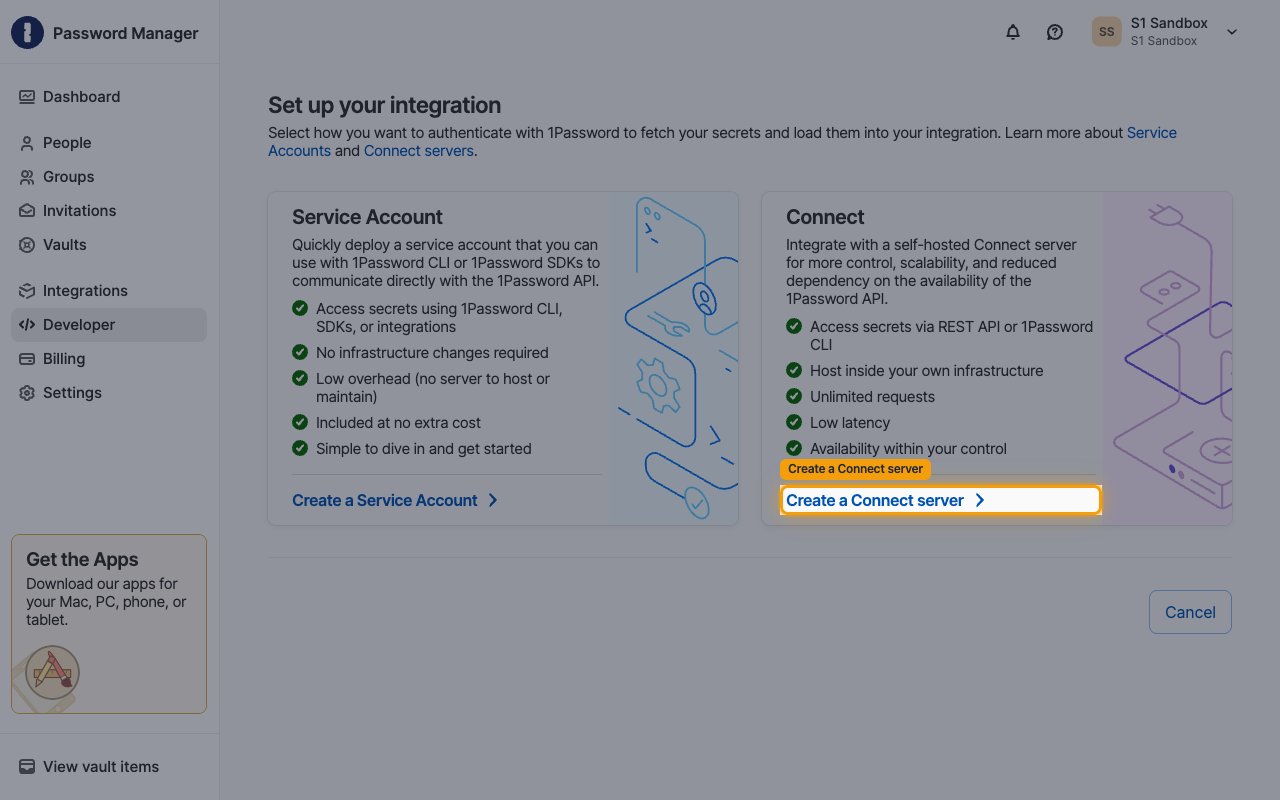
Choose Create a Connect server
On the Set up your integration screen, use the Connect option and click
Create a Connect server.
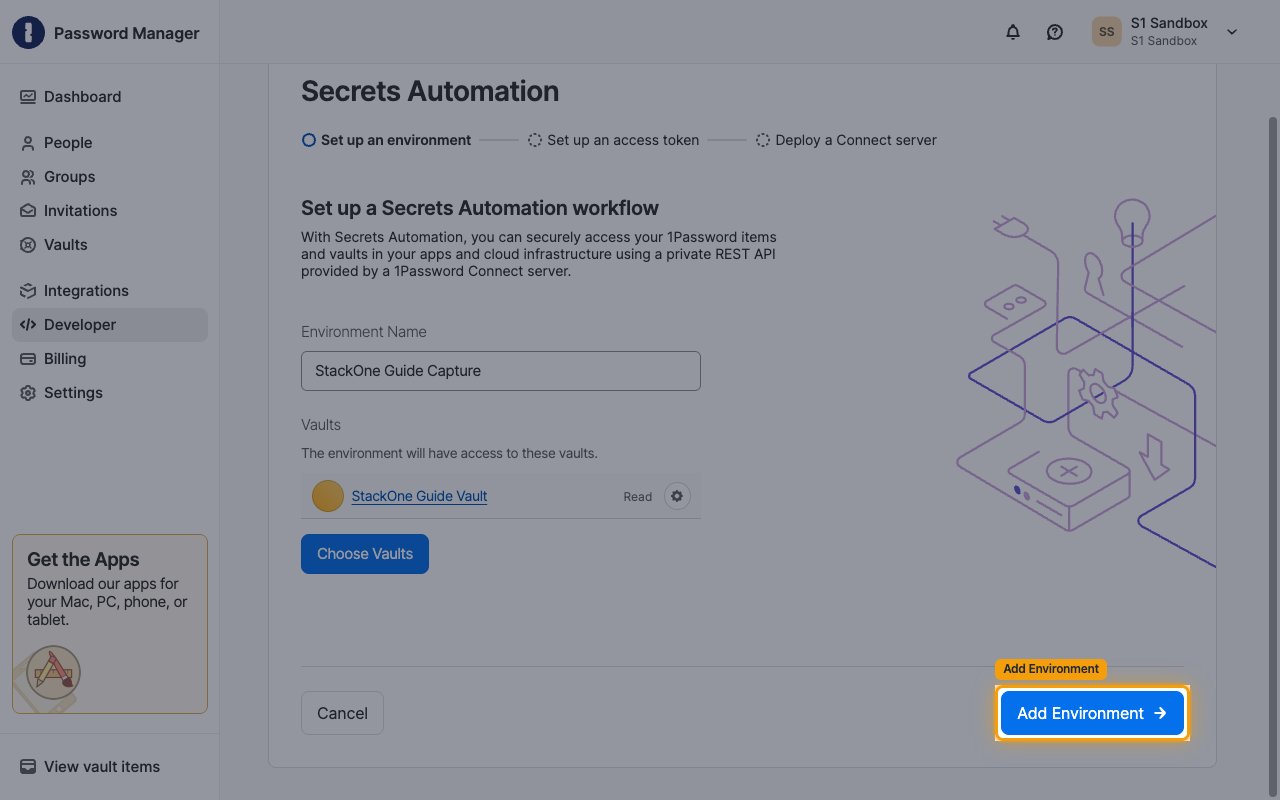
Set up an environment
On the Set up a Secrets Automation workflow screen, enter an Environment Name
(for example, Production). Under Vaults, click Choose Vaults, tick the vaults
this Connect server should access in the Manage Vaults dialog, and click
Update Vaults. Then click Add Environment.
- The environment will have access to these vaults — StackOne can only read items from the vaults you select here.
Issue an access token
Issue the access token StackOne will use to authenticate with your Connect server.
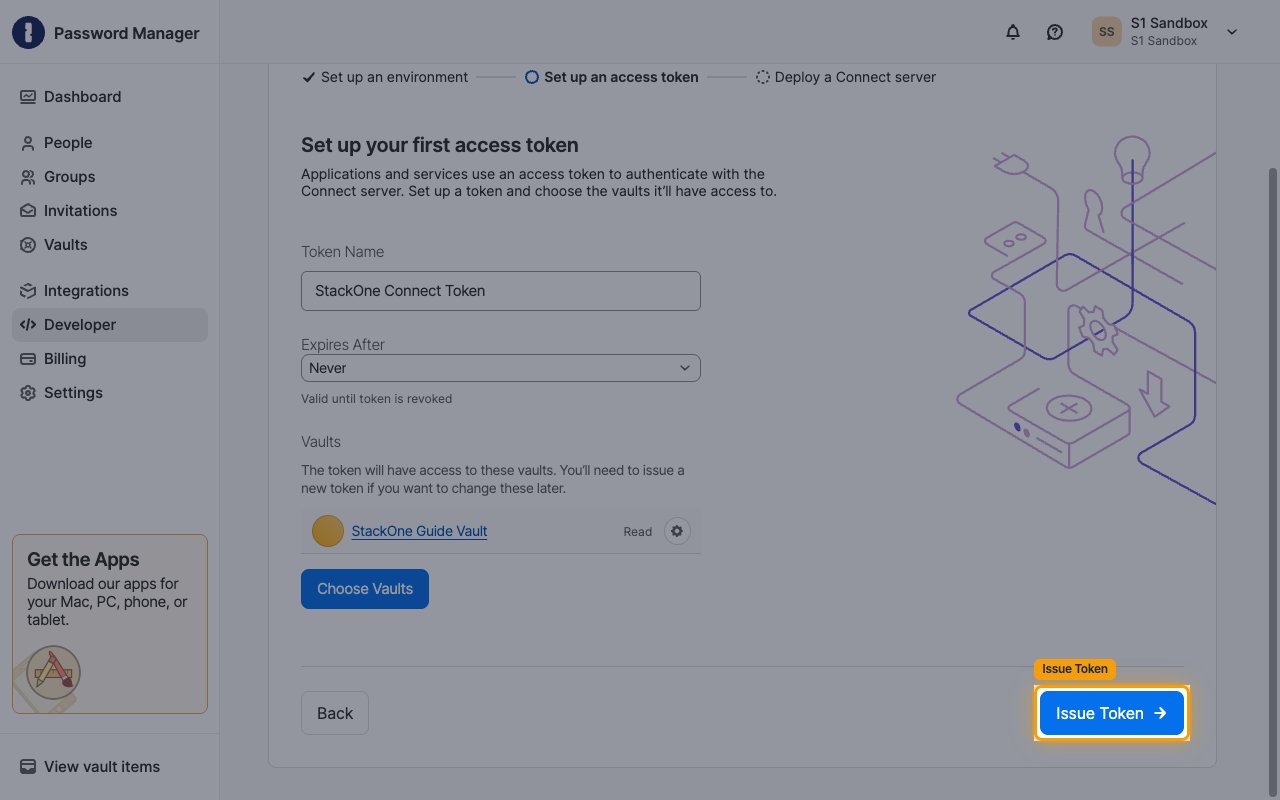
Set up your first access token
On the Set up your first access token screen, enter a Token Name (for example,StackOne). Leave Expires After set to Never to keep the token valid until it is
revoked, or pick a validity period. Under Vaults, click Choose Vaults and select
the vaults the token can access. Then click Issue Token.
- The token will have access to these vaults. You’ll need to issue a new token if you want to change these later.
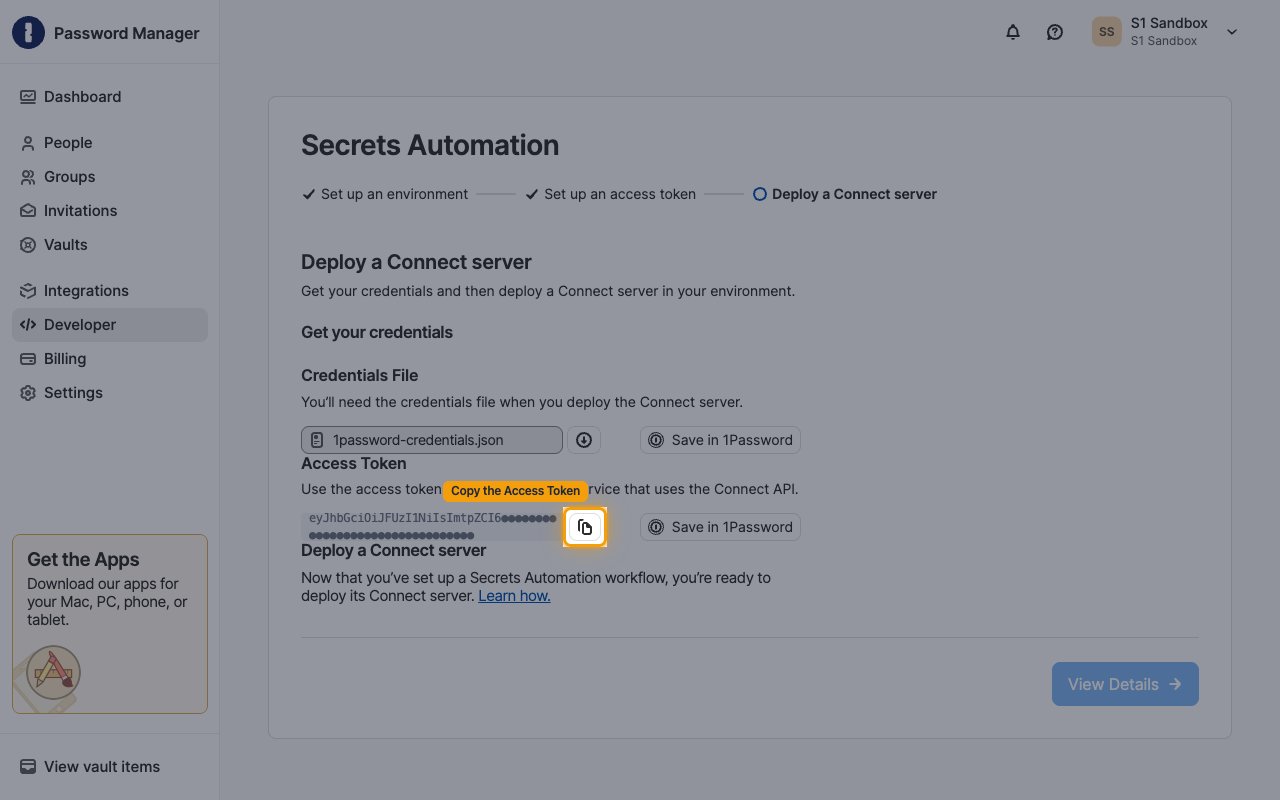
Copy the Access Token
On the Deploy a Connect server screen, under Get your credentials, download the
Credentials File (1password-credentials.json) — you’ll need it to deploy the Connect
server — and copy the Access Token value. Paste it into the Access Token field in
StackOne Hub.
- The Access Token is only displayed on this screen and cannot be retrieved later — copy it now, or use Save in 1Password to store it securely.
Deploy the Connect server and connect StackOne
Deploy the Connect server in your infrastructure, then enter its details in StackOne Hub.
Deploy your Connect server
Deploy a 1Password Connect server inside your own infrastructure using the downloaded1password-credentials.json file — follow the
1Password Connect server deployment guide.
The Connect server must be reachable from StackOne over HTTPS.
Fill in the connection fields
In StackOne Hub, fill in the connection fields:
- Connect Server URL — the base URL where your deployed 1Password Connect server is reachable.
- Format:
https://{your-connect-server-host} - Example:
https://connect.example.com - Access Token — the JWT bearer token you copied in the previous step; it authenticates StackOne with the Connect API.
Optional — SCIM bridge for IAM actions
Only needed for the unified IAM actions (users, groups, and roles); otherwise skip this section.
Provide SCIM bridge credentials (optional)
Fill in these two fields only if you want to use the unified IAM actions (users, groups,
and roles). They require a 1Password Business account with a deployed
1Password SCIM Bridge — set up automated user
provisioning from the Integrations page of your 1Password account. If you don’t use
IAM actions, leave both fields empty.
- SCIM Bridge URL — the base URL of your deployed 1Password SCIM bridge; paste it into the SCIM Bridge URL field in StackOne Hub.
- Format:
https://{your-scim-bridge-host} - Example:
https://op-scim.example.com - SCIM Bridge Bearer Token — the bearer token generated when you set up automated user provisioning. If you lose it, you can regenerate it by following the 1Password SCIM bridge setup guide. Paste it into the SCIM Bridge Bearer Token field in StackOne Hub.
Linking the Account from the Hub
Navigate to the Hub
Fill out the fields
- Connect Server URL
- Access Token
- SCIM Bridge URL (Optional)
- SCIM Bridge Bearer Token (Optional)
Connect
- Click Connect
- If applicable, the provider will redirect you to a sign-in or authorization page. Complete the provider’s authorization flow.
- Once authorization is successful, you will see a confirmation popup
If the account linking is successful, you will see the newly linked account in your Accounts page.