

Getting Your Okta Credentials
To connect Okta with StackOne using OAuth 2.0, you’ll need your Okta domain and OAuth application credentials.
Log in to Okta
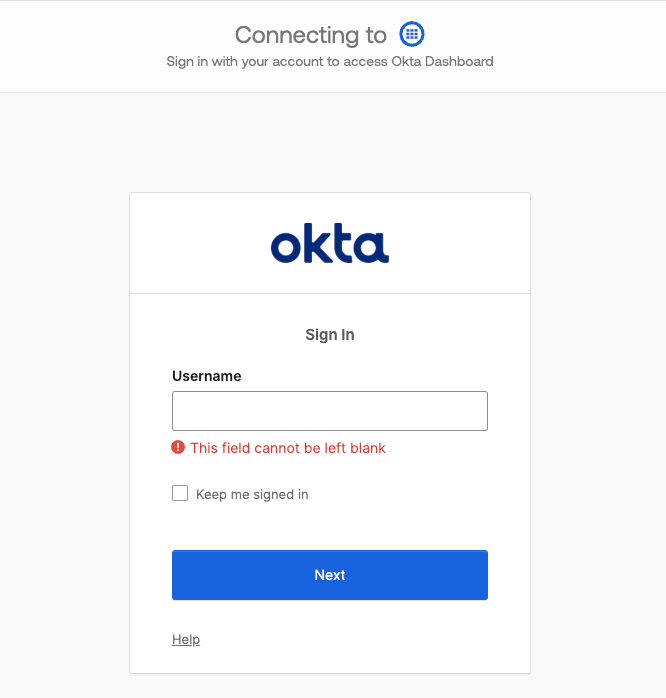
Log in to your Okta account at https://login.okta.com/
Navigate to Okta Admin Console
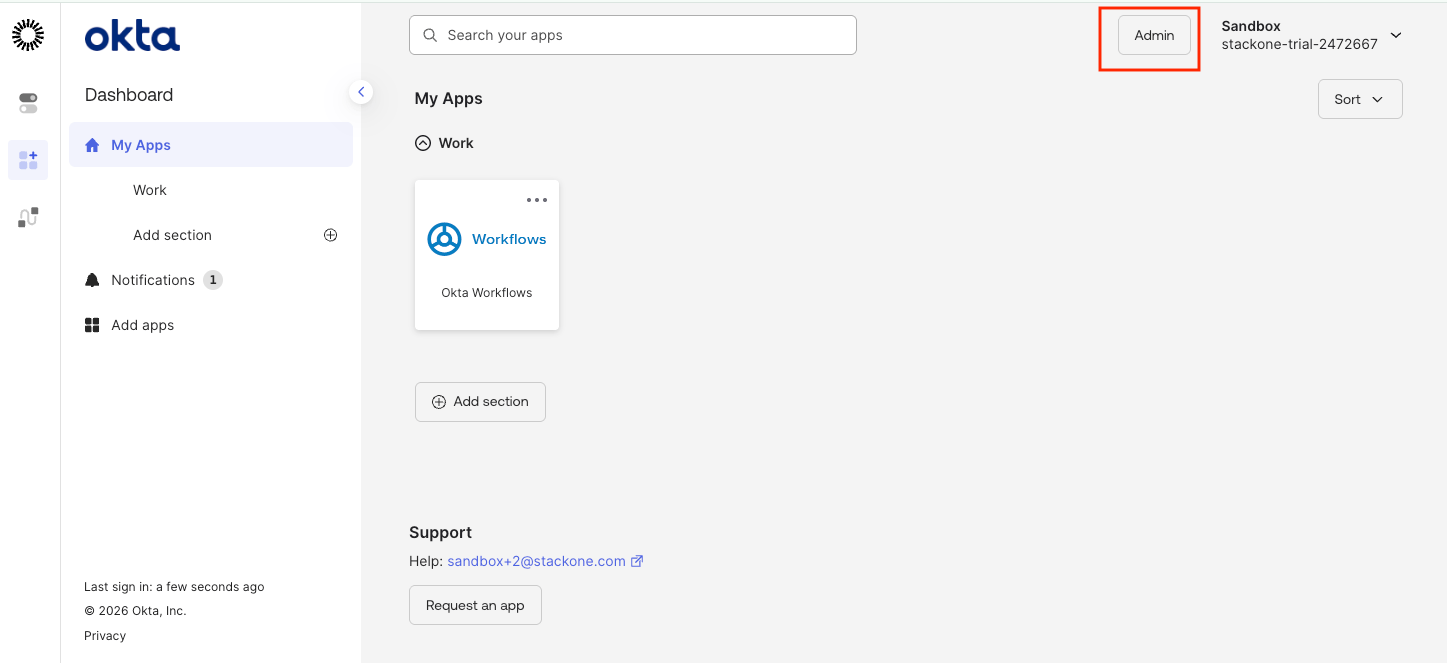
From your Okta homepage, click the Admin button in the top right corner.
Find Your Okta Domain
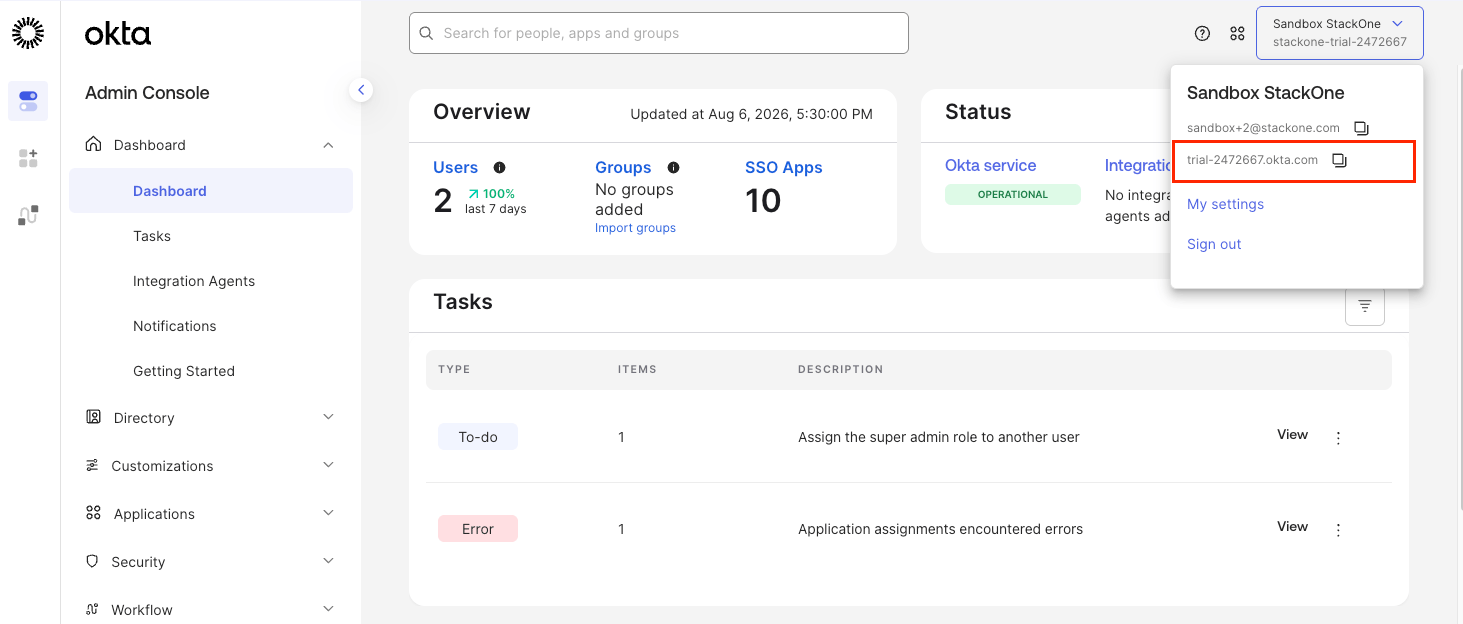
Your Okta domain can be found in the URL when logged in to Okta.
- Given the URL
https://your-org.okta.com/app/UserHome, your domain isyour-org.okta.com - For preview environments, the domain may be
your-org.oktapreview.com
Create an OAuth Application
Create an OAuth application to obtain your Client ID and Client Secret.
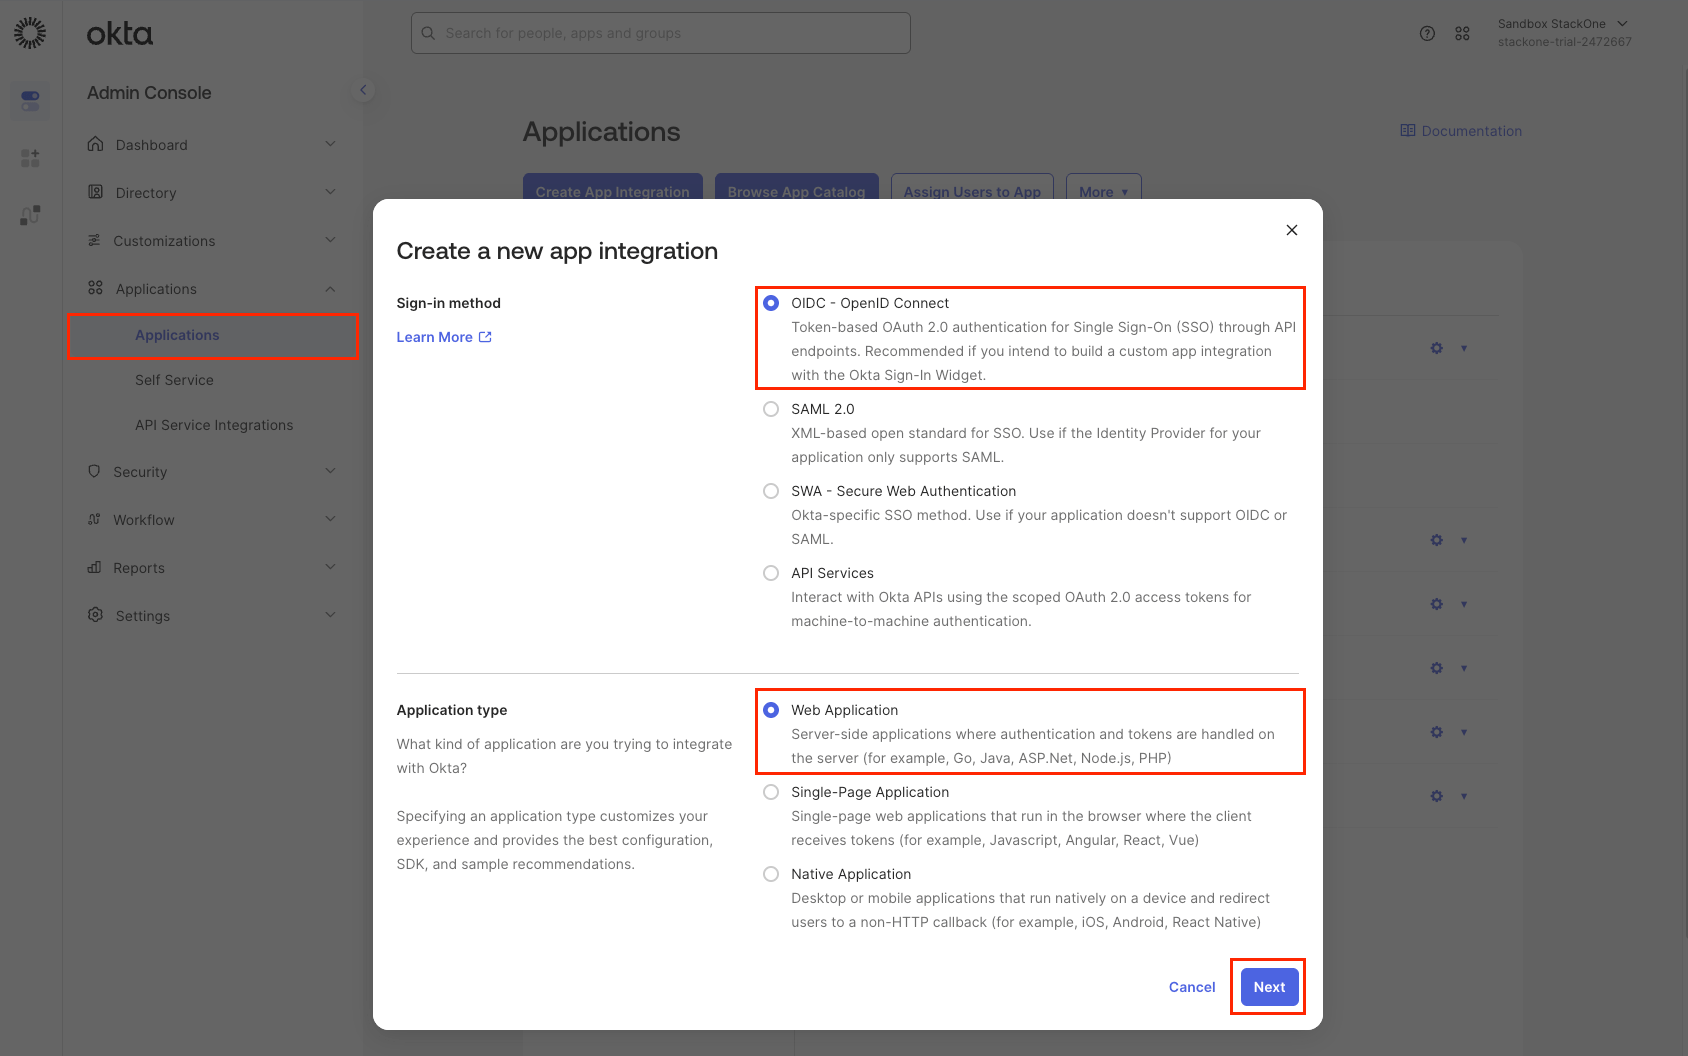
- In the Admin Console, navigate to Applications > Applications
- Click Create App Integration
- Select OIDC - OpenID Connect as the Sign-in method
- Select Web Application as the Application type
- Click Next
Configure Application Settings
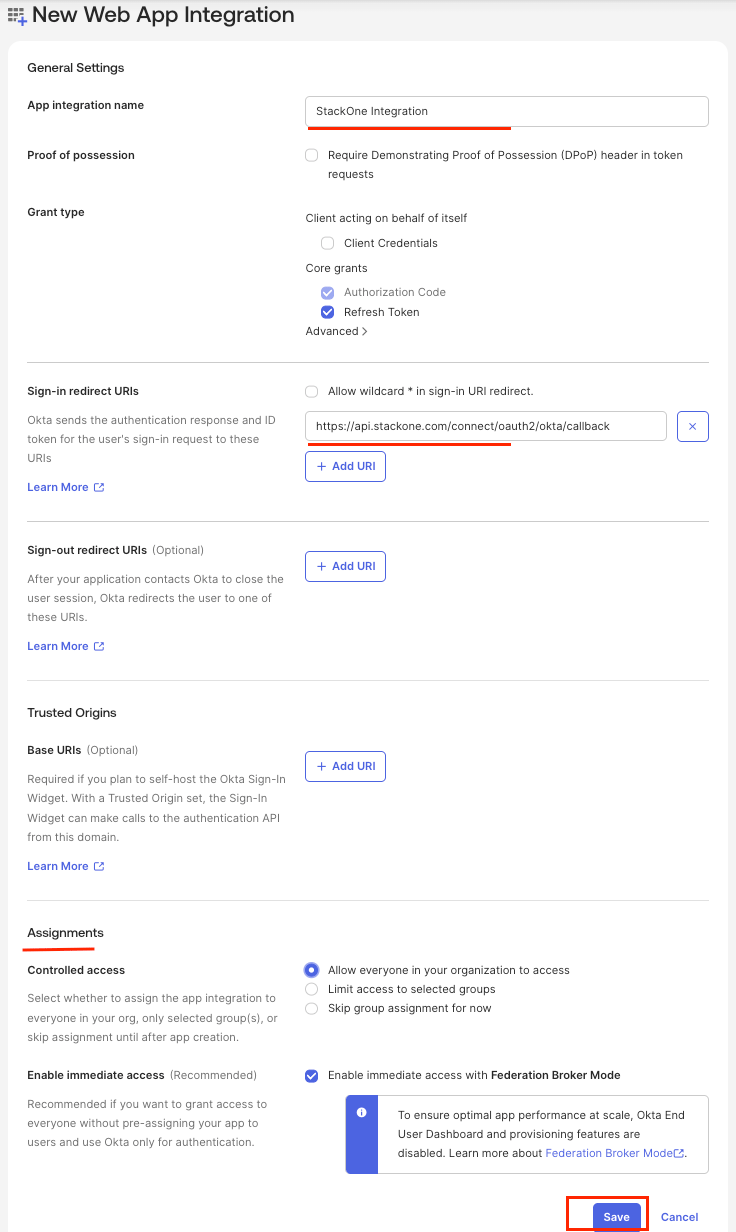
Configure your OAuth application with the appropriate settings.
- Enter an App integration name (e.g., StackOne Integration)
- Check
Authorization CodeandRefresh Tokenboth under the Grant type - Set the Sign-in redirect URI to the callback URL provided by StackOne:
https://api.stackone.com/connect/oauth2/okta/callback - Under Assignments, select Allow everyone in your organization to access or assign specific groups/users as needed
- Click Save
Copy Client Credentials
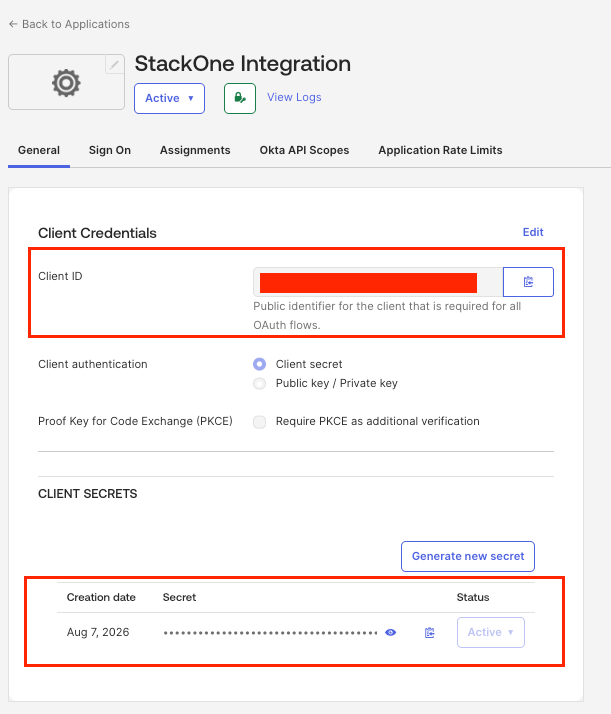
After saving, copy your OAuth credentials.
- Client ID is displayed on the application’s General tab
- Client Secret is also on the General tab (click the eye icon to reveal)
- Store these credentials securely as you’ll need them for the connection
Configure API Scopes
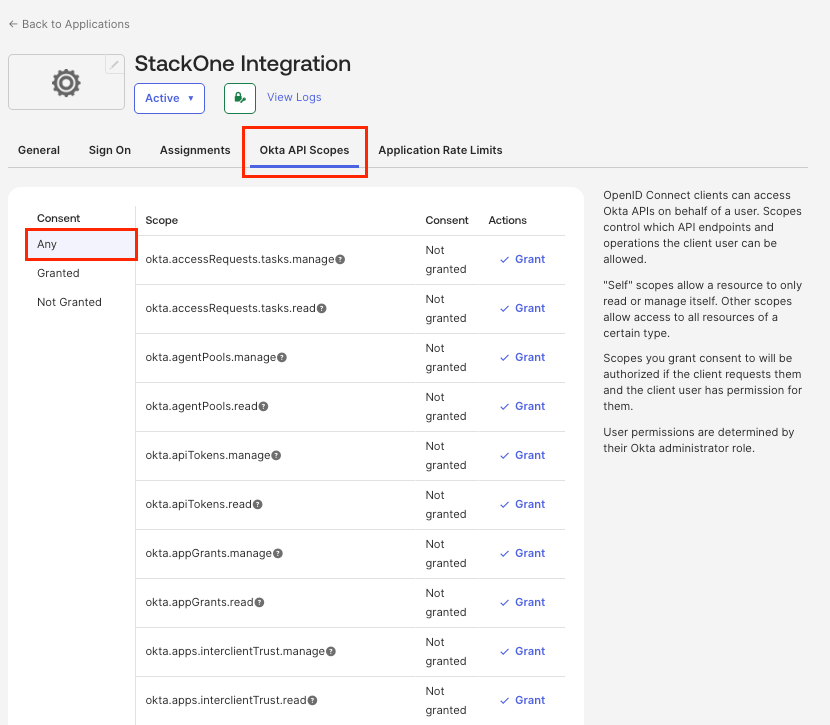
In the application you just created, navigate to the Okta API Scopes tab. For each required okta.* scope listed below, click the Grant button next to the scope name.
See Okta OAuth 2.0 Scopes for details.
Note that offline_access and openid are OIDC scopes — these are not shown in the Okta API Scopes tab. Instead, enter them in the Scopes field when configuring the StackOne connection.
Realm Access Configuration
Realm scopes require an Okta Identity Governance, Secure Partner Access, or Advanced Directory Management subscription.
Verify subscription eligibility
If your subscription does not include realm management, the API will return authorization errors.
- In the Admin Console, click Settings in the left sidebar, then click Account to verify your subscription tier
Security Settings Access Configuration
okta.authenticators.read, okta.roles.read, okta.apiTokens.read, okta.networkZones.read, okta.idps.read and okta.trustedOrigins.read are not requested by default. Grant each one on the Okta API Scopes tab of your app.
Request the scopes and re-link
If the Scopes field is empty, paste this full list, because any value replaces the default list: offline_access openid profile email address phone okta.apps.read okta.users.read okta.users.manage okta.groups.read okta.groups.manage okta.userTypes.read okta.userTypes.manage okta.devices.read okta.devices.manage okta.logs.read okta.policies.read okta.policies.manage okta.eventHooks.read okta.eventHooks.manage okta.authenticators.read okta.roles.read okta.apiTokens.read okta.networkZones.read okta.idps.read okta.trustedOrigins.read. If the field already has scopes, such as the realm scopes, add the six new scopes to the end of that value instead. Then re-link each existing account, because a token refresh cannot add scopes.
- Authenticator actions work only on Okta Identity Engine orgs
Creating the StackOne Connector Profile
To create the Connector Profile in StackOne for Okta:Open the connector
Choose actions and events
- Click Add Profile.
- If the connector offers more than one authentication method, set the Auth Method filter to OAuth 2.0 (Managed App).
- Select the actions, and any events, to enable for this Connector Profile.
- Click Continue.
Set up authentication
- Select Authentication Type as OAuth 2.0 (Managed App).
- Fill out the fields using details retrieved from your provider:
- Okta Domain
- Client ID
- Client Secret
- Scopes (Optional)
- Click Create Profile.