

Sign in to NetSuite
Sign in to NetSuite as an administrator before starting — enabling features, editing role permissions, and creating the integration record all require administrator access.
Sign in to NetSuite
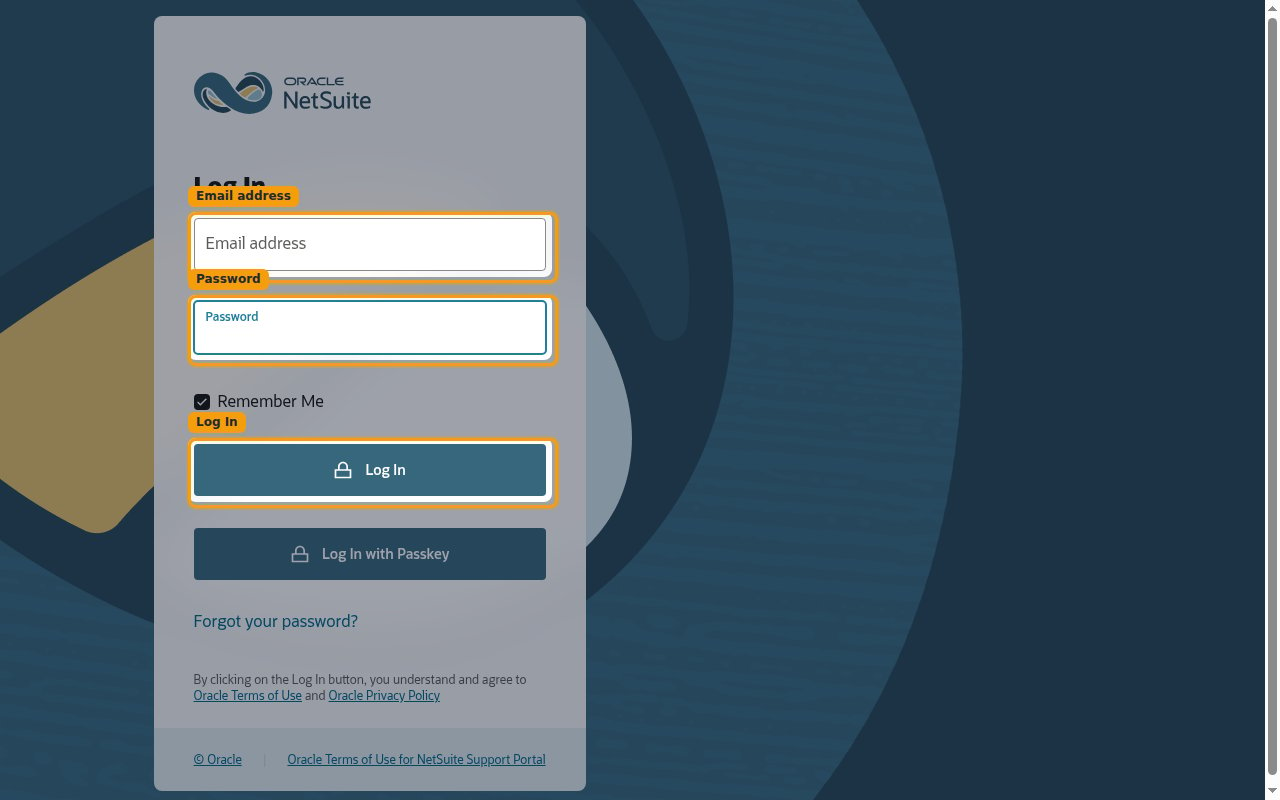
Open the NetSuite login page and sign in.
- Enter your Email address and Password, then click Log In.
- Sign in to the same account (production or sandbox) that you want to connect.
Enable required features and permissions
Before creating the integration, make sure the account has the SuiteTalk REST API features enabled and that the connecting role can authenticate with OAuth 2.0.
Enable REST Web Services
In the top navigation bar, go to Setup > Company > Enable Features and open the SuiteCloud subtab. Under SuiteTalk (Web Services), check REST WEB SERVICES.

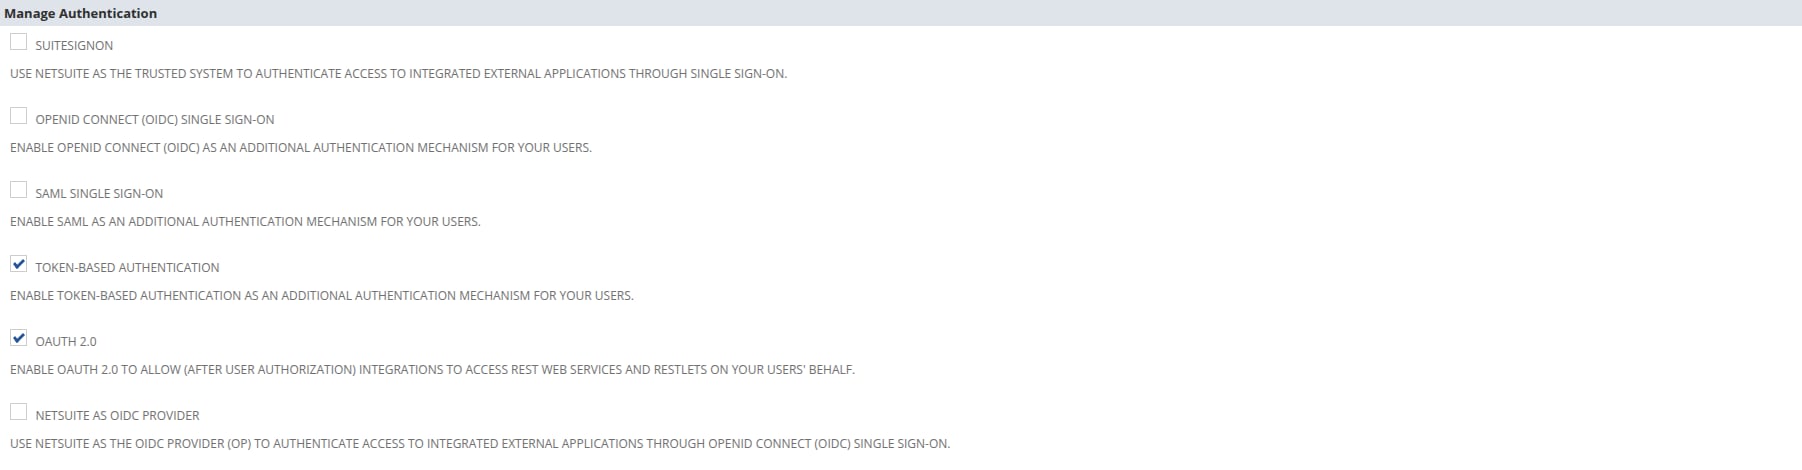
Enable OAuth 2.0
Still on the SuiteCloud subtab, scroll to Manage Authentication and check OAUTH 2.0. Click Save when done.
Grant the role permissions
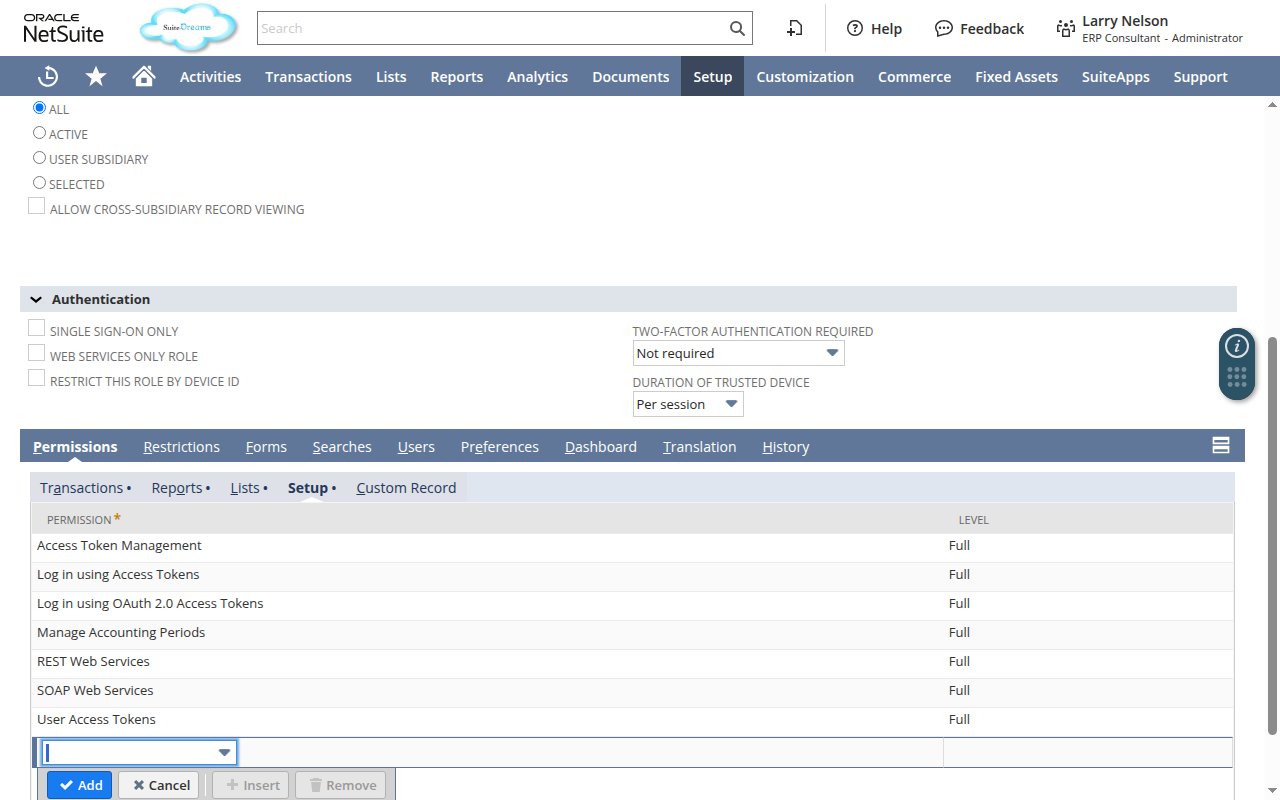
In the top navigation bar, go to Setup > Users/Roles > Manage Roles, then click Edit next to the role the connecting user will use. On the role page, open the Permissions subtab — it is split into sub-tabs by permission type (Transactions, Reports, Lists, Setup, etc.). Add the permissions below on the matching sub-tab, then click Save.
- On the Setup sub-tab, add REST Web Services with Level set to Full.
- On the Setup sub-tab, add Log in using OAuth 2.0 Access Tokens with Level set to Full.
- Add record-level permissions (Level Full) for the data StackOne will access. A recommended baseline: Customers, Vendors, Employees, Invoice, Bills, Sales Order, Purchase Order, Journal Entry, Credit Memo, Customer Payment, Deposit, Items, Accounts, Subsidiaries, Departments, Currency — plus SuiteScript if you also enabled RESTlets.
Create an integration record
Register StackOne as an OAuth 2.0 integration application in your own NetSuite account.
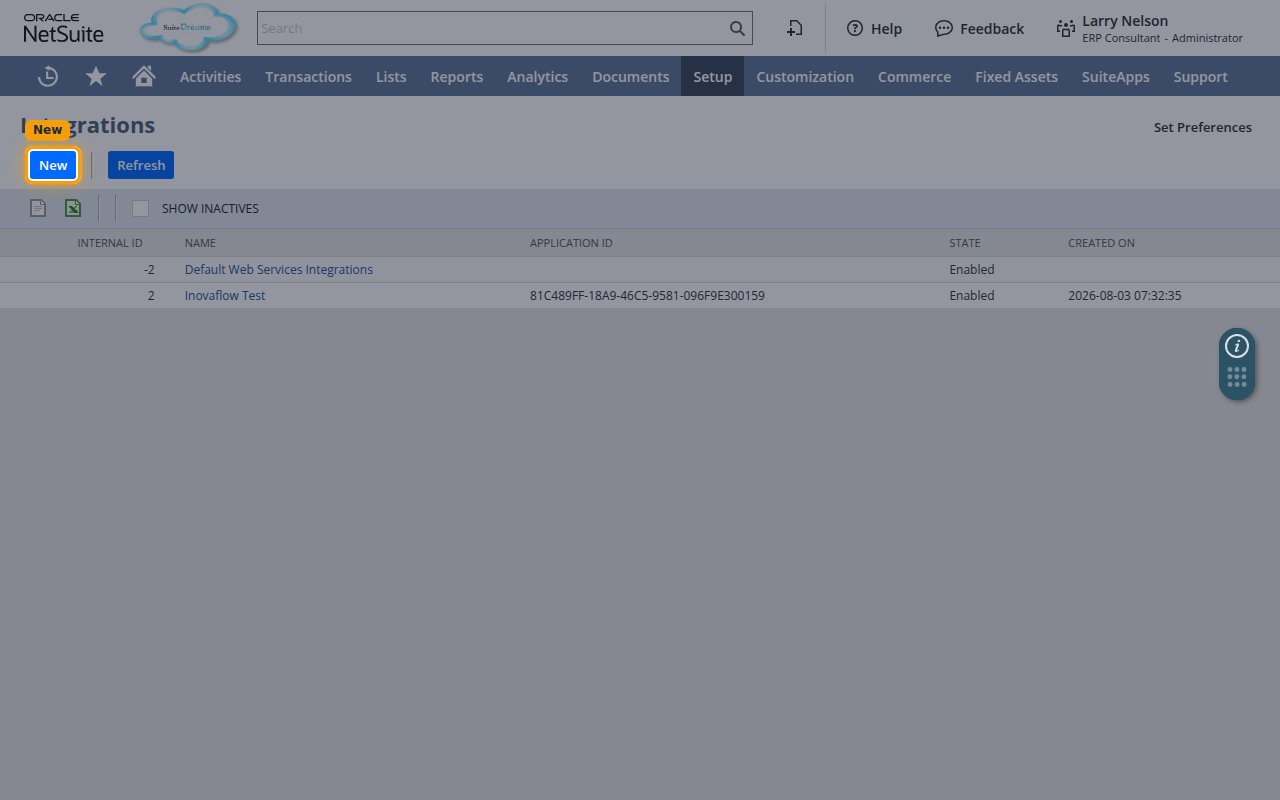
Open Manage Integrations
Go to Setup > Integration > Manage Integrations to open the Integrations list, then click New.
Enter a name for the integration
In the NAME field, enter a name to identify the integration (for example, StackOne Integration). Leave STATE set to Enabled.
- Leave REFRESH TOKEN VALIDITY (IN HOURS) at its default of 168 (7 days). This is the standard NetSuite refresh-token lifetime and is suitable for StackOne — StackOne refreshes the token automatically before it expires. Setting it lower forces more frequent reconnection.
Configure OAuth 2.0
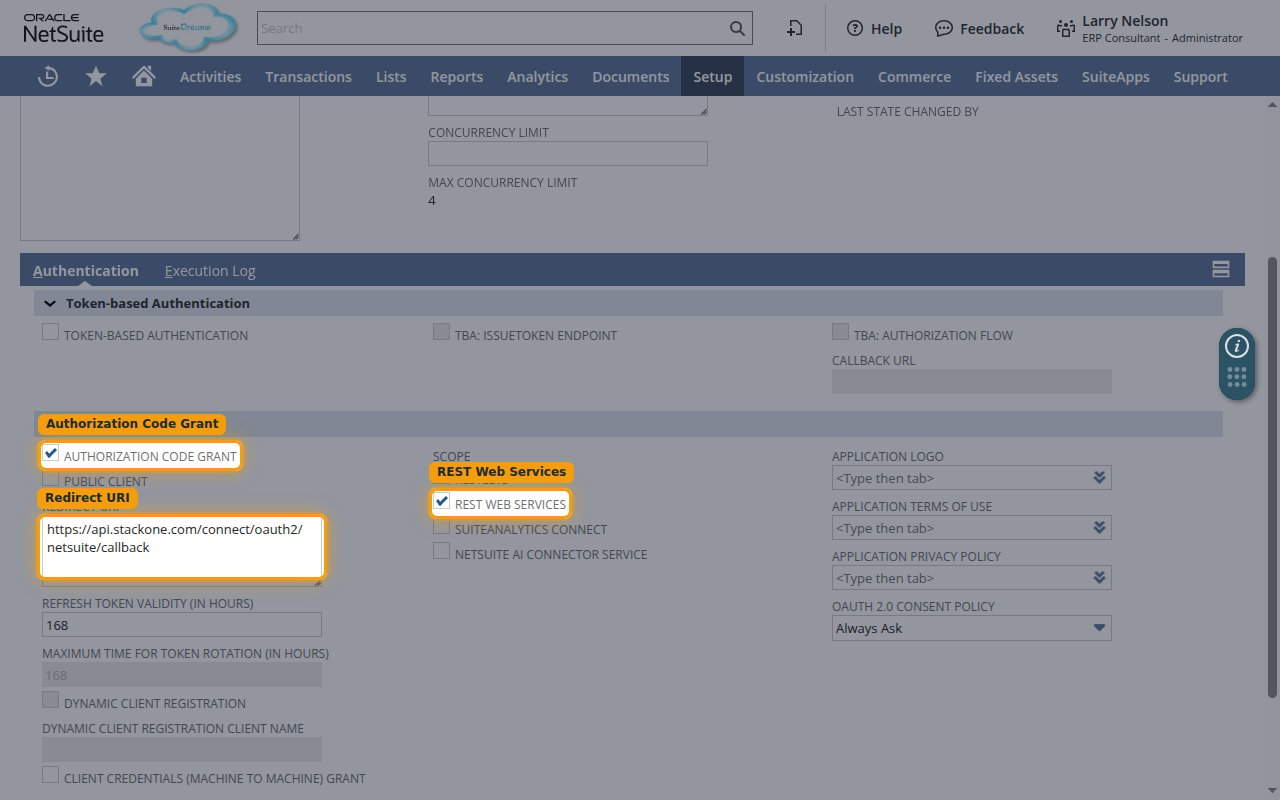
In the Authentication subtab, enable OAuth 2.0 with the Authorization Code Grant and register the StackOne redirect URI.
Enable Authorization Code Grant and set the Redirect URI
In the OAuth 2.0 section, check AUTHORIZATION CODE GRANT. In the REDIRECT URI field, enter the StackOne callback URL exactly.
- Redirect URI:
https://api.stackone.com/connect/oauth2/netsuite/callback - Leave PUBLIC CLIENT unchecked.
Select the REST WEB SERVICES scope
Under SCOPE, enable REST WEB SERVICES so the integration can access the SuiteTalk REST API.
Save and copy your client credentials
Save the integration record and copy the generated client credentials — you’ll enter them
below, along with your Account ID, when connecting this account in StackOne.
Save the integration
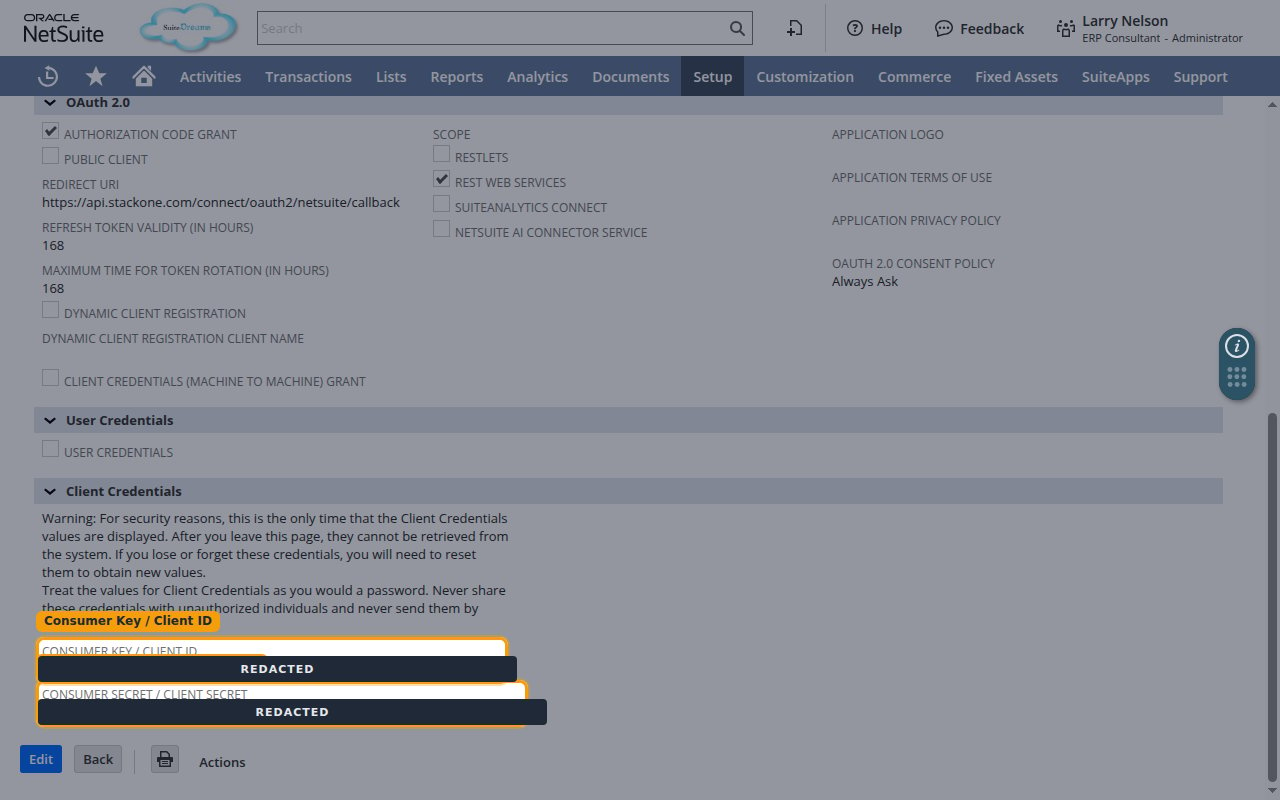
Click Save. NetSuite creates the integration and displays the Client Credentials on the confirmation page.
Copy the Client ID and Client Secret
Copy the CONSUMER KEY / CLIENT ID and CONSUMER SECRET / CLIENT SECRET values — you’ll enter them into the Client ID and Client Secret fields below.
- These values are displayed only once. After you leave this page they cannot be retrieved — if lost, reset the credentials to generate new values.
- Scopes (optional): leave as the default
rest_webservicesunless you also enabled RESTlets, in which case enterrest_webservices restlets.
Find your Account ID
StackOne needs your NetSuite Account ID to build the API URLs for your account.
Open your account settings
Sign in to your NetSuite account (or your account-specific URL, e.g. https://<account-id>.app.netsuite.com).
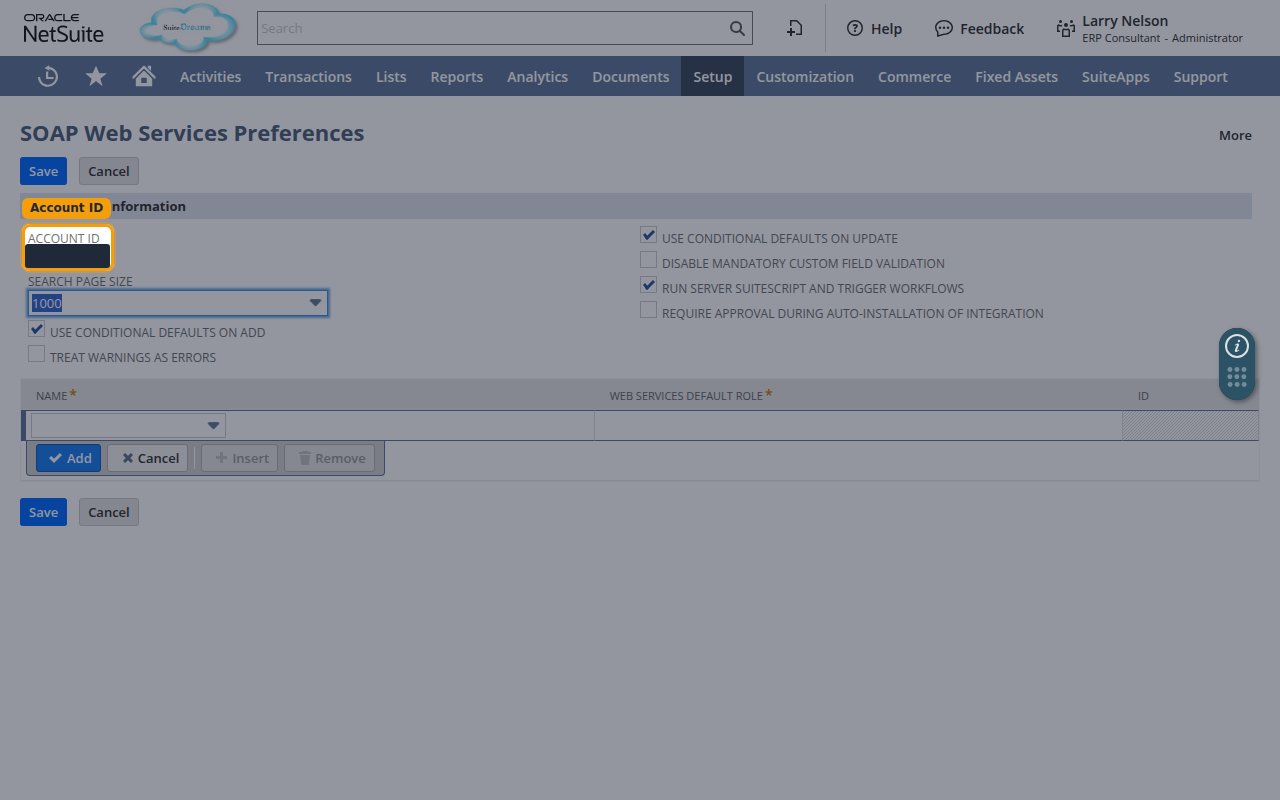
- In the top navigation bar, go to Setup > Integration > SOAP Web Services Preferences.
Copy the Account ID
In the Primary Information section, copy the value shown in the ACCOUNT ID field, then paste it into the Account ID field below.
- Format:
1234567(production) or1234567_SB1(sandbox). - Enter the value in lowercase and replace underscores with hyphens — for example,
1234567_SB1becomes1234567-sb1.
Linking the Account from the Hub
Navigate to the Hub
Fill out the fields
- Account ID
- Client ID
- Client Secret
- Scopes (Optional)
Connect
- Click Connect
- If applicable, the provider will redirect you to a sign-in or authorization page. Complete the provider’s authorization flow.
- Once authorization is successful, you will see a confirmation popup
If the account linking is successful, you will see the newly linked account on your Accounts page.