

Create a Personal Access Token
A Moneybird API token authenticates a single administration. It is created from the administration settings.
Open the External applications settings
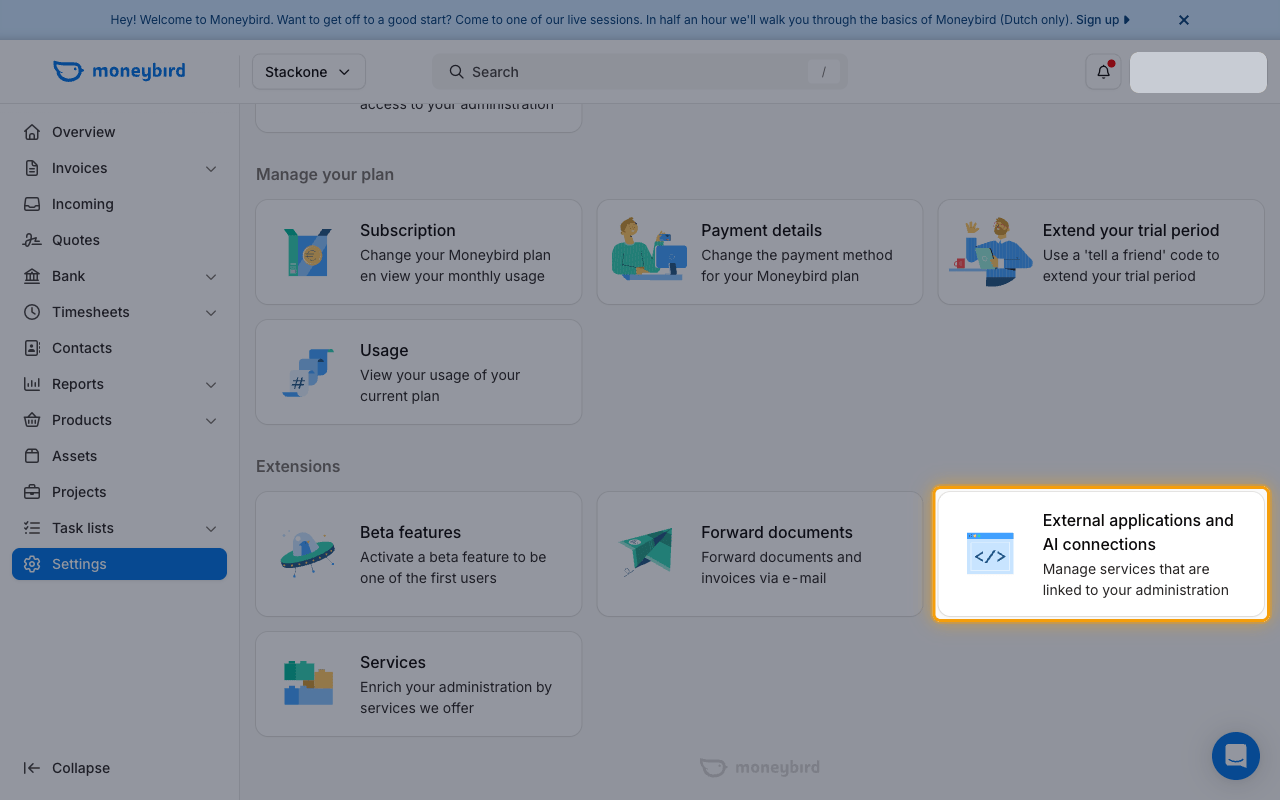
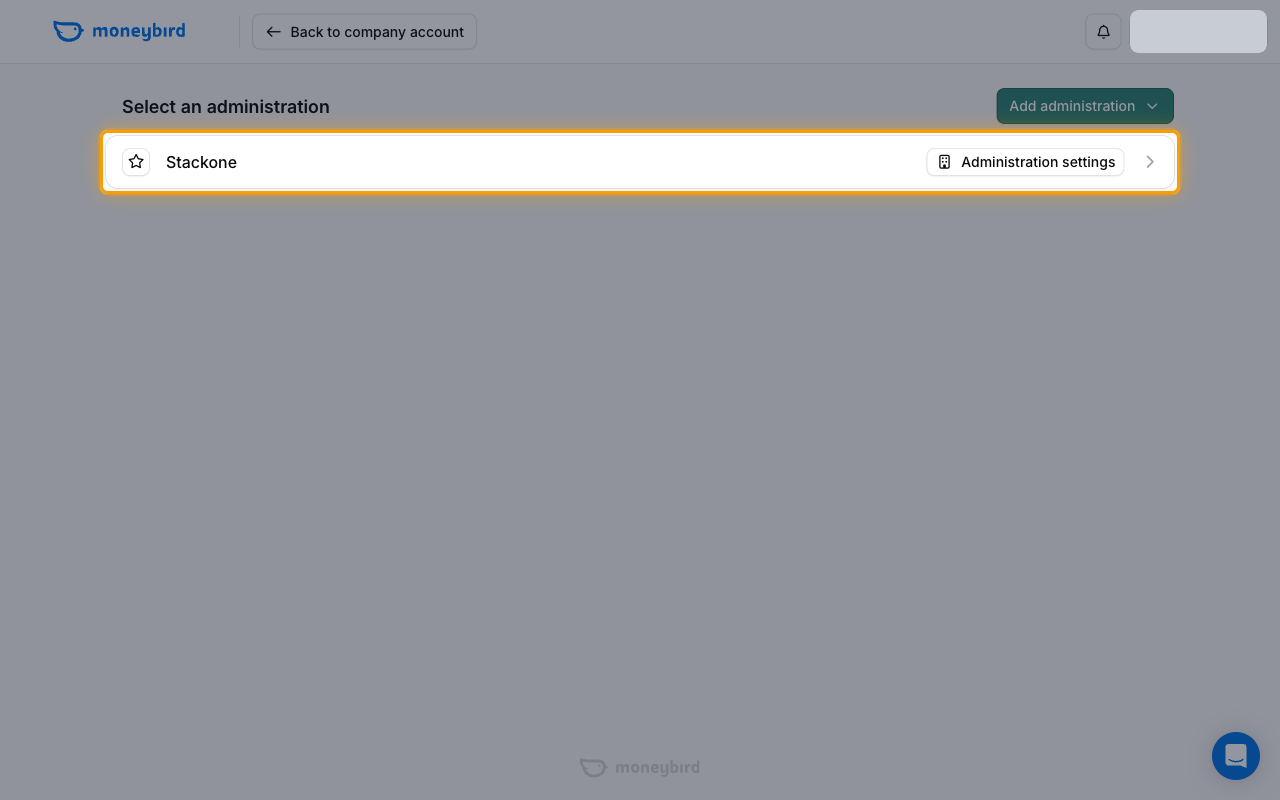
Sign in to Moneybird, open your administration, and click Settings in the sidebar. Under the Extensions section, click External applications and AI connections.
Start a new API token
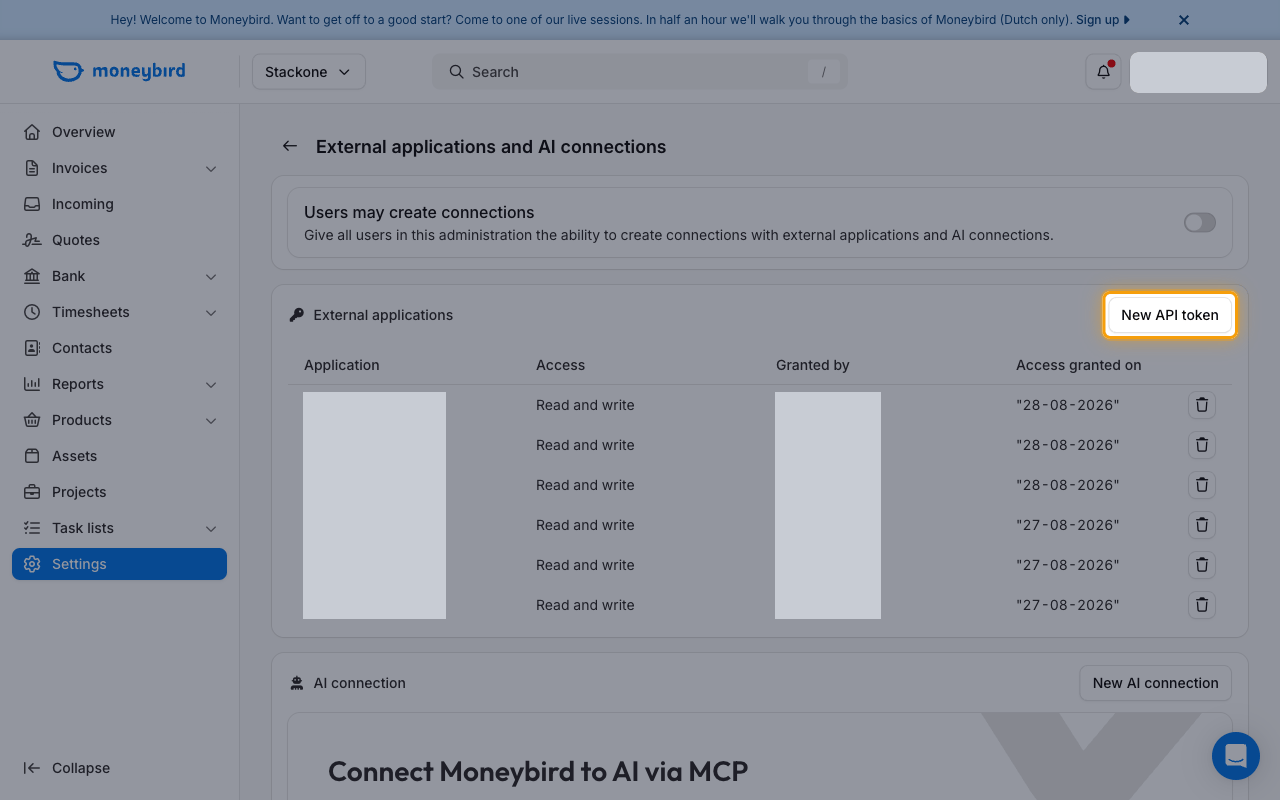
On the External applications and AI connections page, click New API token in the External applications section.
Configure and save the token
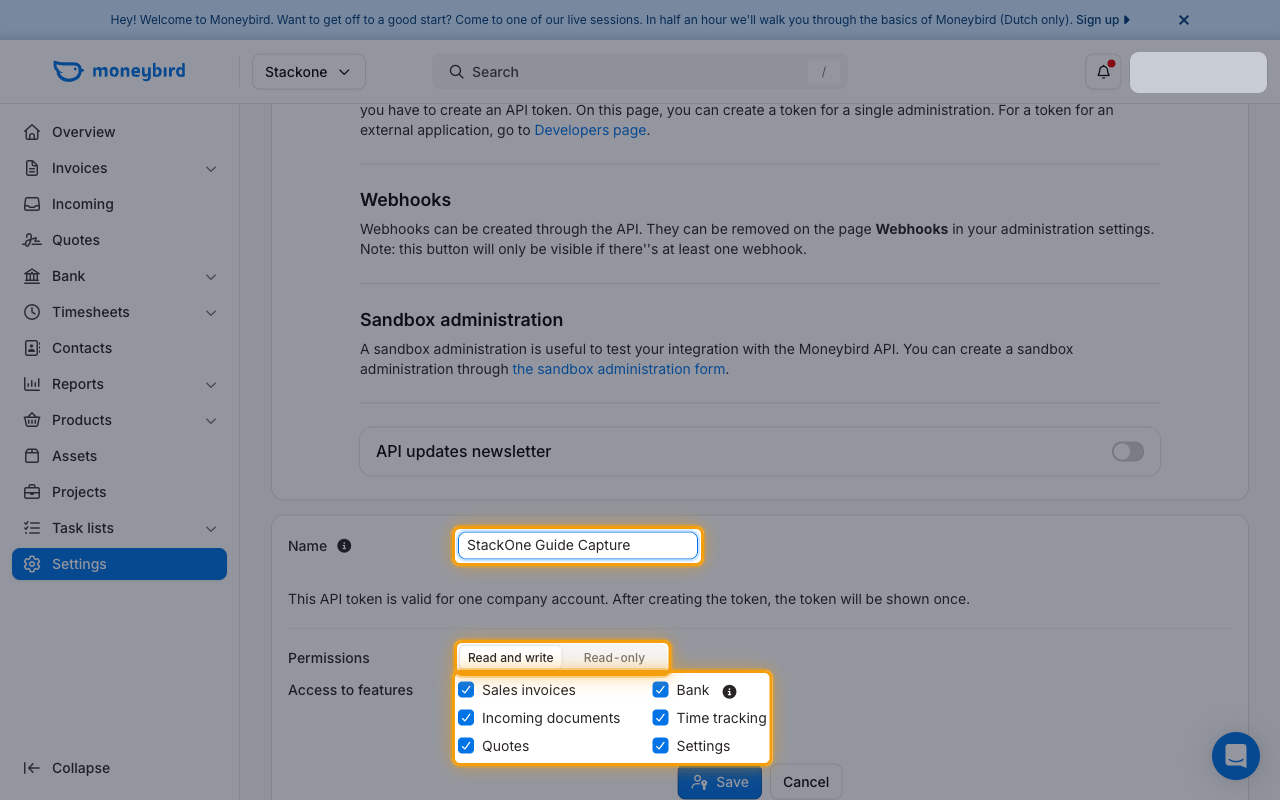
On the Create API token form, configure the token and click Save. Confirm the action with your Password in the Are you sure? dialog.
- Enter a Name for the token (this name is shown to users when a connection is made using this API token).
- Under Permissions, keep Read and write so the connector can create and update records; choose Read-only only if you never need write actions.
- Under Access to features, tick every feature the integration needs — Sales invoices, Bank, Incoming documents, Time tracking, Quotes, and Settings.
Copy the token
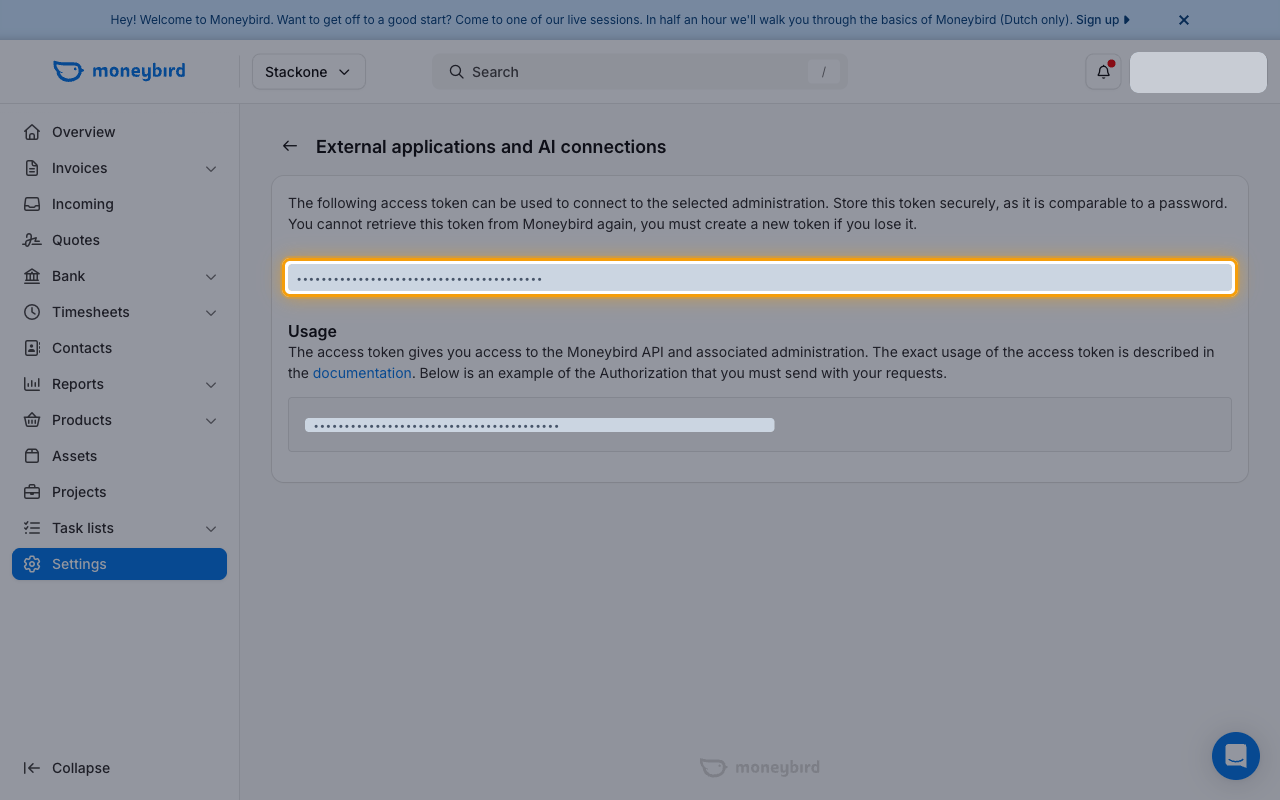
The access token is displayed once after creation. Copy it and paste it into the Personal Access Token field in StackOne Hub.
- Store this token securely, as it is comparable to a password. You cannot retrieve this token from Moneybird again — you must create a new token if you lose it.
Find your Administration ID
Every Moneybird administration has a unique numeric ID that is part of every API request path.
Read the Administration ID from the address bar
While your administration is open, your browser’s address bar shows the numeric Administration ID directly after moneybird.com/. Copy that number and paste it into the Administration ID field in StackOne Hub.
- Format:
https://moneybird.com/{administration_id}/... - Example:
https://moneybird.com/123456789012345678/feed— the Administration ID is123456789012345678
Linking the Account from the Hub
Navigate to the Hub
Fill out the fields
- Personal Access Token
- Administration ID
Connect
- Click Connect
- If applicable, the provider will redirect you to a sign-in or authorization page. Complete the provider’s authorization flow.
- Once authorization is successful, you will see a confirmation popup
If the account linking is successful, you will see the newly linked account in your Accounts page.
Next Steps
Webhooks setup
Configure receiving Events for Moneybird into StackOne.