

Find your domain
Your domain is the project slug from your Mintlify dashboard URL and identifies the project the assistant queries.
- Open your project in the Mintlify dashboard and check the address bar.
- Format:
https://dashboard.mintlify.com/{organization}/{domain} - Example: for
https://dashboard.mintlify.com/acme/acme-docs, your domain isacme-docs. - Use the project slug even if you have a custom domain mapped.
Generating an assistant API key
Create an assistant API key to authenticate with the Mintlify assistant, search, and page content actions.
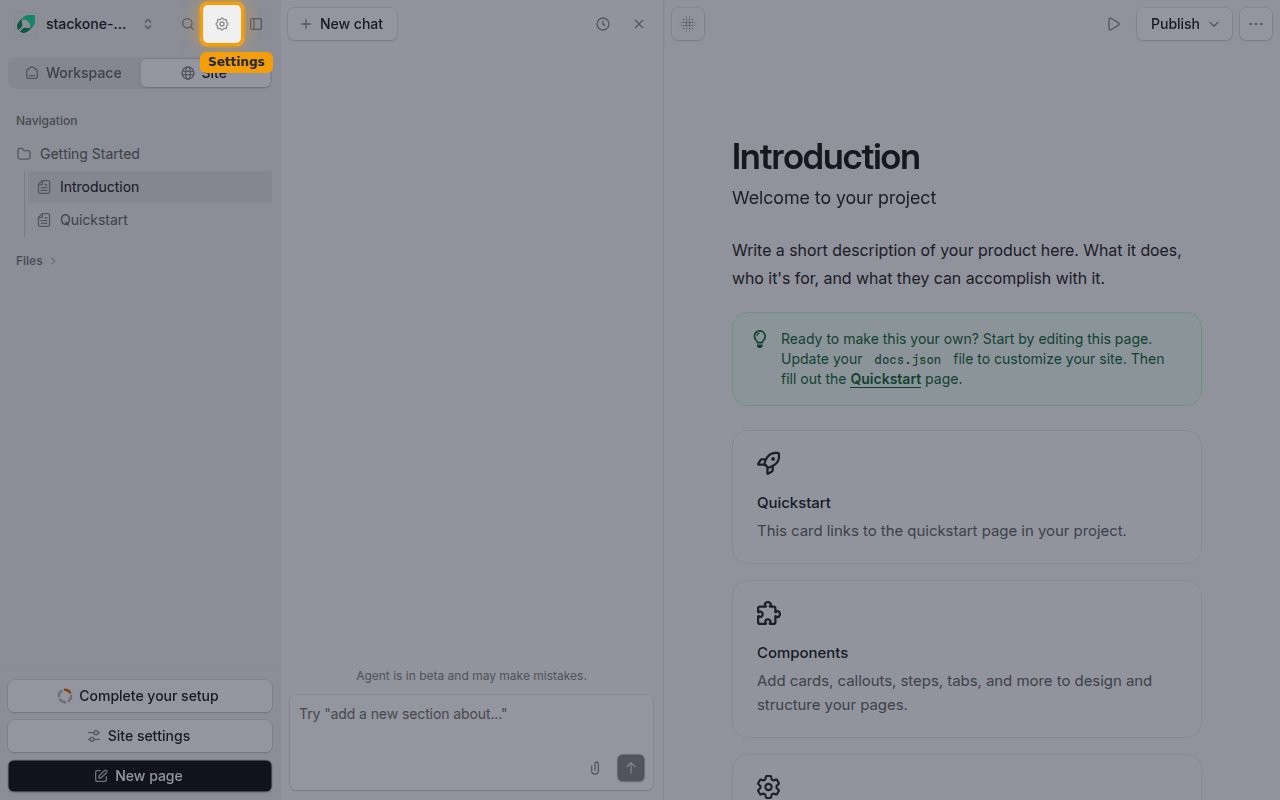
Open Mintlify settings
Sign in to your Mintlify dashboard, then click the Settings icon (gear) in the top left bar.
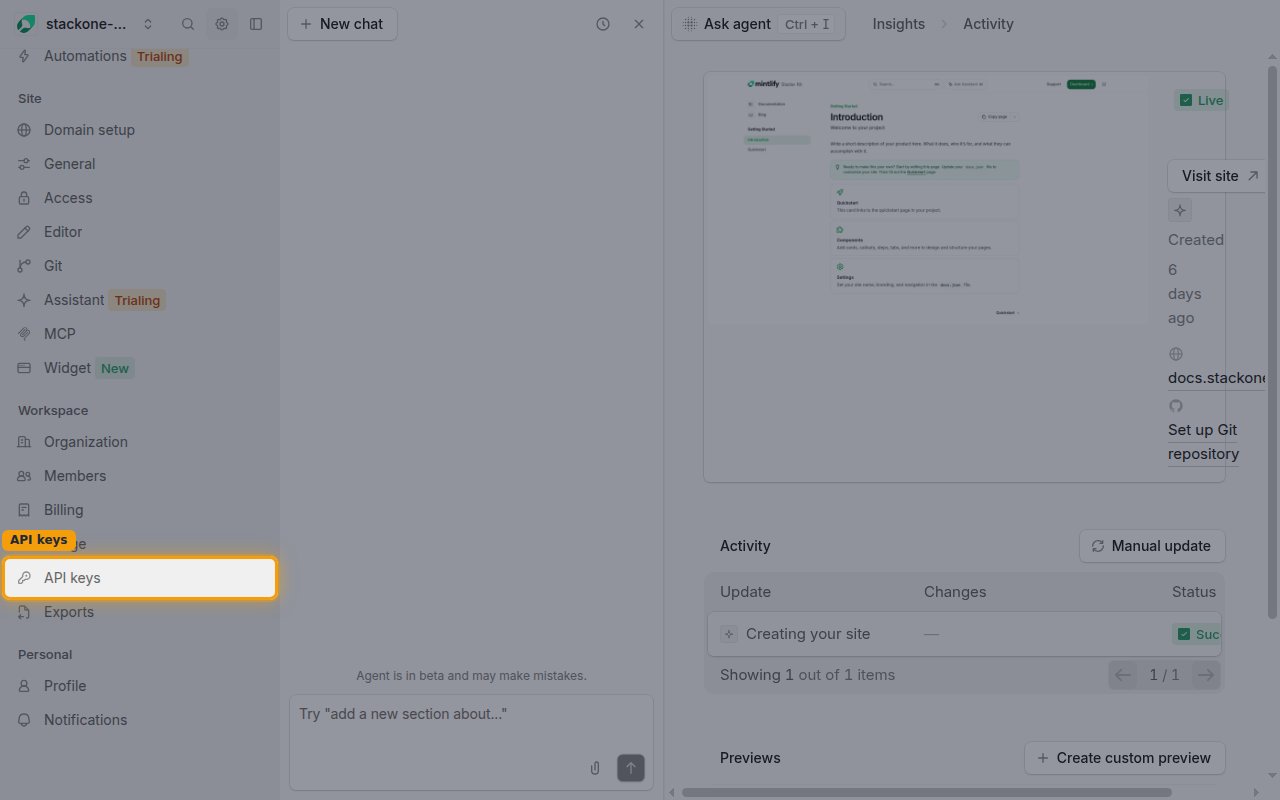
Open the API keys page
In the settings navigation, under the Workspace section, click API keys.
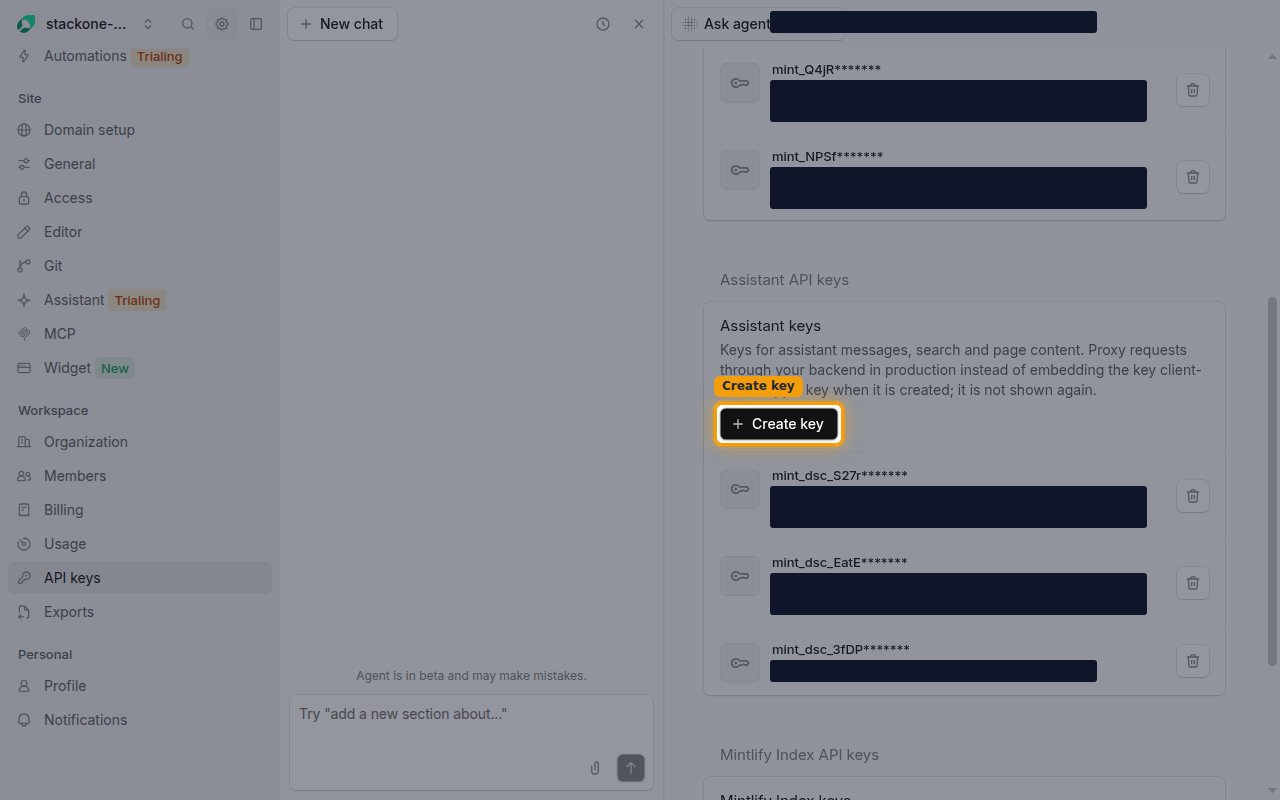
Create a new assistant key
On the API keys page, in the Assistant API keys section, click + Create key.
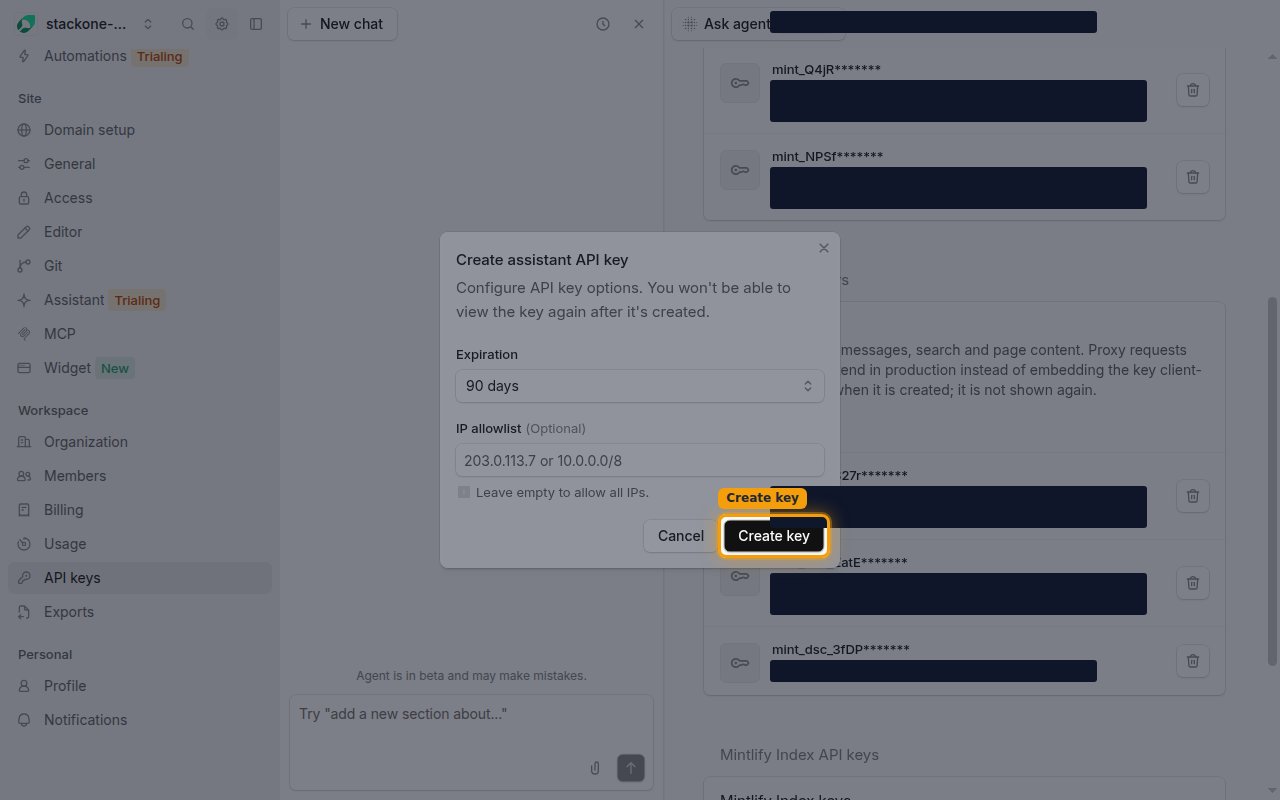
Configure and create the key
In the Create assistant API key dialog, review the key options and click Create key.
- Expiration: choose how long the key stays valid (defaults to 90 days).
- IP allowlist (Optional): leave empty to allow all IPs.
- Assistant API keys begin with the
mint_dsc_prefix. - The key is only displayed once and cannot be retrieved later, so copy it immediately and store it securely.
Link the account in StackOne Hub
Provide your credentials in StackOne Hub to connect the account.
- Paste your assistant API key into the Assistant API Key field.
- Enter your project slug in the Domain field.
Linking the Account from the Hub
Navigate to the Hub
Fill out the fields
- Assistant API Key
- Domain
Connect
- Click Connect
- If applicable, the provider will redirect you to a sign-in or authorization page. Complete the provider’s authorization flow.
- Once authorization is successful, you will see a confirmation popup
If the account linking is successful, you will see the newly linked account in your Accounts page.