Registering the application needs at least the Application Developer role in Microsoft Entra ID, and granting admin consent needs a Global Administrator or Privileged Role Administrator. Microsoft Graph supports the device write operations only with a signed-in user, so the actions that create devices are unavailable with this authentication type.

Register an application in Microsoft Entra ID

An app registration in Microsoft Entra ID holds the credentials and the Microsoft Graph application permissions for the directory. Application permissions apply without a signed-in user, so no redirect URI is needed.

1

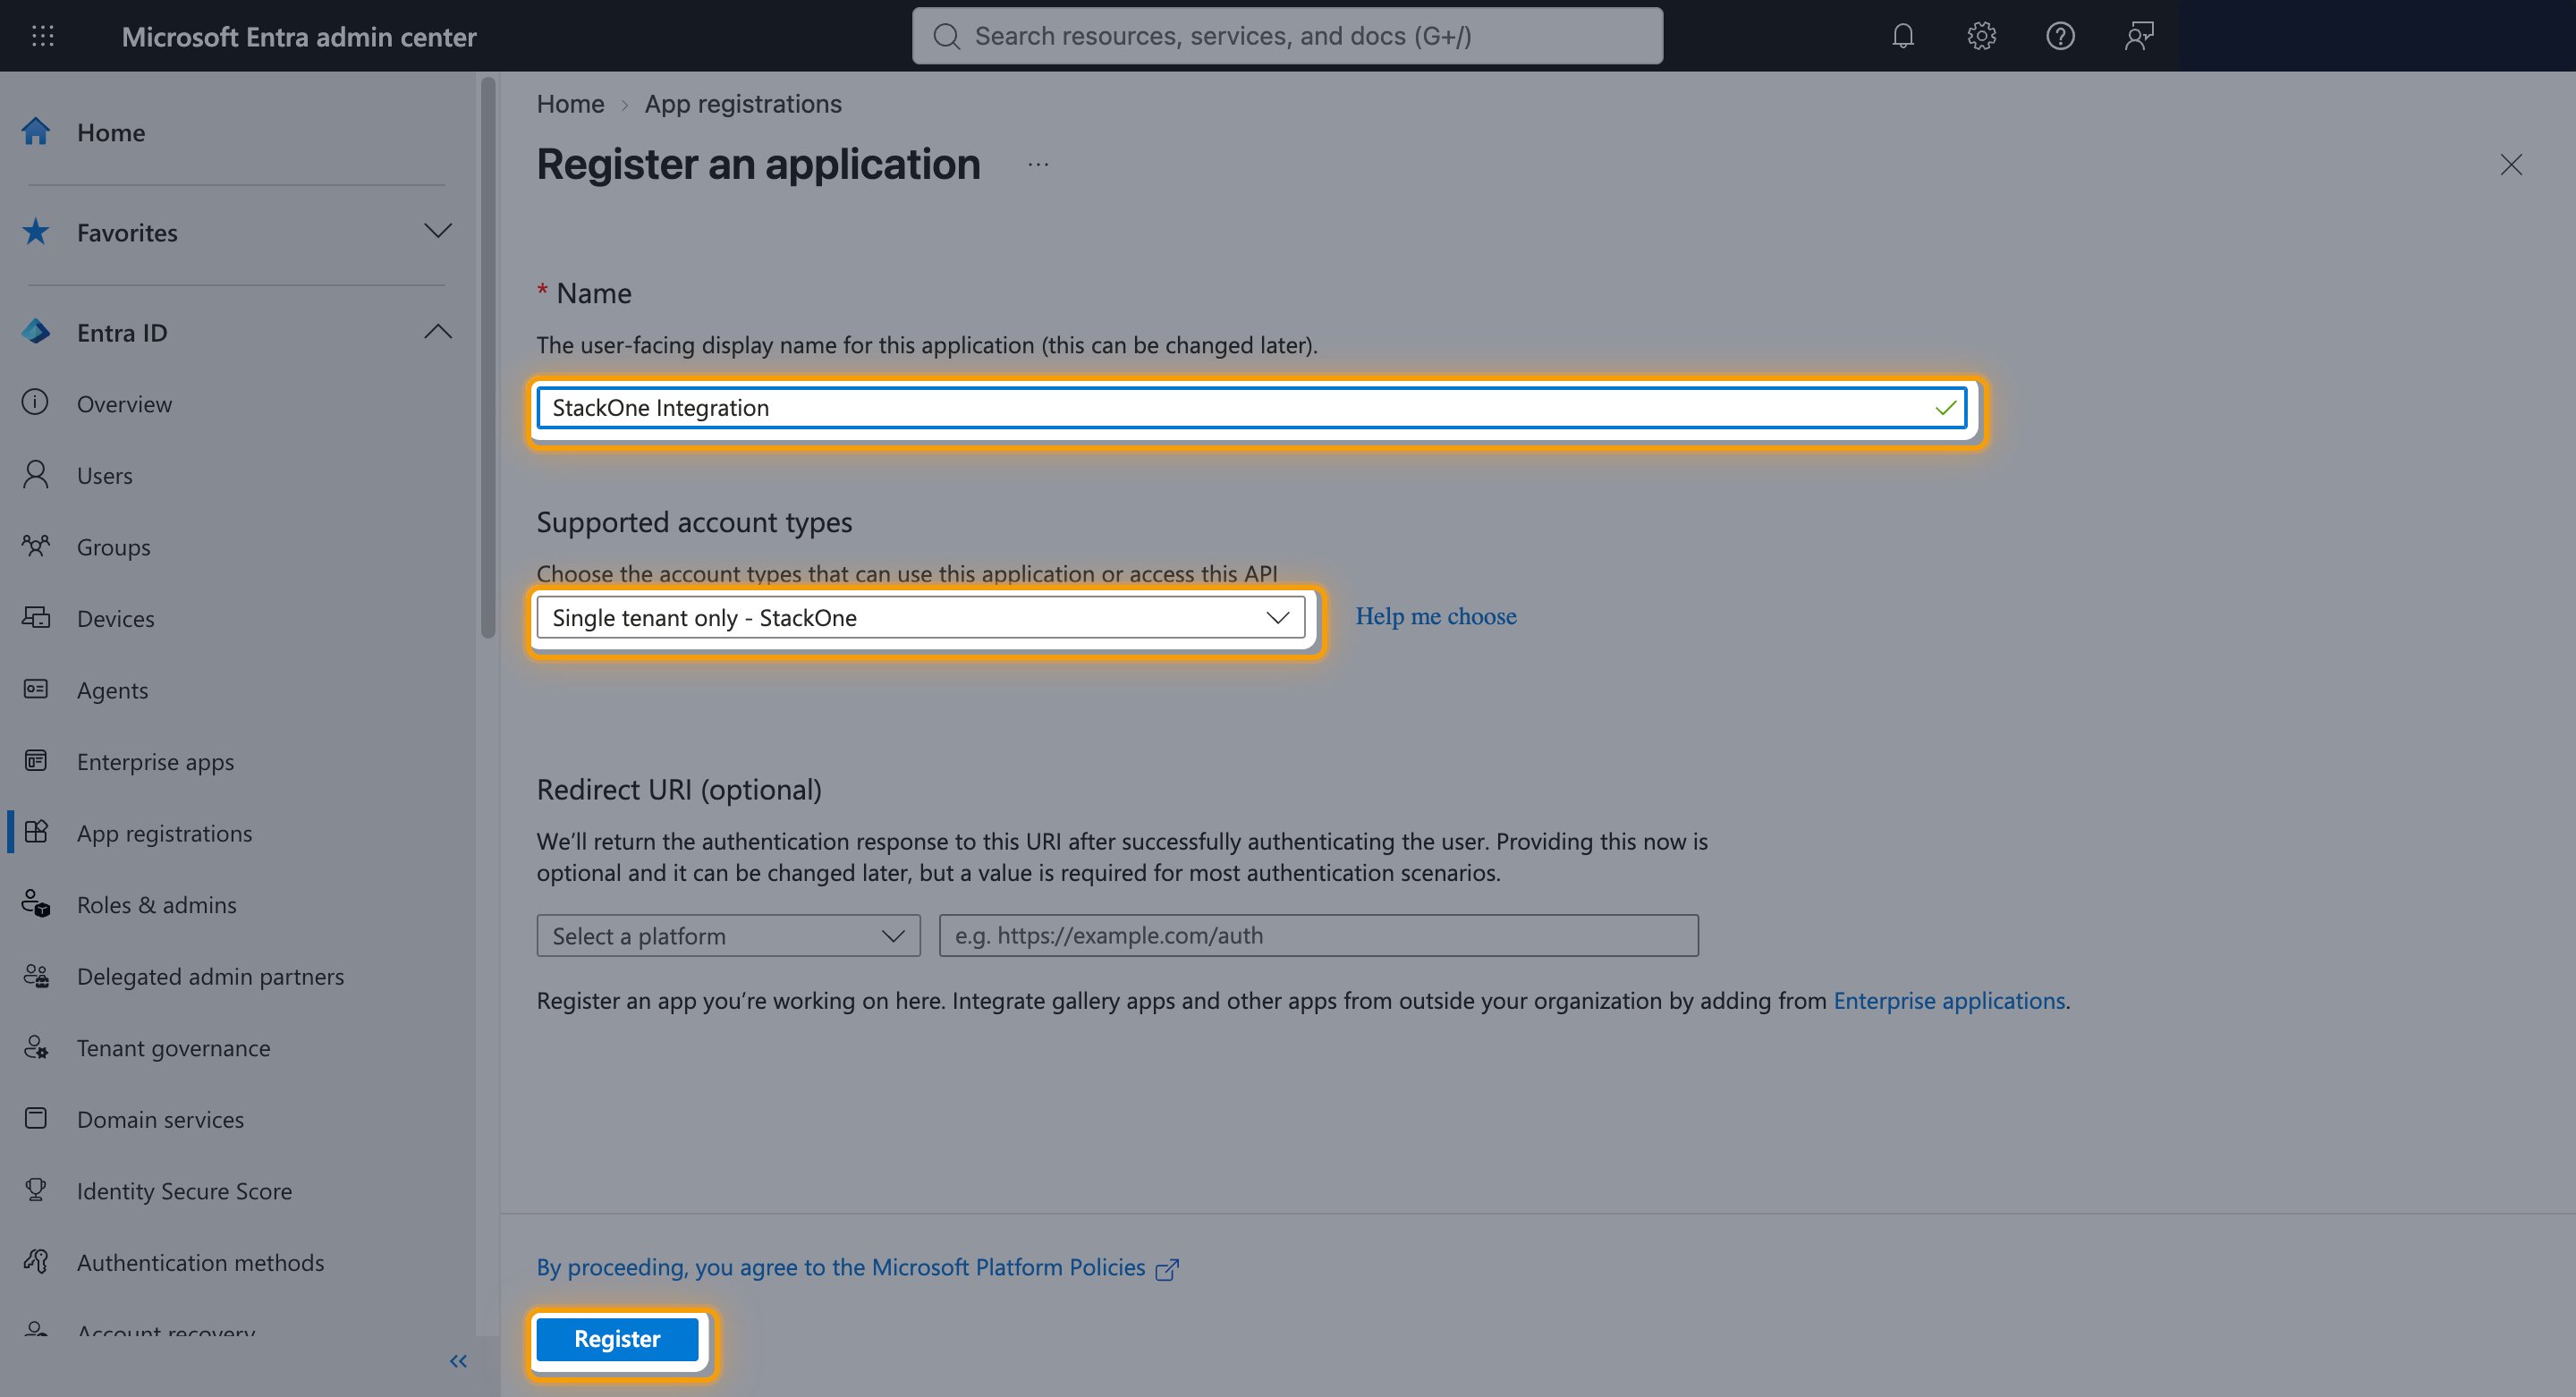
Create the app registration

Sign in to the Microsoft Entra admin center, then open Entra ID > App registrations.

  • Click New registration.
  • Name: StackOne Integration
  • Supported account types: Single tenant only
  • Leave Redirect URI (optional) empty.
  • Click Register.
The Register an application form with the Name field, the Supported account types dropdown and the Register button highlighted

Add the Microsoft Graph application permissions

Application permissions are granted to the application itself rather than to a user, so an administrator consents to them once and they apply across the tenant.

1

Select the permissions

Enables actions: Add App Role Assignment To Service Principal, Add Directory Role Member, Add Group Member, Assign App Role To User, Create Application, Create Conditional Access Policy, Create Country Named Location, Create Domain, Create Group, Create IP Named Location, Create OAuth2 Permission Grant, Create Service Principal, Create User, Delete Application, Delete Conditional Access Policy, Delete Device, Delete Domain, Delete Group, Delete Named Location, Delete OAuth2 Permission Grant, Delete Service Principal, Delete User, Get Application, Get Conditional Access Policy, Get Device, Get Directory Role, Get Domain, Get Group, Get Named Location, Get OAuth2 Permission Grant, Get Organization, Get Service Principal, Get User, List Applications, List Conditional Access Policies, List Device Group Memberships, List Device Registered Owners, List Device Registered Users, List Devices, List Directory Role Members, List Directory Roles, List Domain Service Configuration Records, List Domain Verification DNS Records, List Domains, List Group Members, List Groups, List Named Locations, List OAuth2 Permission Grants, List Organizations, List Role Templates, List Service Principal App Role Assignments, List Service Principals, List User App Role Assignments, List Users, Remove App Role Assignment From Service Principal, Remove App Role From User, Remove Directory Role Member, Remove Group Member, Update Application, Update Conditional Access Policy, Update Device, Update Group, Update OAuth2 Permission Grant, Update Organization, Update Service Principal, Update User, Verify Domain

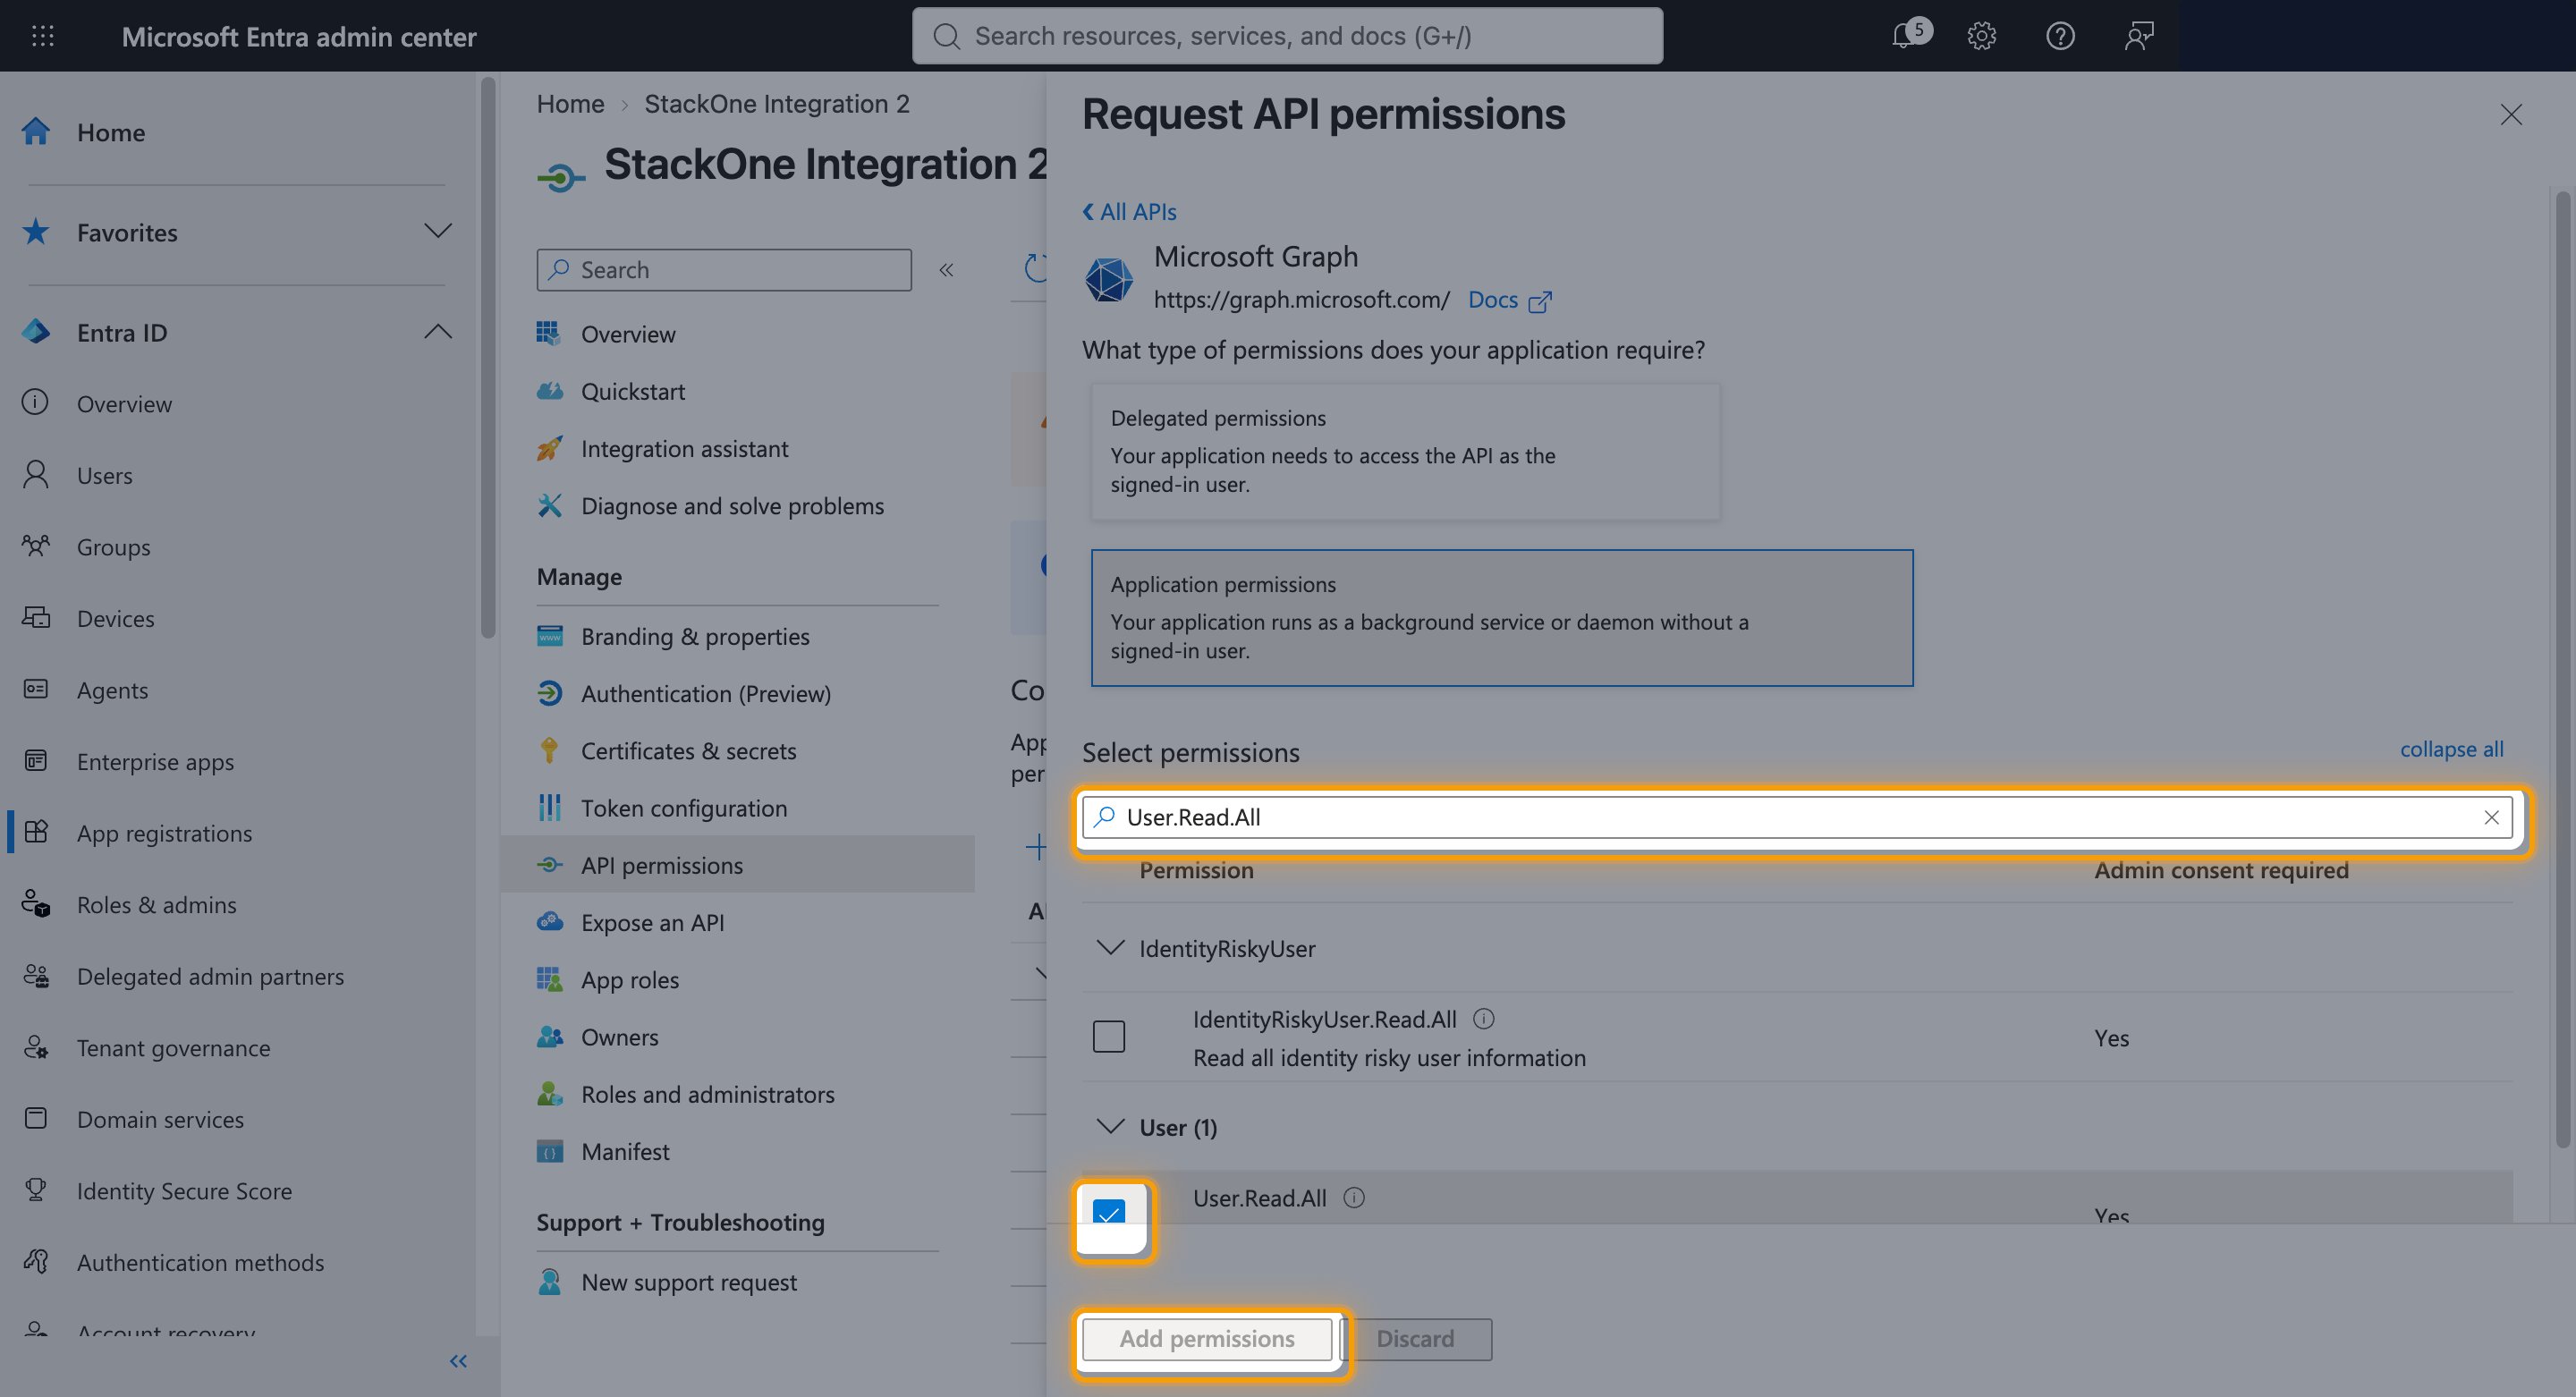
From the left menu under Manage, select API permissions.

  • Click Add a permission.
  • Select Microsoft Graph.
  • Select Application permissions.
  • Under Select permissions, filter the catalog and select the checkbox beside each permission.
  • Click Add permissions.
The Select permissions list filtered to User.Read.All with its checkbox and the Add permissions button highlighted
2

Grant admin consent

Application permissions take effect only once an administrator consents to them, which is why the Status column reads Not granted for [tenant name] until then.

  • Click Grant admin consent for [tenant name].
  • Click Yes on Grant admin consent confirmation.
  • Check that the Status column reads Granted for [tenant name] for every permission.
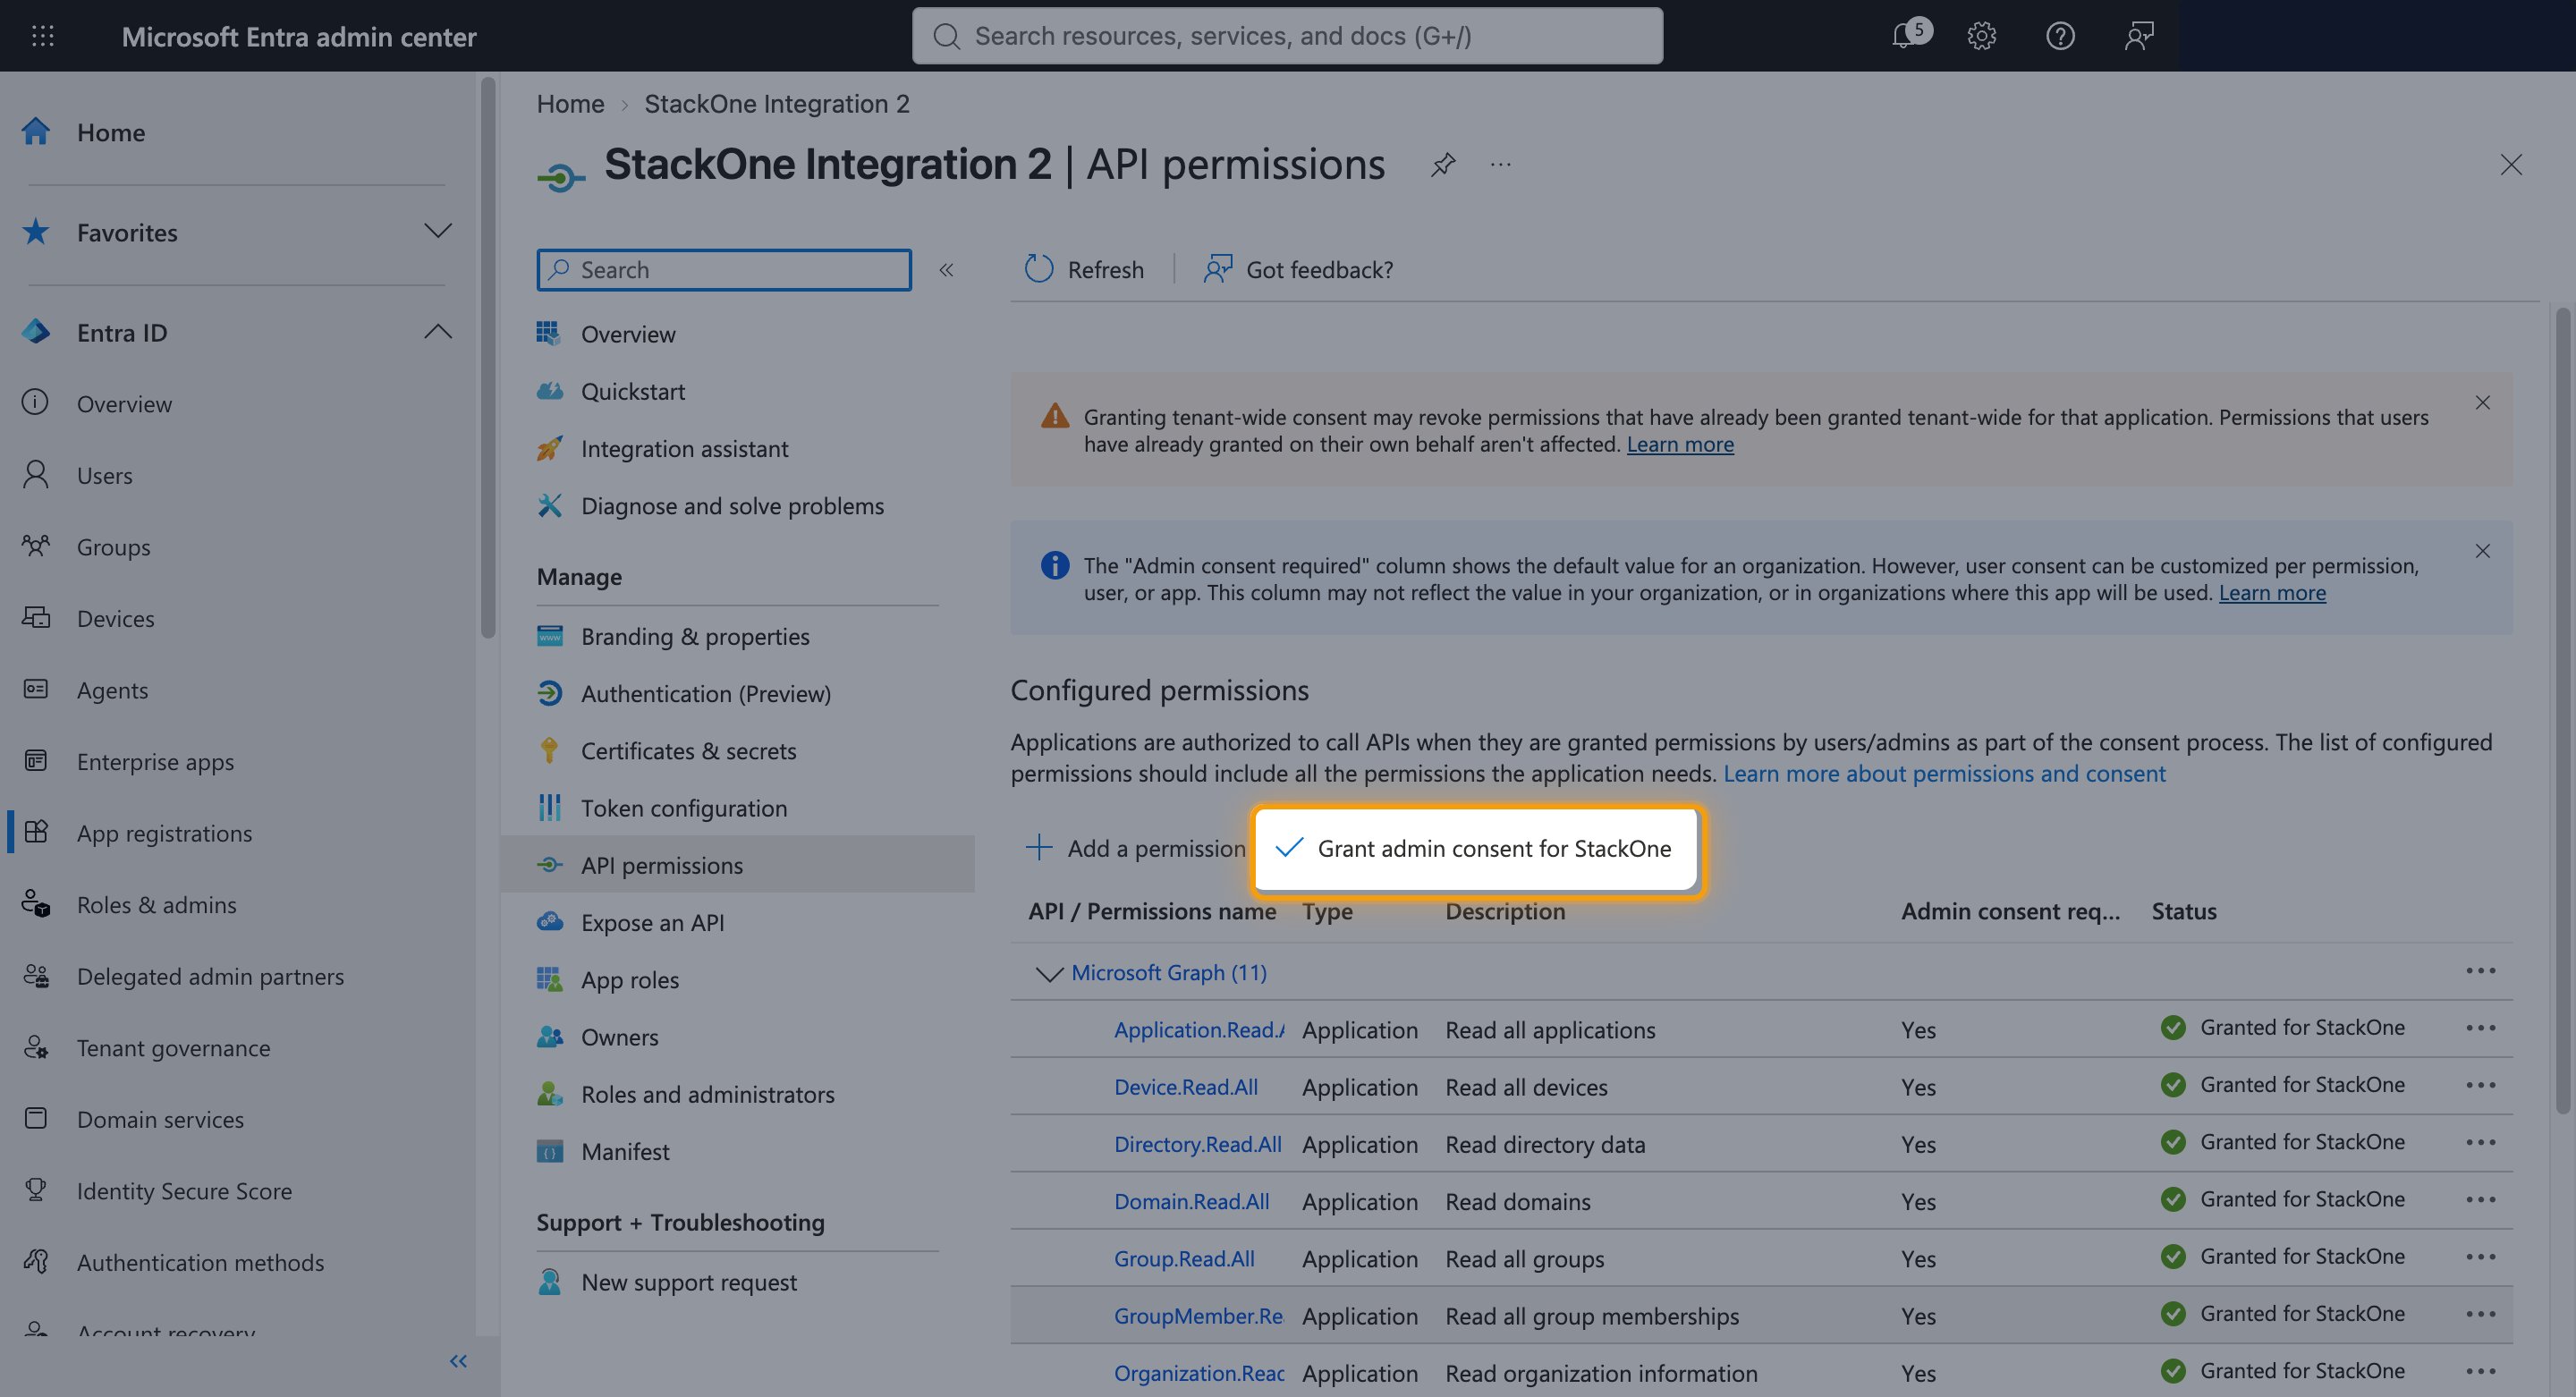
The Configured permissions table with the Grant admin consent button highlighted

Copy the credentials

The application identifies itself with three values from the registration — two on the Overview page and a secret you create.

1

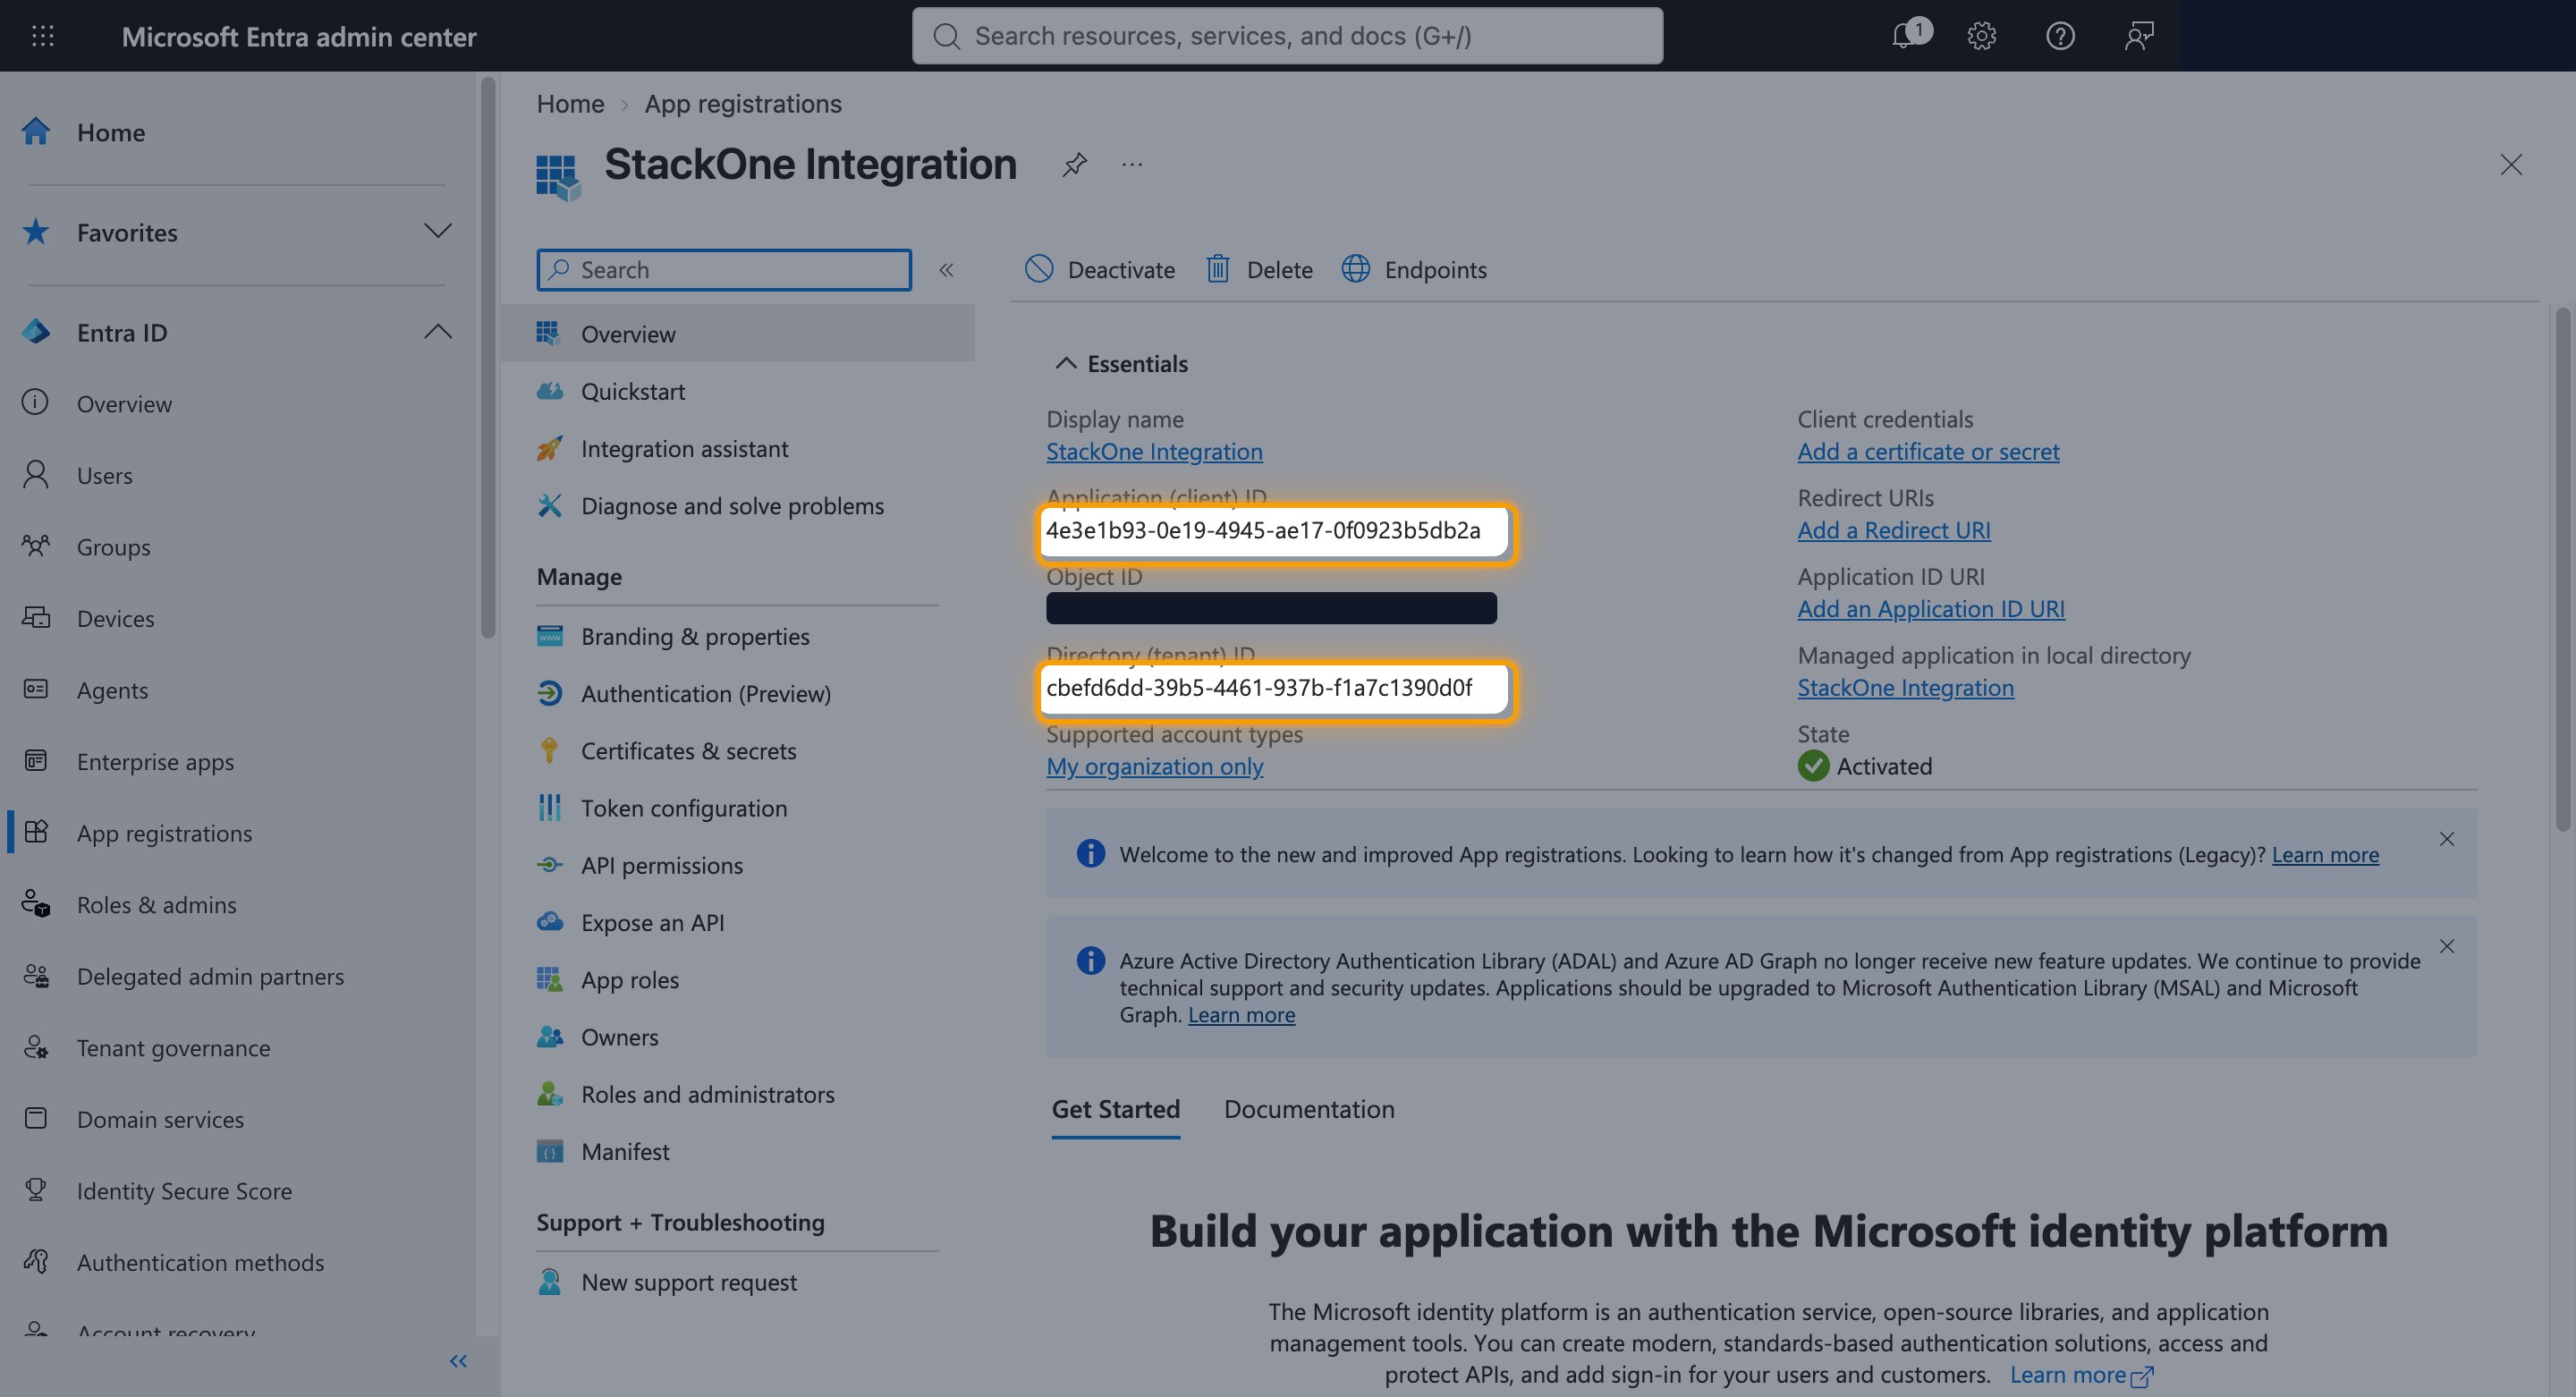
Copy the Client ID and Tenant ID

From the left menu, select Overview, then copy both values across.

  • Client ID: the Application (client) ID
  • Tenant ID: the Directory (tenant) ID
The application Overview page with the Application (client) ID and Directory (tenant) ID values highlighted
2

Create a client secret

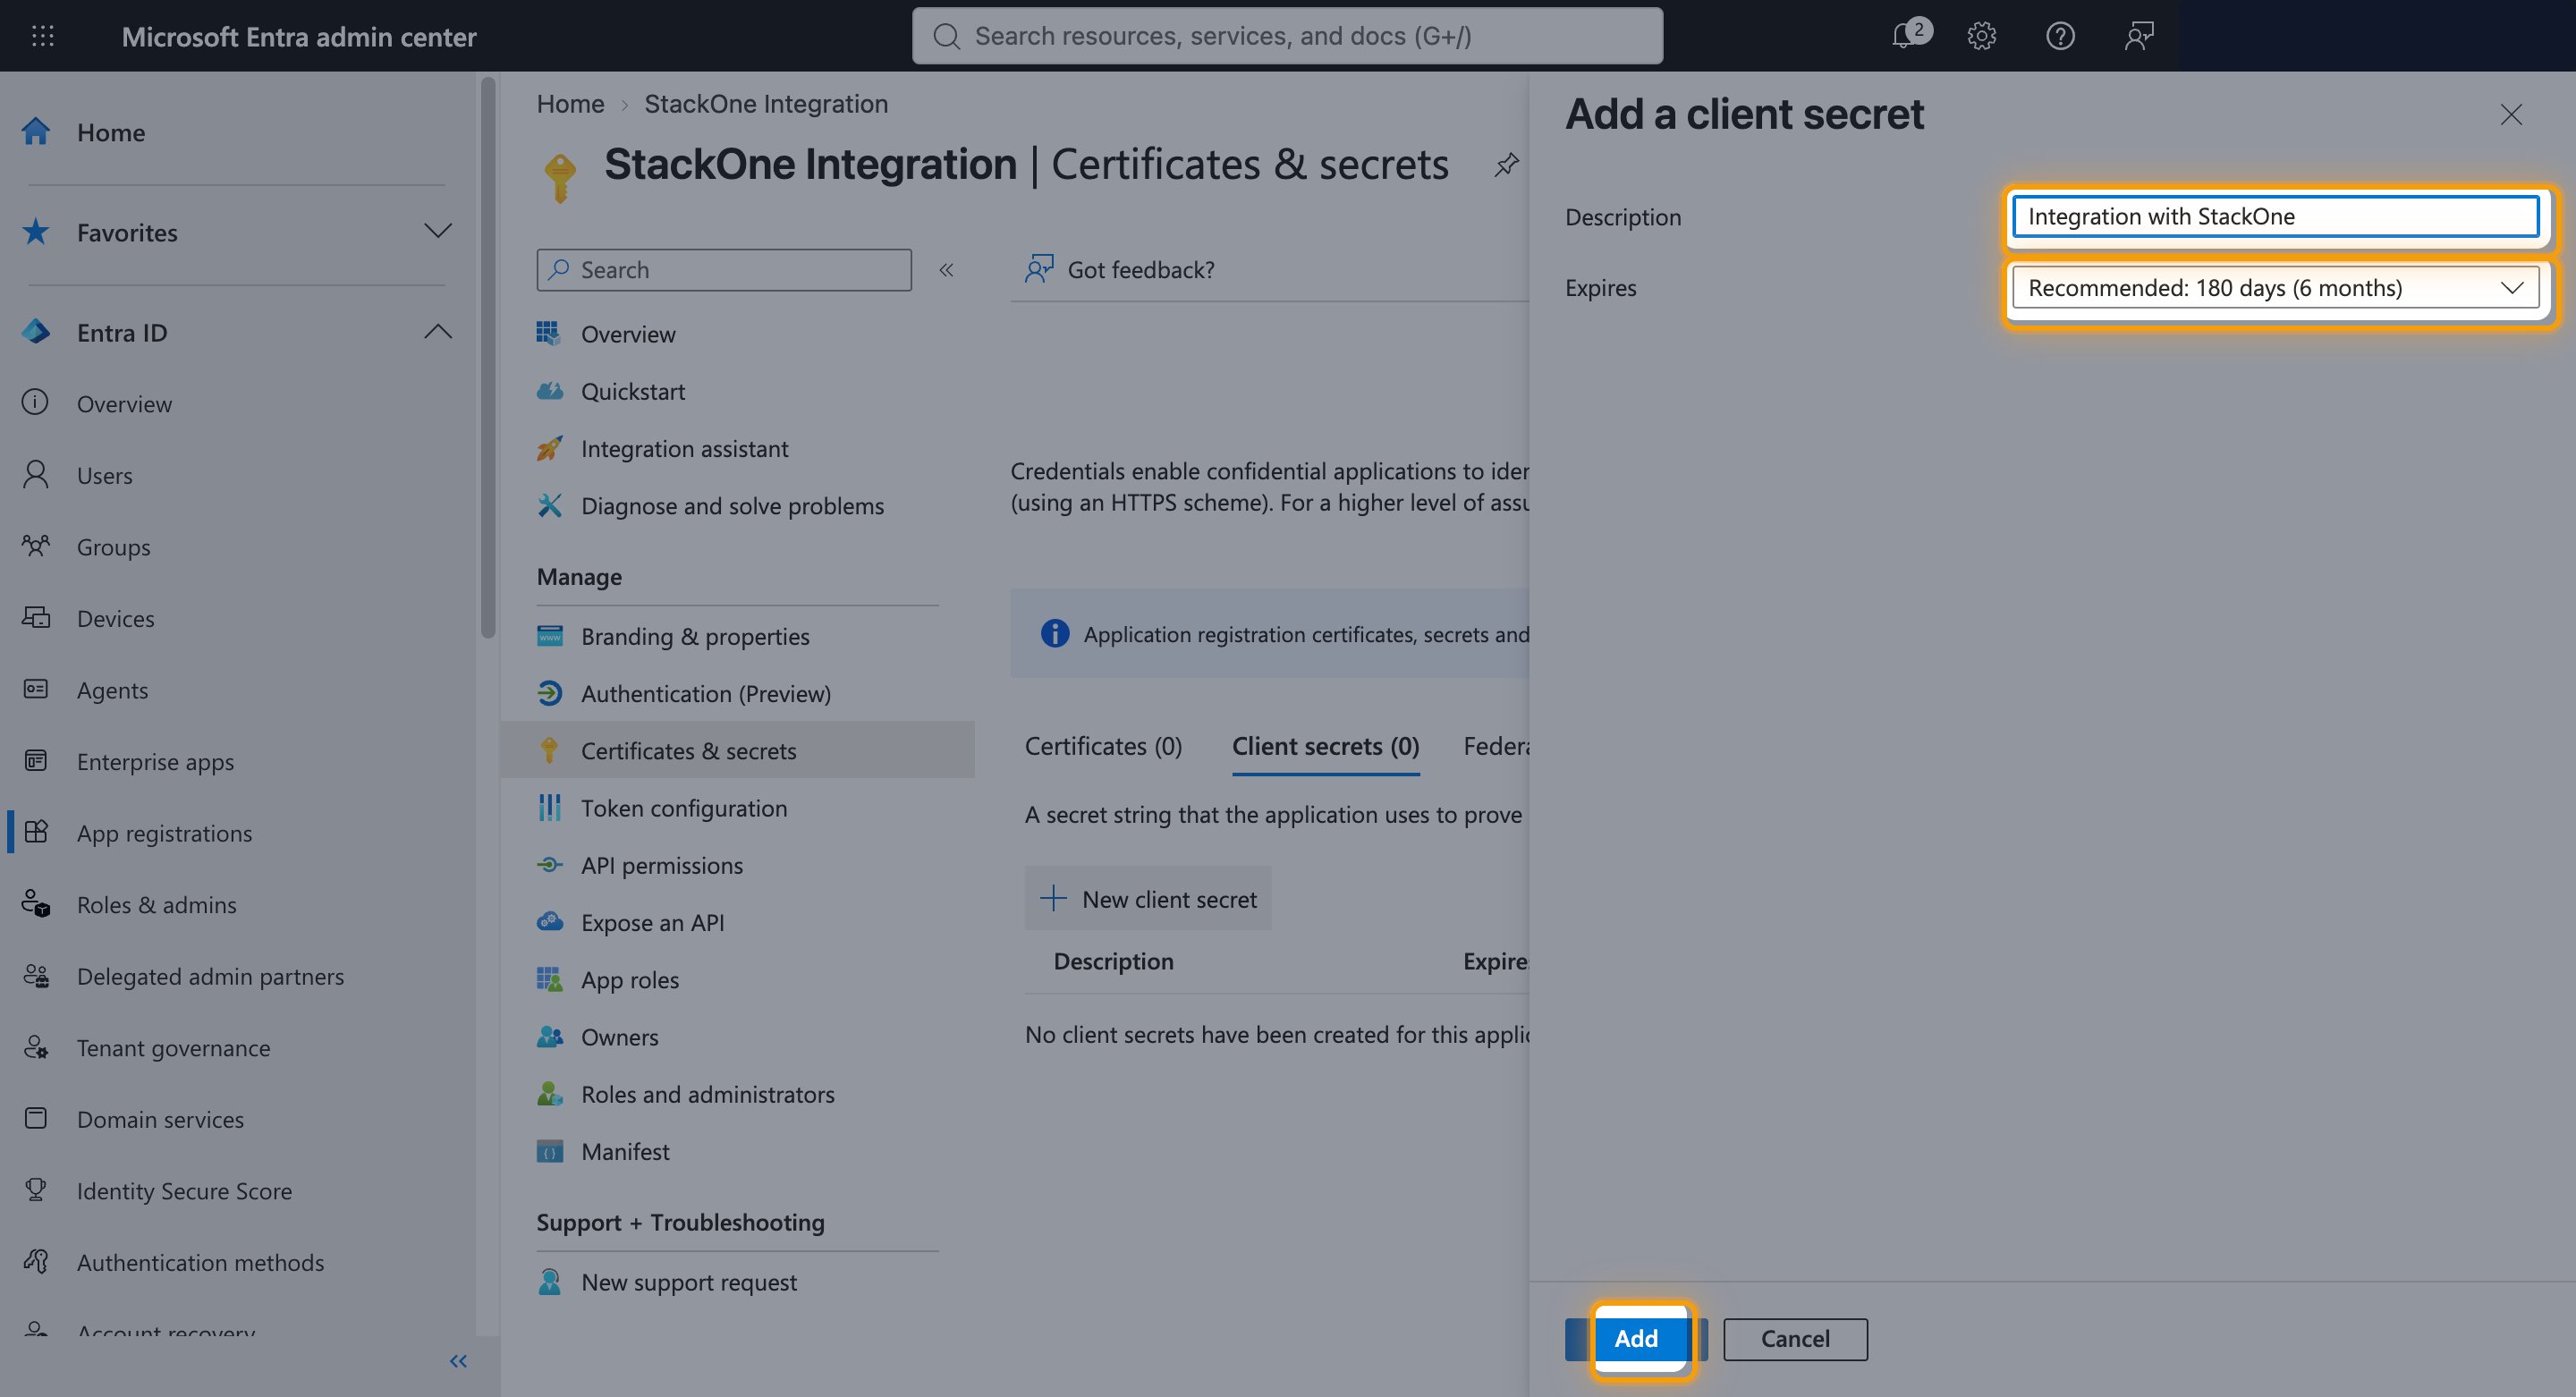
From the left menu under Manage, select Certificates & secrets, then open the Client secrets tab.

  • Click New client secret.
  • Description: Integration with StackOne
  • Expires: how long the secret stays valid
  • Click Add.
The Add a client secret pane with the Description field, the Expires dropdown and the Add button highlighted
3

Copy the Client Secret

Copy the Value of the new secret across.

  • The Value is only displayed when the secret is created and cannot be retrieved later.
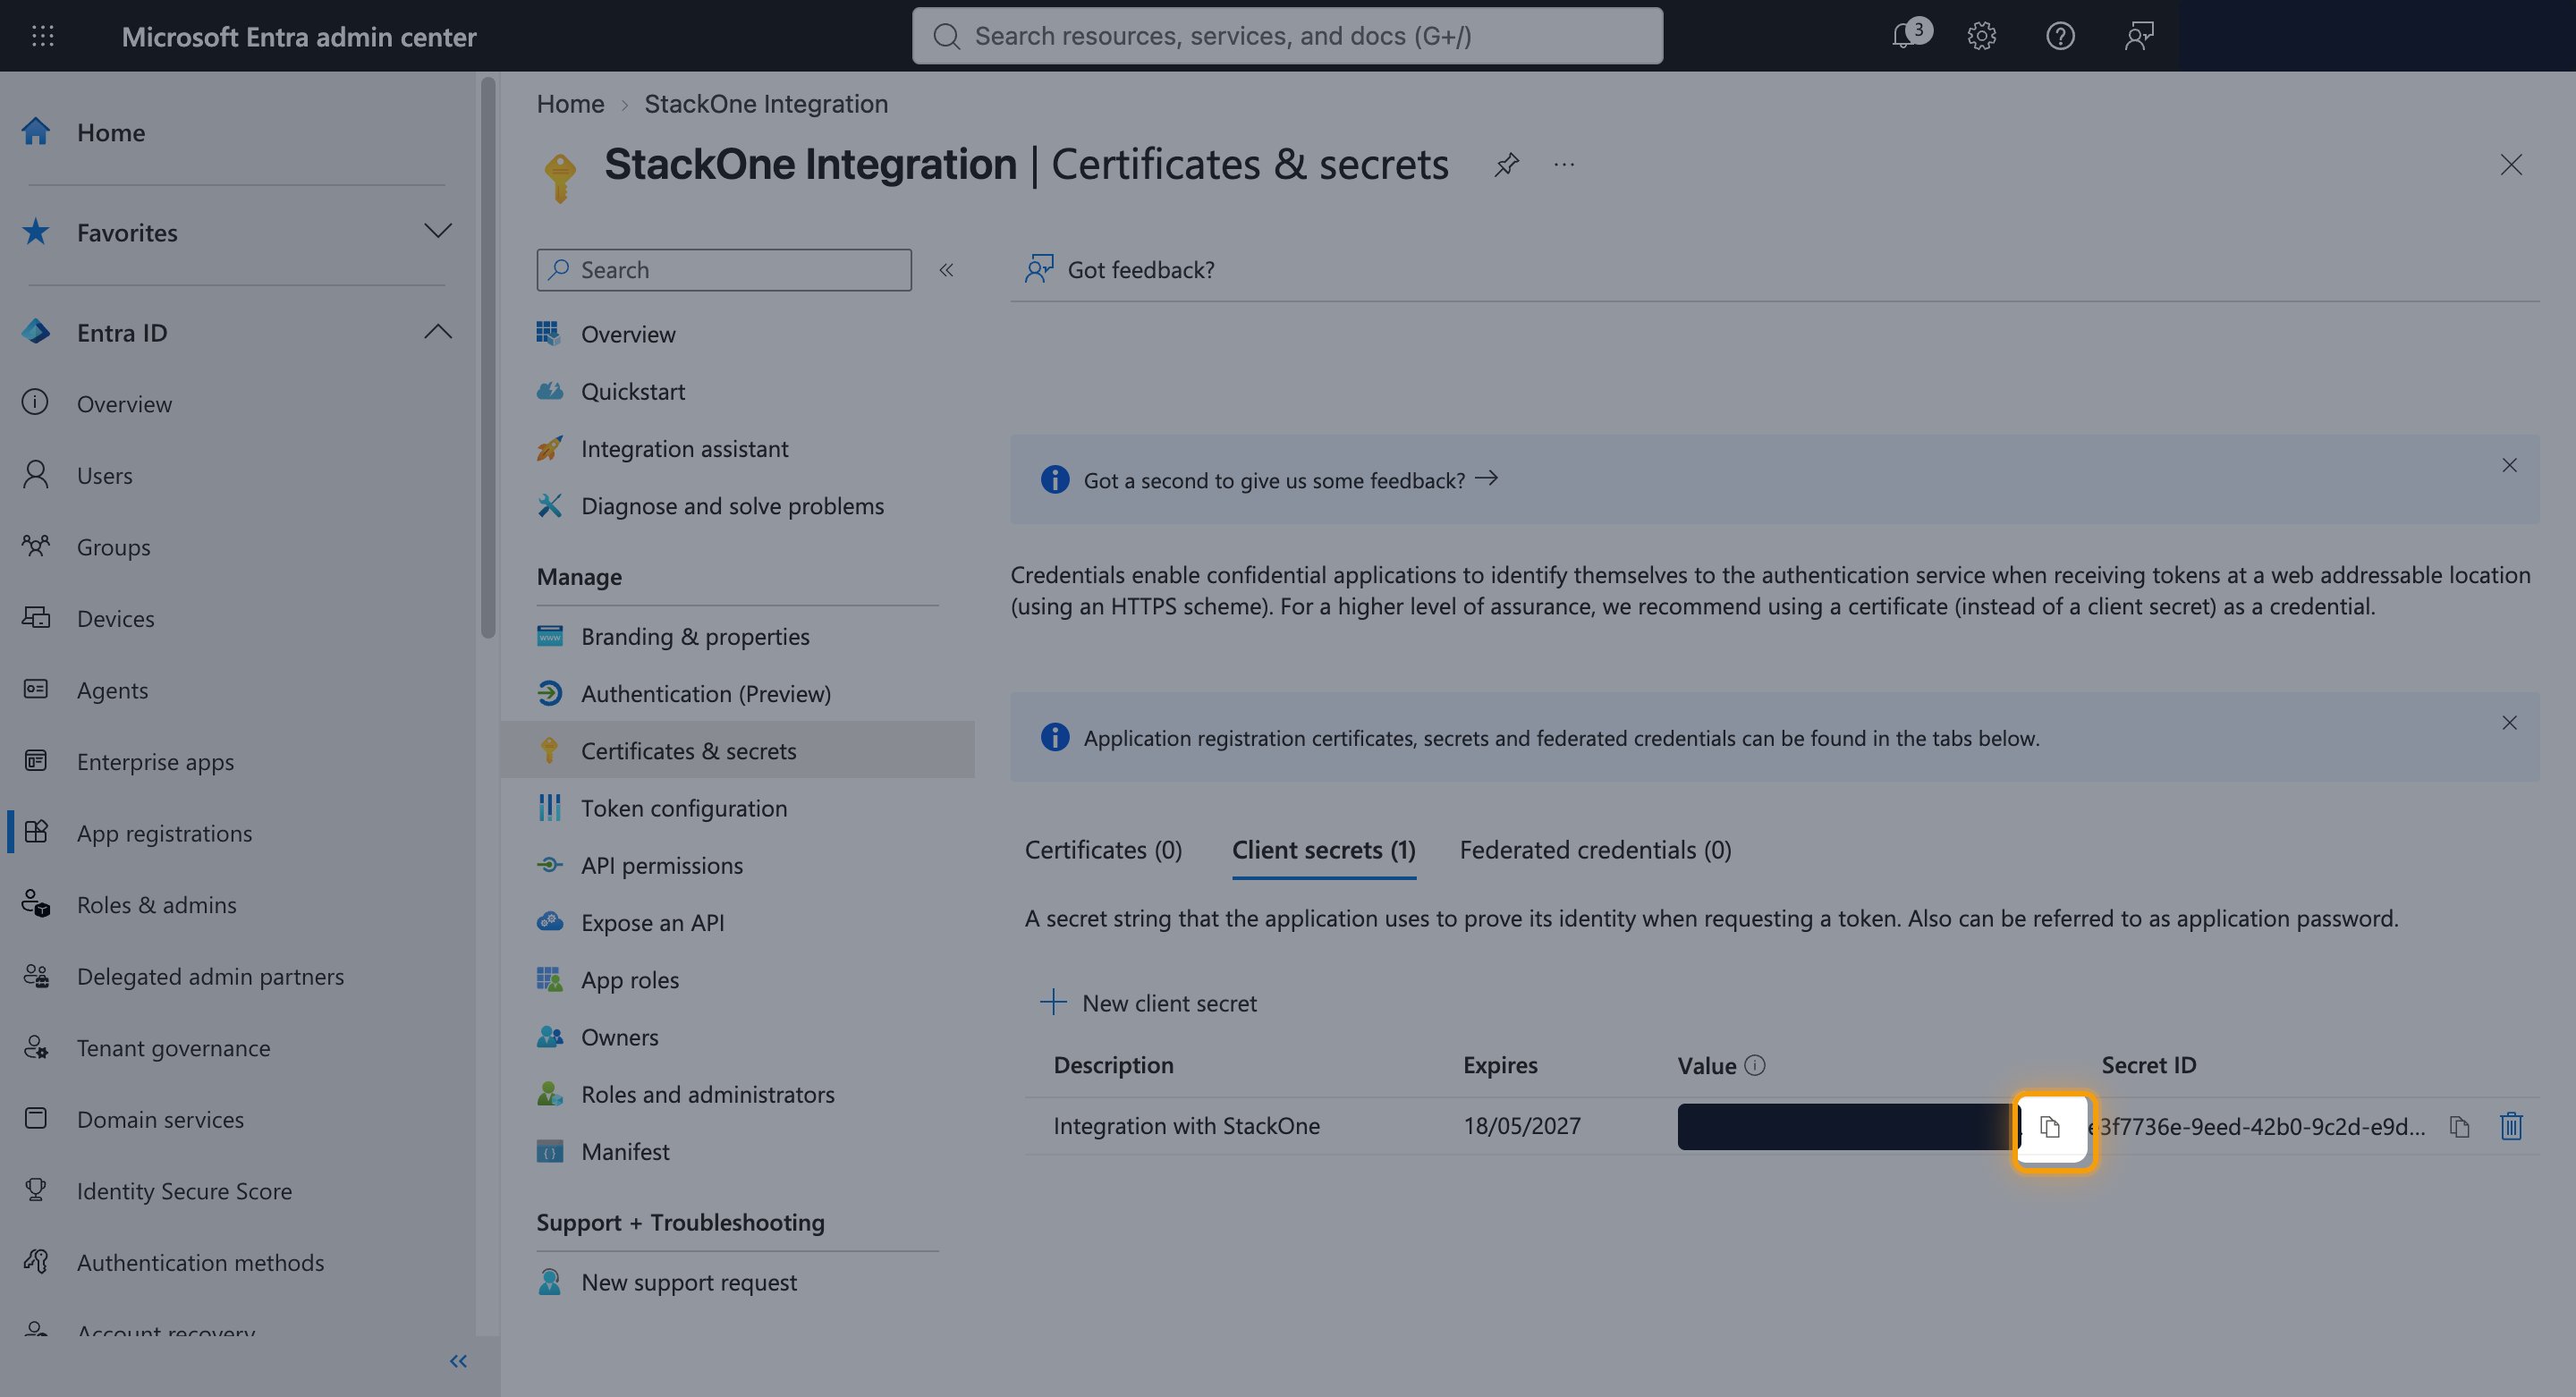
The Client secrets table with the copy button beside the secret Value highlighted
1

Connect

  • Click Connect.
  • If applicable, the provider will redirect you to a sign-in or authorization page. Complete the provider’s authorization flow.
  • Once authorization is successful, you will see a confirmation popup.
2

Use Actions

Connect an AI platform to the linked account’s actions. See AI Platforms.Other ways to call actions are listed in Protocols & SDKs.

Next Steps

Webhooks setup

Configure receiving Events for Microsoft Entra ID into StackOne.