

Find your zone
Your zone identifies which Make server hosts your account. It is the first part of the
host name in every Make URL you see while signed in.
- Sign in to Make and check your browser address bar.
- Format:
https://{zone}.make.com/... - Example: if your URL is
https://eu1.make.com/organization/12345/dashboard, your zone iseu1 - Make zones are named
eu1,eu2,us1, andus2. - Enter the zone on its own in the Zone field in StackOne Hub —
eu1, noteu1.make.com.

Generating an API token
Create an API token under your Make profile. The token carries the scopes you grant it,
so select them before the token is created.
Sign in to Make
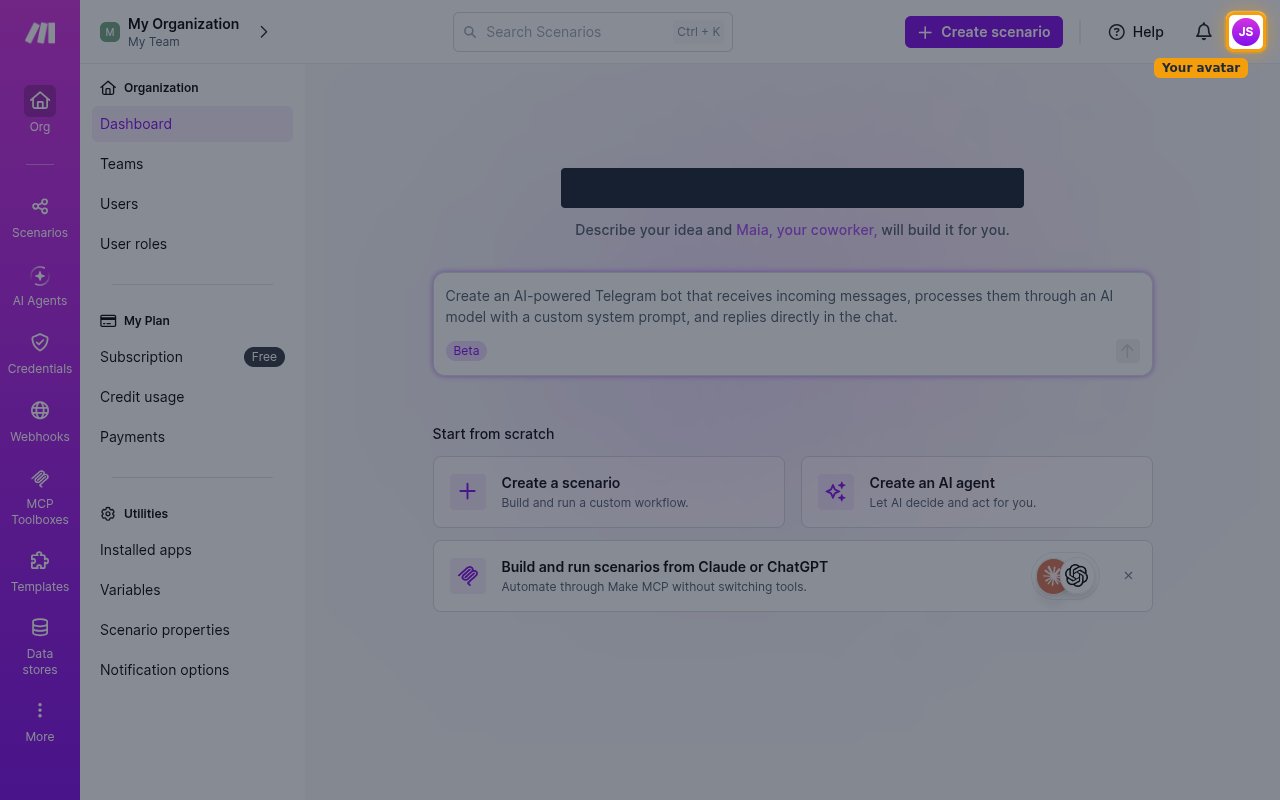
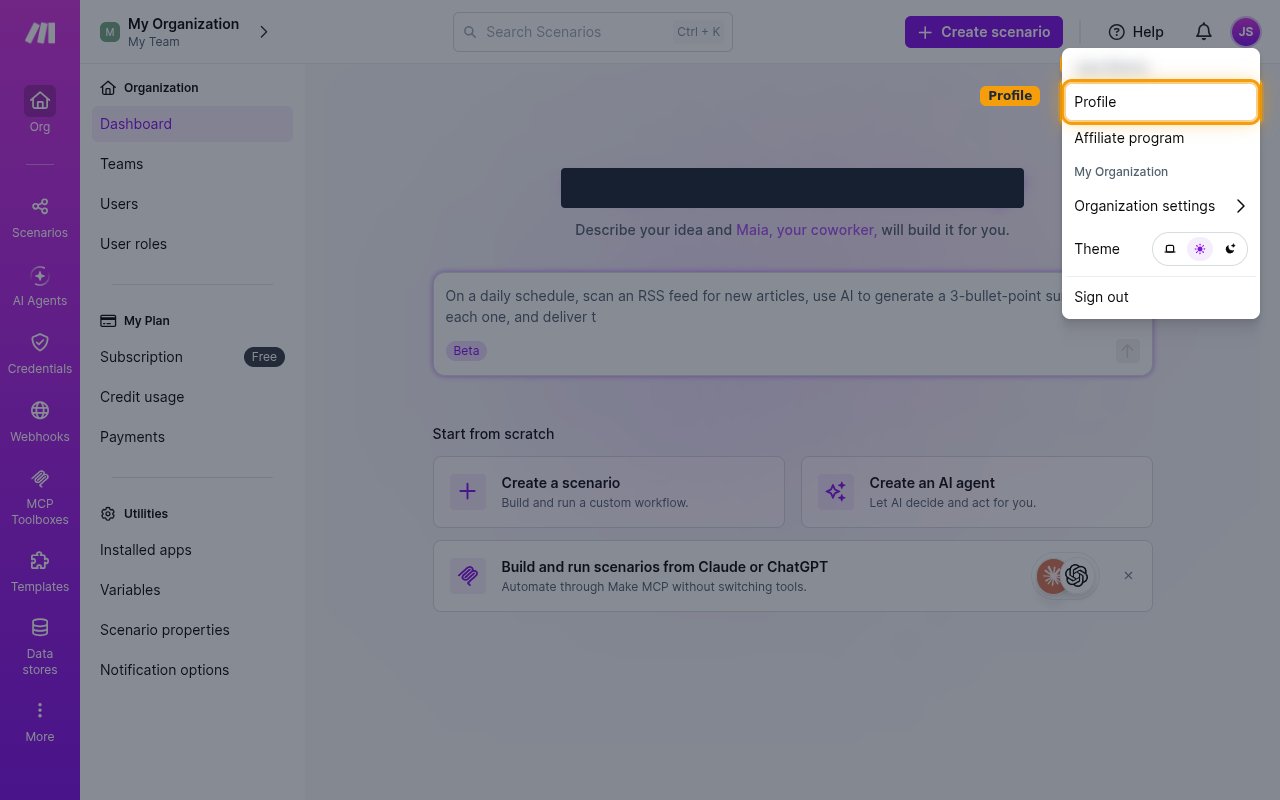
Open your profile
Select Profile from the account menu.
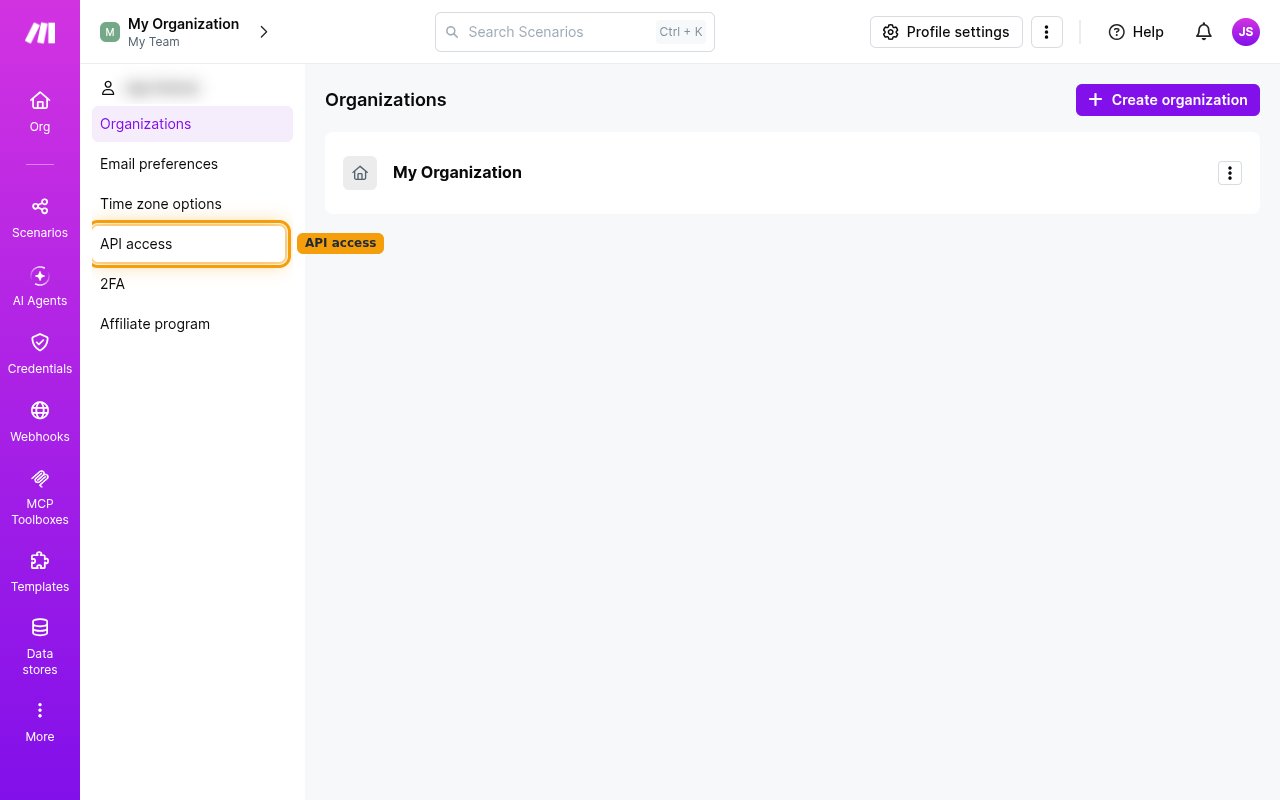
Open API access
In the profile settings sidebar, click API access.
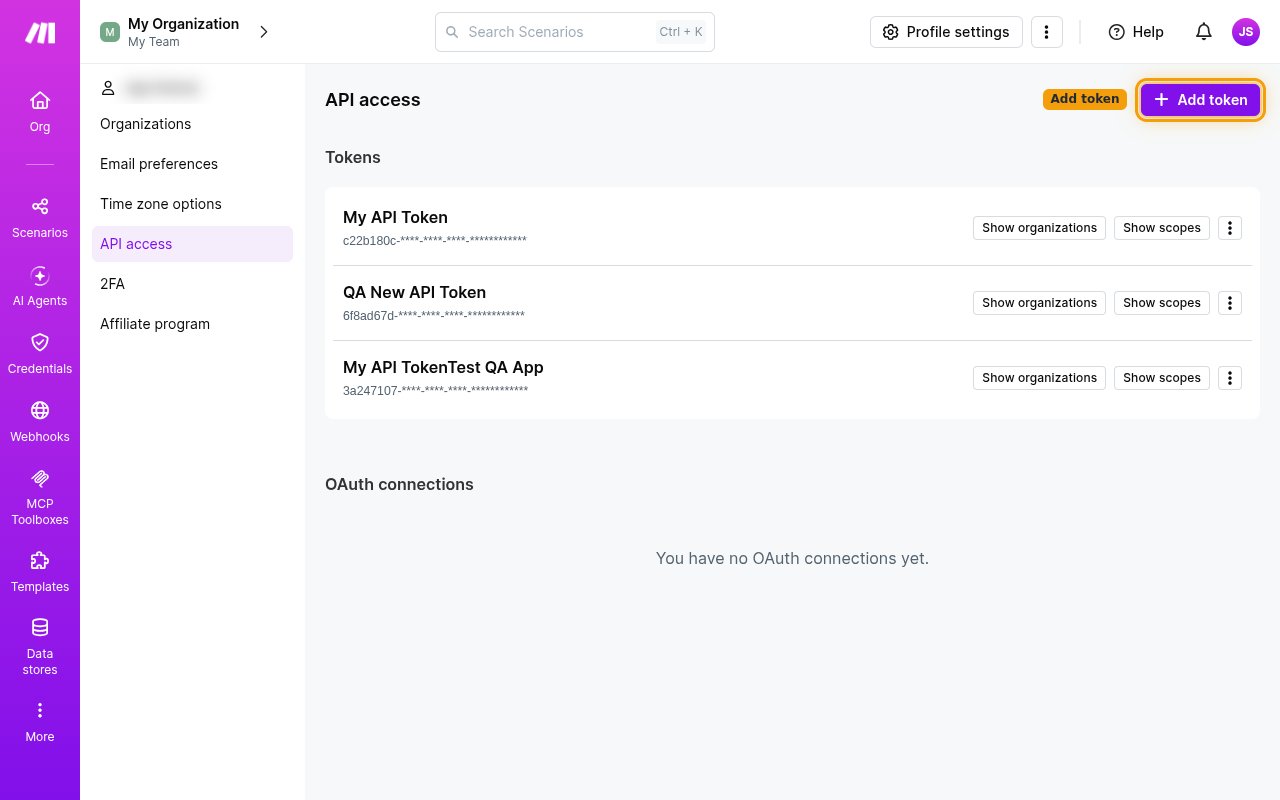
Create a new token
On the API access page, click + Add token.
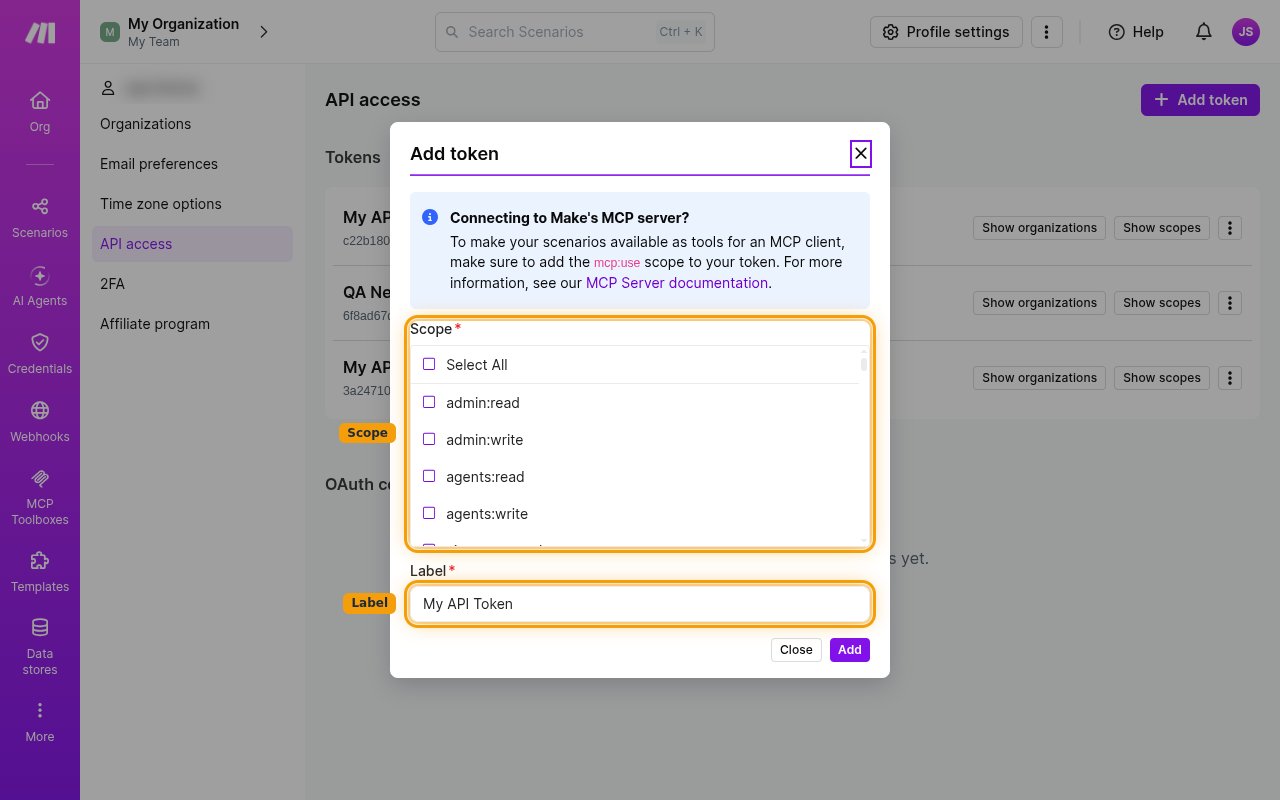
- The Add token dialog opens with a Scope list and a Label field.
Select the token scopes
In the Scope list, tick the scopes this connection needs — a token carries only what
is ticked here, and scopes are set in Make, not in StackOne. Tick Select All for full
access, or enable the scopes below (:read covers list and get actions, :write covers
create, update, and delete):
- Users and roles:
user:read,user:write - Organizations:
organizations:read,organizations:write - Teams:
teams:read,teams:write - Scenarios:
scenarios:read,scenarios:write,scenarios:run - Connections:
connections:read,connections:write - Agents:
agents:read,agents:write - AI agents:
ai-agents:read,ai-agents:write - Data structures:
udts:read,udts:write - Keys:
keys:read,keys:write - Devices:
devices:read,devices:write
Name and create the token
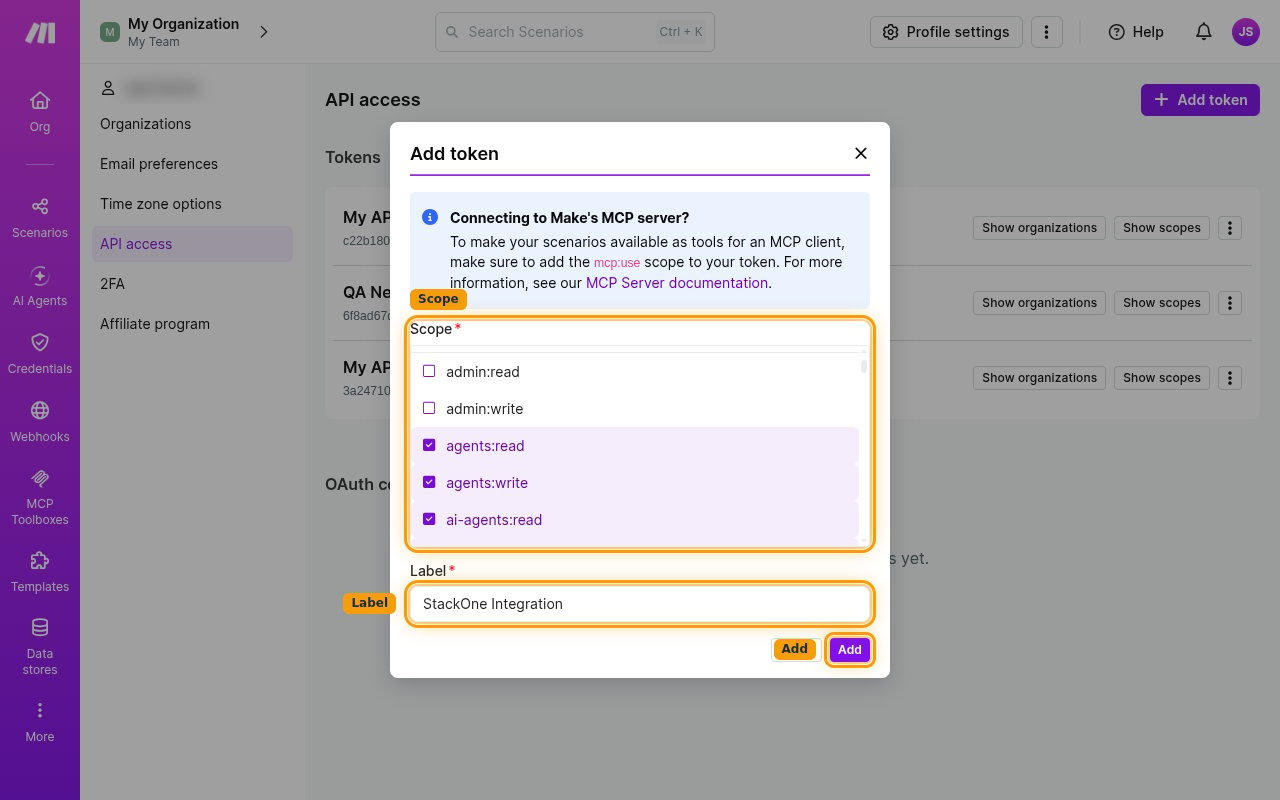
Give the token a name you will recognize later, then create it.
- Label:
StackOne Integration - Click Add.
Copy the token
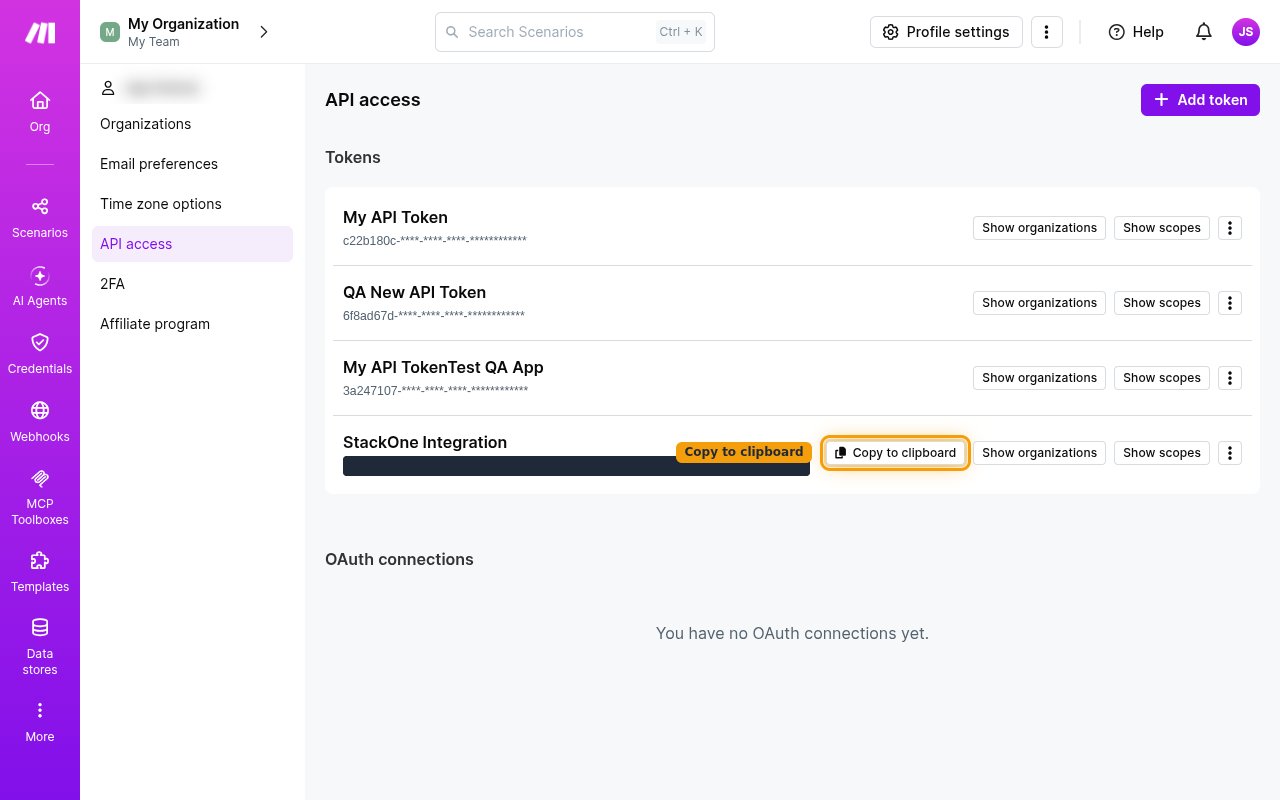
The new token appears at the bottom of the Tokens list. Click Copy to clipboard
next to it and store it securely for use later, then paste it into the API Token
field in StackOne Hub.
- The full token value is shown only once, right after it is created. Once you leave the page it is masked and cannot be retrieved again.
- If you lose it, delete the token and create a new one.
Native Webhook URL
The Native Webhook URL field is generated by StackOne and is read-only.
- Leave it as it is when you connect the account — there is nothing to enter.
- Copy it afterwards if you want a Make scenario to send events to StackOne.
Linking the Account from the Hub
Navigate to the Hub
Fill out the fields
- Zone
- API Token
Connect
- Click Connect
- If applicable, the provider will redirect you to a sign-in or authorization page. Complete the provider’s authorization flow.
- Once authorization is successful, you will see a confirmation popup
If the account linking is successful, you will see the newly linked account in your Accounts page.
Next Steps
Webhooks setup
Configure receiving Events for Make into StackOne.