

Prerequisites
The connector should already be set up, with a Connector Profile and a Linked Account. See Getting Started on the Mailjet connector page.Copy your Native Webhook URL
Before configuring Mailjet, copy the Native Webhook URL from this connection in StackOne Hub. This is the address Mailjet posts message events to — you will paste it into the Endpoint URL field for each event type in the next steps. It is only available after the account has been connected.
Open the Event API page in Mailjet
Open the Event notifications (webhooks) page, where Mailjet’s message events are configured.
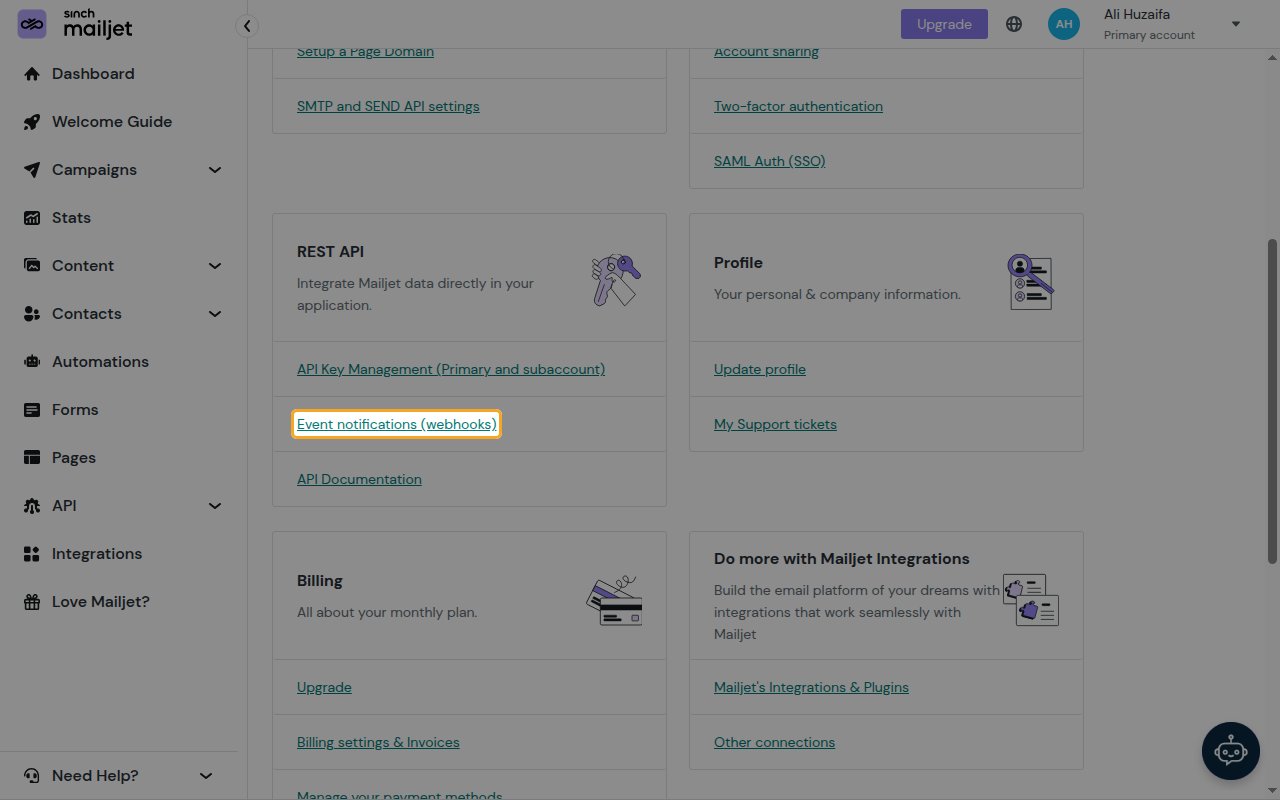
Open Event notifications from Account Information
Sign in to Mailjet, open the account menu at the top right, and click Account settings to open the Account Information page. In the REST API card, click Event notifications (webhooks).
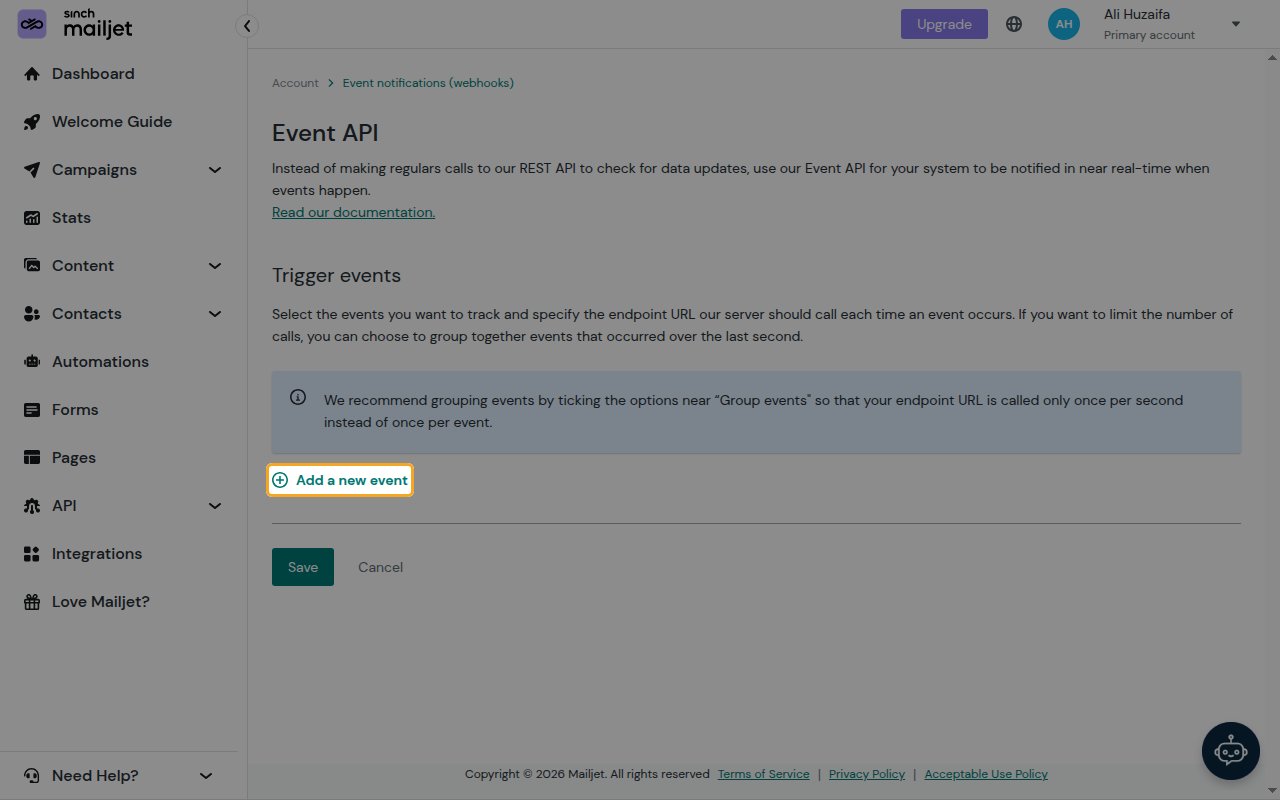
Start a new event
On the Event API page, under Trigger events, click Add a new event. A new event row appears with an Event type selector and an Endpoint URL field.
Configure the webhook
Register the Native Webhook URL for each event type you want to receive. Repeat this for every event — Mailjet stores one endpoint URL per event type.
Select the event and paste the Native Webhook URL
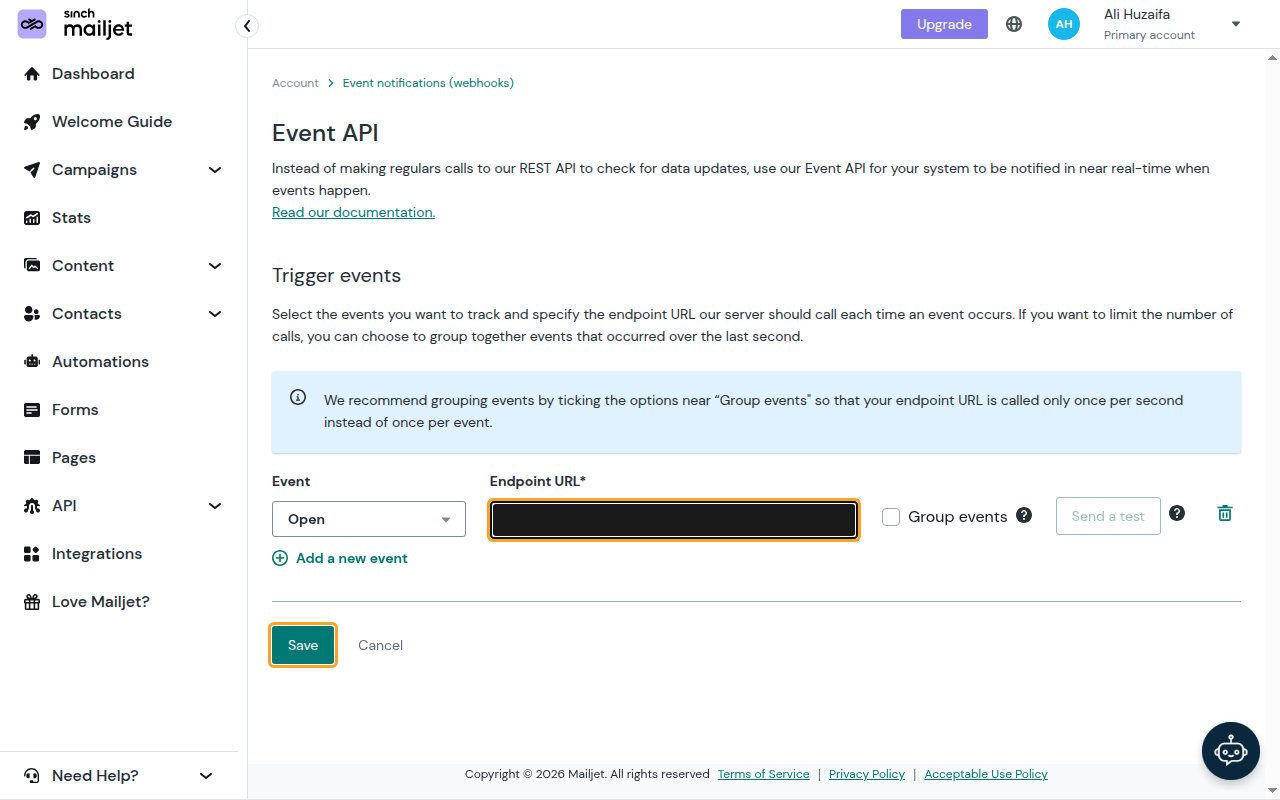
In the new row, choose the event from the Event selector, then paste your Native Webhook URL into the Endpoint URL field.
- Select the event type (for example Sent, Open, Click, Bounce, Blocked, Spam, or Unsub) from the Event selector.
- Paste your Native Webhook URL into the Endpoint URL field.
- Leave Group events unchecked. StackOne processes one event per request; with grouping enabled Mailjet batches events into a single array, which StackOne does not route.
- Click Add a new event again to add another row, and repeat for each event type you want.
Save
Click Save to register the callbacks. Mailjet will begin posting the selected events to your Native Webhook URL.
Available webhook events
The following Mailjet message events can be enabled. Register the Native Webhook URL for each event type you want to receive — Mailjet only posts the event types you have configured a callback for.
Message events
Events related to the delivery and engagement lifecycle of a message.
- Message Sent (
sent) — Fired when a message is accepted and delivered to the recipient’s mail server. - Message Opened (
open) — Fired when a recipient opens a message (requires open tracking). - Link Clicked (
click) — Fired when a recipient clicks a tracked link in a message (requires click tracking). - Message Bounced (
bounce) — Fired when a message bounces (soft or hard) because the recipient server rejected or could not deliver it. - Message Blocked (
blocked) — Fired when a message is blocked before sending, for example when the recipient address is on a suppression list. - Spam Complaint (
spam) — Fired when a recipient marks a message as spam (a feedback-loop complaint). - Unsubscribed (
unsub) — Fired when a recipient unsubscribes via a message’s unsubscribe link.
Delivery format
How Mailjet delivers events to StackOne.
One event per request
Leave Group events unchecked so Mailjet posts a single JSON event object per request. StackOne routes each delivery to the matching event handler by its event field. With Group events enabled, Mailjet batches events into a JSON array, which StackOne does not route — so keep grouping off for StackOne connections.