

Create a Project-Scoped API Key
A key scoped to a single project is created from that project’s own settings. Use this key when you connect Logfire with the Project API Key authentication method — it reads only the project it was created in. Telemetry queries are available only on this Project API Key connection type — searching logs, traces and exceptions requires connecting with this method.
Open Project settings and API keys
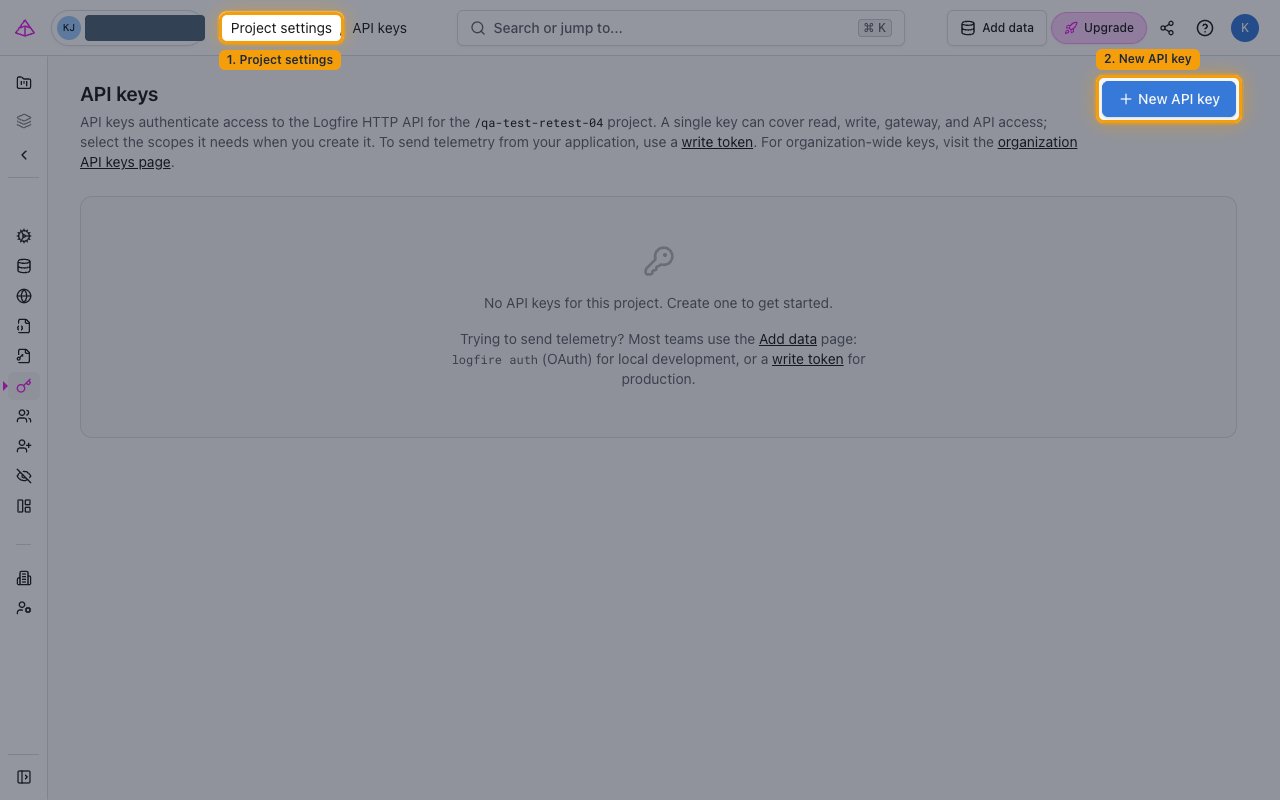
Open the project, then click Project settings in the breadcrumb and select API keys from the project settings sidebar. Click + New API key to open the form.
Configure the project key
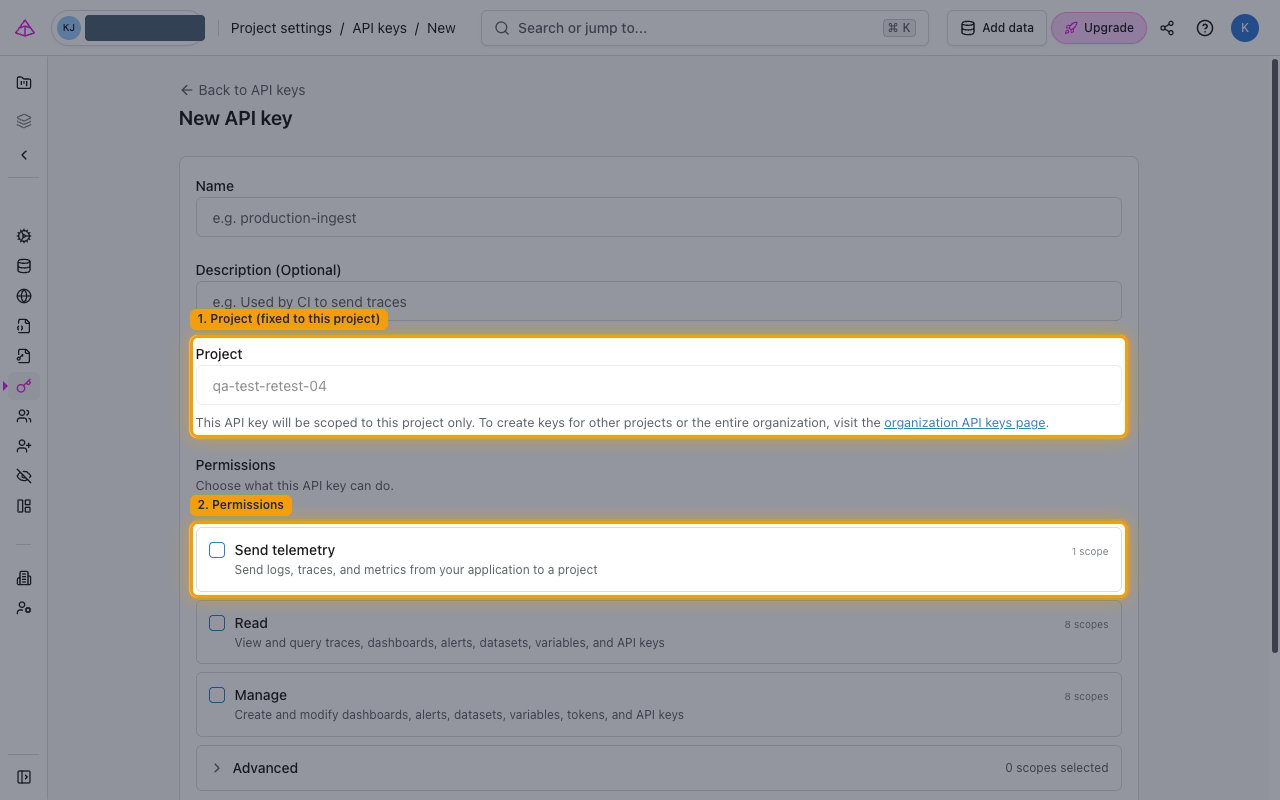
The Project field is fixed to the current project (to create keys for other projects or the whole organization, use the organization API keys page link). Under Permissions, enable the scopes the key needs — Read and Manage — or expand Advanced for individual scopes. Send telemetry (project:write_otlp) is only for applications that ship data into Logfire; no connector action uses it, so leave it off. Set Expiration, click Create API key, and copy the key.
Enter it in StackOne Hub
Paste the key into the API Key field in StackOne Hub, then set the API Region URL for your region. The key itself determines which project this connection reads — there is no project field.
- For querying logs, traces and metrics, enable Read under Permissions, or expand Advanced and select
project:read_otlp. - For variable types, the key needs
project:read_variablesto list and read them, plusproject:write_variablesto create them.
Minimum Scope to Connect
Set the permissions when you create the key. Minimum to connect: Query telemetry (project:read_otlp), which the connection test uses.
- Query telemetry (
project:read_otlp) — required for searching logs, traces, exceptions and services, and for the queryable schema. - Variables management — required for the variable-type actions.
- Project settings, Alerts management, Dashboards management, Write tokens management — add these to also manage projects, alerts, dashboards and write tokens.
- Organization-level resources (notification channels, invitations, organization settings) are not reachable with a project key — connect an Organization API Key for those.
Determine Your API Region URL
Logfire runs in two independent data regions. StackOne Hub asks for the API Region URL — the API base URL that matches the region where your Logfire account was created.
Enter the API Region URL for your region
Check the address bar while signed in to the Logfire console to identify your region, then paste the matching base URL into the API Region URL field in StackOne Hub.
- If the console URL is
logfire-eu.pydantic.dev, you are on the EU region. Enterhttps://api-eu.pydantic.dev - If the console URL is
logfire-us.pydantic.dev, you are on the US region. Enterhttps://api-us.pydantic.dev - Format:
https://{region-host} - Example:
https://api-eu.pydantic.dev
Linking the Account from the Hub
Navigate to the Hub
Fill out the fields
- API Key
- API Region URL
Connect
- Click Connect
- If applicable, the provider will redirect you to a sign-in or authorization page. Complete the provider’s authorization flow.
- Once authorization is successful, you will see a confirmation popup
If the account linking is successful, you will see the newly linked account in your Accounts page.