

Prerequisites
The connector should already be set up, with a Connector Profile and a Linked Account. See Getting Started on the Lever connector page.Copy the Native Webhook URL from StackOne
StackOne generates one webhook URL per connected Lever account. Every event you enable in Lever points at this same URL, and StackOne routes each event to the right handler.
Copy the URL from the linked account
In StackOne Hub, open the linked Lever account and copy the Native Webhook URL. The URL already contains the token that identifies your account, so treat it as a secret and do not shorten or edit it.
Open the webhook settings in Lever
Webhooks are configured once per Lever environment, under the account’s integration settings.
Sign in to Lever
Sign in to Lever as a Super Admin. Webhook settings are hidden for every other role.
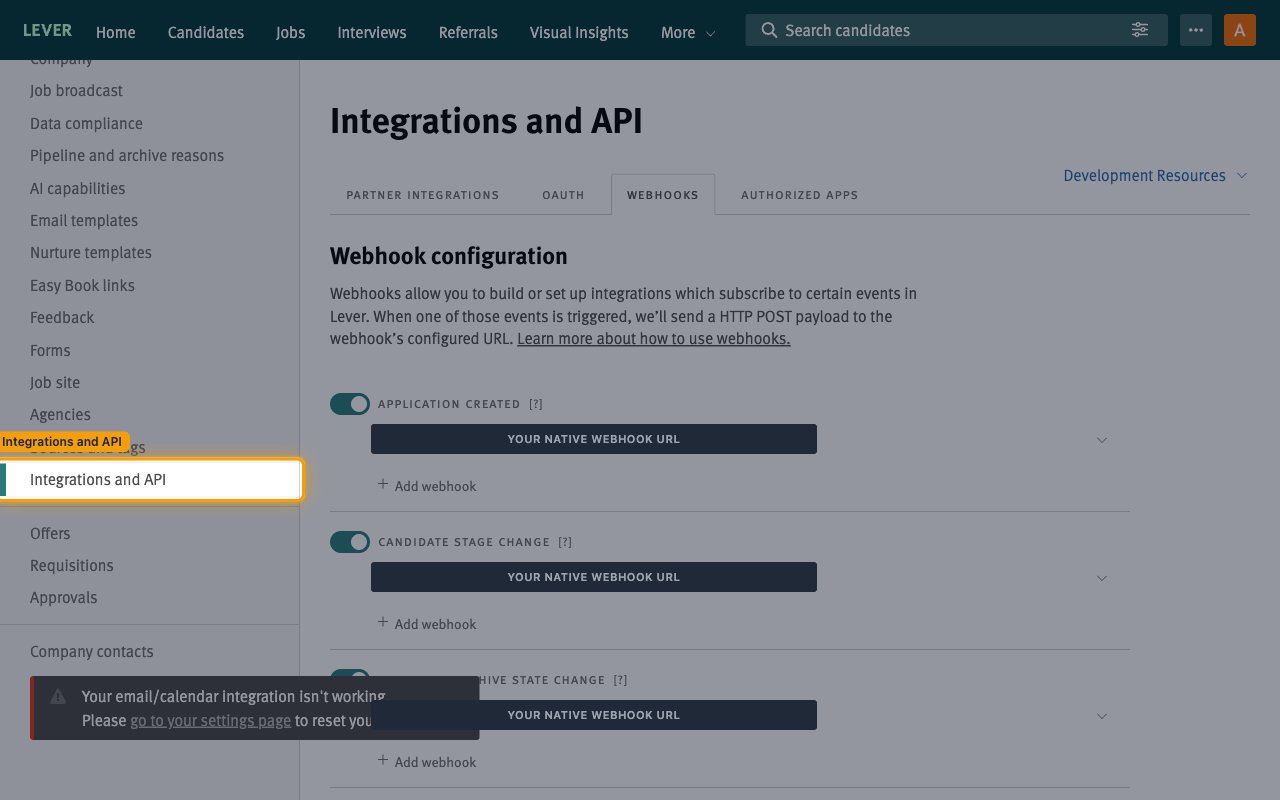
Open Integrations and API
Open Settings, then select Integrations and API in the left sidebar.
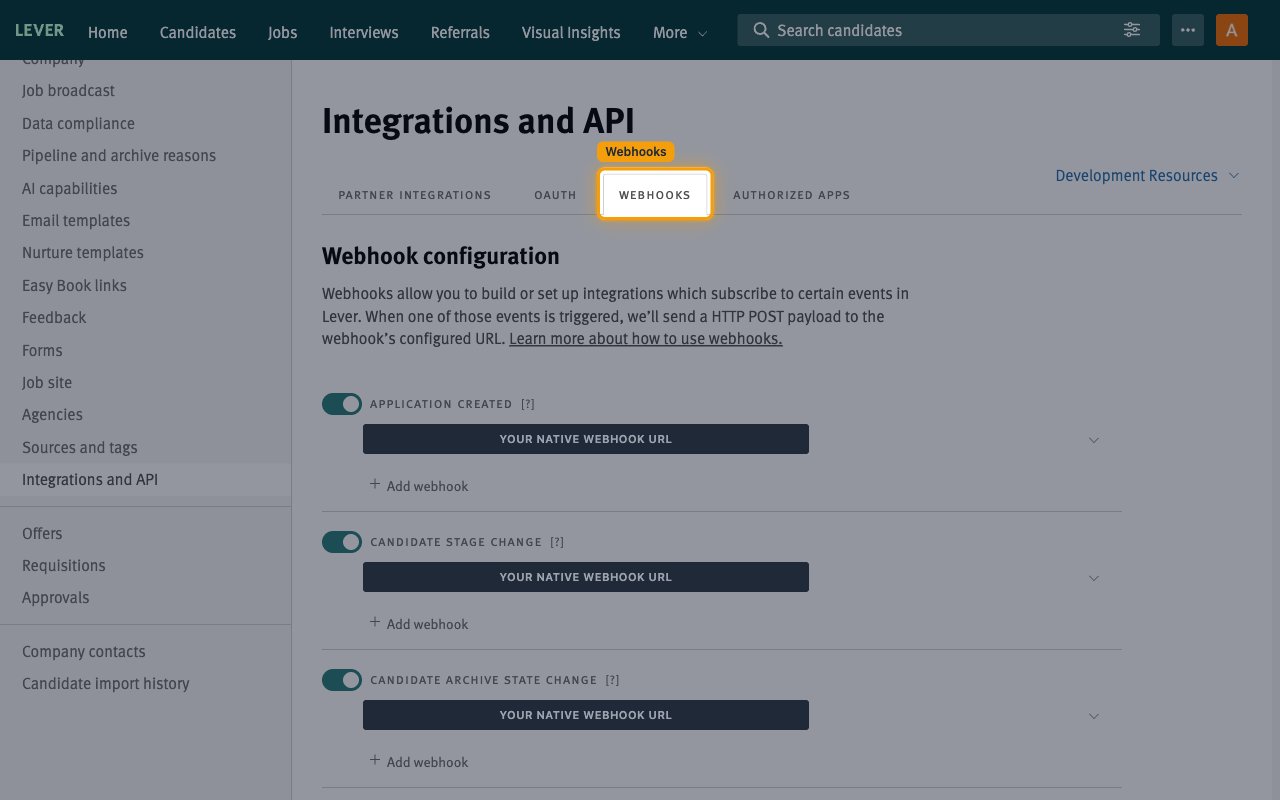
Select the Webhooks tab
Select the Webhooks tab. The Webhook configuration section lists every event Lever can send.
Add the URL to each event you want
Lever keeps a separate URL list for every event. Repeat these steps for each event in the catalog below — enabling an event without adding the URL to it delivers nothing.
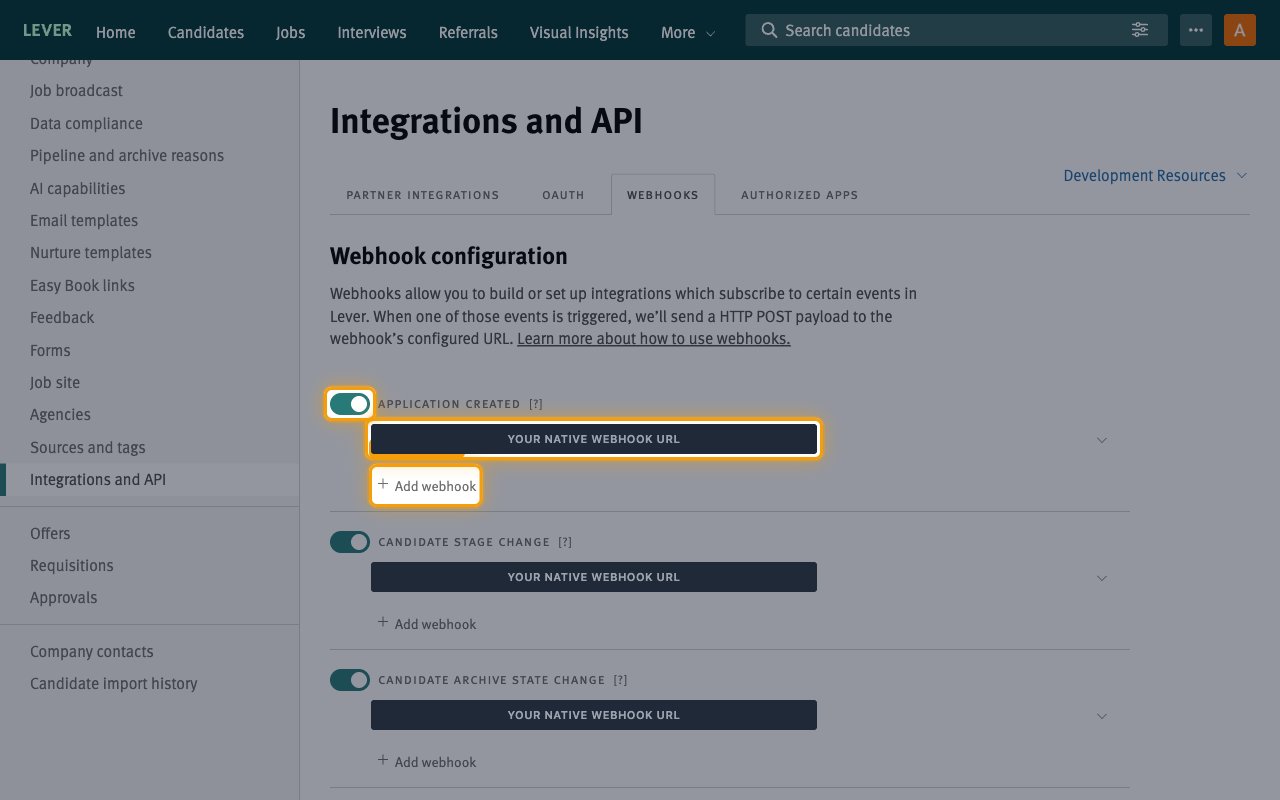
Switch on the event and add the URL
Switch on the toggle beside the event, for example Application created. Select Add webhook, then paste the Native Webhook URL into the field. Lever shows the scheme prefix separately, so paste the rest of the URL after it.
- Repeat for every event you want delivered — the URL is stored per event, not per account.
- A webhook StackOne created through the API shows its URL as read-only; Lever does not allow editing those.
Choose which candidate origins trigger the event
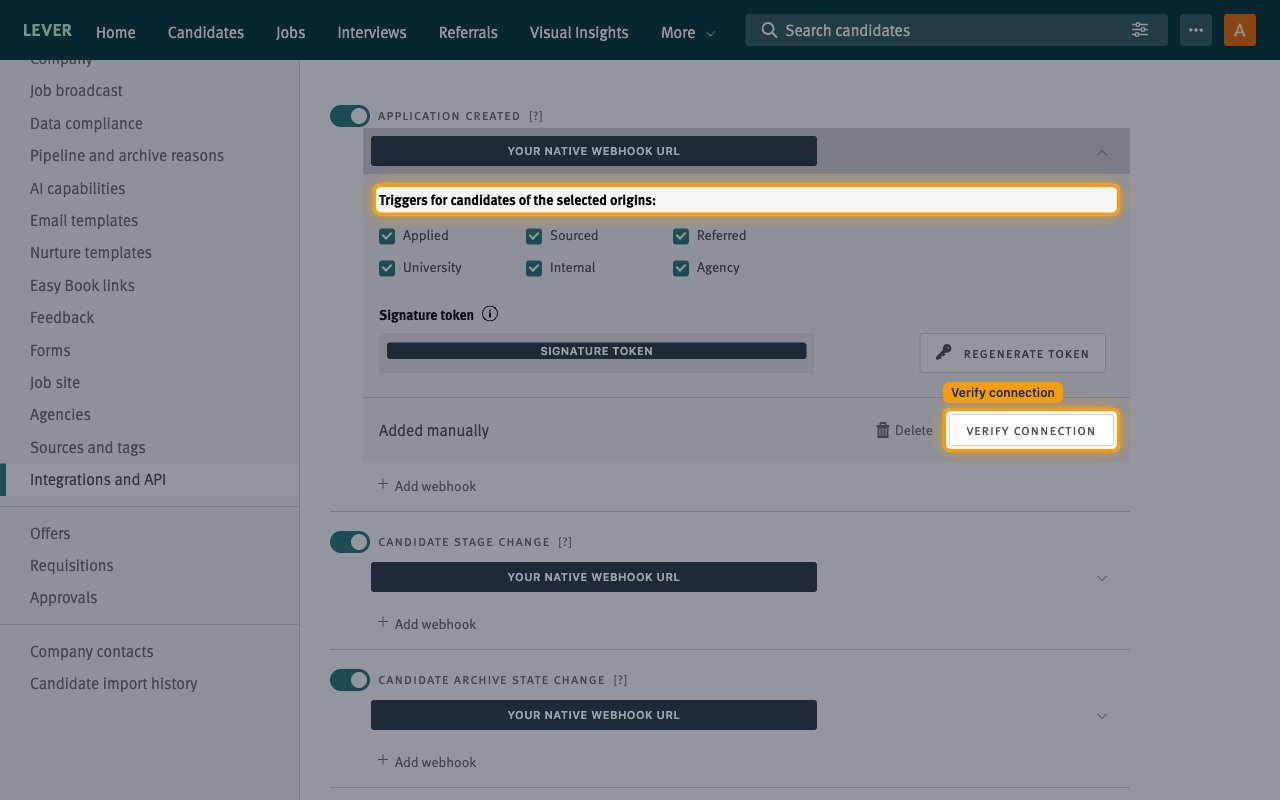
Expand the event to show Triggers for candidates of the selected origins: and tick the origins you want. Applied, Sourced, Referred, University, Internal and Agency are all selected by default. This applies to Application created, Candidate stage change, Candidate archive state change and Candidate hired only; the other events always fire.
Verify the connection
Select Verify connection. Lever sends a sample request and expects a response within one second. If it reports a failure, select it again — a slow first response is the usual cause, and the second attempt normally succeeds.
Note the signature token
Each event has its own Signature token, shown when the event is expanded. Lever signs every request with it so the receiver can confirm the payload came from Lever. Regenerate Token issues a new one and invalidates the old.
Available webhook events
The following Lever events can be enabled. Only events you switch on and give the URL to are delivered — Lever sends nothing for the rest.
Enable candidate and application events
Events covering applications and the candidate lifecycle.
- Application created (
applicationCreated) — Fired when a candidate application is created. - Candidate hired (
candidateHired) — Fired when a candidate is marked as hired. - Candidate stage change (
candidateStageChange) — Fired when a candidate moves between stages; carries the stage moved from and to. - Candidate archive state change (
candidateArchiveChange) — Fired when a candidate is archived or unarchived; carries the previous and updated archive state. - Candidate deleted (
candidateDeleted) — Fired when a candidate is deleted; carries the user who deleted them.
Enable interview events
Events covering interview scheduling. Lever marks these Beta.
- Interview created (
interviewCreated) — Fired when an interview is created. - Interview updated (
interviewUpdated) — Fired when an interview is updated. - Interview deleted (
interviewDeleted) — Fired when an interview is deleted.
Enable contact events
Events covering contact records.
- Contact created (
contactCreated) — Fired when a contact is created. - Contact updated (
contactUpdated) — Fired when a contact is updated.