

Generate an API token
Create a new API token for authenticating with the Jira REST API.
Open the API tokens page
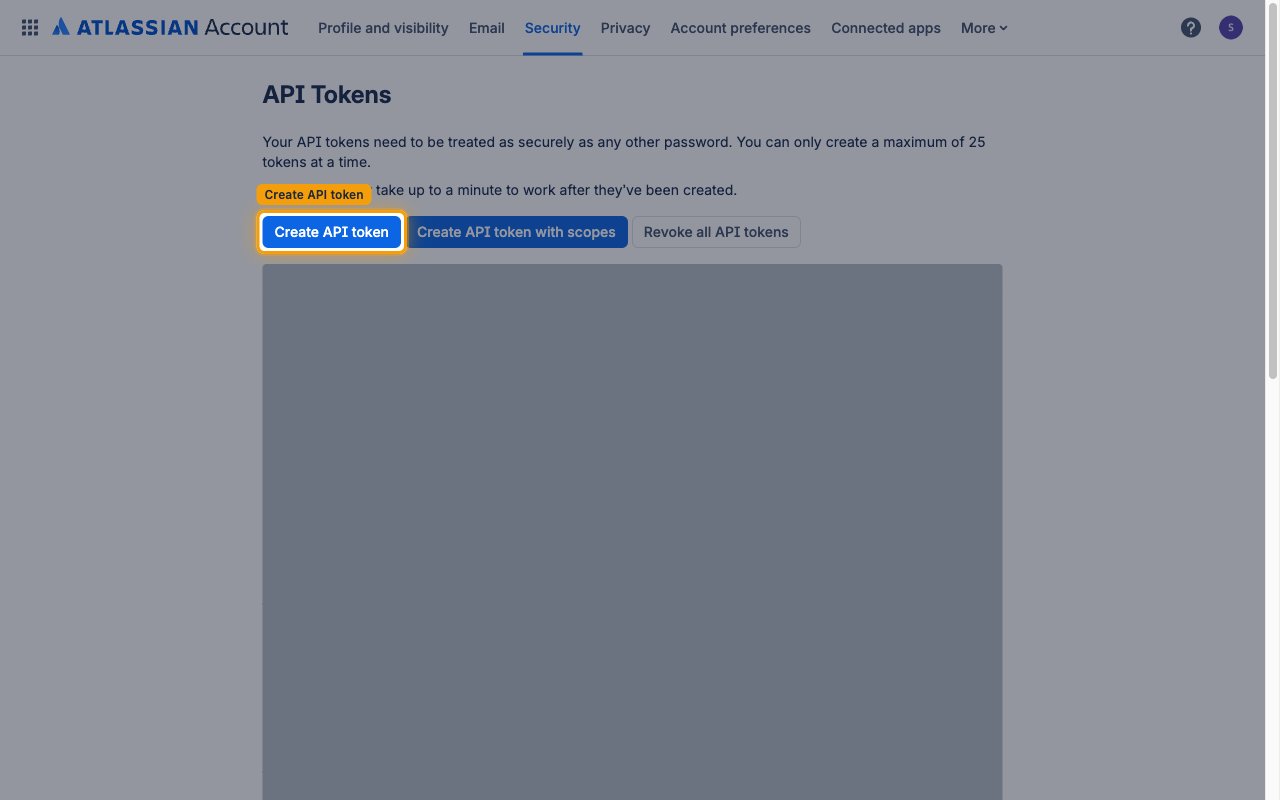
Go to the Atlassian API tokens page and click Create API token.
- Atlassian may ask you to verify your identity with a code sent to your email before showing this page.
Create the token
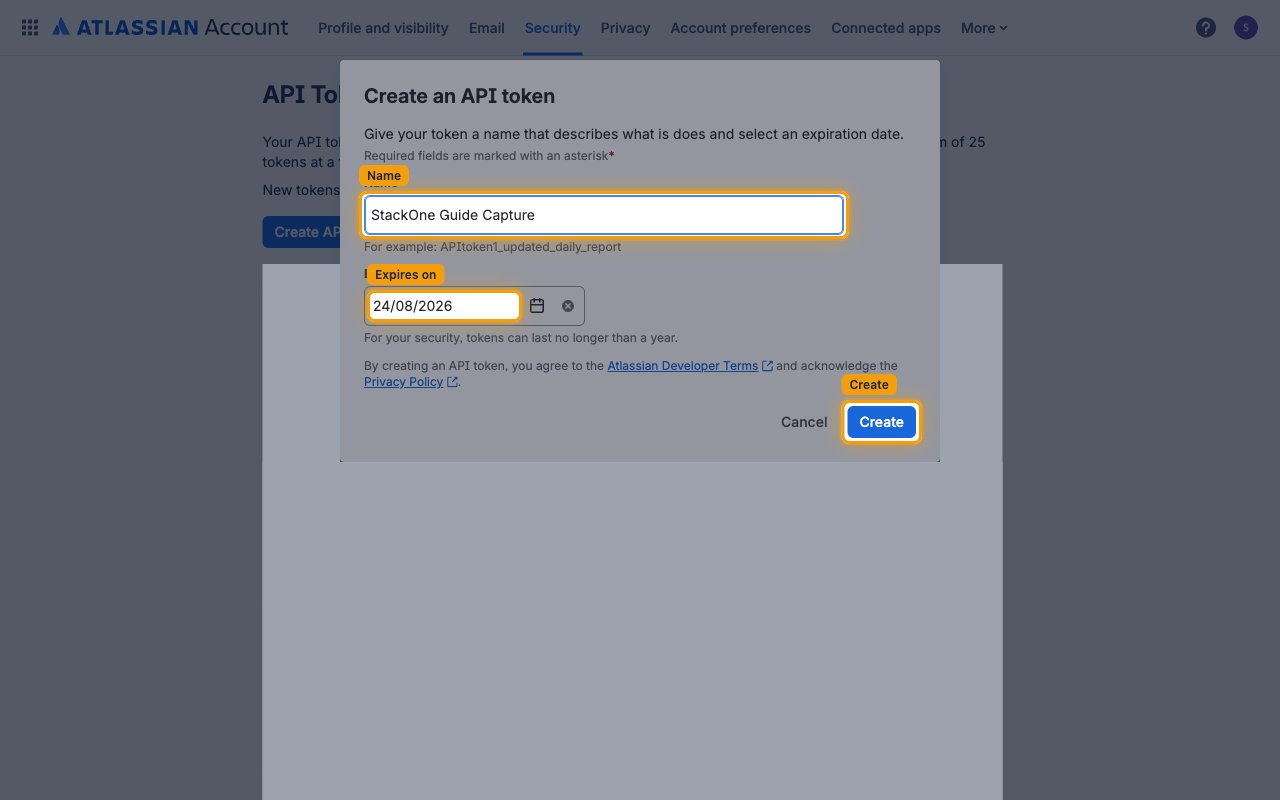
Fill in the Create an API token dialog.
- Enter a Name that describes the integration (e.g., “StackOne JSM Integration”).
- Set Expires on — for your security, tokens can last no longer than a year.
- Click Create.
Copy the token
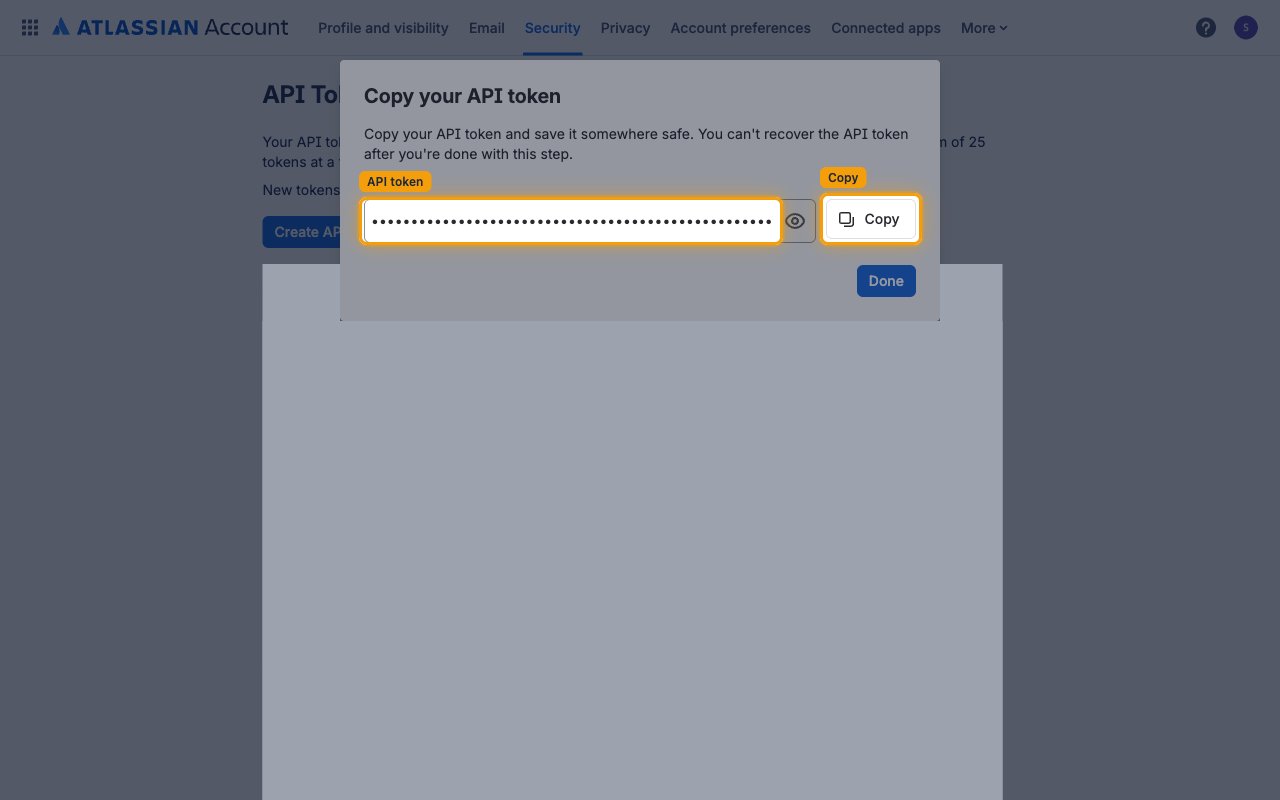
In the Copy your API token dialog, click Copy, save the value somewhere safe, then click Done.
- The token is shown once and cannot be retrieved after you close this dialog.
- New tokens may take up to a minute to work after they have been created.
- Paste the token into the API Token field in StackOne Hub.
Find your email and domain
Along with the token, StackOne needs the email and domain of the Jira account the token belongs to.
Find your email
Email is the address you use to sign in to Jira. You can check it in your Atlassian profile email settings. Enter it in the Email field in StackOne Hub.
Find your domain
Domain is the part of your Jira URL before .atlassian.net. Check your browser address bar when signed in to Jira Service Management and enter just that part in the Domain field in StackOne Hub.
- Format:
https://{domain}.atlassian.net - Example: if your URL is
https://acme.atlassian.net, your Domain isacme
Linking the Account from the Hub
Navigate to the Hub
Fill out the fields
- API Token
- Domain
Connect
- Click Connect
- If applicable, the provider will redirect you to a sign-in or authorization page. Complete the provider’s authorization flow.
- Once authorization is successful, you will see a confirmation popup
If the account linking is successful, you will see the newly linked account in your Accounts page.
Next Steps
Webhooks setup
Configure receiving Events for Jira Service Management into StackOne.