

Register a service in Hub
Sign in to your YouTrack instance’s Hub, then register a service for StackOne.
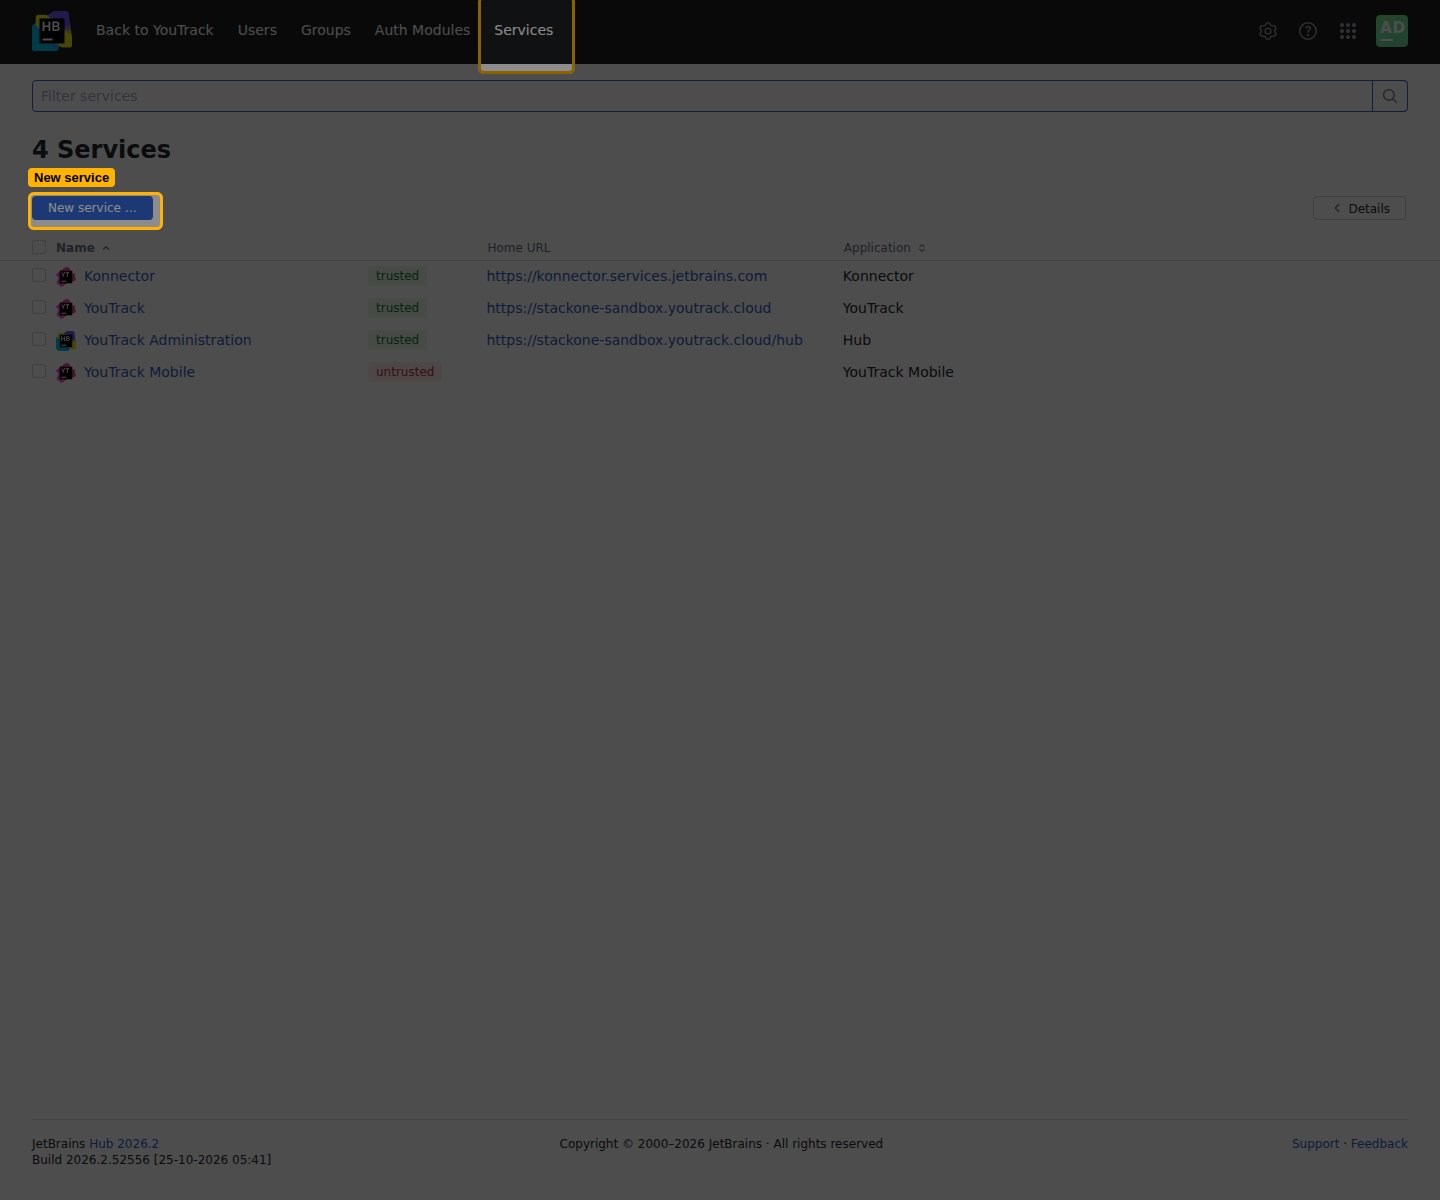
Open Services
Go to your Hub URL (<your YouTrack URL>/hub), then click Services in the top navigation bar.
Create the service
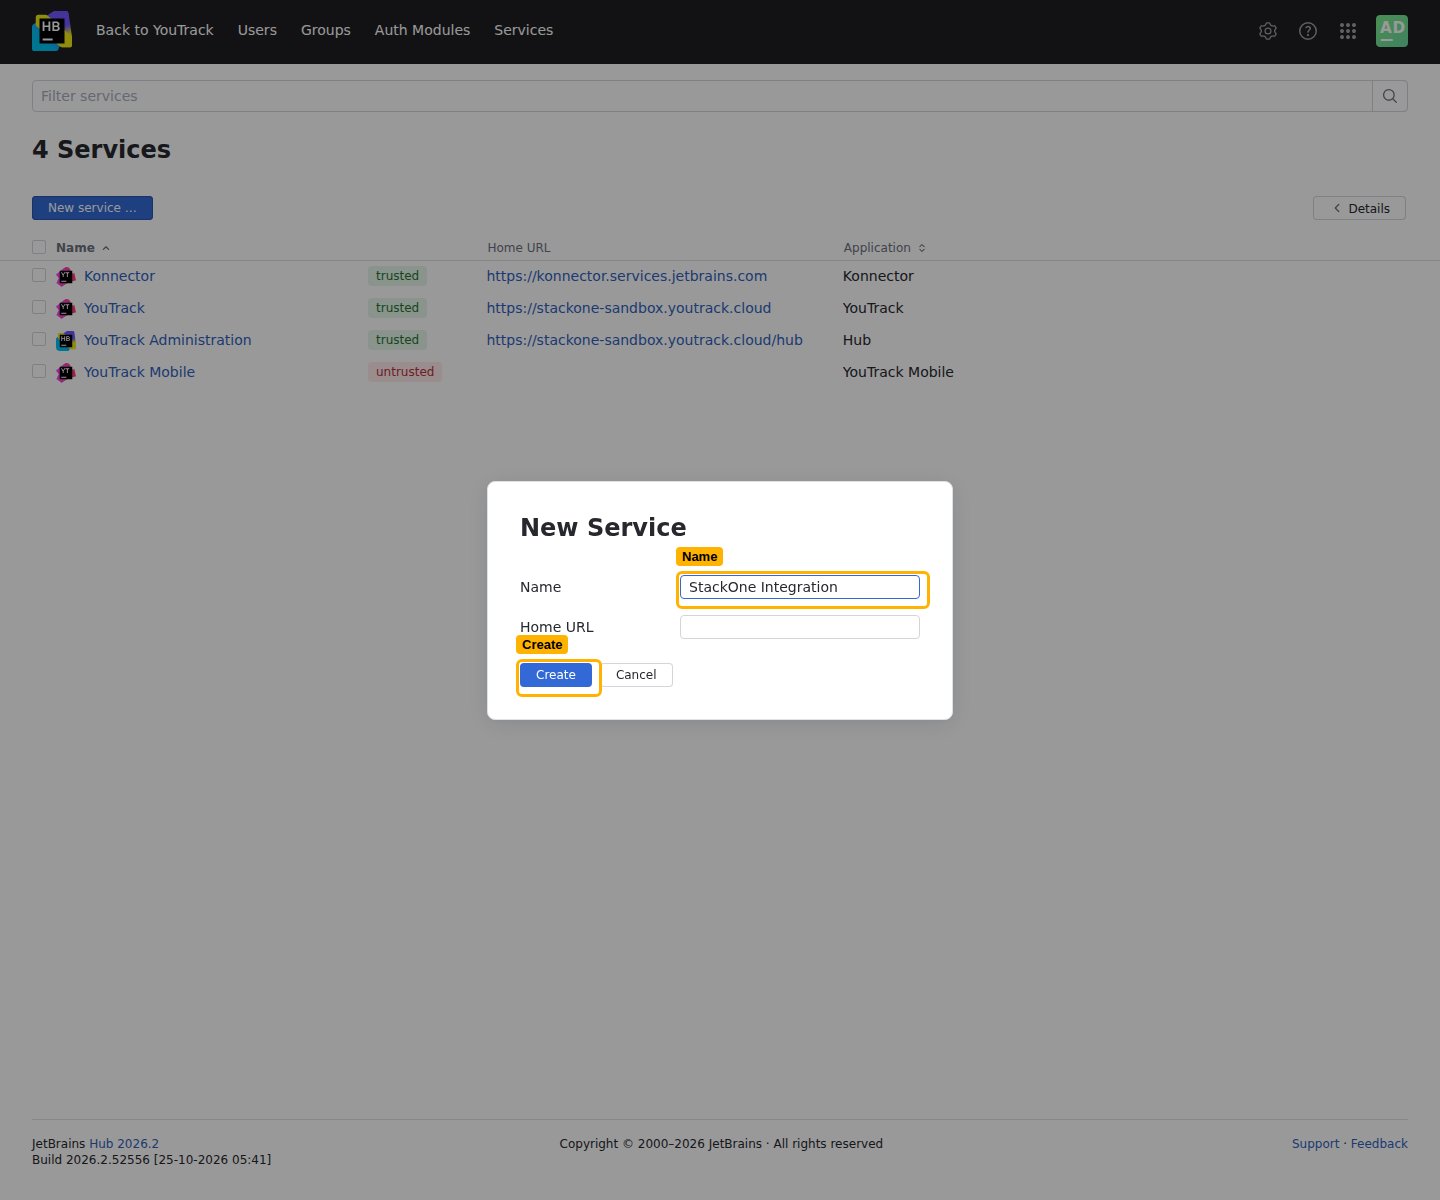
Click New service … and fill in the New Service dialog.
- Name:
StackOne Integration - Click Create.
Enable the Authorization Code flow
Creating the service opens its Authentication tab, where the OAuth flow and redirect
URI are configured.
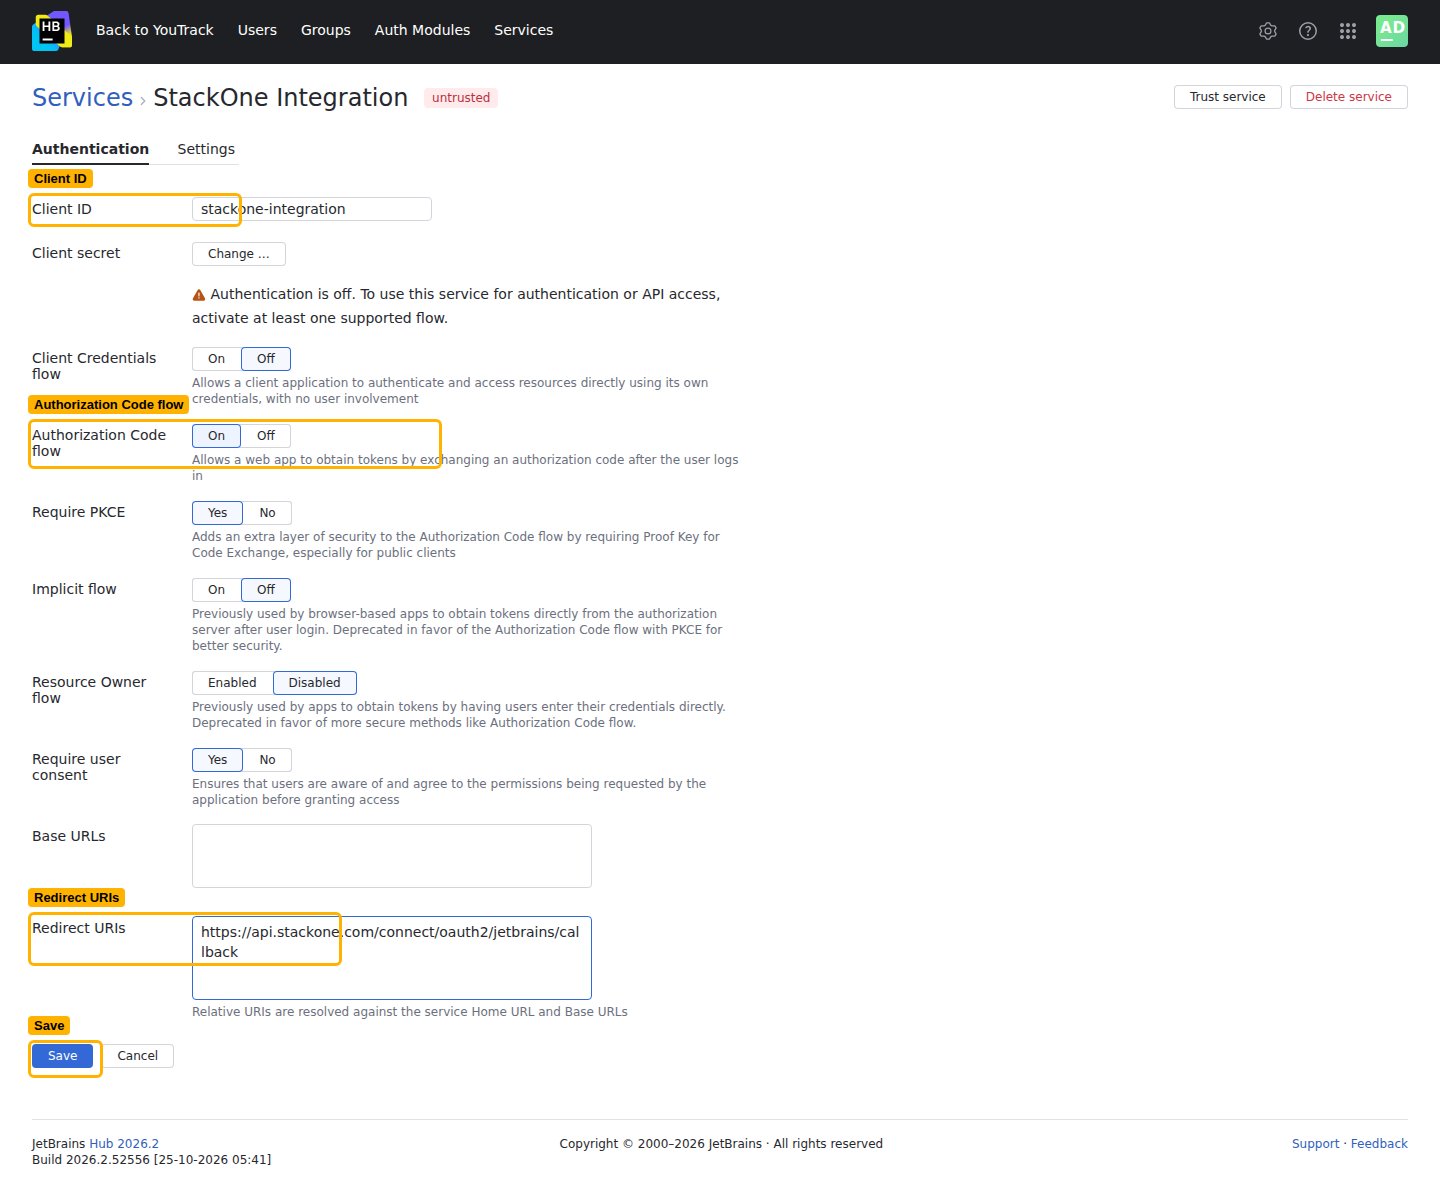
Turn on the Authorization Code flow
Set Authorization Code flow to On.
- A warning reads Authentication is off. To use this service for authentication or API access, activate at least one supported flow. until a flow is enabled.
- Set Require PKCE to Off — StackOne’s authorization-code flow does not send a PKCE code challenge, and Hub rejects the exchange with a
pkce_is_requirederror if this stays on.
Set the redirect URI
In Redirect URIs, enter the Callback URL from your Connector Profile.
- Click Save.
Copy the credentials
The service’s Client ID and Client secret are the values StackOne needs.
Copy the Client ID
Copy the Client ID value shown on the Authentication tab across as the Client ID.
Generate and copy the Client secret
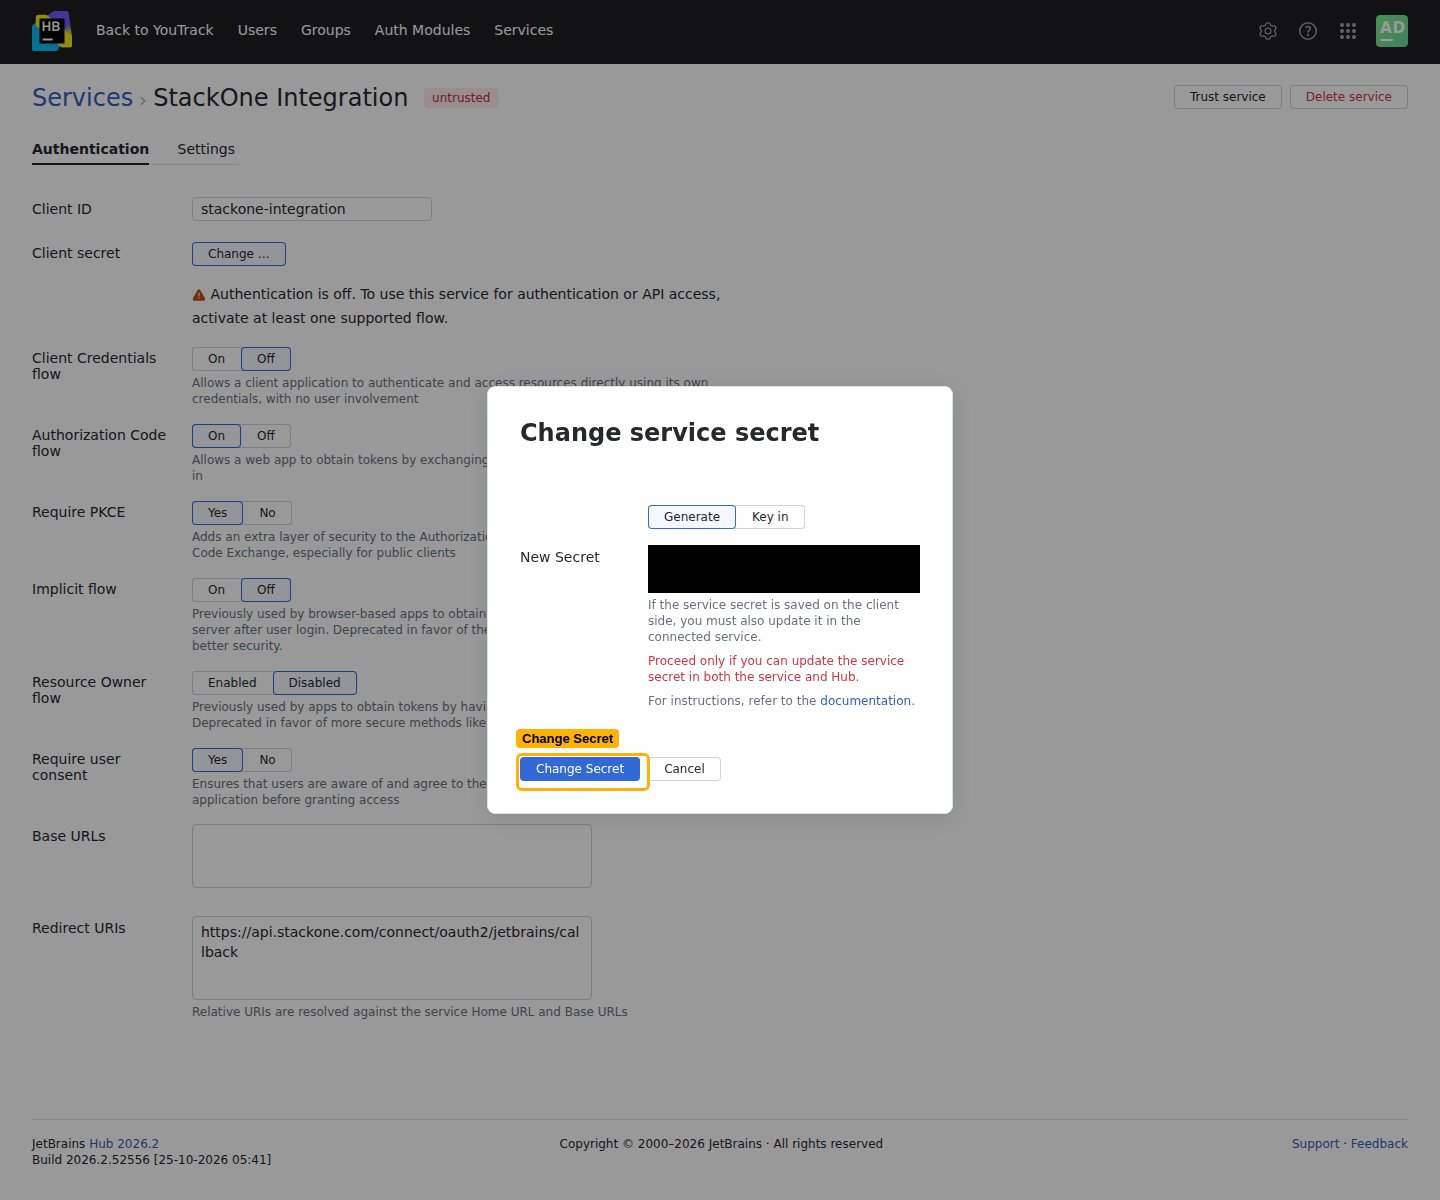
Click Change … next to Client secret, then Generate a new value.
- Click Change Secret to confirm and reveal the new secret.
- Copy the New Secret value across as the Client Secret before closing the dialog.
- The secret is only shown once and cannot be retrieved after you close the dialog.
Find your YouTrack base URL
Your base URL identifies the YouTrack instance this Hub service belongs to — the same instance the Client ID and Client secret above were issued on. Copy the YouTrack Base URL across.
- Check your browser address bar when signed in to YouTrack.
- New cloud — if your URL is
https://acme.youtrack.cloud/issues, your base URL ishttps://acme.youtrack.cloud - Legacy cloud — if your URL is
https://acme.myjetbrains.com/youtrack/issues, your base URL ishttps://acme.myjetbrains.com/youtrack - Self-hosted — use your server URL, for example
https://youtrack.example.com - Enter the base URL without a trailing
/api— StackOne appends it automatically. - Format:
https://{your-org}.youtrack.cloud - Example:
https://acme.youtrack.cloud
Create the StackOne Connector Profile
Create a Connector Profile
Link an Account