

Creating an IPGeolocation.io account
IPGeolocation.io issues an API key as soon as you create an account, so there is no application or approval step. Skip this section if you already have an account.
1
Create your account
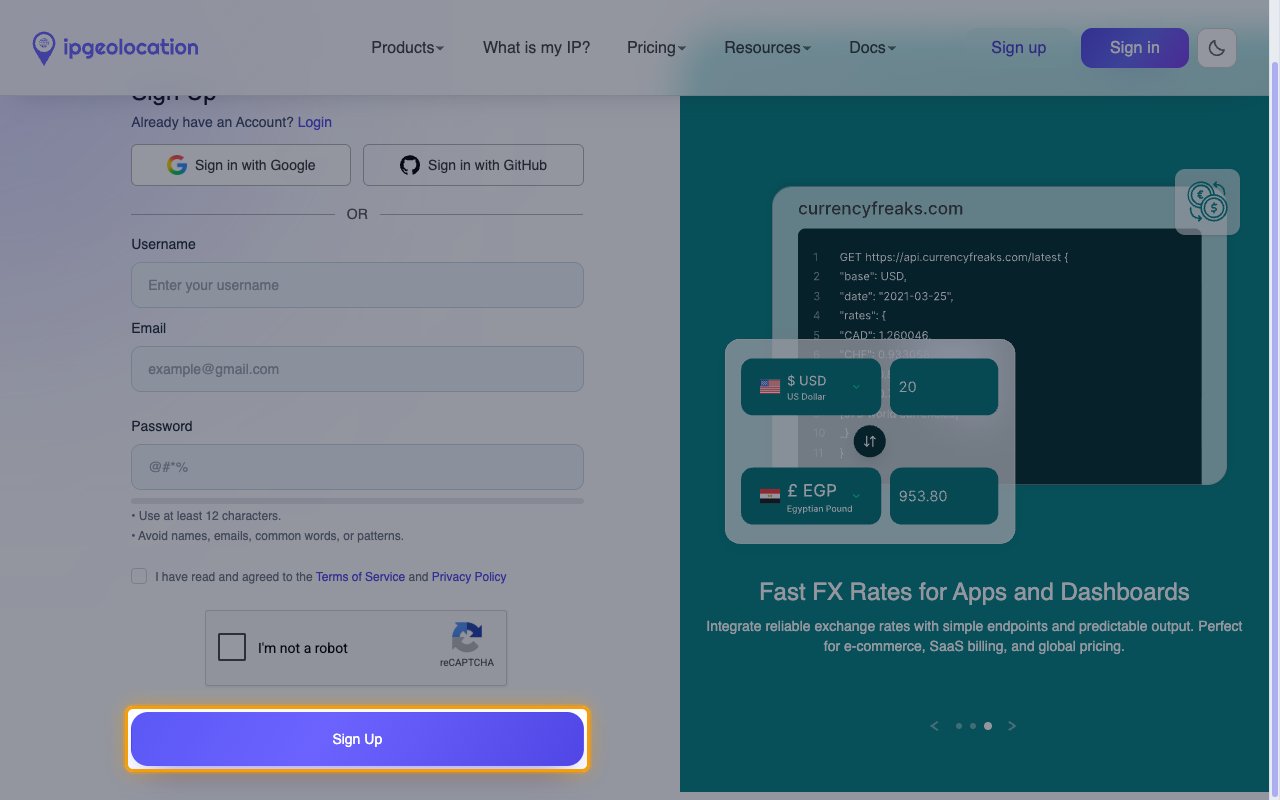
Go to the IPGeolocation.io sign-up page and complete the form.
- Fill in Username, Email, and Password.
- The password must use at least 12 characters.
- Select the I have read and agreed to the Terms of Service and Privacy Policy checkbox.
- Complete the I’m not a robot check, then click Sign Up.
- You can register with Sign in with Google or Sign in with GitHub instead of choosing a password.
Find your API key
Your API key authenticates every request. It is created together with your account and stays available on the Dashboard, so it can be copied again at any time.
1
Sign in to IPGeolocation.io
Sign in to your IPGeolocation.io account.
- The Dashboard opens by default. If you navigate away, click Dashboard in the left sidebar.
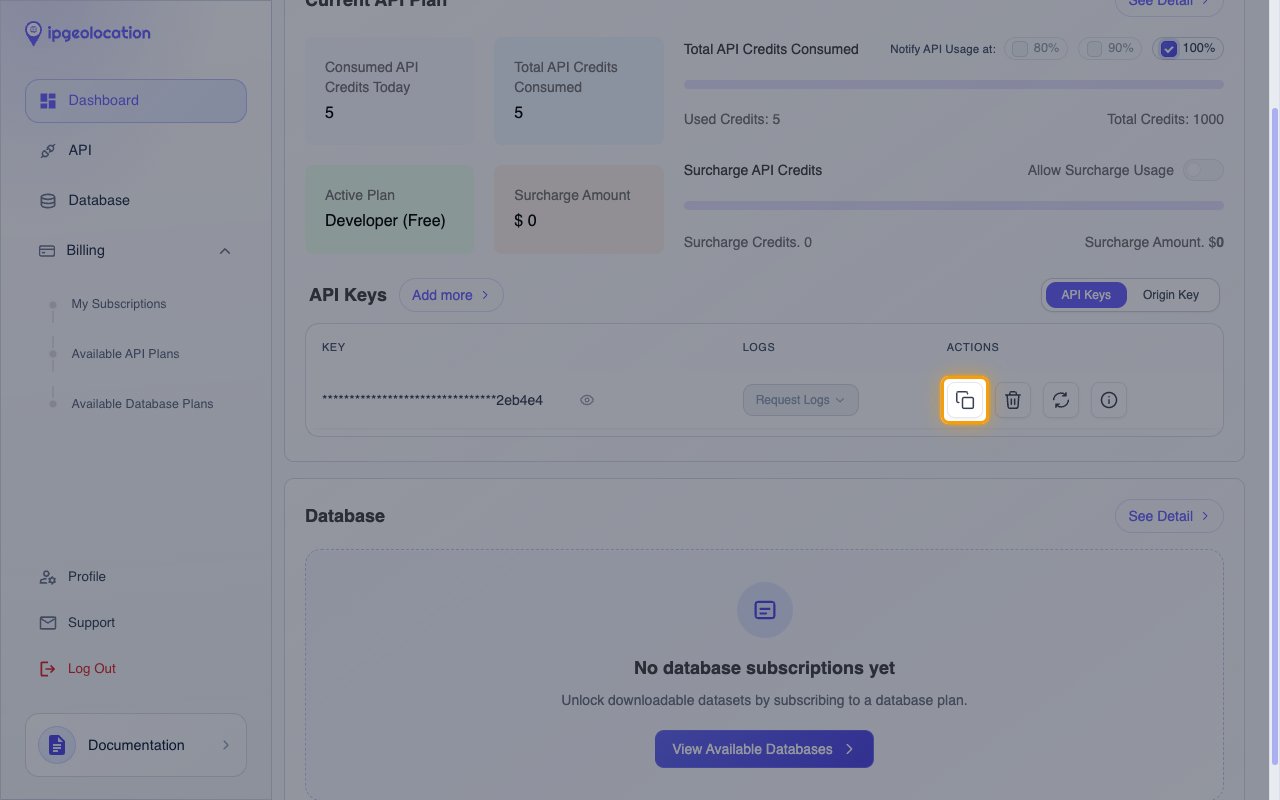
- Scroll to the API Keys panel, below Current API Plan.
2
Copy your API key
In the API Keys panel, click Copy API key in the Actions column.
- The Key column shows the key masked, so use Copy API key to copy the full value.
- Paste it into the API Key field in StackOne Hub.
- The Developer (Free) plan includes a single API key. Add more requires a paid plan.
- IPGeolocation.io sends the key as a URL query parameter, so treat it as a secret and avoid logging full request URLs. Click Reset API key to rotate it if it is ever exposed.
Linking the Account from the Hub
1
Navigate to the Hub
Use one of the three Linking Account Methods to access the Hub.
2
Fill out the fields
Fill out the following fields using details from your provider:
- API Key
3
Connect
- Click Connect
- If applicable, the provider will redirect you to a sign-in or authorization page. Complete the provider’s authorization flow.
- Once authorization is successful, you will see a confirmation popup
If the account linking is successful, you will see the newly linked account in your Accounts page.