

Create a User Access Token
Hugging Face authenticates API calls with a User Access Token generated from your account settings.
Sign in to Hugging Face
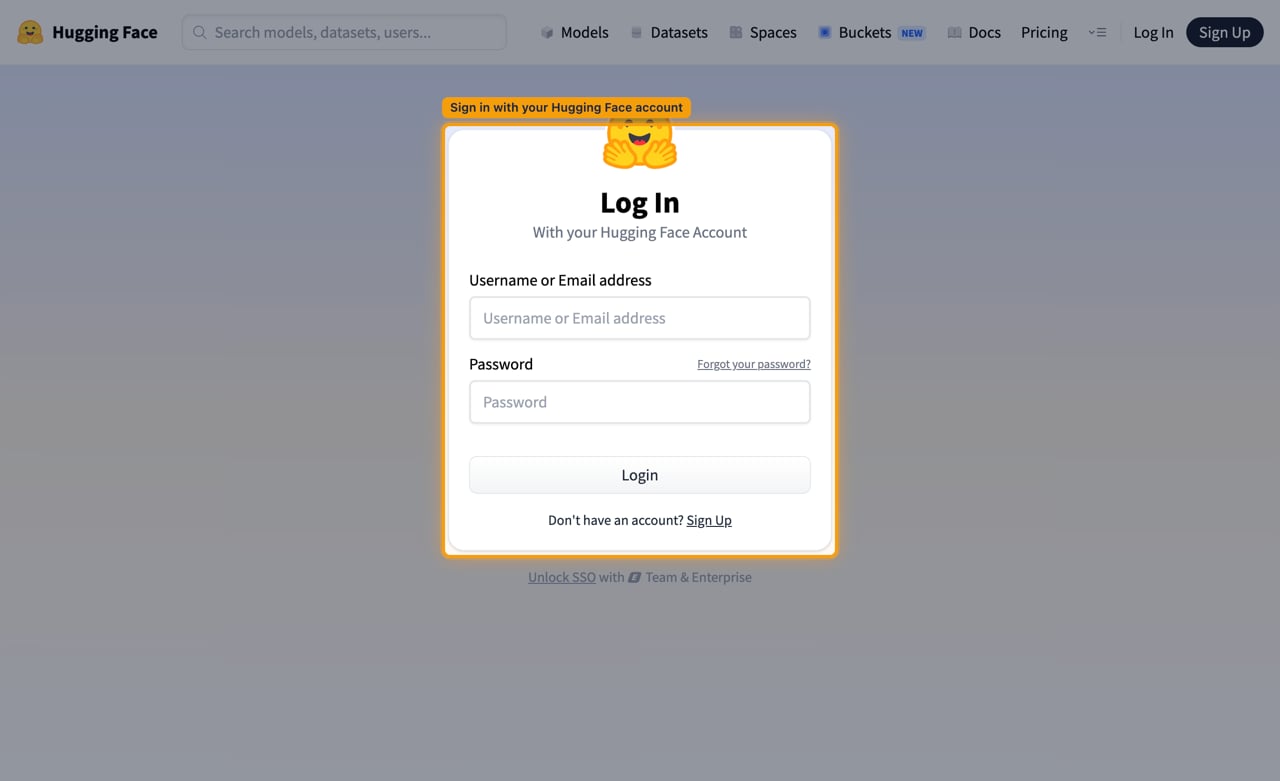
Sign in on the Hugging Face log-in page with your Username or Email address and Password, then click Login.
Open Access Tokens
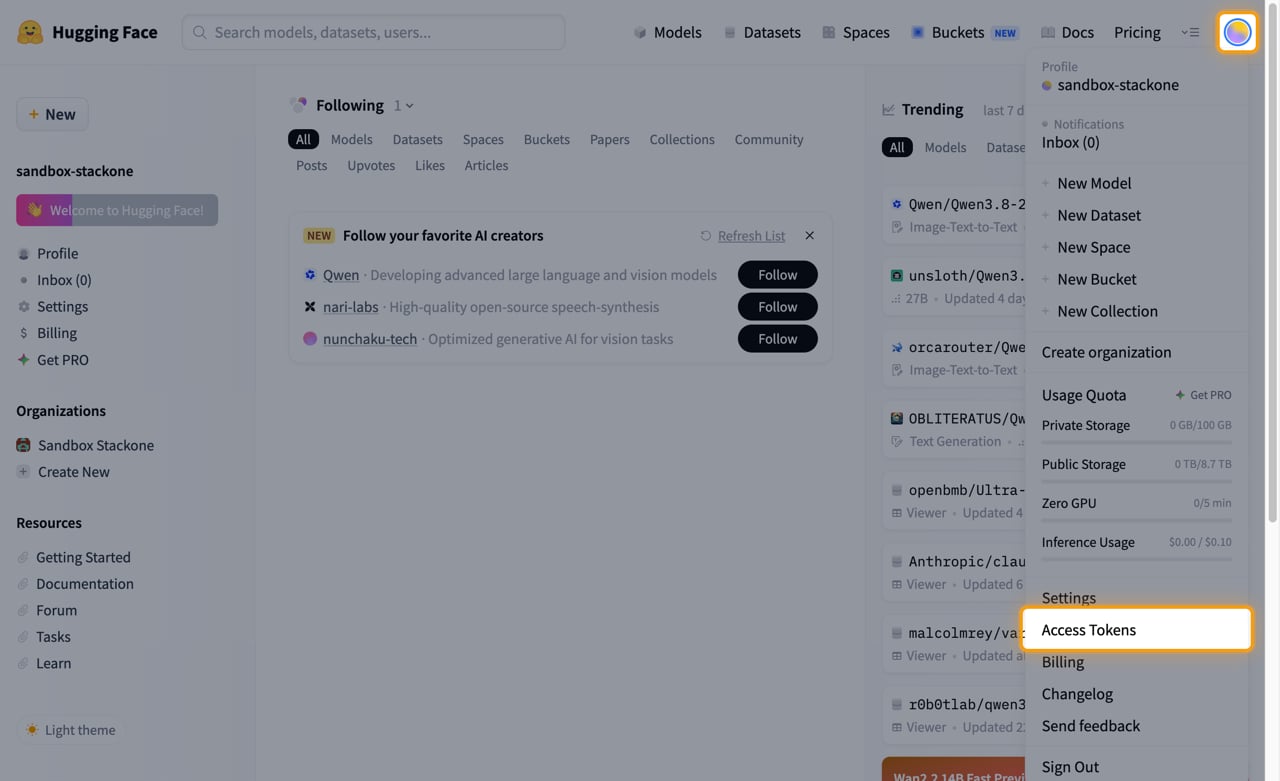
Click your avatar in the top right and choose Access Tokens — or go straight to the Access Tokens settings page.
Open the new token form
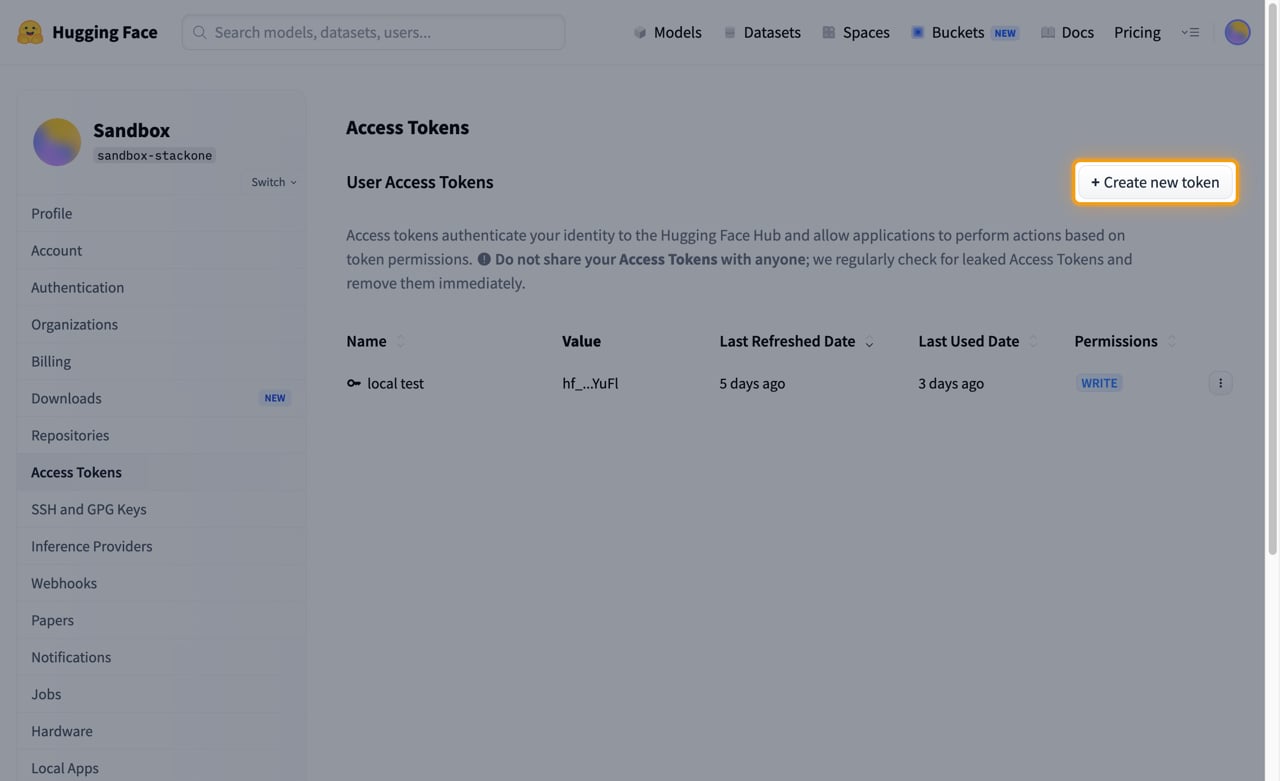
On the Access Tokens page, under User Access Tokens, click + Create new token.
Choose the token type and name it
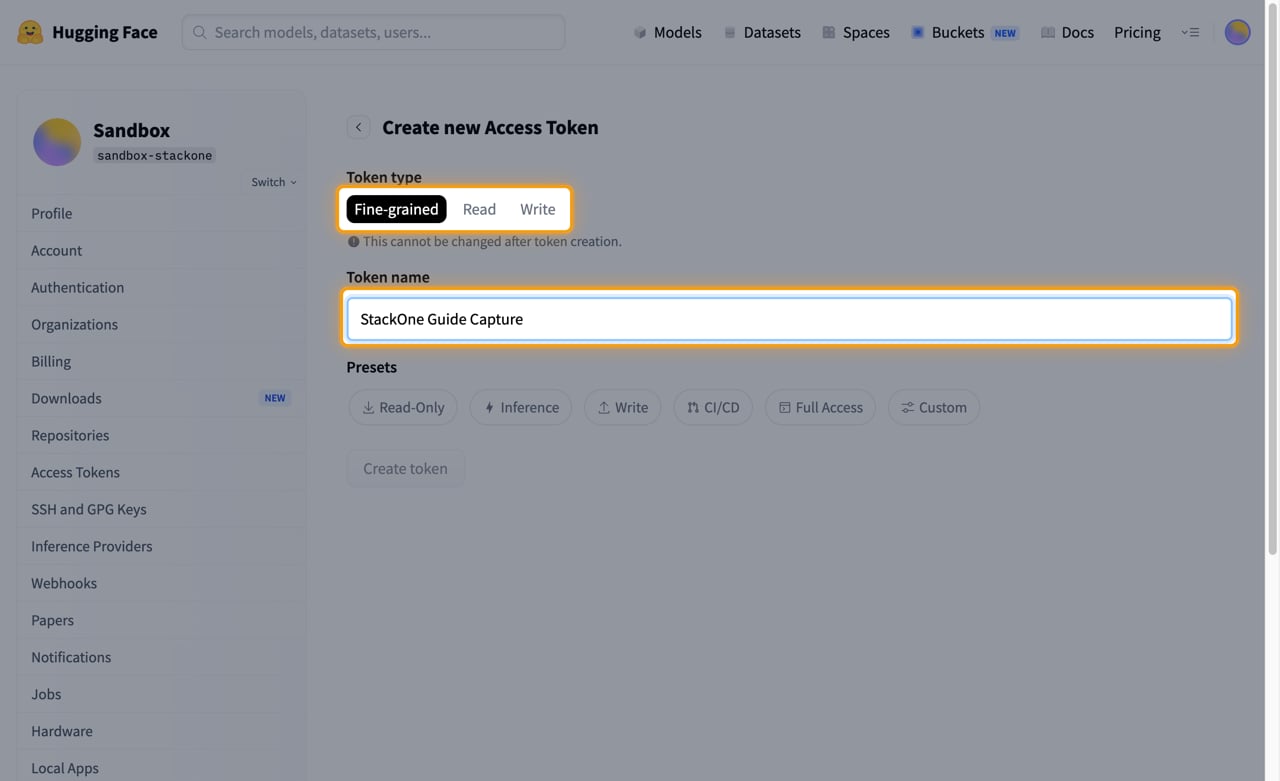
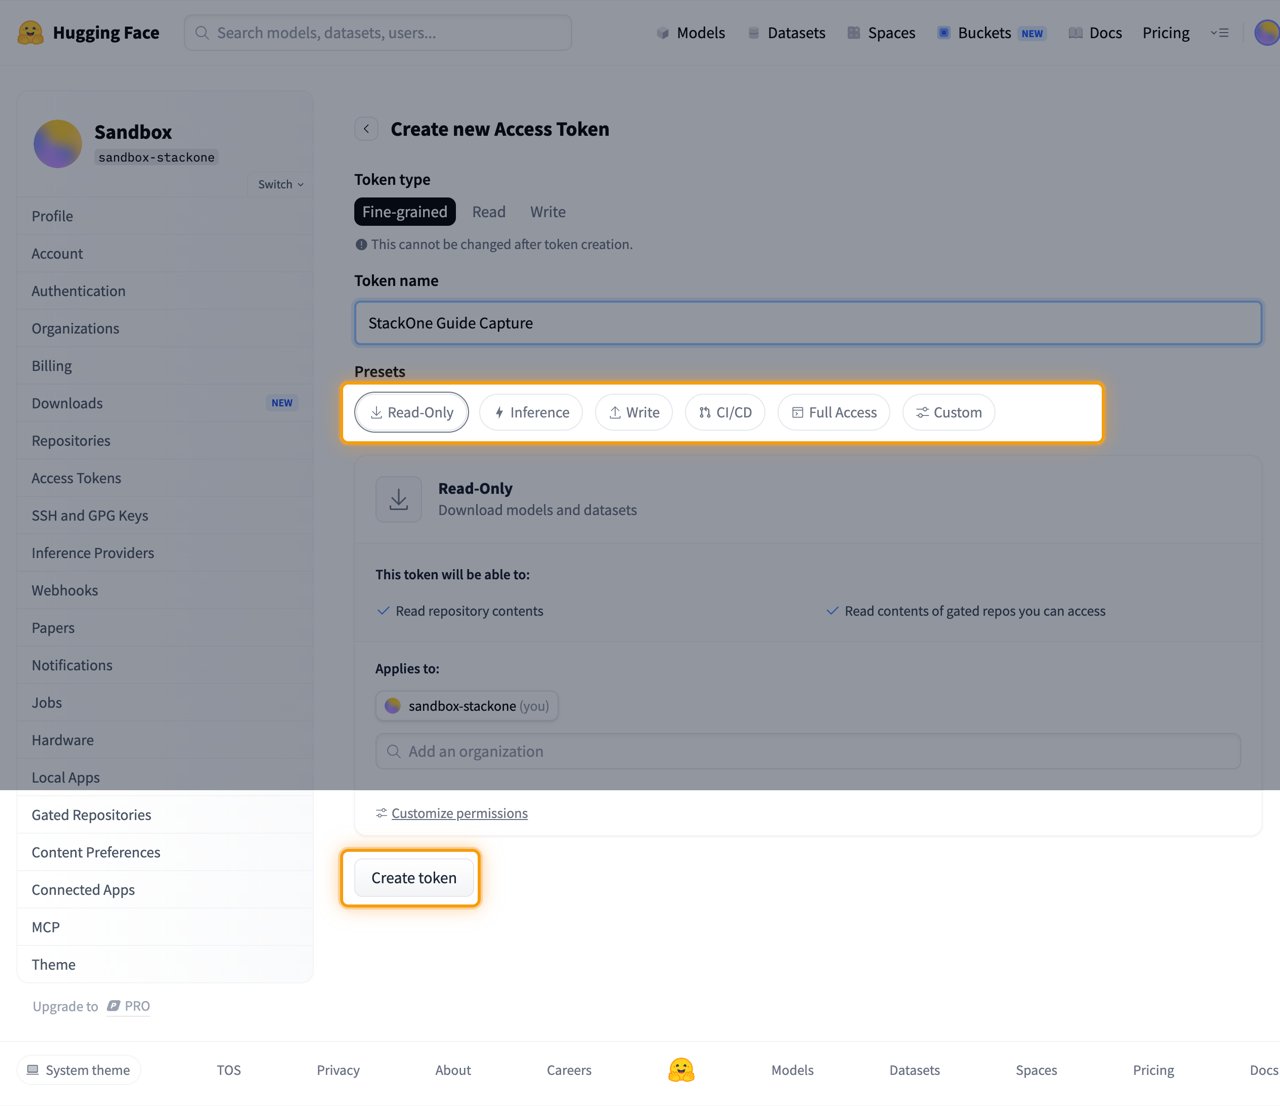
On Create new Access Token, pick a Token type and fill in Token name. Hugging Face warns that This cannot be changed after token creation.
- Fine-grained — recommended. Tick only the permissions you need and scope them to selected repositories or organizations.
- Read — read access to every public and private repository you can already read.
- Write — read plus write access to every repository you can write to.
Pick a preset or customize permissions
Under Presets, choose the closest starting point, then click Customize permissions to adjust it. Create token stays disabled until a preset is chosen.
- Read-Only — Download models and datasets.
- Inference, Write, CI/CD, Full Access and Custom are the other presets.
- Under Applies to:, your own namespace is included; use Add an organization to extend the token to an organization.
Create the token and copy it
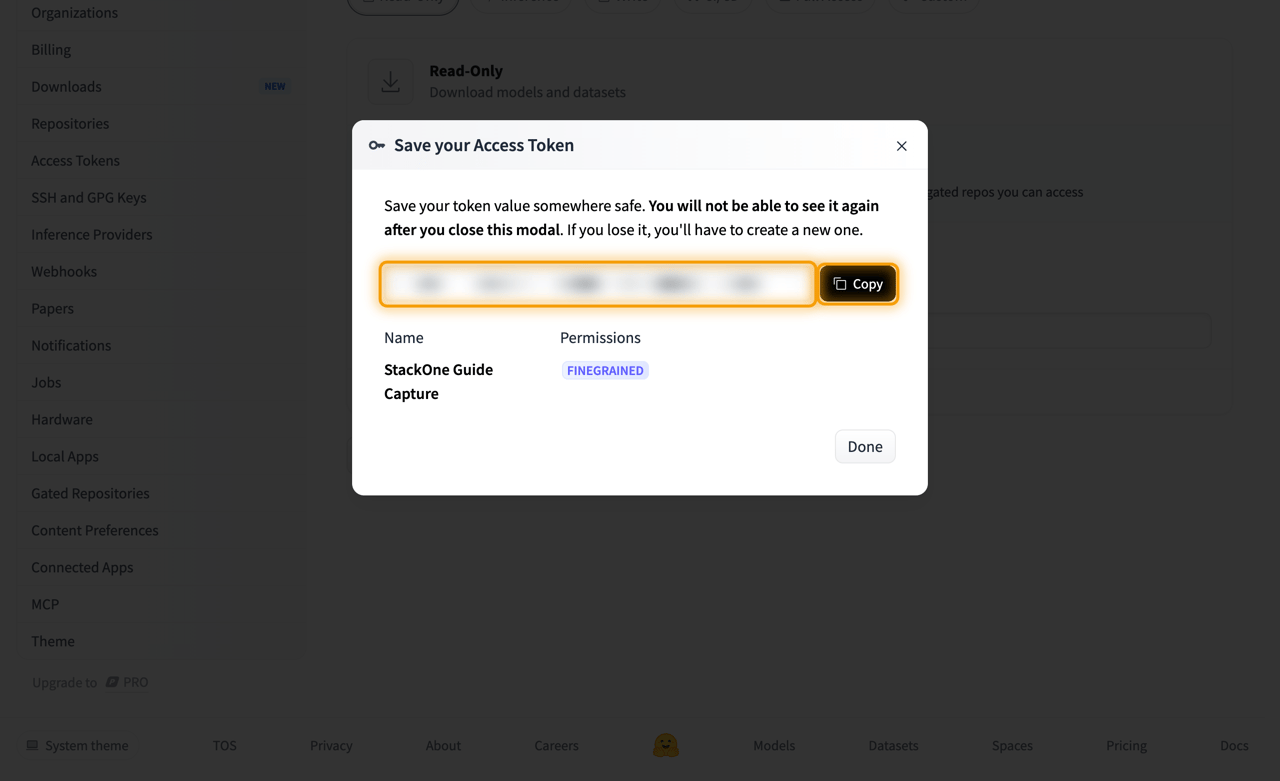
Click Create token. Hugging Face shows Save your Access Token with the value and a Copy button. Copy it, then paste it into the User Access Token field in StackOne Hub.
- The token value is only displayed once and cannot be retrieved later — close the modal with Done only after you have copied it.
- The value starts with
hf_.
Permissions to select on a fine-grained token
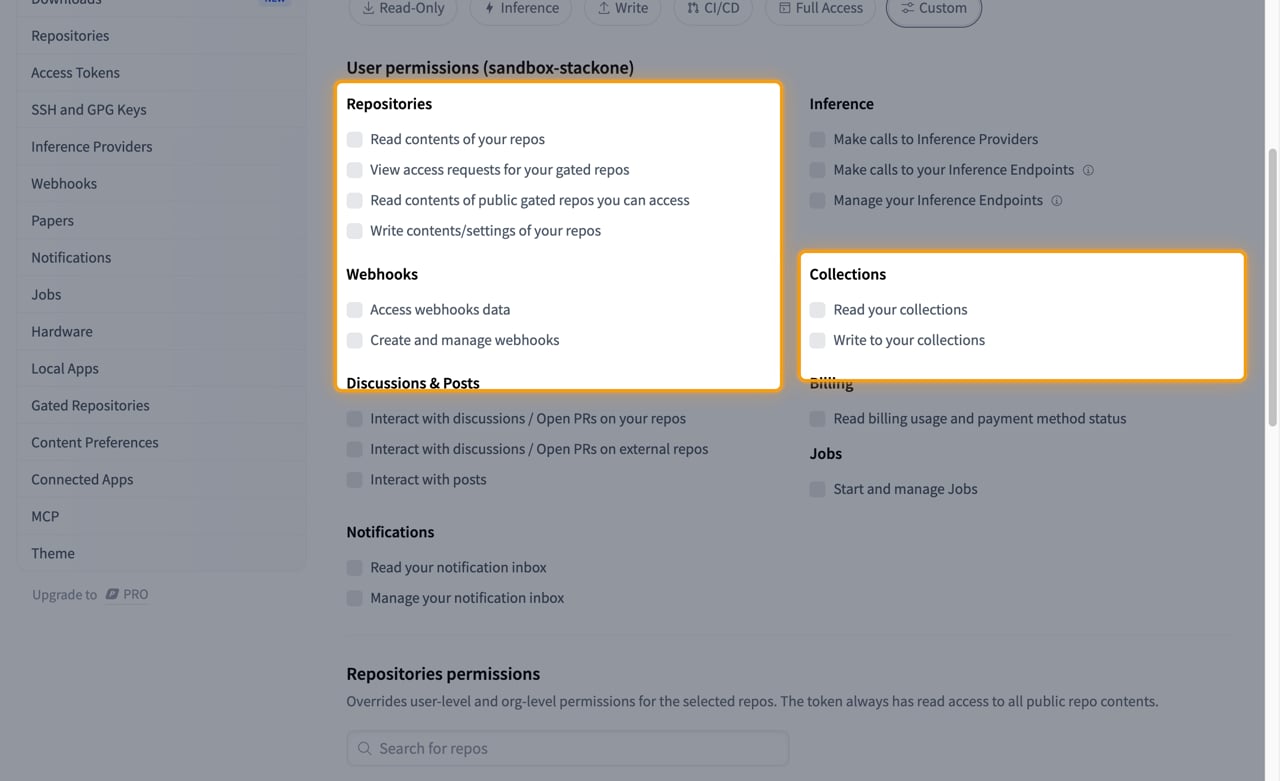
Choosing the Custom preset opens the full permission list. Tick the entries matching the actions you plan to run.
Select the permissions this connector needs
Under User permissions, the groups below carry the permissions the connector’s actions use.
- Read contents of your repos — required for every model, dataset and Space read action.
- Write contents/settings of your repos — required for commits, branches, tags and repository settings.
- Read contents of public gated repos you can access and View access requests for your gated repos — required for the gated-repository actions.
- Interact with discussions / Open PRs on your repos and Interact with discussions / Open PRs on external repos — required for the discussion and pull request actions.
- Read your collections and Write to your collections — required for the collection actions.
- Read billing usage and payment method status — required for the usage and billing actions.
- Read org settings — required for the organization member actions.
- Use Repositories permissions below the user permissions to override these for individually selected repositories.
Organizations with token policies
Organizations on the Team and Enterprise plans can restrict which tokens reach their resources.
- A fine-grained token scoped to such an organization starts as Pending until an administrator approves it, and returns
403against that organization’s resources until then. - Some organizations reject read and write tokens outright and accept only fine-grained tokens.
Linking the Account from the Hub
Navigate to the Hub
Fill out the fields
- User Access Token
Connect
- Click Connect
- If applicable, the provider will redirect you to a sign-in or authorization page. Complete the provider’s authorization flow.
- Once authorization is successful, you will see a confirmation popup
If the account linking is successful, you will see the newly linked account on your Accounts page.