

Create a Grafana user
Basic Authentication signs in as a Grafana user, so access follows that user’s organization role. Use a dedicated user rather than a personal account.
1
Create the user
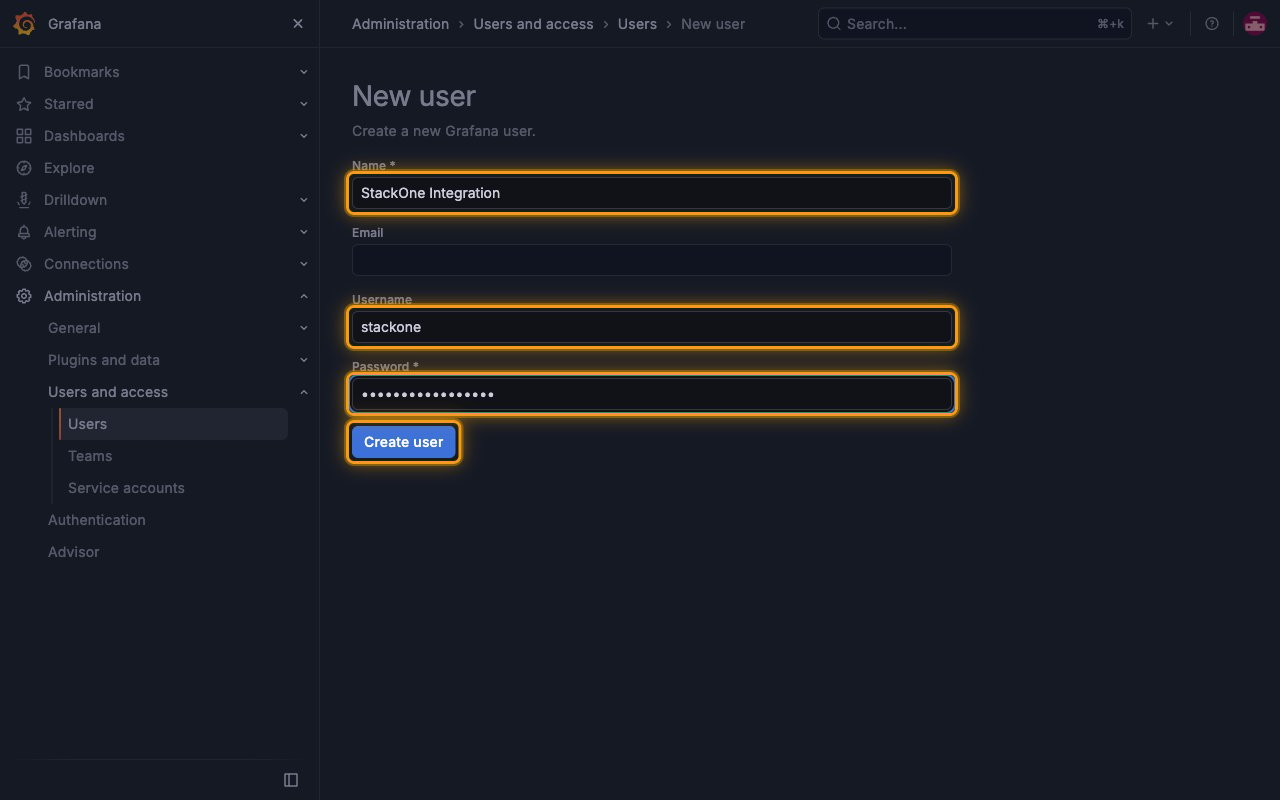
Sign in to your Grafana server as a Grafana server administrator, then go to Administration > Users and access > Users.
- Click New user.
- Name:
StackOne Integration - Username:
stackone - Password: A strong password for this user
- Click Create user.
2
Set the organization role
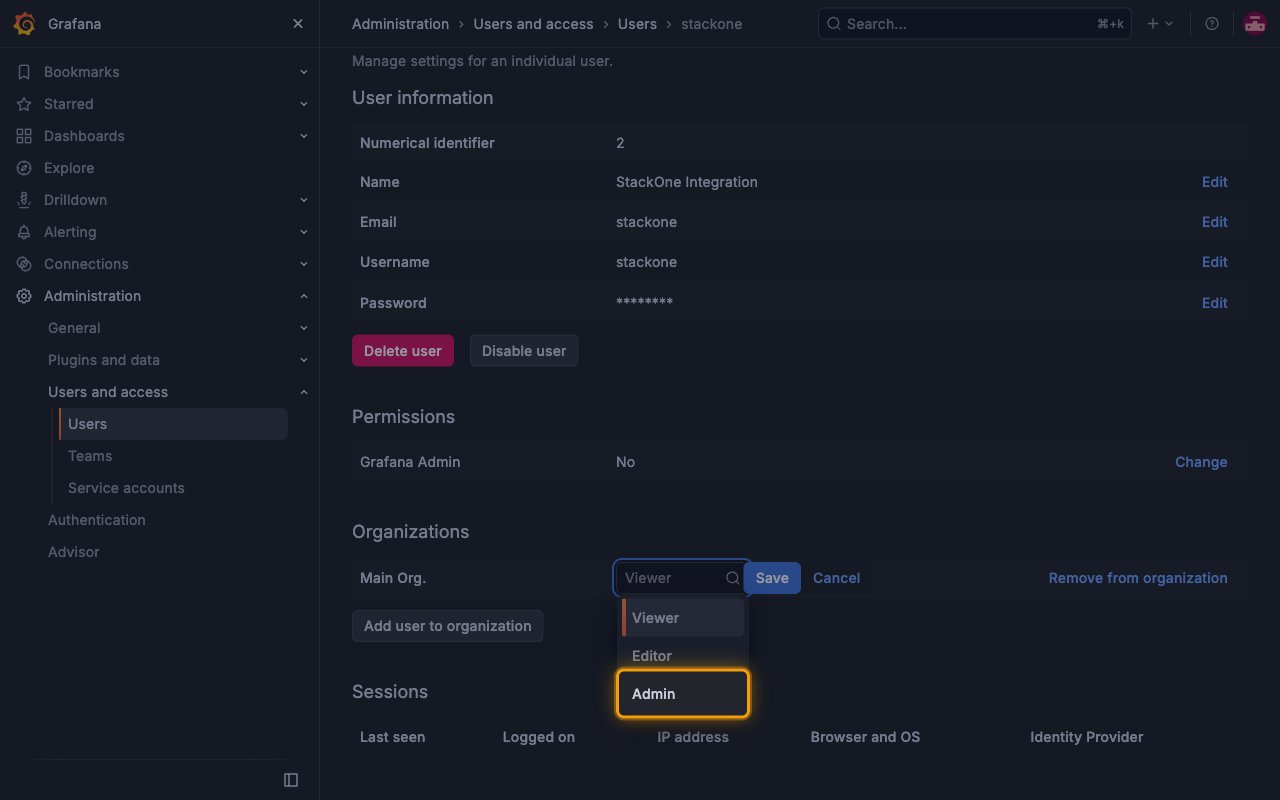
On the user’s page, find your organization in the Organizations section.
- Click Change role.
- Select Admin for full access, or Editor or Viewer to limit access.
- Click Save.
3
Copy the credentials
Copy the Username and Password across.
Find your instance URL
Your instance URL is the base address of your Grafana server, including the trailing slash.
- Format:
https://{your-grafana-host}/ - Example: if your URL is
https://grafana.yourcompany.com/dashboards, your Instance URL ishttps://grafana.yourcompany.com/
Link the Account
1
Connect
- Click Connect.
- If applicable, the provider will redirect you to a sign-in or authorization page. Complete the provider’s authorization flow.
- Once authorization is successful, you will see a confirmation popup.
2
Use Actions
Connect an AI platform to the linked account’s actions. See AI Platforms.Other ways to call actions are listed in Protocols & SDKs.
Next Steps
Webhooks setup
Configure receiving Events for Grafana into StackOne.