

Creating a service account key
Work in the Google Cloud project you are connecting. Text-to-Speech needs billing enabled on the project, and the roles you grant the service account decide which actions work.
1
Enable the required APIs
Sign in to the Google Cloud Console and select the project. Turn on the Cloud Text-to-Speech API.
- For each API, search for it in Search (/) for resources, docs, products, and more and open it.
- Click Enable.
- If the page shows Manage and API Enabled, the API is already on.
2
Create the service account
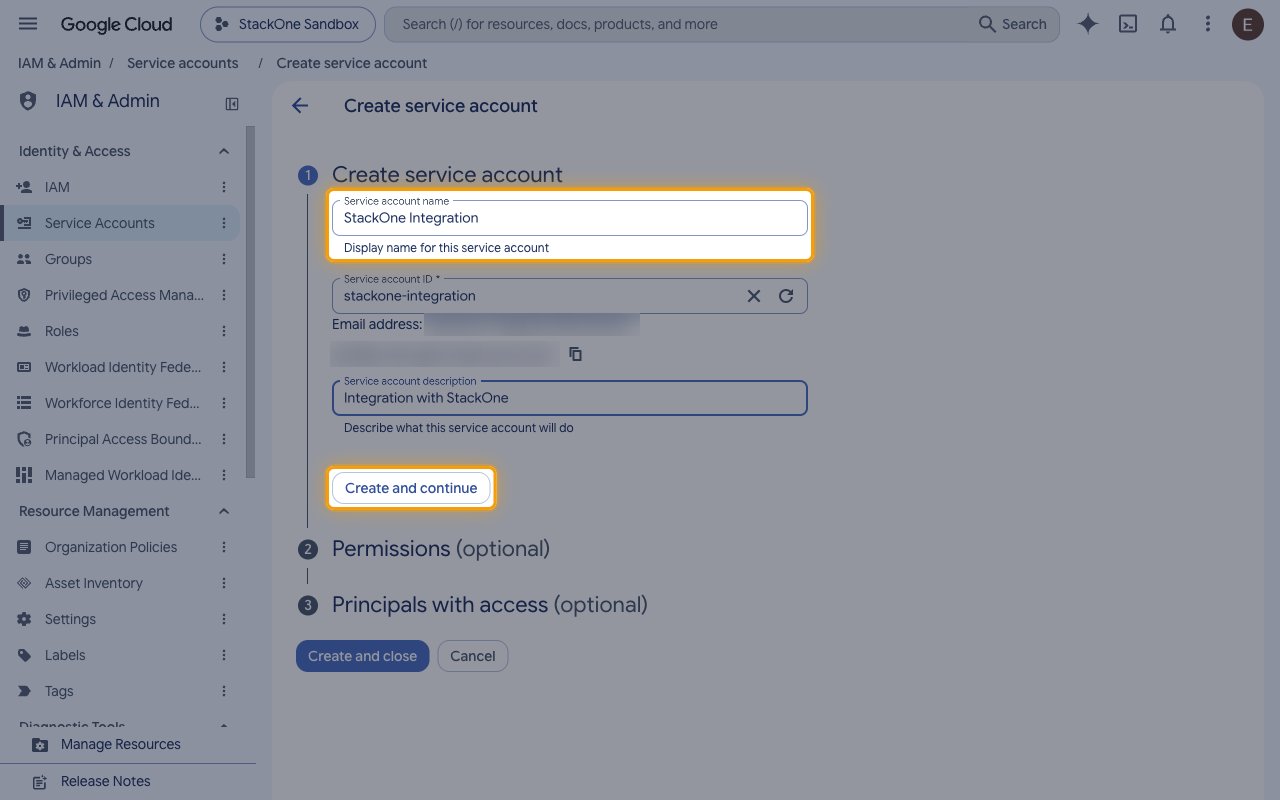
Open IAM & Admin > Service Accounts.
- Click Create service account.
- Service account name:
StackOne Integration - Click Create and continue.
3
Grant the roles
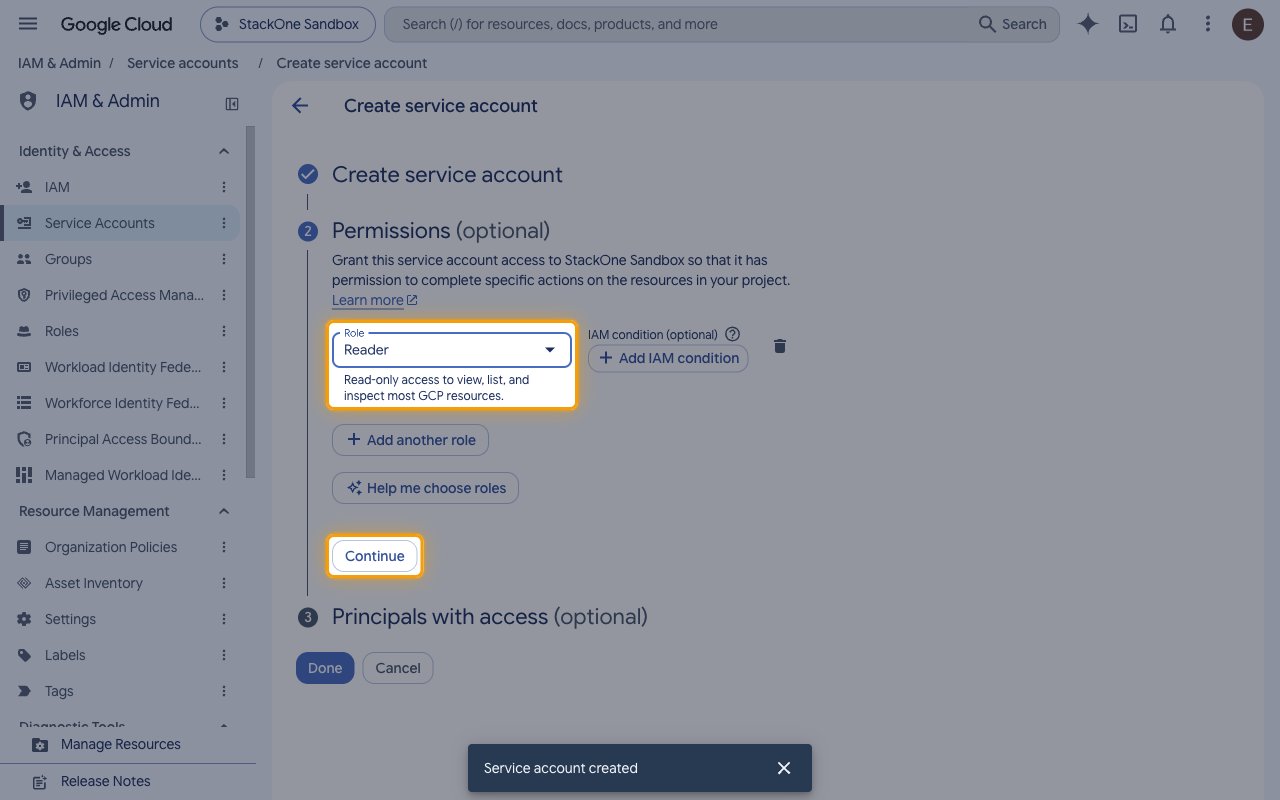
Under Permissions (optional), add a role for each kind of action you plan to use.
- Click Select a role.
- Search for
Service Usage Consumer. - Select Service Usage Consumer so the service account can call the APIs enabled on the project.
- For each kind of resource you create, change or delete, click Add another role and add its role.
- Storage Object Creator: writing the audio file of a long audio synthesis job to its output Cloud Storage bucket
- Storage Object Viewer: reading that audio file back from the bucket
- Click Continue.
- Click Done.
- New roles can take a few minutes to become active.
4
Create the JSON key
In Service Accounts, click the email of the new service account and open the Keys tab.
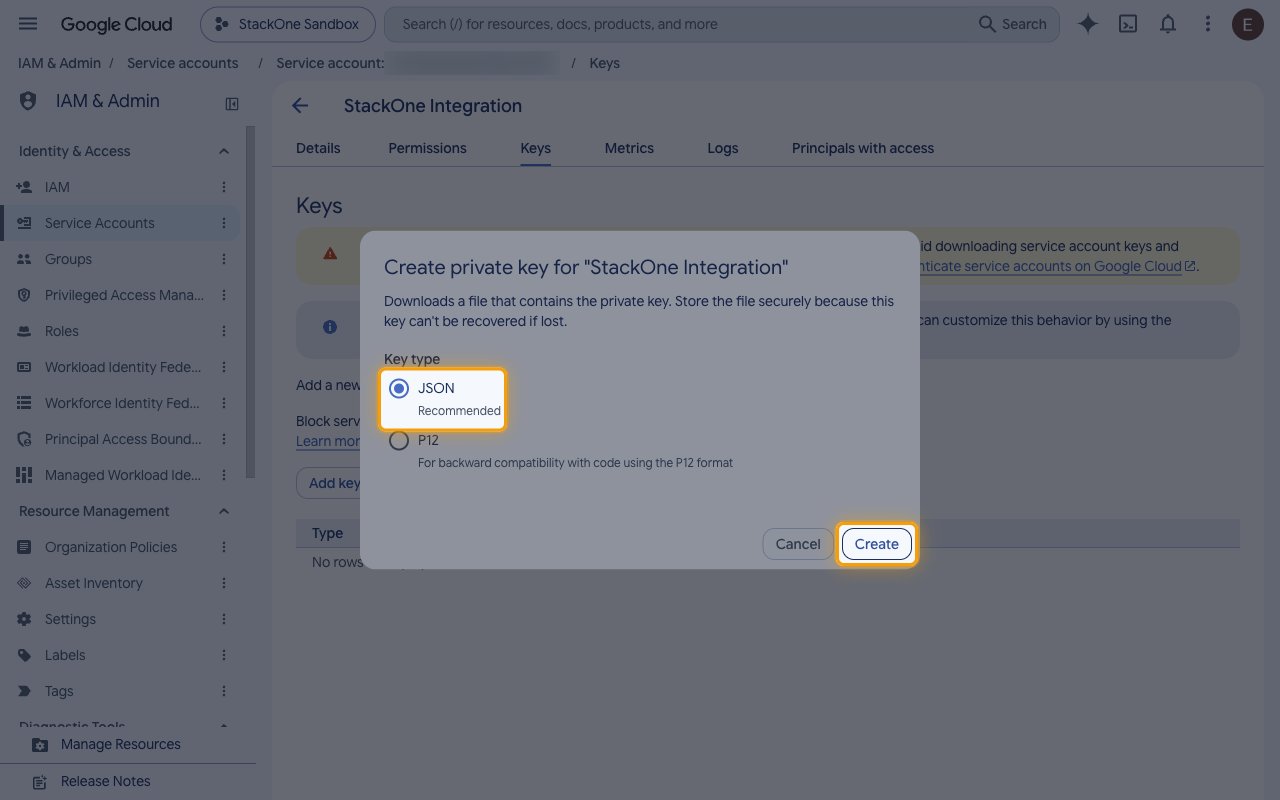
- Click Add key.
- Select Create new key.
- Key type: JSON
- Click Create. The key file downloads once, and Google can’t recover it if it is lost.
- If your organization blocks key creation with an organization policy, ask an organization policy administrator to allow it for this project.
Entering the key
Open the downloaded .json key file in a text editor. The whole file, including the outer braces, is the key.
- Copy the Service Account Key (JSON) across.
- Copy the project number across to GCP Project Number. It is the numeric Project number on the Project info card of the Google Cloud Dashboard, not the
project_idin the key file.
Link the Account
1
Connect
- Click Connect.
- If applicable, the provider will redirect you to a sign-in or authorization page. Complete the provider’s authorization flow.
- Once authorization is successful, you will see a confirmation popup.
2
Use Actions
Connect an AI platform to the linked account’s actions. See AI Platforms.Other ways to call actions are listed in Protocols & SDKs.