

Select or create a Google Cloud project
Google Search Console API access is granted through an OAuth client that belongs to a Google Cloud project, so start by choosing the project that will own the credentials.
Sign in to Google Cloud
Sign in at the Google Cloud console with an account that has Owner or Editor access to the project you want to use.
Select or create a project
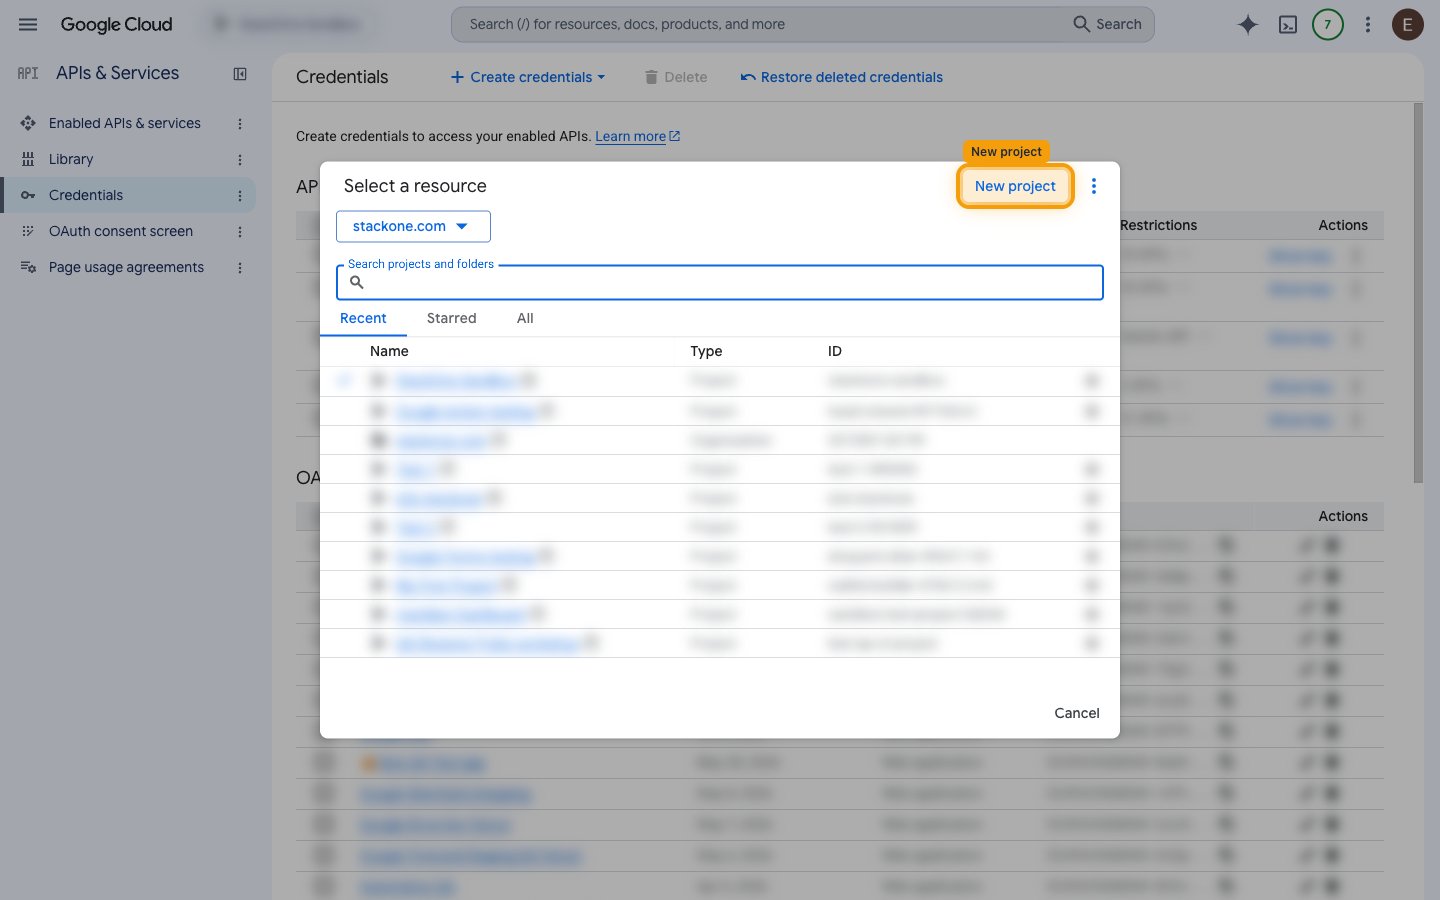
Click the project name in the top bar to open the Select a resource dialog. Pick an existing project from the list, or click New project to create one. An existing project is fine — the only requirement is that you can administer it.
Enable the Google Search Console API
The API must be enabled on the project before its scopes can be granted or its endpoints called.
Open the API Library
In the Google Cloud console, go to APIs & Services > Library and search for “Google Search Console API”, then open the result.
Enable the API
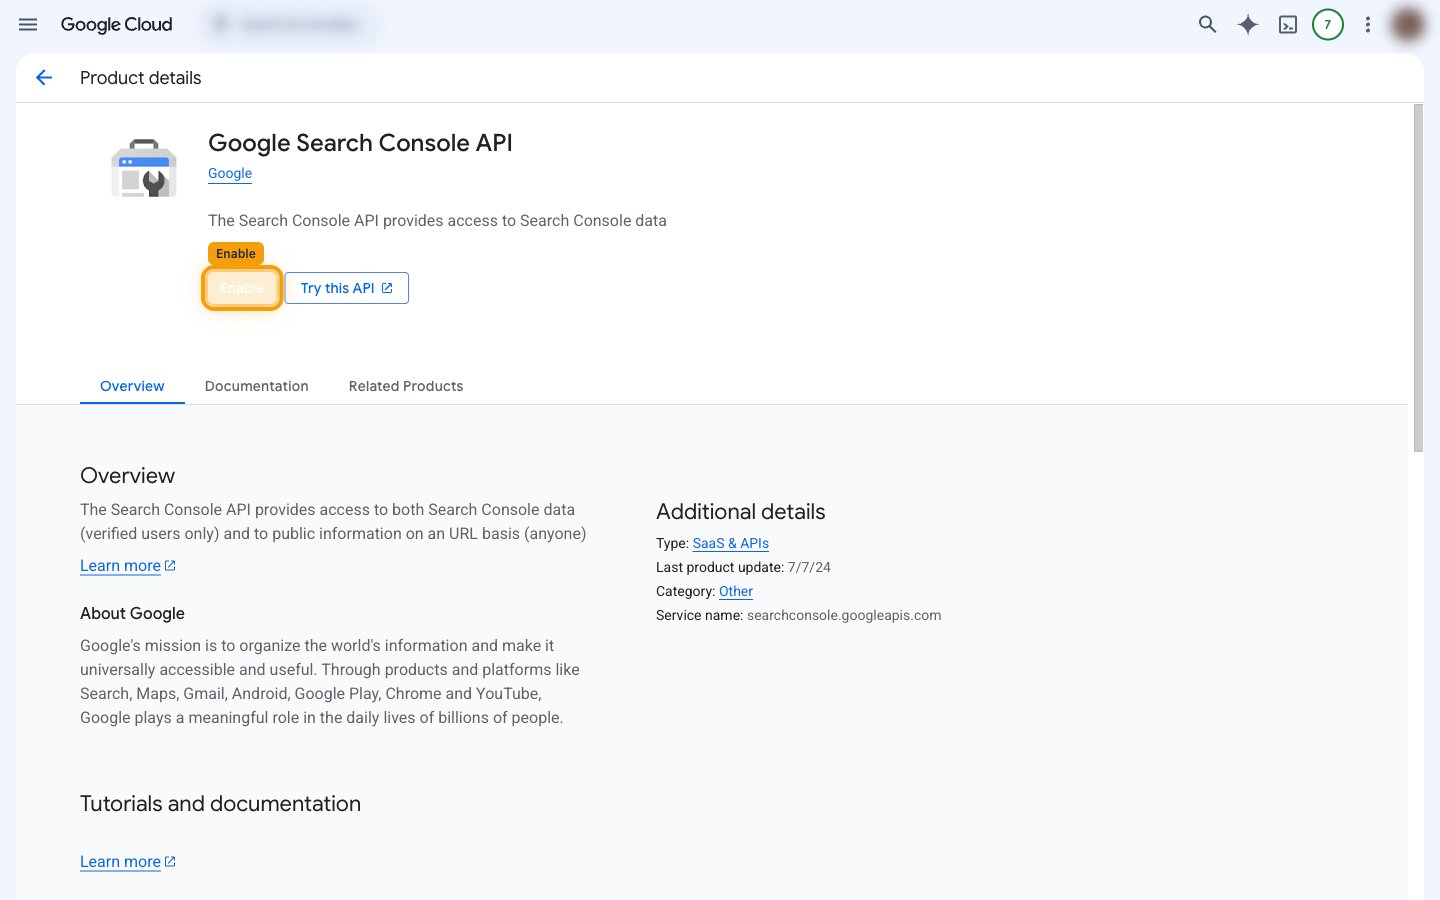
On the Google Search Console API product page, click Enable.
- If the API is already enabled on this project, the button shows Manage next to an API Enabled marker instead, and no action is needed.
- Enable the API before configuring scopes. The scope editor only lists scopes belonging to APIs that are already enabled.
Configure Google Auth Platform
Google Auth Platform holds the consent-screen configuration that your OAuth client presents to users. It must be configured before the client can be used.
Open Google Auth Platform
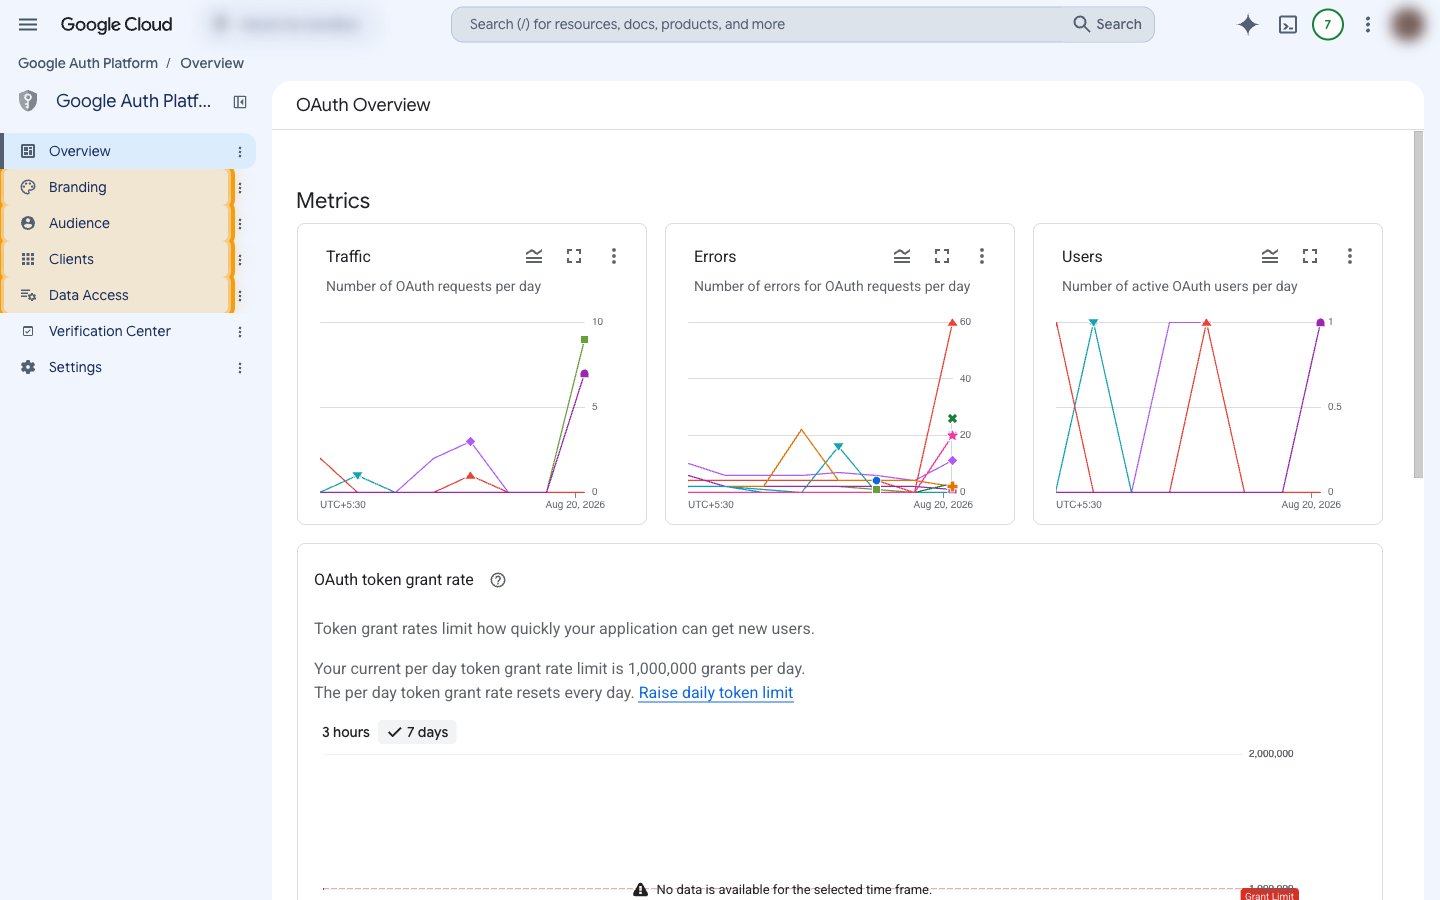
In the Google Cloud console, go to APIs & Services > OAuth consent screen. This opens Google Auth Platform, whose sidebar contains Overview, Branding, Audience, Clients, Data Access, Verification Center and Settings.
- If the platform is already configured, Overview shows the OAuth Overview page with usage metrics — go straight to Branding.
- If it has not been configured yet, complete the getting-started flow that Overview presents, then return to Branding.
Enter the app information
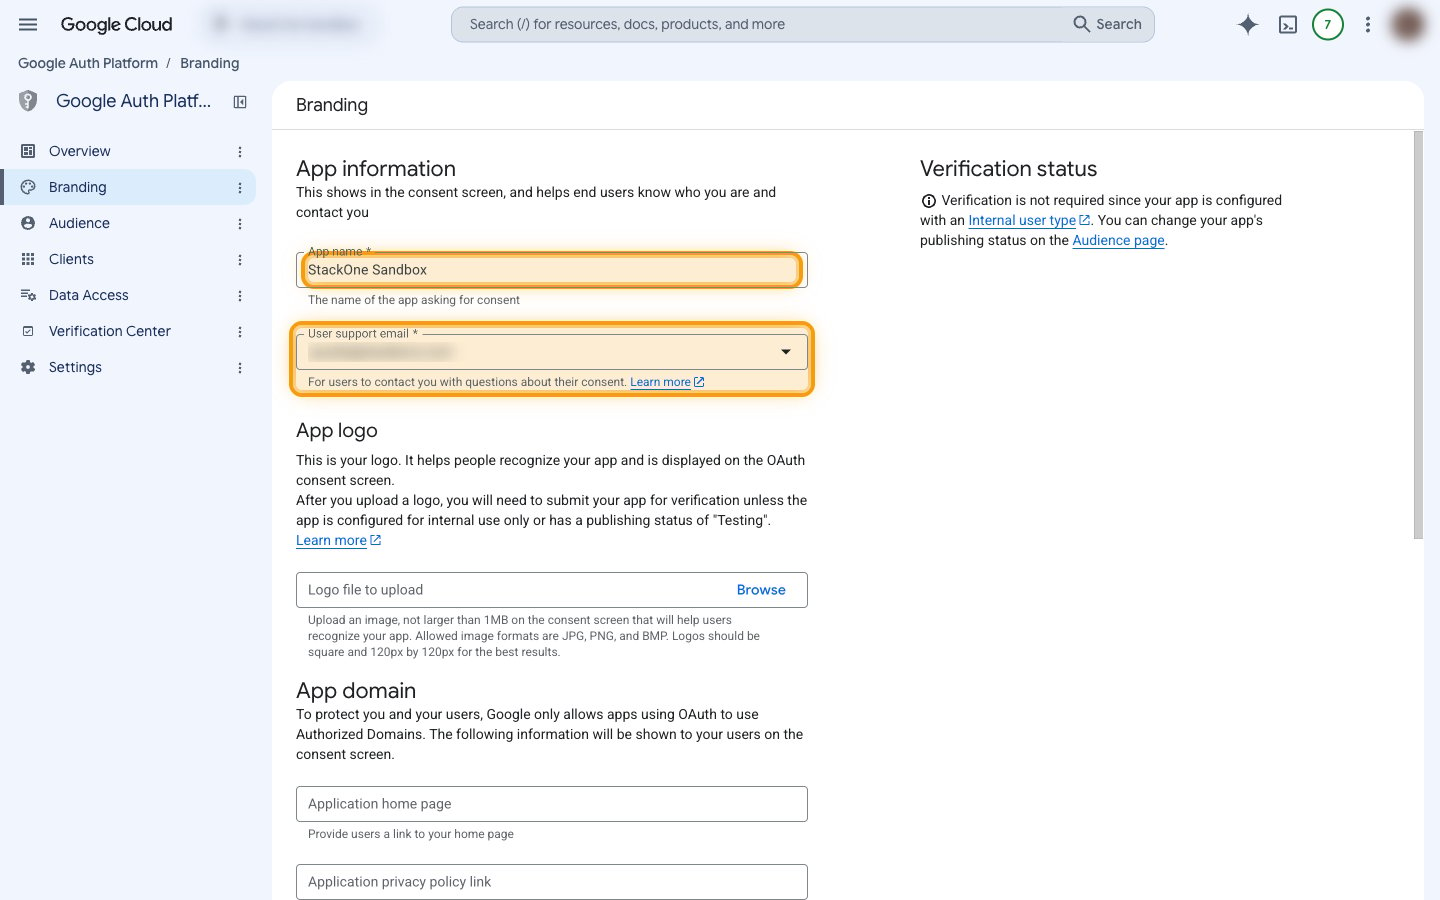
Open Branding and fill in the App information section.
- App name — the name shown on the consent screen when a user authorizes access (for example, StackOne Integration).
- User support email — the address users can contact with questions about their consent.
- Click Save at the bottom of the page.
Set the audience
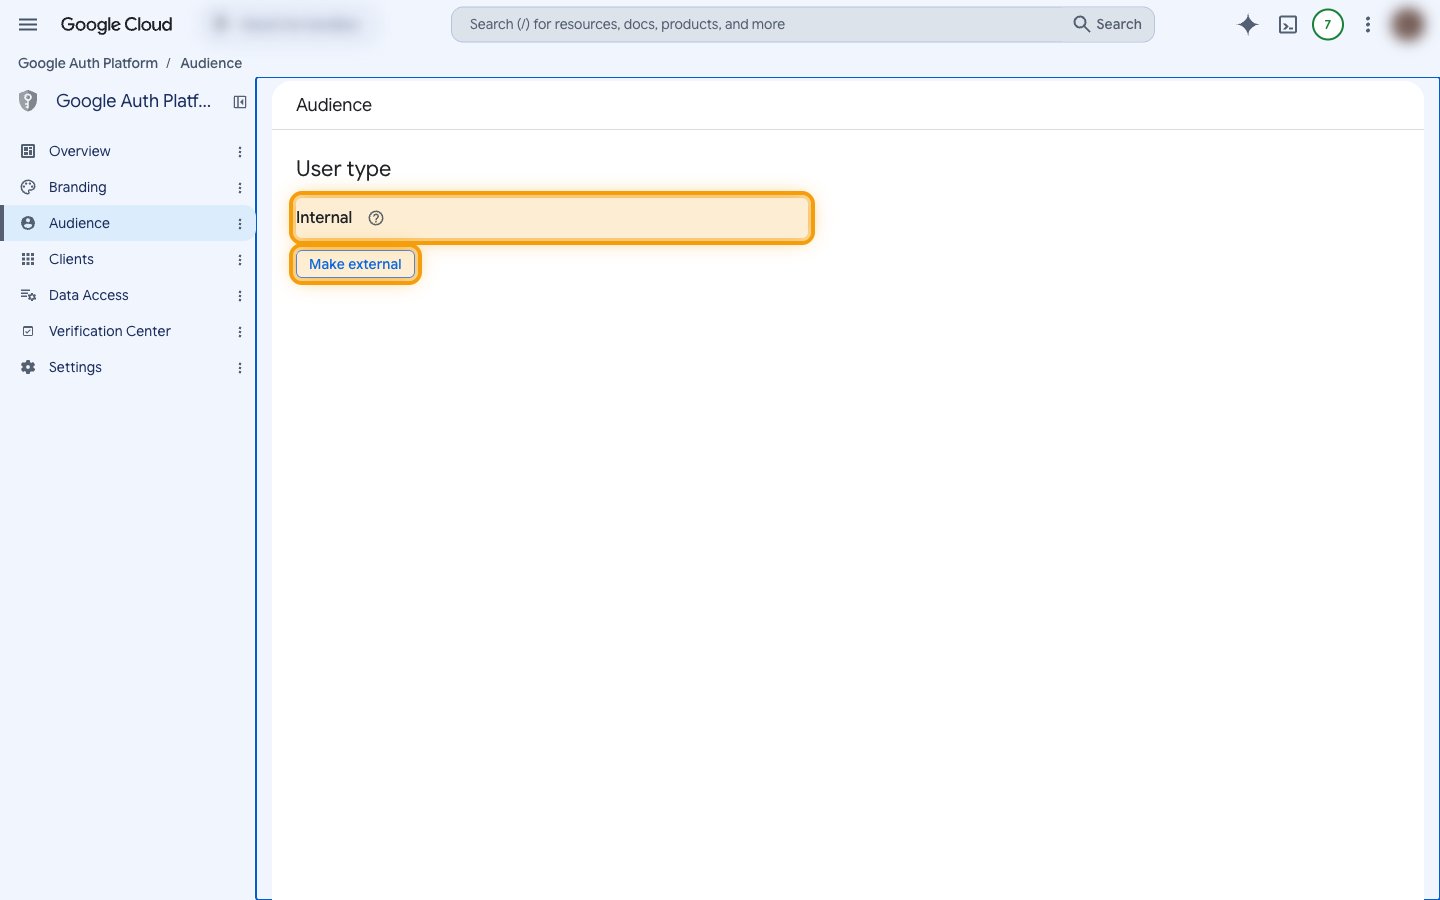
Open Audience and check User type.
- Internal — only users in your Google Workspace organization can authorize the app, and no verification is required.
- Click Make external to allow any Google account to authorize it. External apps need verification before general production use.
- Google warns that OAuth access is restricted to users within your organization unless the OAuth consent screen is published and verified.
Configure scopes
Grant the Search Console scopes that this connector’s actions call. Scopes are configured on the Data Access page.
Open the scope editor
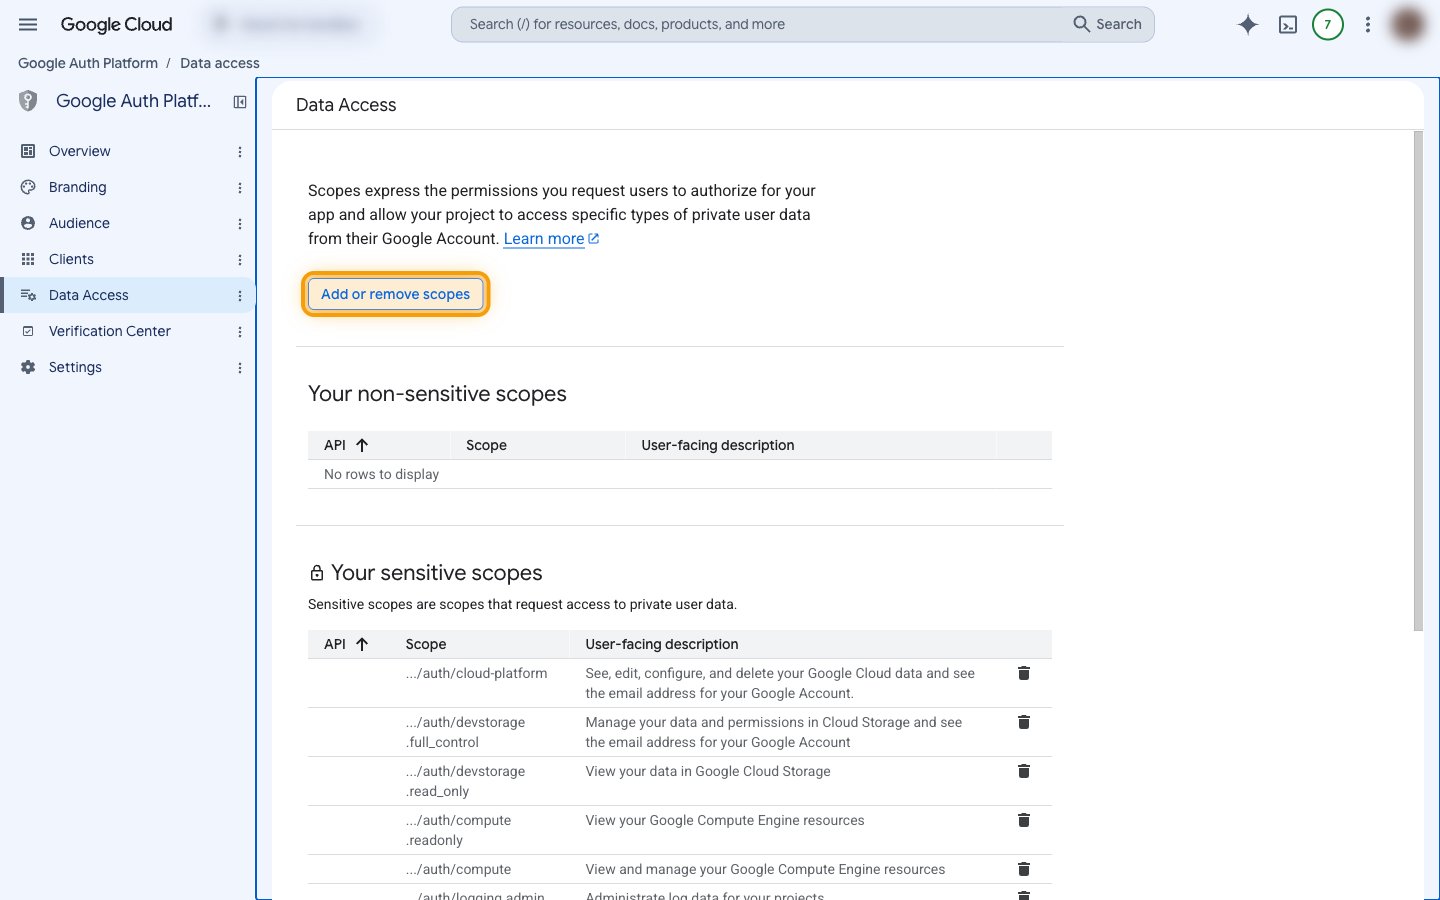
In Google Auth Platform, open Data Access and click Add or remove scopes. The page groups what you already have into Your non-sensitive scopes, Your sensitive scopes and Your restricted scopes.
Select the required scopes
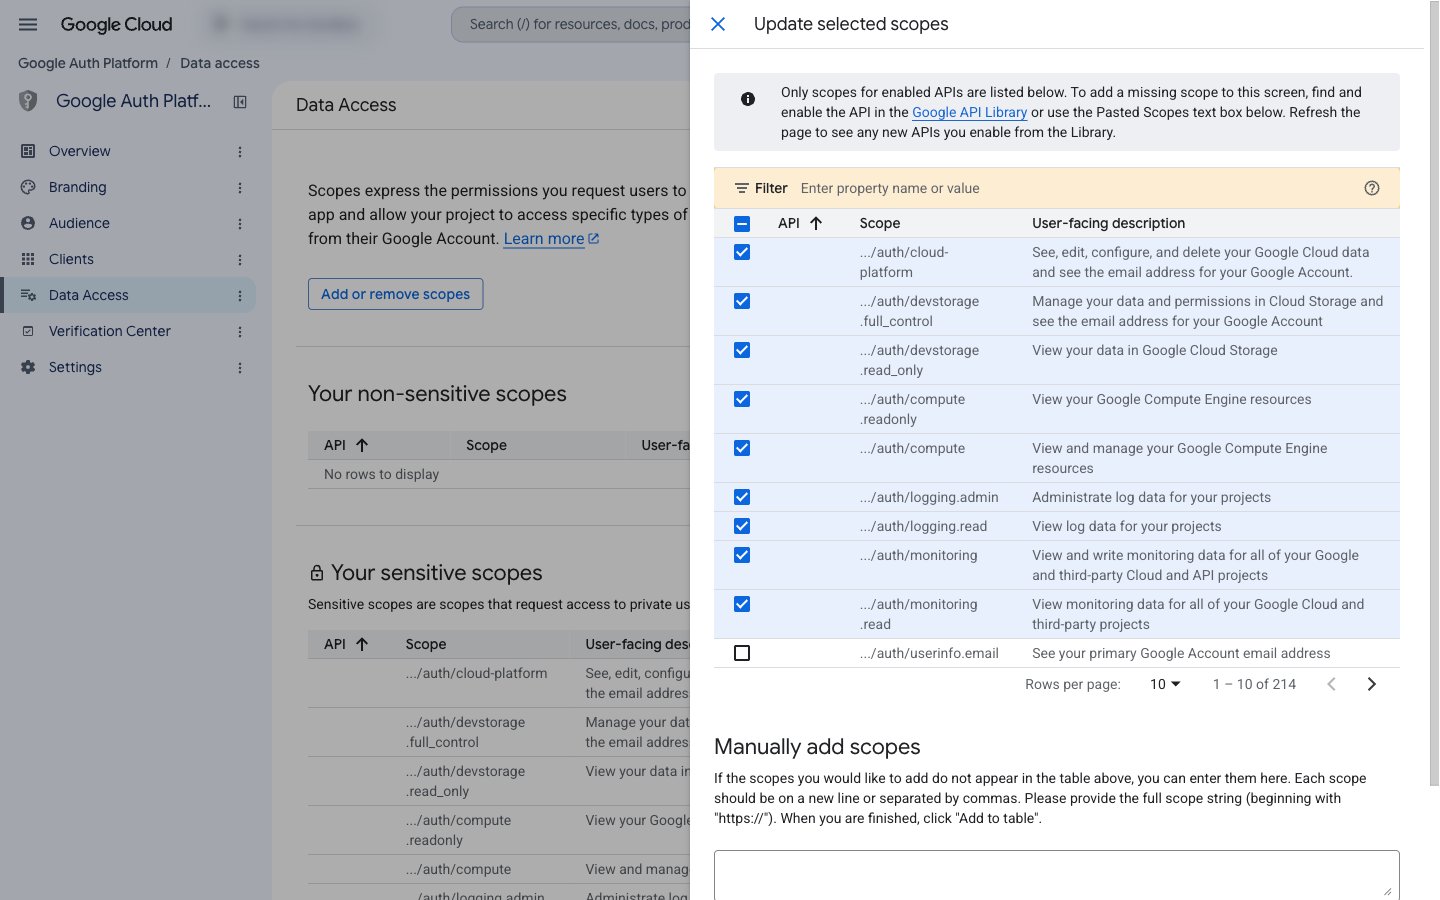
In the Update selected scopes side panel, use Filter to find each scope by name, then tick it in the table. Every scope this connector’s actions need is listed below.
- The panel notes that only scopes for enabled APIs are listed — if no Search Console scopes appear, enable the API first and reload the page.
https://www.googleapis.com/auth/webmasters.readonlycovers the read actions (listing sites, sitemaps and search analytics).https://www.googleapis.com/auth/webmastersis additionally required by the write actions (adding and deleting sites and sitemaps, and URL inspection).
Add scopes manually if they are missing
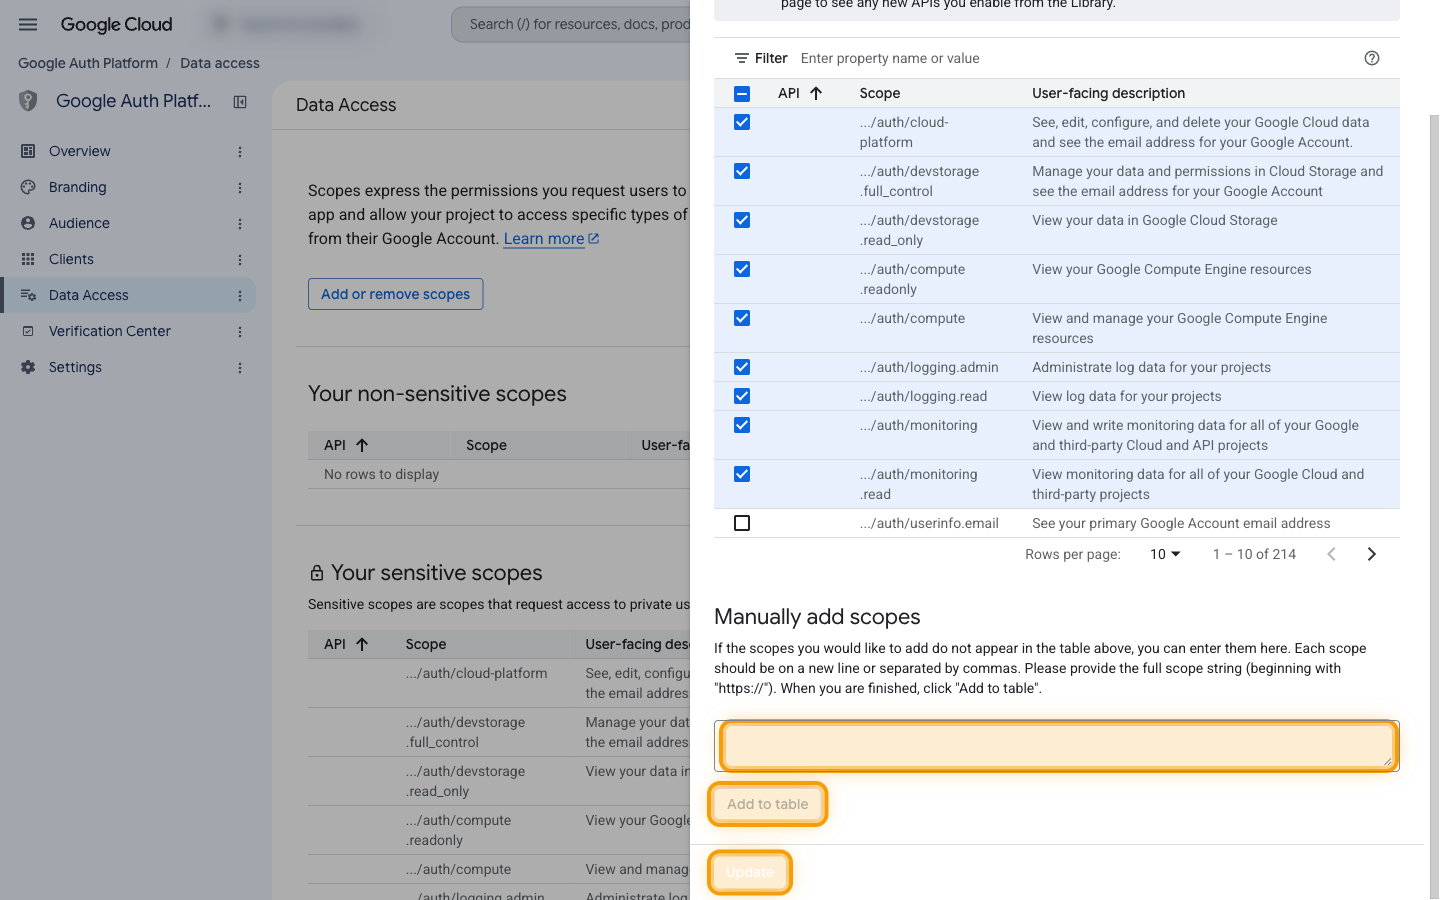
If a required scope does not appear in the table, use the Manually add scopes section at the bottom of the panel.
- Paste the full scope URL into the text box — one scope per line, or separated by commas.
- Click Add to table.
Save the scope configuration
Persist the selection in two steps.
- Click Update to apply the selected scopes. The side panel closes.
- Back on Data Access, click Save.
Create OAuth 2.0 client credentials
The client supplies the Client ID and Client Secret that StackOne uses. Create a new client, or reuse an existing one by adding the StackOne redirect URI and generating a fresh secret.
Open Credentials and start a new client
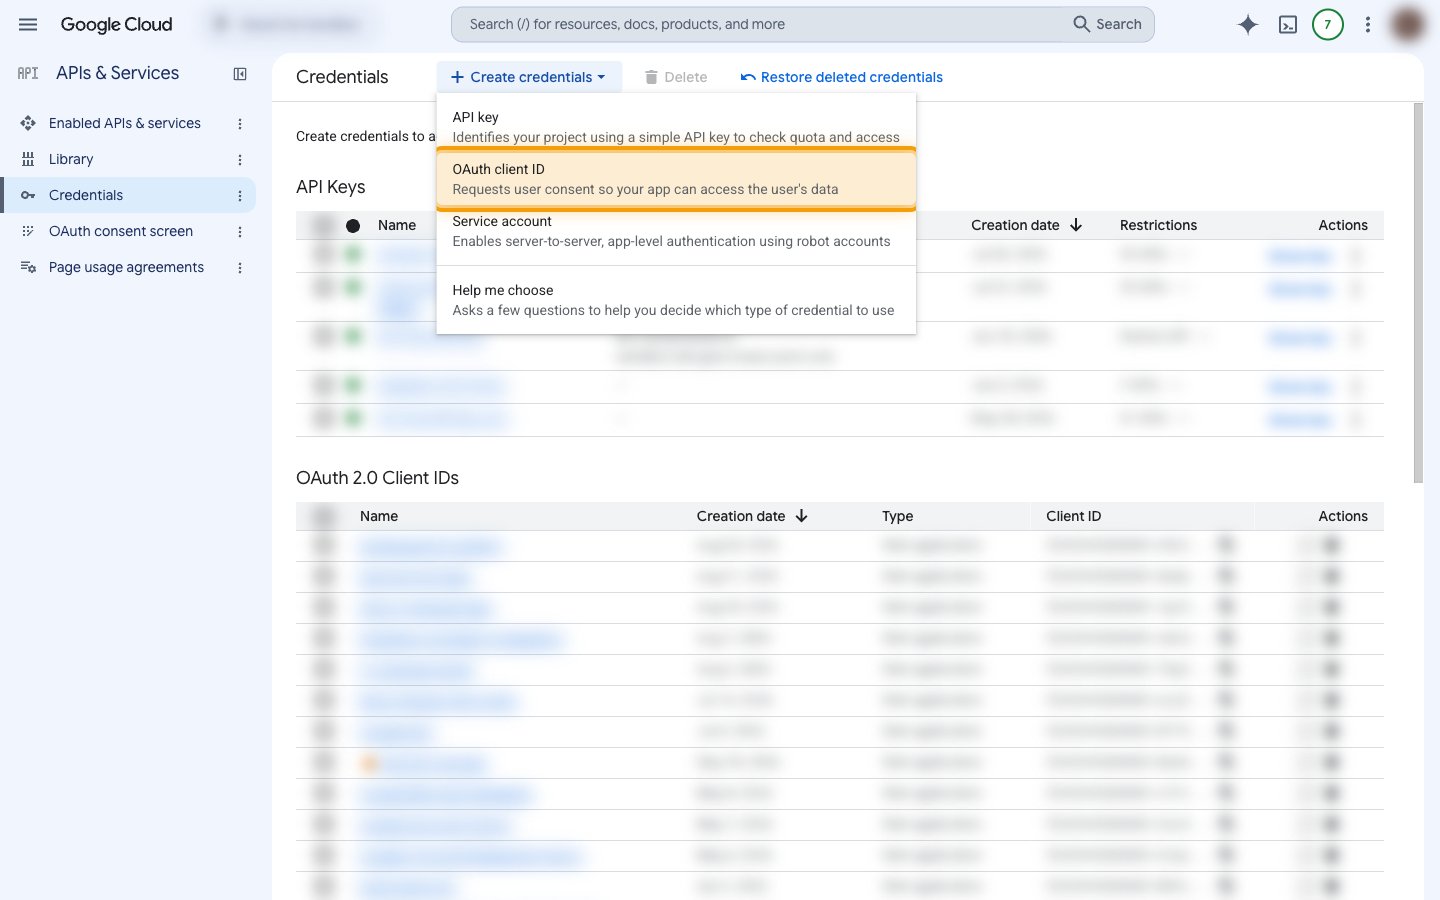
Go to APIs & Services > Credentials, click + Create credentials, and choose OAuth client ID.
Select the application type
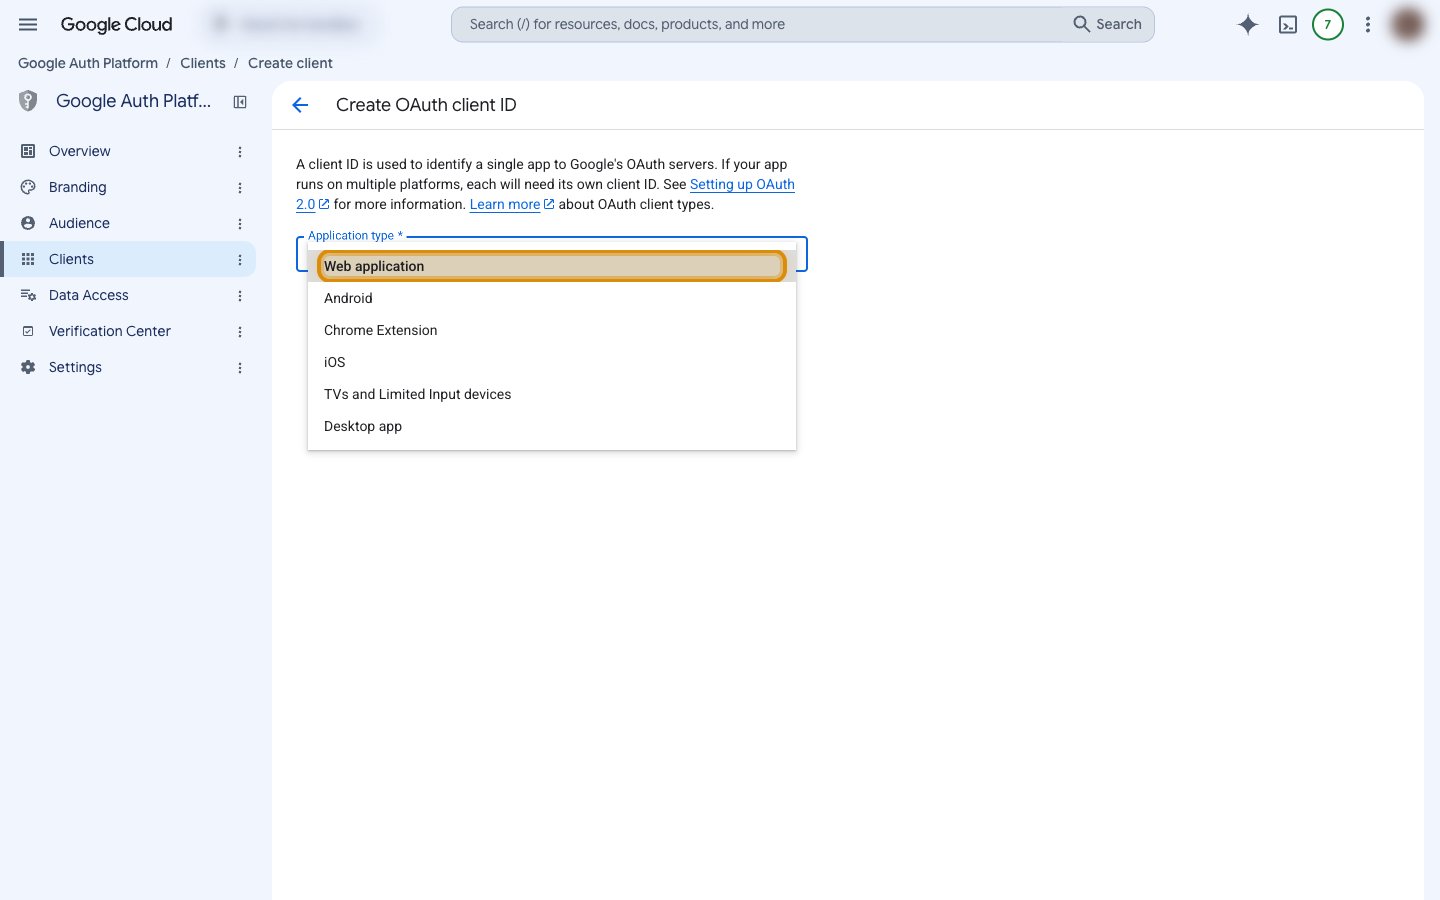
On Create OAuth client ID, set Application type to Web application.
Enter the client name and redirect URI
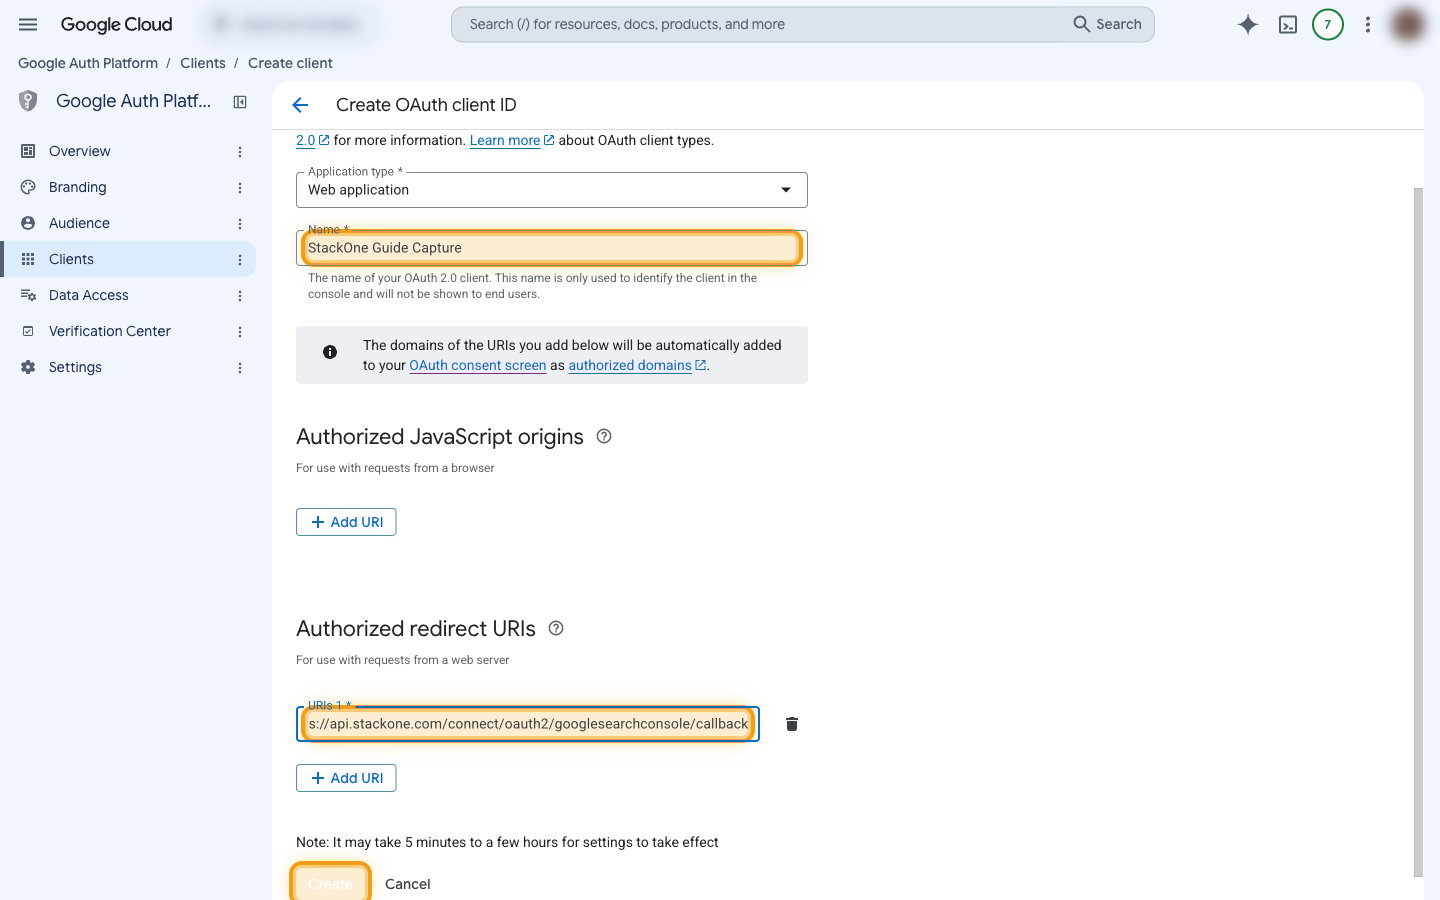
Fill in the client details, then create it.
- Name — a label used only to identify the client in the console (for example, StackOne Search Console Integration). It is never shown to end users.
- Under Authorized redirect URIs, click + Add URI and enter StackOne’s callback URL exactly —
https://api.stackone.com/connect/oauth2/googlesearchconsole/callback - Leave Authorized JavaScript origins empty — StackOne calls the API from a server, not a browser.
- Click Create.
- Google notes that it may take 5 minutes to a few hours for settings to take effect, so a newly added redirect URI may not work immediately.
Copy the Client ID and Client Secret
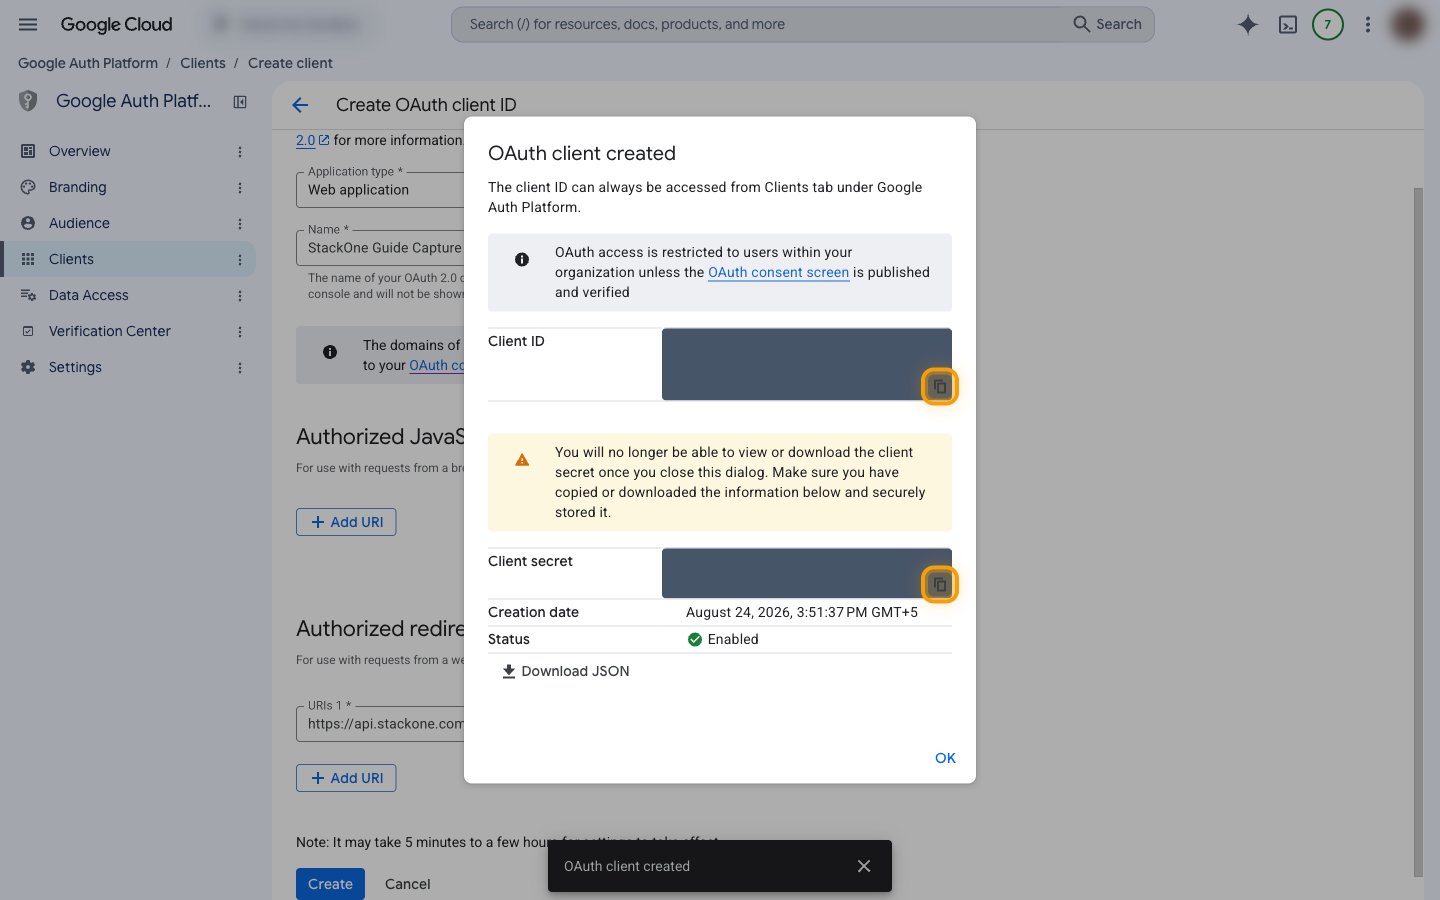
The OAuth client created dialog shows both values, each with a copy button. Copy them before closing it.
- Google warns that you will no longer be able to view or download the client secret once you close this dialog, so copy it or use Download JSON first.
- The Client ID stays available afterwards from the Clients page in Google Auth Platform.
- Click OK to close the dialog.
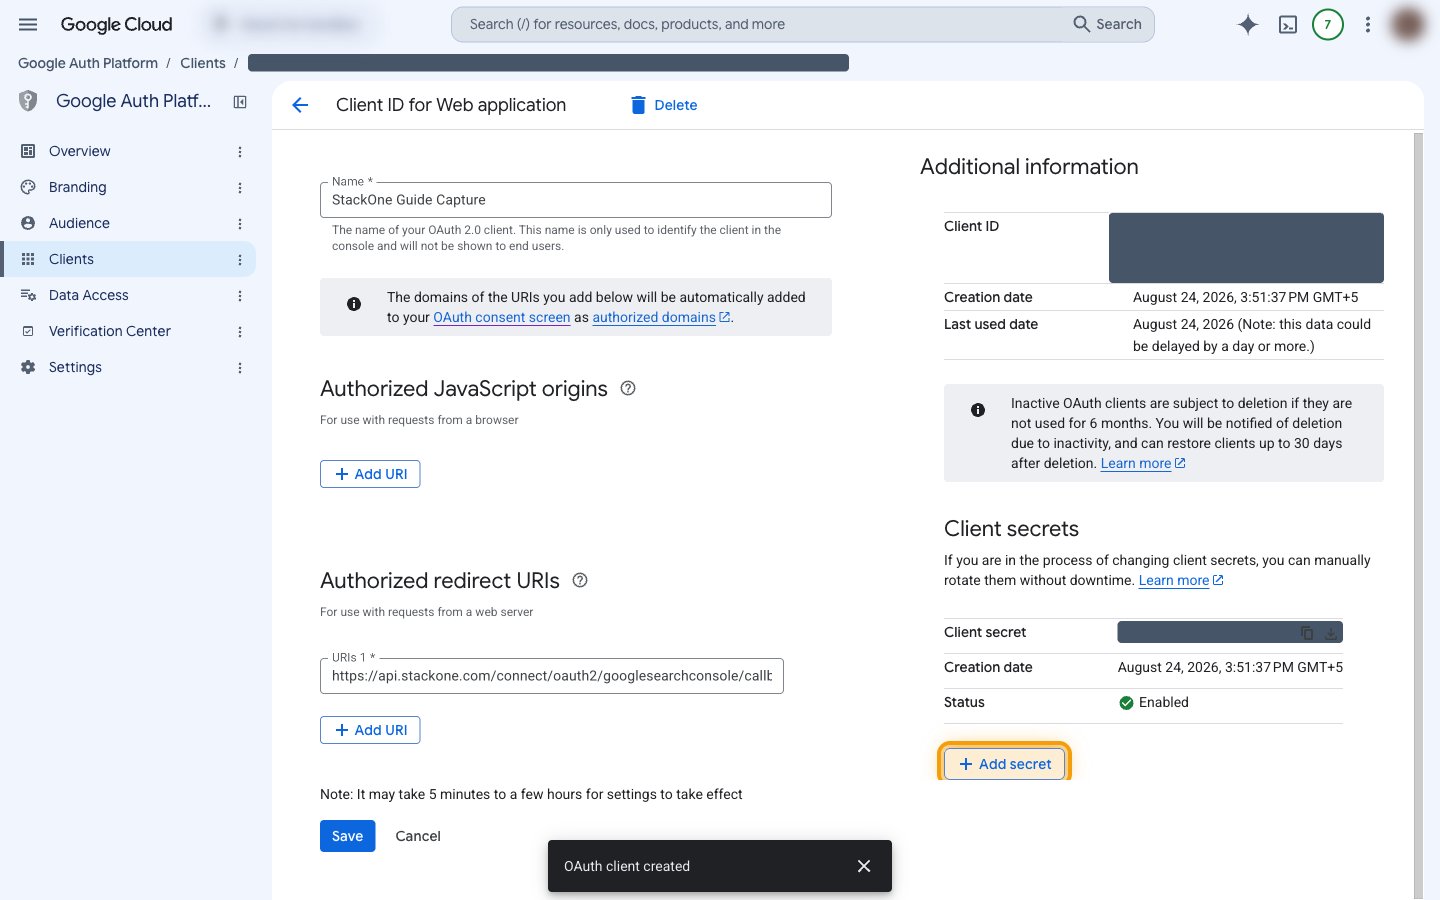
Add the redirect URI to an existing client (optional)
Skip this step if you created a new client above. To reuse a client you already have, open it from the Clients page.
- Under Authorized redirect URIs, click + Add URI, enter
https://api.stackone.com/connect/oauth2/googlesearchconsole/callback, then click Save. - Under Client secrets, click + Add secret to generate a new secret, and copy it — an existing secret is only ever shown truncated and cannot be retrieved in full.
- Your Client ID is shown on the same page under Additional information.
Enter the credentials in StackOne
Fill in the connector’s setup fields with the values you just copied.
Fill in the setup fields
Paste each value into the matching field in the StackOne Connector profile.
- Client ID — the public identifier of your OAuth client, ending in
.apps.googleusercontent.com. Copy it from the OAuth client created dialog, or later from Additional information on the client’s page. - Client Secret — the private half of the credential pair, beginning with
GOCSPX-. Copy it from the creation dialog, or generate a new one with + Add secret. - Scopes — optional. Leave it empty to request
https://www.googleapis.com/auth/webmasters, which covers every action in this connector. Set it to a space-separated list only when you want to narrow access — for examplehttps://www.googleapis.com/auth/webmasters.readonlyfor read-only use.
Creating the StackOne Connector Profile
To create the Connector Profile in StackOne for Google Search Console:Navigate to Connector Profiles
Create New Connector Profile
- Click + Connector Profile
- Search for and select Google Search Console
- Select Type as OAuth 2.0
- Fill out the fields using details retrieved from your provider:
- Client ID
- Client Secret
- Scopes (Optional)
- (Optional) Select Actions to be enabled for this Connector Profile
- Click Create profile