

Creating a service account key
The service account is created in a Google Cloud project, then added as a user in Google Ads. Google Ads access is granted in Google Ads, not in Google Cloud IAM.
1
Enable the required APIs
Sign in to the Google Cloud Console and select the project. Turn on the Google Ads API.
- For each API, search for it in Search (/) for resources, docs, products, and more and open it.
- Click Enable.
- If the page shows Manage and API Enabled, the API is already on.
2
Create the service account
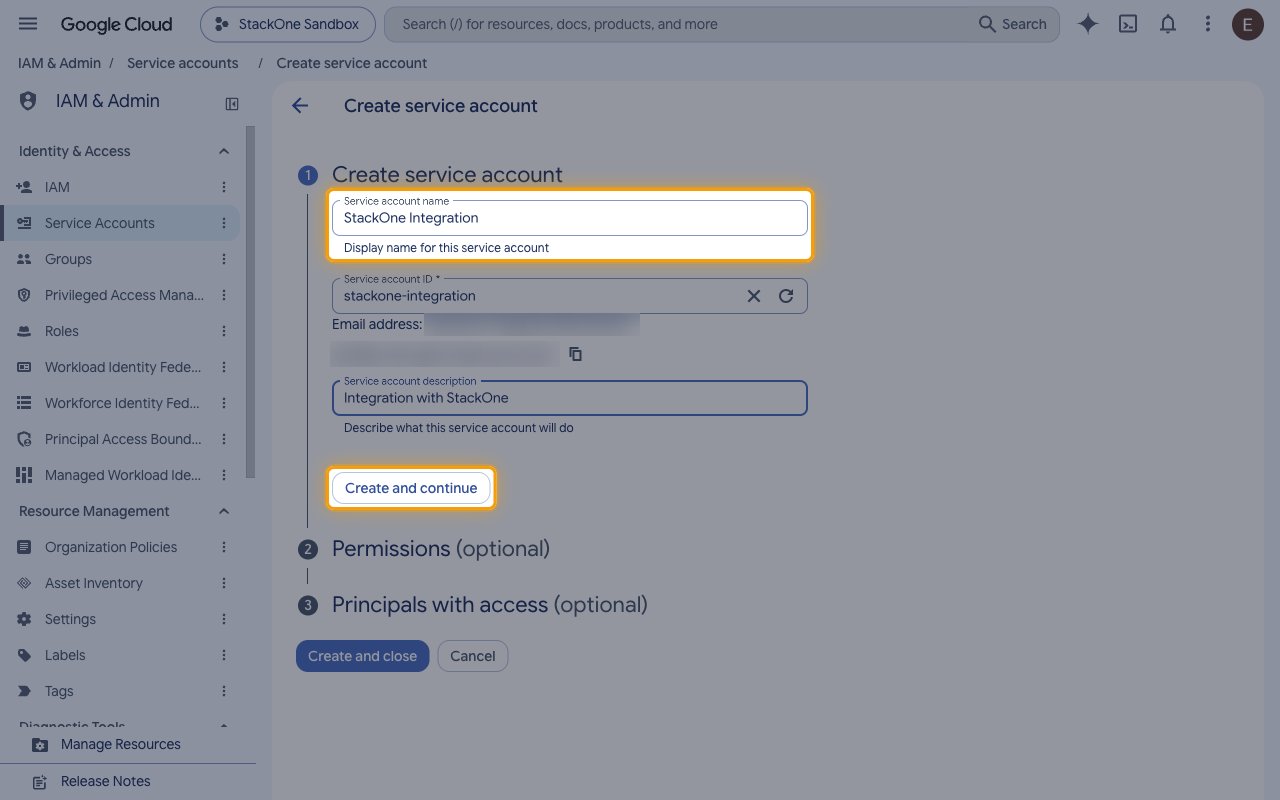
Open IAM & Admin > Service Accounts.
- Click Create service account.
- Service account name:
StackOne Integration - Click Create and continue.
3
Create the JSON key
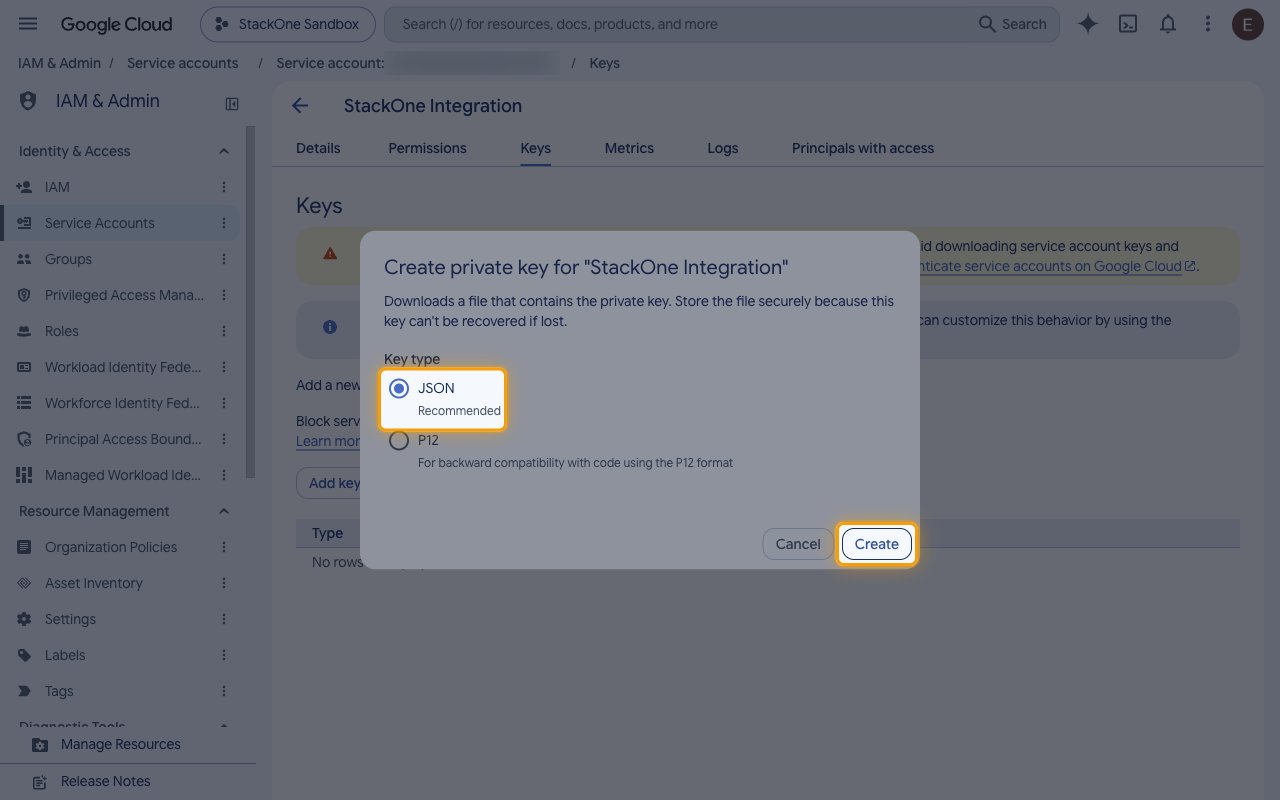
In Service Accounts, click the email of the new service account and open the Keys tab.
- Click Add key.
- Select Create new key.
- Key type: JSON
- Click Create. The key file downloads once, and Google can’t recover it if it is lost.
- If your organization blocks key creation with an organization policy, ask an organization policy administrator to allow it for this project.
Granting the service account access in Google Ads
The service account reaches nothing until it is added as a user on each Google Ads account this connection should reach.
- Sign in to Google Ads as an administrator of the account.
- Click Admin, then Access and security, then the Users tab.
- Click +, the plus button, to invite a user.
- Enter the service account’s email address, which ends in
iam.gserviceaccount.comand is theclient_emailvalue in the key file. - Select an access level. Email only is not supported for service accounts, and administrative access can’t be granted to one.
- Click Send invitation.
- One service account email can be associated with up to 20 Google Ads accounts. Use a manager account above that.
Entering the key
Open the downloaded .json key file in a text editor. The whole file, including the outer braces, is the key.
- Copy the Service Account Key (JSON) across.
- If the connection reaches client accounts through a manager account, copy that manager account’s 10-digit ID, without hyphens, across to Login Customer ID.
Link the Account
1
Connect
- Click Connect.
- If applicable, the provider will redirect you to a sign-in or authorization page. Complete the provider’s authorization flow.
- Once authorization is successful, you will see a confirmation popup.
2
Use Actions
Connect an AI platform to the linked account’s actions. See AI Platforms.Other ways to call actions are listed in Protocols & SDKs.