Creating an app requires access to your Front company settings.

Create an app

Front apps are created from the Developers area of your company settings. Sign in to your Front account to begin.

1

Open the Developers settings

Open Settings, switch to the Company settings tab, then under Integrations click Developers.
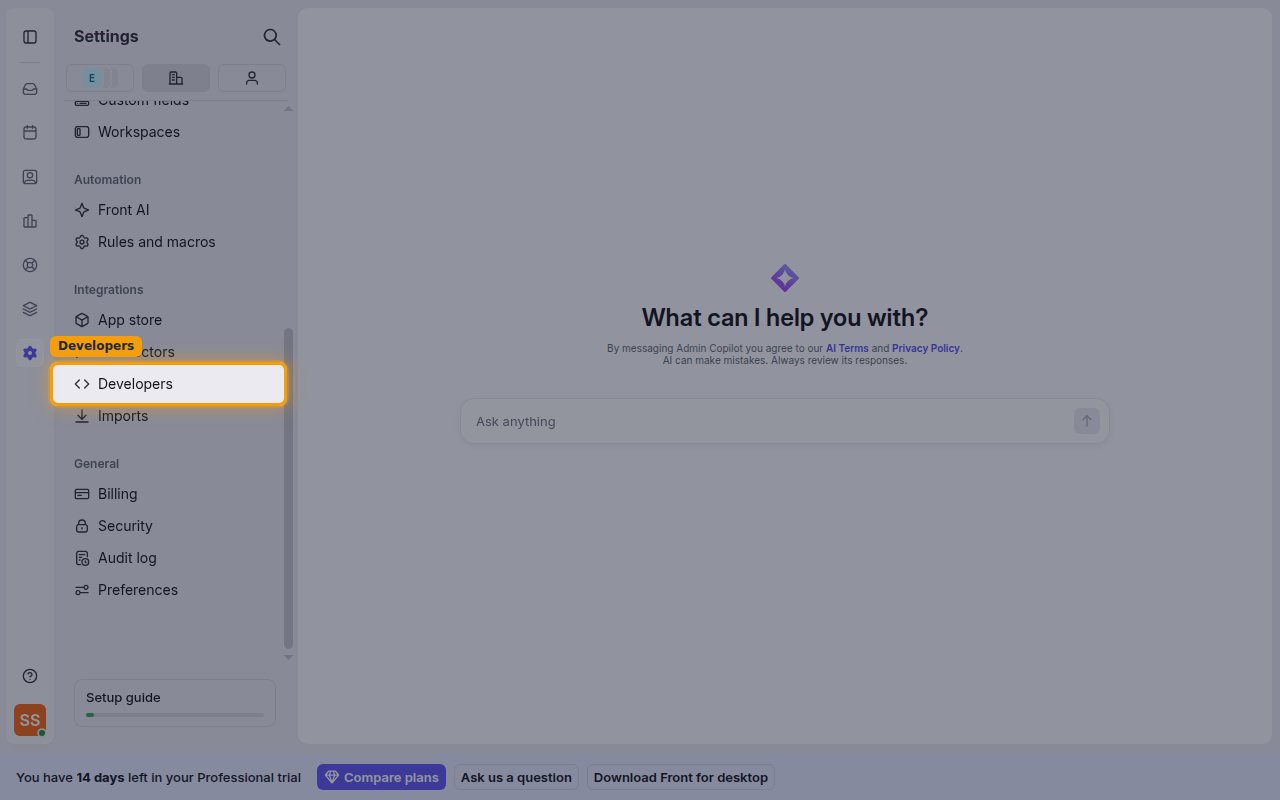
Front company settings with Developers highlighted under Integrations
2

Name the app

On the Developers page, click Create app.

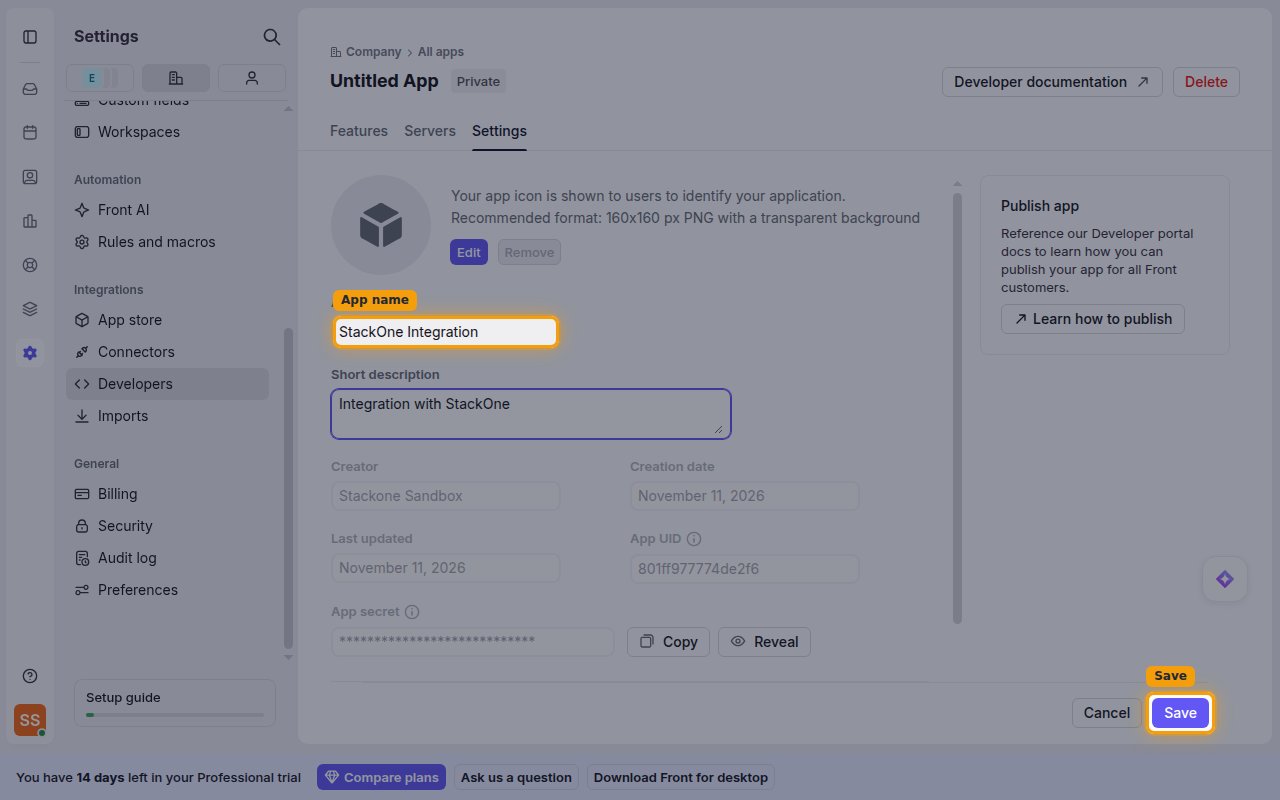
  • App name: StackOne Integration
  • Short description: a short note on what the app is for (for example, Integration with StackOne).
  • Click Save.
App settings tab with the App name field and Save button highlighted

Enable the Public API feature

Adding the Public API feature creates the app’s OAuth client (Client ID and Client Secret).

1

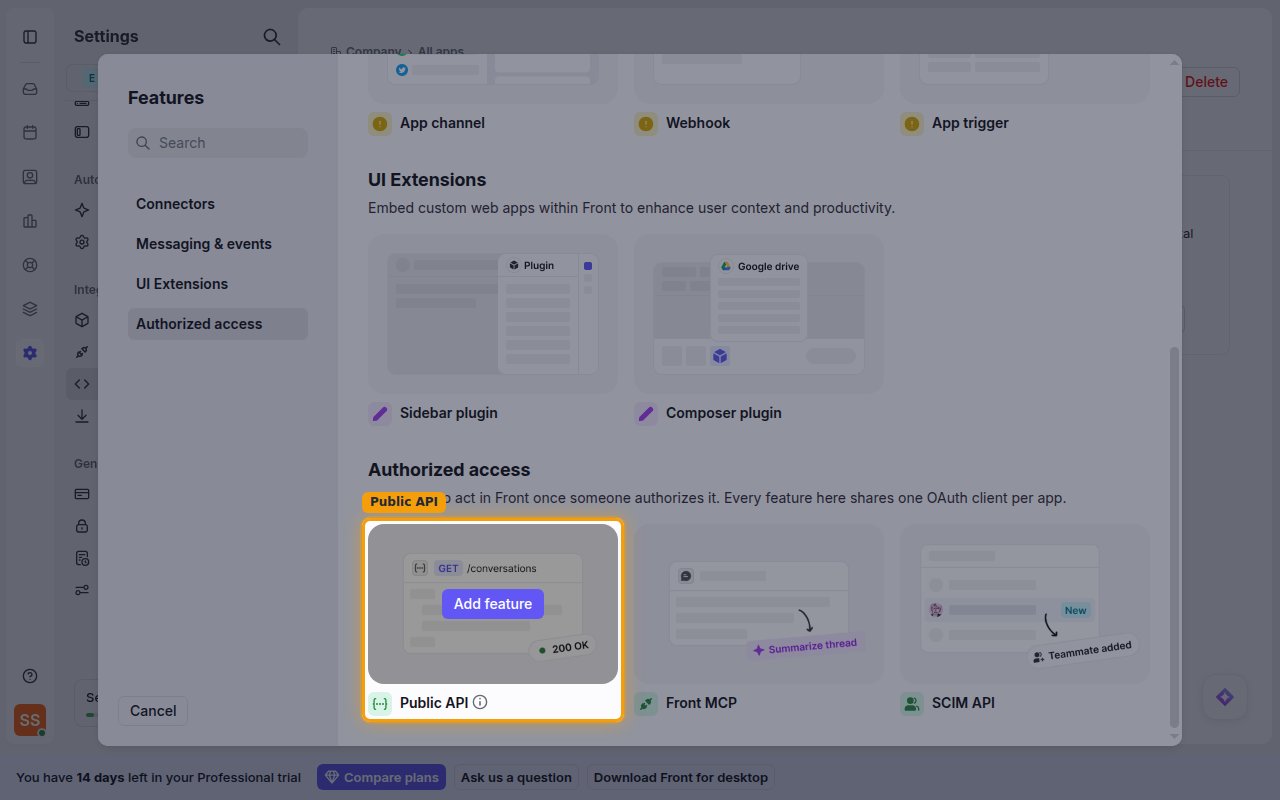
Add the Public API feature

Click Add feature.

  • Choose Authorized access.
  • Select Public API.
Features picker with the Public API card under Authorized access highlighted
2

Set the redirect URL

On the Enable Public API screen, under Redirect URLs, enter the Callback URL from your Connector Profile.
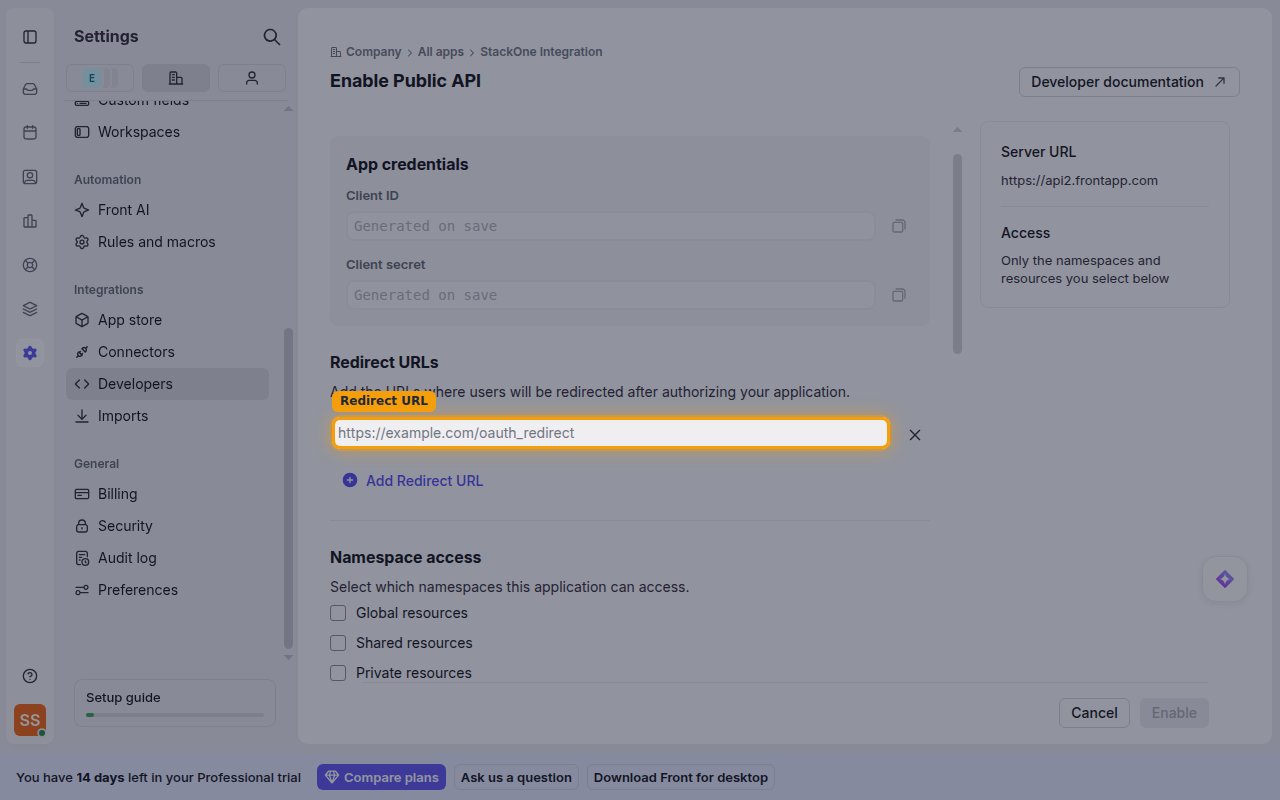
Enable Public API screen with the Redirect URL field highlighted

Configure permissions and copy credentials

Select which namespaces and resources the app can access, then save and copy the credentials.

1

Select namespace access

Under Namespace access:

  • Check Global resources.
  • Check Private resources, if you need access to private resources.
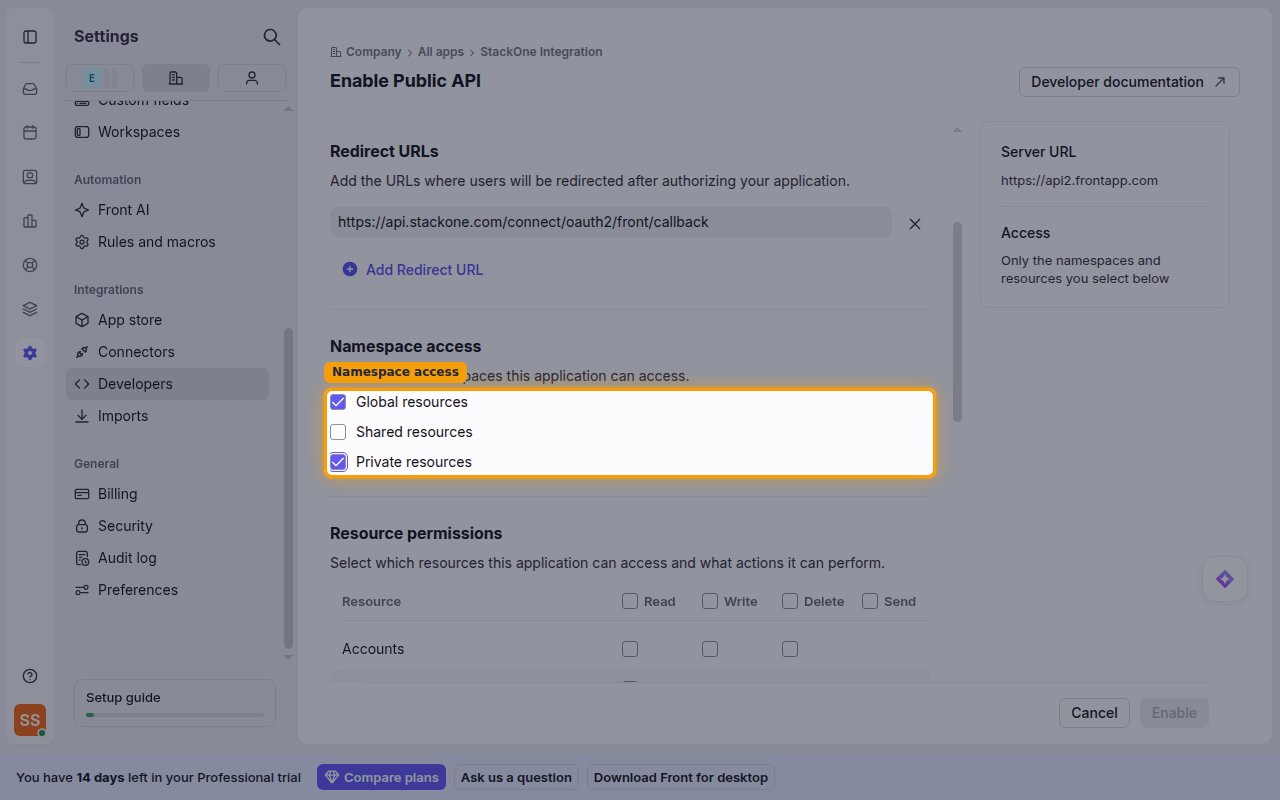
Namespace access checkboxes with Global resources and Private resources checked
2

Configure resource permissions

Enables actions: Add Contact Handle, Add Contact Note, Add Conversation Comment, Add Conversation Followers, Add Conversation Tag, Create Account, Create Channel, Create Child Tag, Create Contact, Create Draft, Create Inbox, Create Tag, Delete Account, Delete Contact, Delete Conversation, Delete Tag, Get Account, Get Channel, Get Contact, Get Conversation, Get Event, Get Inbox, Get Message, Get Tag, Get Teammate, Get Unified Group, Get Unified User, List Account Contacts, List Accounts, List Channels, List Child Tags, List Contact Conversations, List Contacts, List Conversation Comments, List Conversation Events, List Conversation Followers, List Conversation Messages, List Conversations, List Events, List Inbox Channels, List Inbox Conversations, List Inboxes, List Tagged Conversations, List Tags, List Teammates, List Unified Groups, List Unified Resource Users, List Unified Users, Remove Conversation Tag, Search Conversations, Send Message, Update Account, Update Channel, Update Contact, Update Conversation, Update Conversation Assignee, Update Tag, Update Teammate

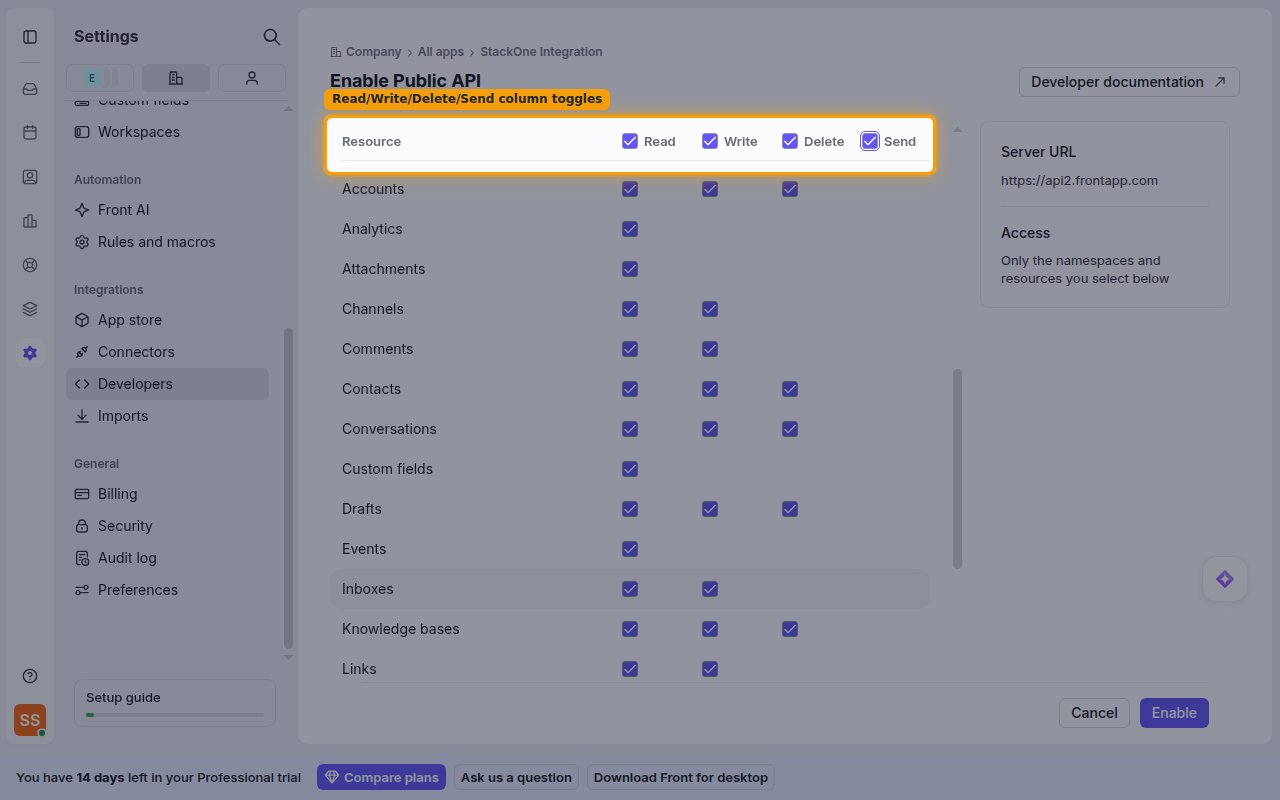
Under Resource permissions, enable the permissions this integration needs. You can toggle a whole column using the Read, Write, Delete, and Send column headers.

  • When you are done, click Enable.
Resource permissions matrix with the Read, Write, Delete, and Send column headers highlighted
3

Copy the Client ID and Client Secret

Open the app’s Public API feature.

  • Click Copy next to the Client ID field, then paste it into your Connector Profile.
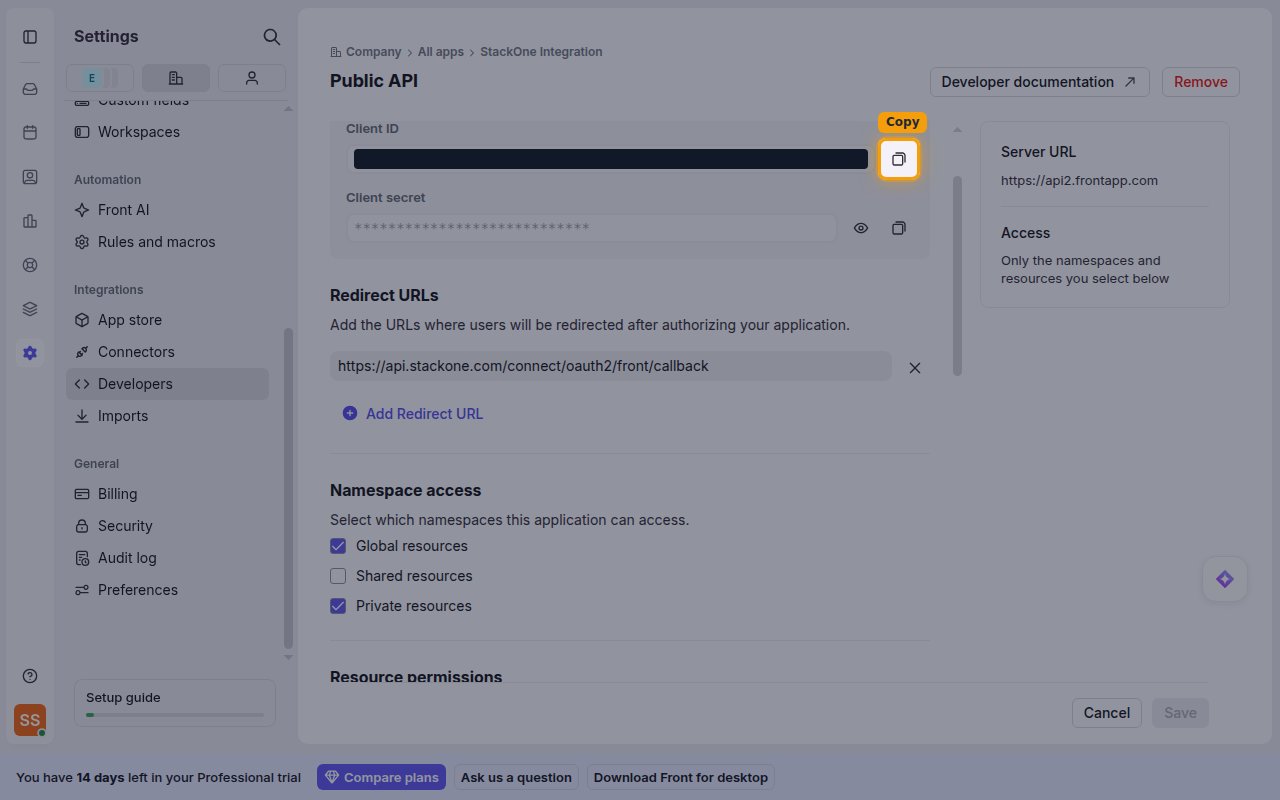
  • Click Copy next to the Client secret field, then paste it into your Connector Profile.
Public API feature screen with the Copy button next to Client ID highlighted

Create the StackOne Connector Profile

1

Create a Connector Profile

Enable the connector and create a Connector Profile in your project. See Setup Connector Profile.
2

Link an Account

Once the Connector Profile is created, continue to link an account.