

Prerequisites
The connector should already be set up, with a Connector Profile and a Linked Account. See Getting Started on the Freshservice connector page.Send Freshservice events to StackOne via a Workflow Automator webhook
Copy the Native Webhook URL from this StackOne connection and use it as the Callback URL of a Trigger Webhook action in a Freshservice Workflow Automator, so Freshservice posts data to StackOne when the workflow’s conditions are met.
Copy the Native Webhook URL from StackOne
On this connection in StackOne, copy the read-only Native Webhook URL. It contains a secure per-connection key, so treat it like a secret — you will paste it into Freshservice in a later step.
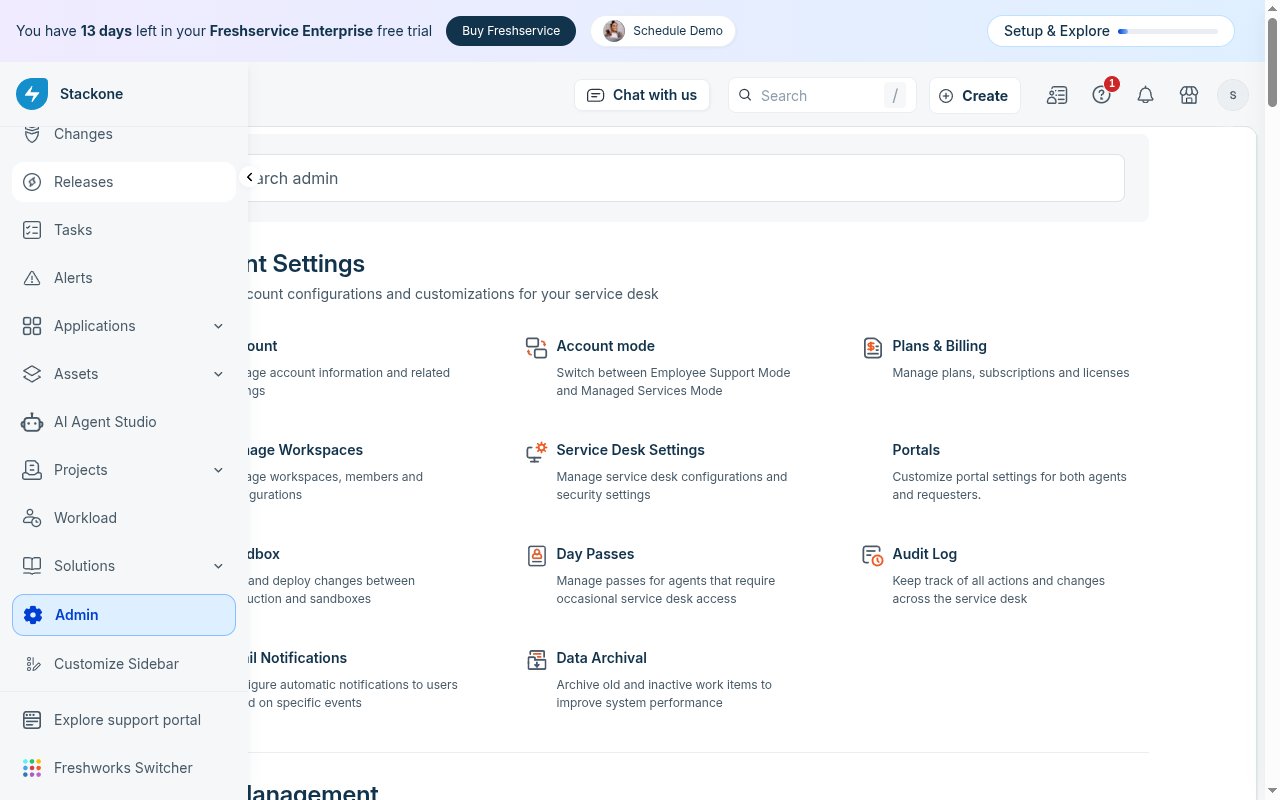
Open the Admin area
Sign in to Freshservice as an Admin. In the left sidebar, expand it and click Admin (the gear icon at the bottom) to open the admin settings.
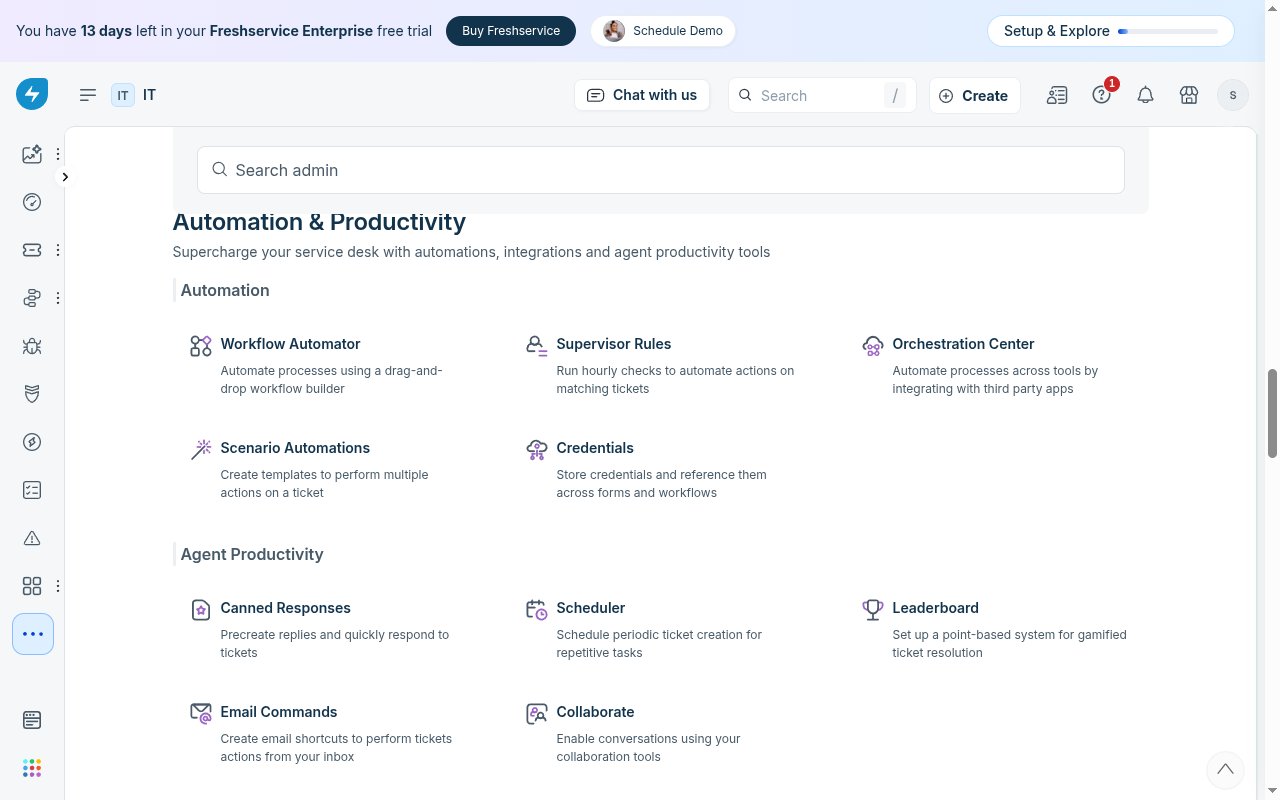
Open the Workflow Automator
On the Admin page, scroll to the Automation & Productivity area and, under Automation, click Workflow Automator (“Automate processes using a drag-and-drop workflow builder”). You can also type “Workflow Automator” in the Search admin box.
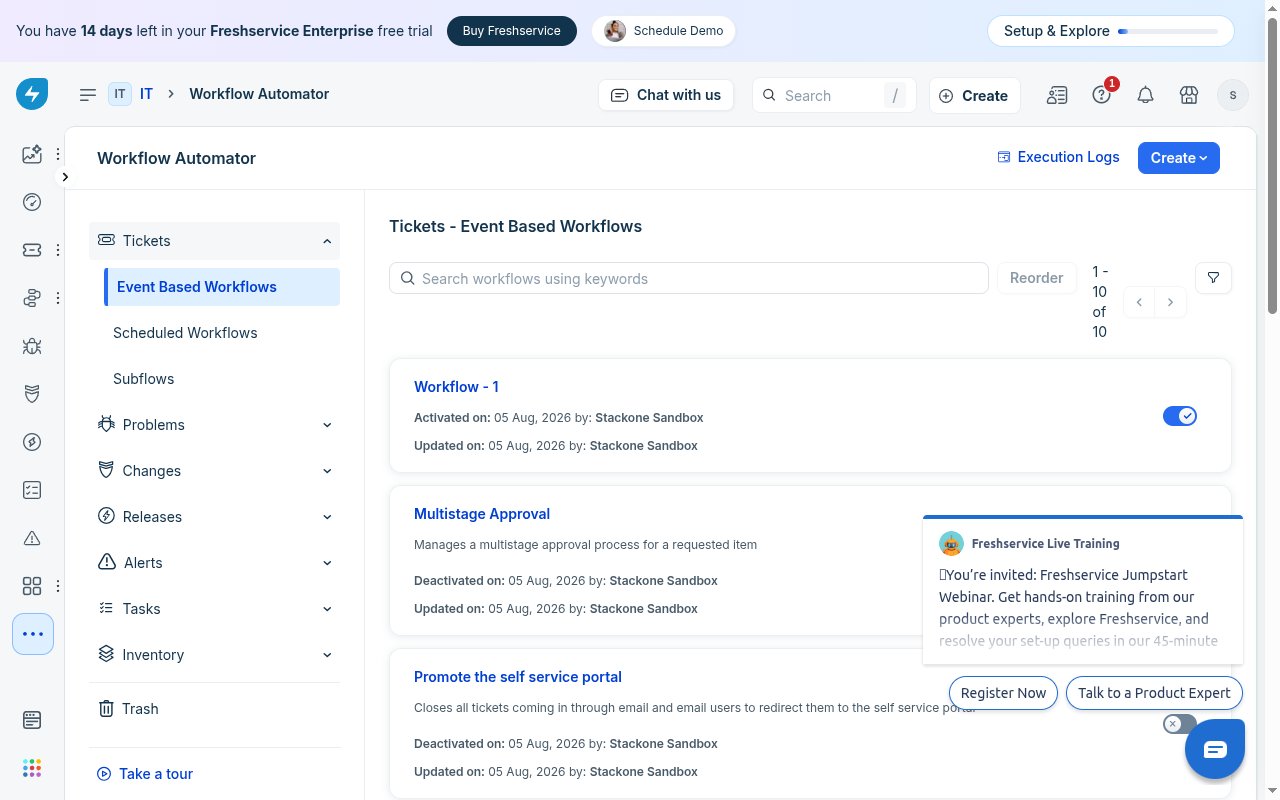
Create a workflow for the module you want
Choose the module in the left panel — Tickets, Problems, Changes, Releases, etc. — open Event Based Workflows, then click Create to start a new workflow.
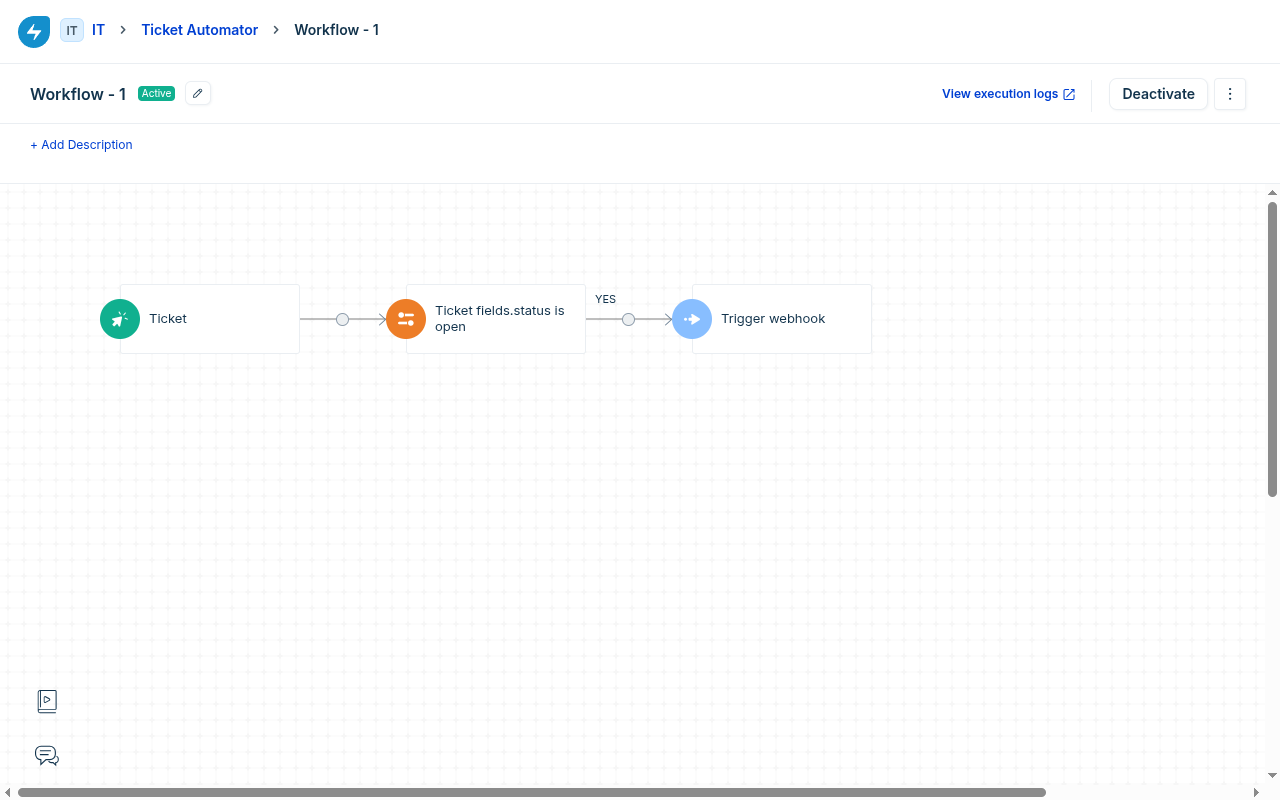
Set the Event, a condition, and add the Trigger Webhook action
The workflow is a drag-and-drop canvas: it starts with an Event node (for example, a ticket being raised). Configure the Event first — this is what unlocks the next steps. To add the webhook, click the plus (+) on the connector after the Event (or after a condition node) and choose an Action, then select Trigger Webhook. (The Action option stays disabled until the Event node is configured.)
Configure the webhook Action
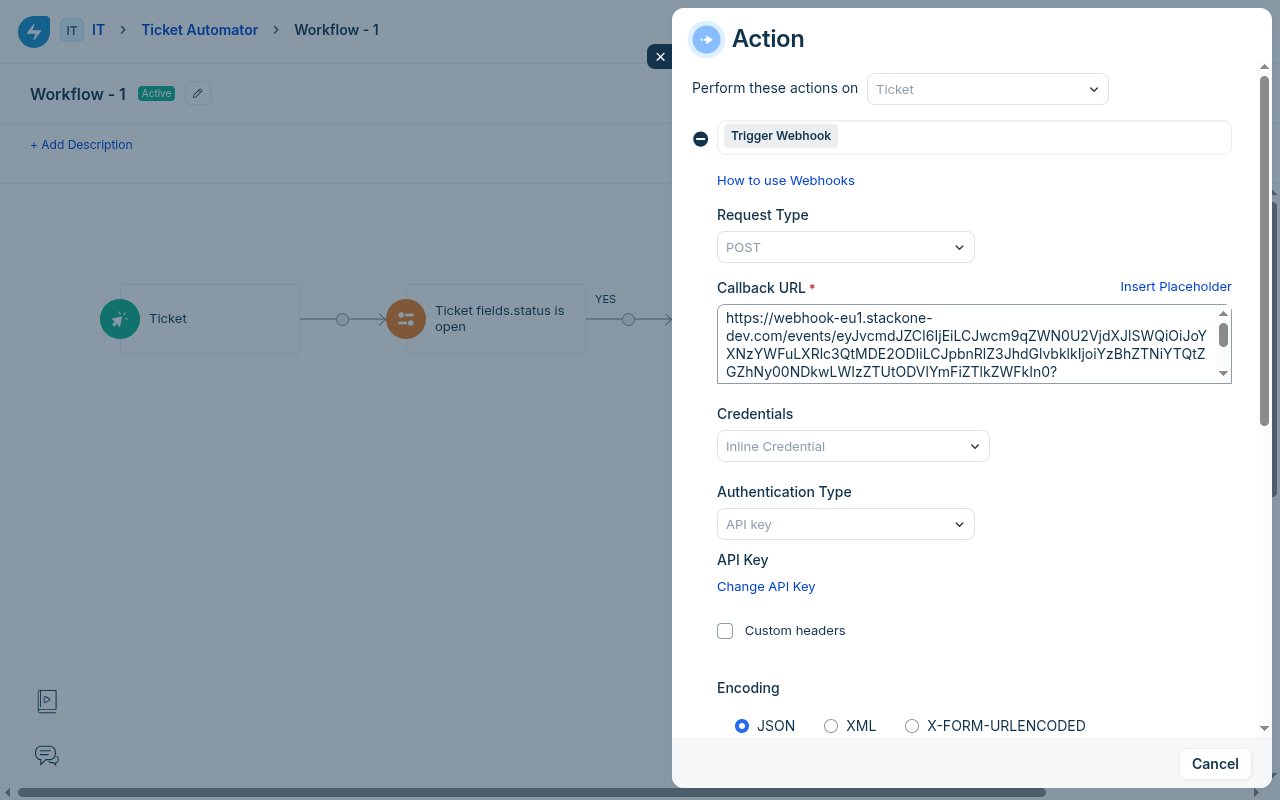
In the Action panel, keep Trigger Webhook selected and complete the fields below.
- Request Type — select POST.
- Callback URL — paste the Native Webhook URL you copied from this StackOne connection.
- Authentication Type — you can leave this at the default; the secure key in the Callback URL is what authenticates the delivery to StackOne, so no separate credential is required.
- Encoding — select JSON.
Choose the content, test, and activate
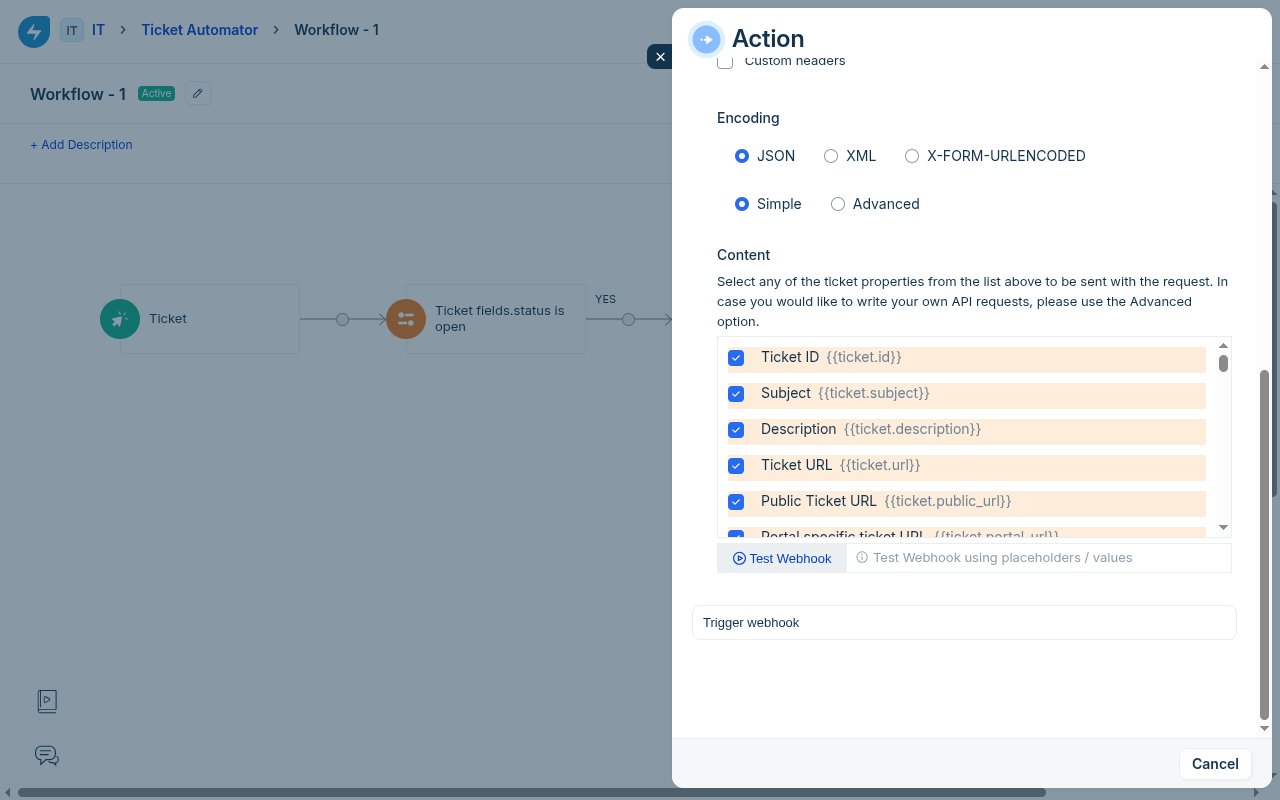
Under the encoding, choose Simple and tick the fields to send in Content — make sure Ticket ID ({{ticket.id}}) is selected so StackOne can set the record id (use Advanced if you want to hand-write the JSON body). Click Test Webhook to confirm StackOne accepts it (a successful test returns 200), then save the action and Activate the workflow.
Available webhook events
A Freshservice Workflow Automator can send events from any of these modules — build one workflow per module and event you want to receive. Only the fields you tick in the workflow’s Content are delivered.
- Tickets — a ticket is raised (created) or updated (including status changes).
- Problems — a problem is created or updated.
- Changes — a change is created or updated.
- Releases — a release is created or updated.
- Assets — an asset is created or updated.
Delivery format
Freshservice sends each event as a single HTTPS POST. The default (Simple) payload is wrapped under a top-level freshdesk_webhook object with placeholder-named fields — for a ticket, ticket_id (the display id, e.g. “INC-2”), id_numeric (the numeric id), ticket_subject, ticket_status, and so on. StackOne passes the full payload through as the event data and sets the record id from freshdesk_webhook.id_numeric (falling back to ticket_id and other id fields for custom payloads). There is no verification handshake, and the secure key in the Callback URL authenticates the delivery.